NDNCZDHC All Mode Transceiver
All Mode Transceiver User Manual
Model: All Mode Transceiver (5 Bands USB LSB CW AM FM)
Brand: NDNCZDHC
1. Introduction
This manual provides detailed instructions for the setup, operation, and maintenance of your NDNCZDHC All Mode Transceiver. Please read this manual thoroughly before operating the device to ensure proper functionality and safety. This transceiver is designed for industrial applications, offering robust performance across multiple communication modes and frequency bands.
2. Safety Information
- Power Supply: Use only a 13.8V DC power supply. Ensure correct polarity when connecting. Incorrect voltage or polarity can damage the device.
- Antenna: Always connect a suitable antenna before transmitting. Operating without an antenna or with a mismatched antenna can cause damage to the transceiver's final amplifier stage.
- Ventilation: Ensure adequate ventilation around the transceiver to prevent overheating, especially during prolonged transmission.
- Environment: Avoid exposing the device to extreme temperatures, humidity, dust, or direct sunlight. Keep away from water and other liquids.
- Servicing: Do not attempt to open or service the transceiver yourself. Refer all servicing to qualified personnel.
3. Package Contents
Verify that all items are present in the package:
- 1 x All Mode Transceiver Unit
- 1 x Microphone
4. Product Overview
The NDNCZDHC All Mode Transceiver is a compact and robust communication device. Below are images illustrating its key components and interfaces.

Figure 4.1: The All Mode Transceiver unit shown with its accompanying microphone. The transceiver features a durable aluminum alloy casing.

Figure 4.2: Front panel view of the transceiver. It includes a display screen, PTT, MENU, ENTER buttons, KEY/MIC input, and a TUN (tuning) knob for frequency adjustment.

Figure 4.3: Rear panel view of the transceiver. This side features KJ and HP (headphone) jacks, CAT and PTT OUT ports, a DC 13.8V power input, and an ANT (antenna) connector.
5. Specifications
| Feature | Description |
|---|---|
| Item Type | All Mode Transceiver |
| Material | Aluminum alloy |
| Voltage | 13.8V DC |
| DSP Filters | 4000, 2500, 1700, 500, 200, 100, 50 Hz passbands |
| Supported Bands | 80m, 60m, 40m, 30m, 20m |
| Supported Modes | USB, LSB, CW, AM, FM |
| Transmission Efficiency | Above 75% for all frequency bands |
| Output Power | 3-5W (across 5 bands) |
| Frequency Accuracy | Better than 1PPM |
| Frequency Stability | Better than 0.5PPM |
| Interfaces | CAT, PTT OUT, MIC/KEY, K head microphone, HP (Headphone) |
| Noise Level | Low noise (uses op amp chip with lower noise than LM4562) |
| Capacitors | All LPF parts use 100V COG or NPO capacitors |
| Item Weight | 0.35 Kilograms (12.3 ounces) |
| International Protection Rating | IP66 |
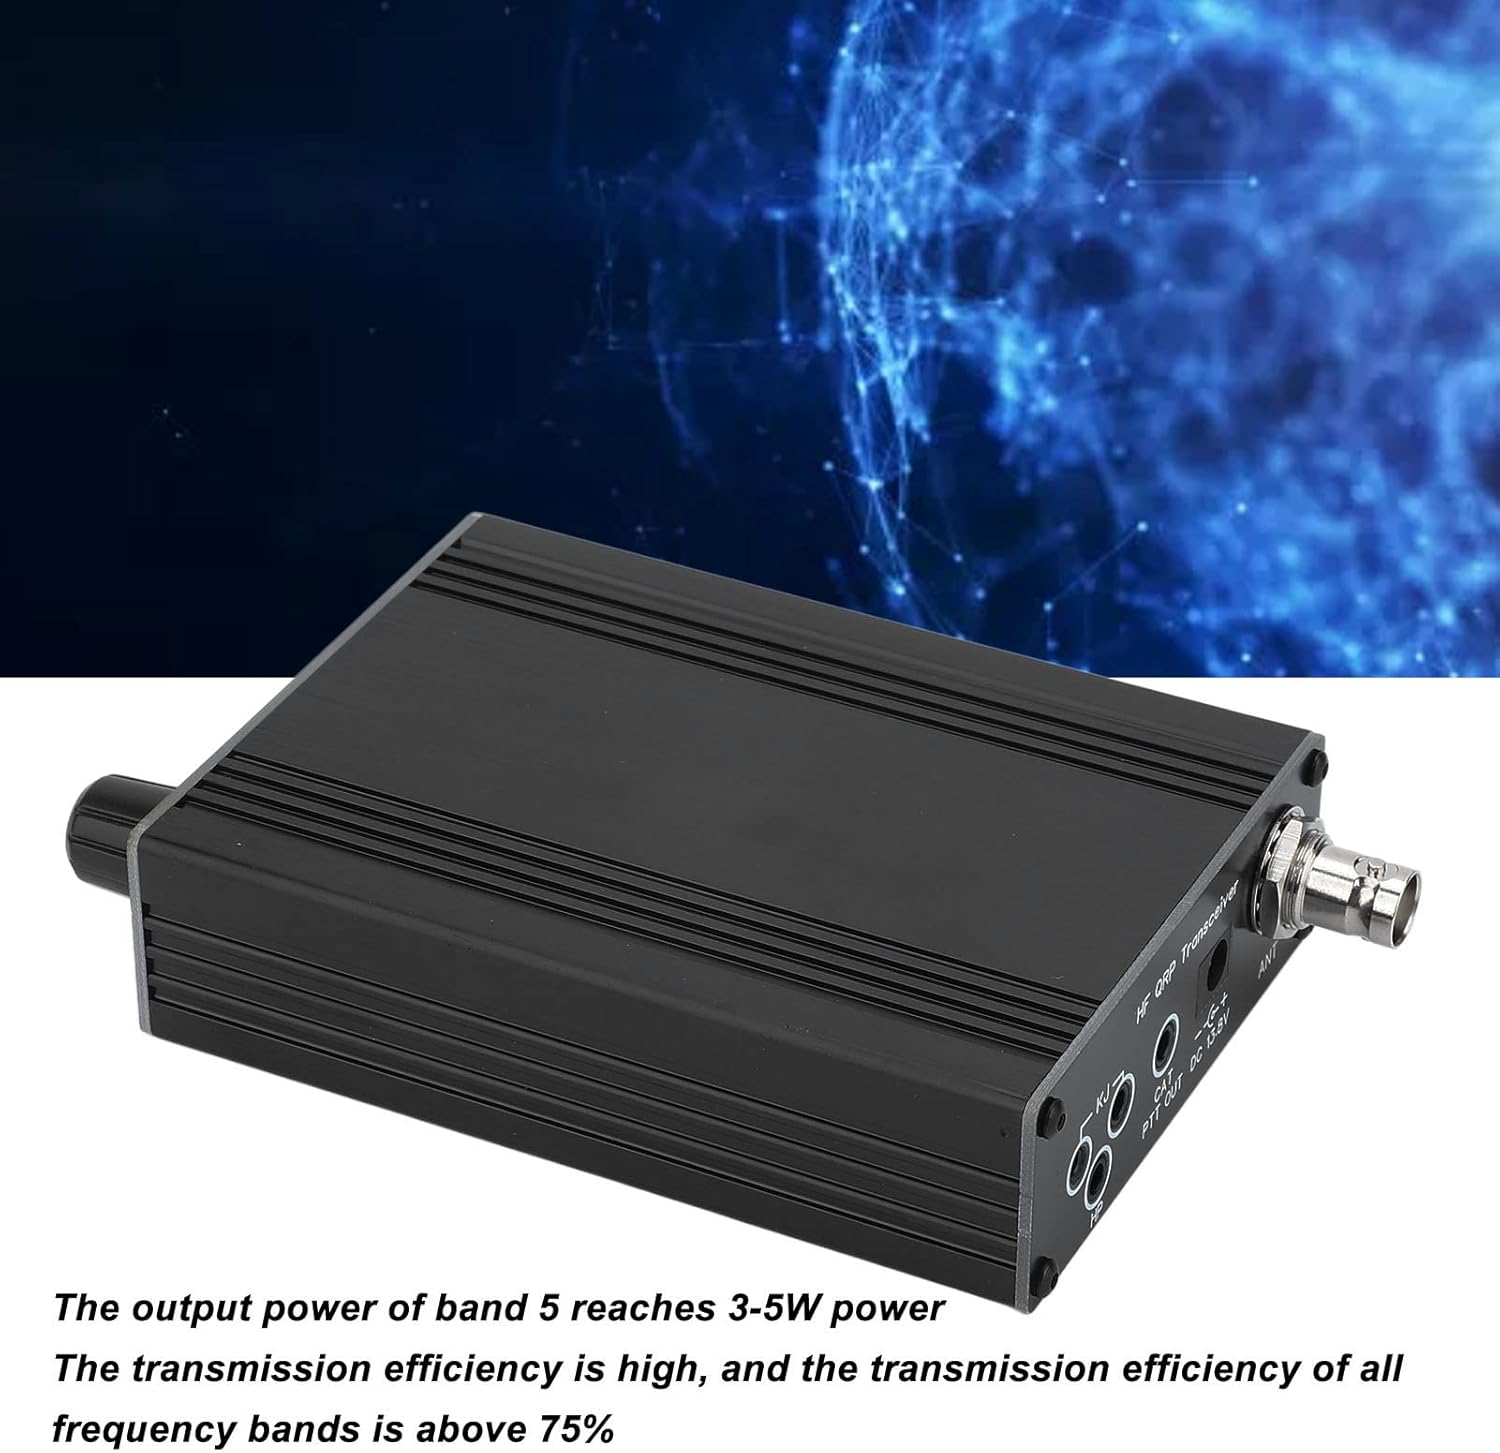
Figure 5.1: The transceiver's robust performance includes 3-5W output power and over 75% transmission efficiency across all bands.
6. Setup
Follow these steps to set up your transceiver for operation:
- Power Connection: Connect a stable 13.8V DC power supply to the 'DC 13.8V' input port on the rear panel. Ensure the power supply can provide sufficient current for transmission.
- Antenna Connection: Connect a suitable antenna for your desired operating band to the 'ANT' connector on the rear panel. Use a coaxial cable with a compatible connector (e.g., BNC).
- Microphone/Key Connection: Plug the supplied microphone into the 'KEY/MIC' port on the front panel. For CW operation, a morse code key can also be connected here.
- Headphones (Optional): For private listening, connect headphones to the 'HP' jack on the rear panel.
- CAT/PTT OUT (Optional): If using computer control (CAT) or an external amplifier (PTT OUT), connect the appropriate cables to these ports on the rear panel.
7. Operating Instructions
Once set up, you can begin operating your transceiver:
- Power On: Ensure all connections are secure, then apply power to the transceiver. The display on the front panel should illuminate.
- Frequency Tuning: Use the large 'TUN' knob on the front panel to adjust the operating frequency. The current frequency will be displayed on the screen.
- Mode Selection: Press the 'MENU' button to access the mode selection options. Use the 'TUN' knob to scroll through available modes (USB, LSB, CW, AM, FM) and press 'ENTER' to confirm your selection.
- DSP Filter Adjustment: The transceiver features multiple DSP filter passbands (4000, 2500, 1700, 500, 200, 100, 50 Hz). Consult the menu system (via 'MENU' button) to select the appropriate filter for your operating conditions and mode.
- Transmission (PTT): To transmit, press and hold the PTT (Push-To-Talk) button on the microphone or the 'PTT' button on the front panel. Release the button to return to receive mode. Ensure you are on a clear frequency before transmitting.
- Volume Adjustment: Adjust the audio output volume to a comfortable listening level.
8. Maintenance
Proper maintenance ensures the longevity and optimal performance of your transceiver:
- Cleaning: Use a soft, dry cloth to clean the exterior of the transceiver. Do not use abrasive cleaners or solvents. For stubborn dirt, a slightly damp cloth can be used, ensuring no moisture enters the device.
- Ventilation: Regularly check that the ventilation slots are clear of dust and debris to prevent overheating.
- Storage: When not in use for extended periods, store the transceiver in a cool, dry place, away from direct sunlight and extreme temperatures. Disconnect all cables.
- Cable Inspection: Periodically inspect all cables (power, antenna, microphone) for signs of wear or damage. Replace damaged cables immediately.
9. Troubleshooting
If you encounter issues with your transceiver, refer to the following common problems and solutions:
| Problem | Possible Cause | Solution |
|---|---|---|
| No power/display off | Power cable disconnected; Faulty power supply; Incorrect voltage/polarity | Check power cable connection; Verify power supply output; Ensure correct 13.8V DC and polarity. |
| No audio on receive | Volume too low; Speaker/headphone issue; Incorrect mode selected | Increase volume; Check headphone connection; Verify correct operating mode (e.g., USB for SSB signals). |
| Cannot transmit | Antenna not connected; Microphone not connected; PTT button not pressed | Connect antenna; Ensure microphone is securely plugged in; Press PTT button firmly. |
| Poor transmission quality | Mismatched antenna; Low power supply; Interference | Check antenna SWR; Ensure stable 13.8V power supply; Identify and mitigate sources of interference. |
| Frequency instability | Environmental factors (temperature); Internal component issue | Ensure stable operating temperature; If persistent, contact support. |
If the problem persists after trying these solutions, please contact customer support.
10. Warranty and Support
For warranty information, please refer to the terms and conditions provided at the point of purchase or contact your retailer. NDNCZDHC is committed to providing quality products and support.
For technical assistance, troubleshooting beyond this manual, or service inquiries, please visit the official NDNCZDHC store on Amazon or contact their customer service directly. Keep your purchase receipt or order number handy for faster service.
Note: Protection plans may be available from third-party providers. These are separate from any manufacturer's warranty.