1. Introduction
Thank you for choosing the Philips S5885/10 5000 Series Electric Shaver. This device is designed to provide a smooth and comfortable shaving experience, whether wet or dry. It features SkinIQ technology and self-sharpening ComfortCut blades that adapt to your facial contours for efficient hair removal.
This manual provides essential information on how to set up, operate, maintain, and troubleshoot your shaver to ensure optimal performance and longevity.
2. Safety Information
Before using the appliance, read this user manual carefully and save it for future reference. Improper use may result in hazards or serious injury.
- WARNING: Keep the appliance and its USB charging cable dry. Do not immerse the shaver in water while it is connected to the power supply.
- WARNING: This appliance is not intended for use by persons (including children) with reduced physical, sensory or mental capabilities, or lack of experience and knowledge, unless they have been given supervision or instruction concerning use of the appliance by a person responsible for their safety.
- WARNING: Children should be supervised to ensure that they do not play with the appliance.
- Always check the appliance before use. Do not use the appliance if it is damaged.
- Only use the original USB charging cable provided with the appliance.
- Do not open the appliance to replace the battery.
- For hygiene reasons, the shaver should only be used by one person.
3. What's in the Box
Carefully unpack the box and ensure all items are present and in good condition.
- Philips S5885/10 Electric Shaver
- USB Charging Cable
- Protective Cap
- Cleaning Brush
- Travel Pouch (may vary by region)

Figure 1: Philips S5885/10 Electric Shaver with included travel pouch.
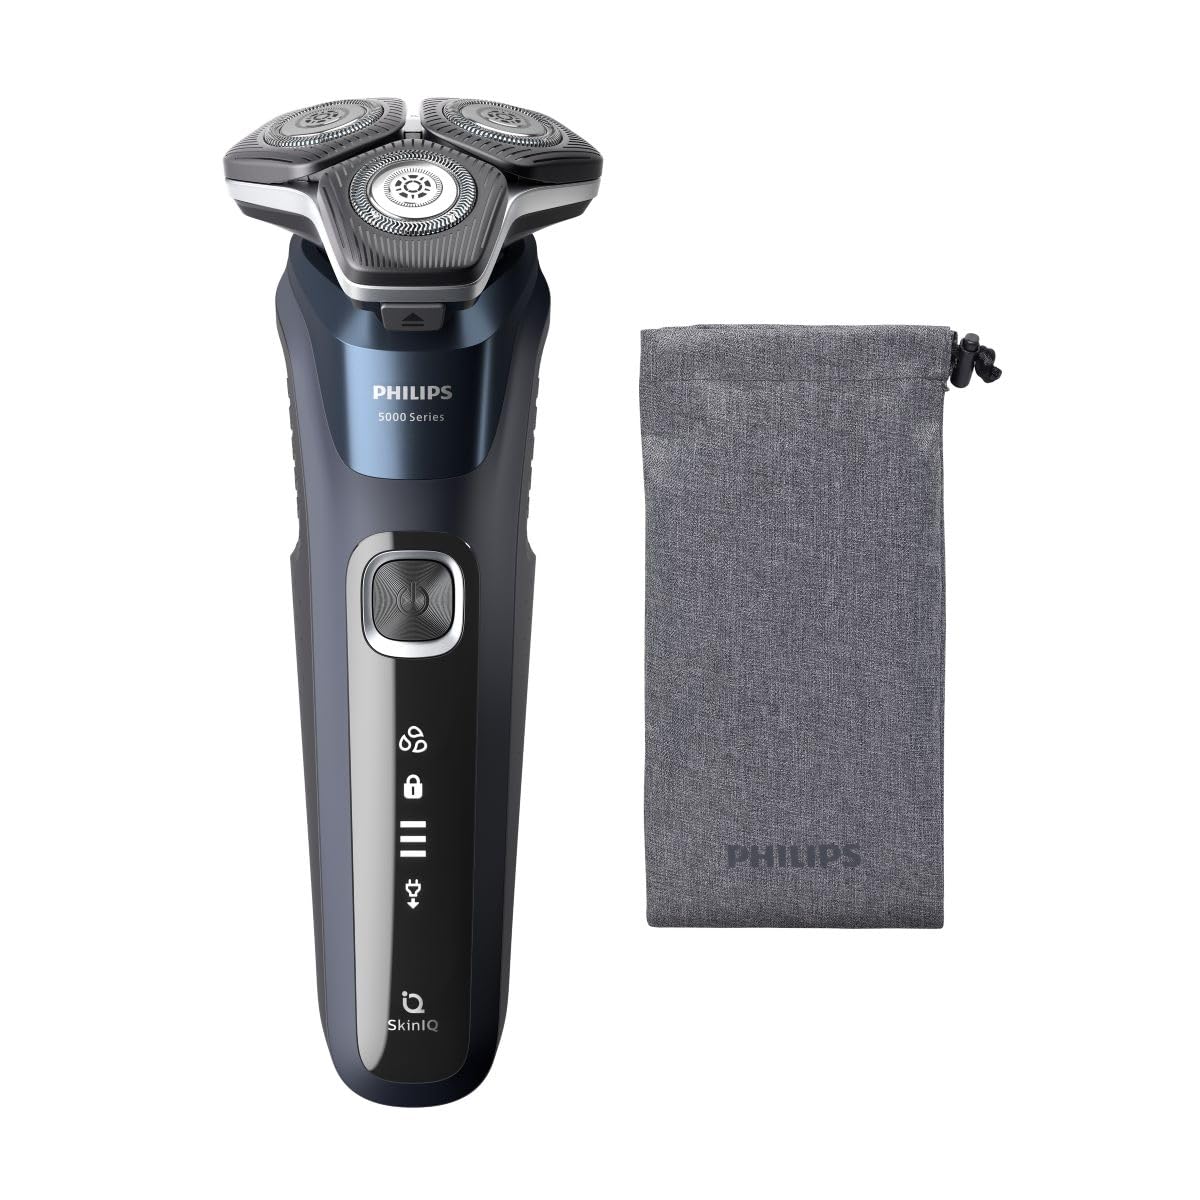
Figure 2: The Philips S5885/10 Electric Shaver as packaged in its retail box.
4. Setup and Charging
Initial Charge
Before first use, fully charge your shaver. A full charge takes approximately 1 hour and provides up to 60 minutes of cordless shaving time.
- Ensure the shaver is switched off.
- Insert the small plug of the USB charging cable into the charging port at the bottom of the shaver.
- Plug the USB connector into a compatible USB power adapter (not included) or a USB port on a computer.
- The battery indicator lights on the shaver will illuminate to show the charging progress. When fully charged, all lights will be solid.
- Disconnect the shaver from the power source once charging is complete.
Battery Indicator
The shaver features a multi-level battery indicator. When the battery is low, the last segment of the indicator will flash. During charging, the segments will progressively light up until the battery is full.
5. Operating the Shaver
Power On/Off
Press the power button once to turn the shaver on. Press it again to turn the shaver off.
Dry Shaving
For a dry shave, ensure your face is clean and completely dry. Move the shaver in small, circular motions over your skin, applying gentle pressure. The flexible heads will adjust to the contours of your face for optimal contact.
Wet Shaving
For a refreshing wet shave, you can use shaving foam or gel. Apply the foam or gel to your skin and then move the shaver in small, circular motions. The shaver is 100% waterproof and can be used safely in the shower.
SkinIQ Technology
The shaver is equipped with SkinIQ technology, which senses your hair density and adapts the cutting power for a personalized and comfortable shave. This ensures efficient hair removal with less irritation.
6. Cleaning and Maintenance
Regular cleaning ensures optimal performance and hygiene of your shaver.
Quick Cleaning (After Each Use)
- Turn off the shaver.
- Press the release button to open the shaver head unit.
- Rinse the shaver head unit thoroughly under warm running water.
- Shake off excess water and close the shaver head unit.
Thorough Cleaning (Weekly)
- Perform the quick cleaning steps.
- Carefully remove the shaving heads from the holder.
- Rinse each shaving head and the holder under warm running water.
- Allow all parts to air dry completely before reassembling.
- Do not wipe the shaving heads with a towel or tissue, as this may damage them.
Replacing Shaving Heads
For best shaving results, replace the shaving heads every 12 months. Replacement heads are available from Philips retailers or online.
7. Storage
When not in use, store your shaver in a clean, dry place, away from direct sunlight and extreme temperatures. Use the protective cap to prevent damage to the shaving heads.
8. Troubleshooting
| Problem | Possible Cause | Solution |
|---|---|---|
| Shaver does not turn on. | Battery is empty. | Charge the shaver for at least 1 hour. |
| Shaver does not charge. | USB cable or adapter is faulty; poor connection. | Ensure the USB cable is properly connected. Try a different USB port or adapter. |
| Poor shaving performance. | Shaving heads are dirty or worn out. | Clean the shaving heads thoroughly. Replace shaving heads if they are older than 12 months. |
| Skin irritation after shaving. | Skin needs to adjust; improper technique. | Allow 2-3 weeks for skin to adjust. Ensure gentle, circular motions. Consider wet shaving with foam/gel. |
If you encounter problems not listed here, or if the suggested solutions do not resolve the issue, please contact Philips Customer Support.
9. Specifications
- Model: S5885/10
- Brand: Philips
- Power Source: Corded Electric (via USB charging)
- Battery Type: Lithium-ion
- Battery Life: Up to 60 minutes cordless shaving
- Charging Time: Approximately 1 hour for a full charge
- Blade Material: Stainless Steel (ComfortCut blades)
- Features: Wet & Dry use, SkinIQ Technology, 360-D Flexing Heads, Portable
- Item Weight: 0.44 Kilograms
- Color: Grey
10. Warranty and Support
This Philips S5885/10 Electric Shaver comes with a 24-month limited warranty from the date of purchase. Please retain your proof of purchase for warranty claims.
For detailed warranty terms, product support, or to find replacement parts, please visit the official Philips website or contact Philips Customer Service in your region. Contact information can typically be found in the warranty booklet or on the Philips website.


