1. Introduction
This manual provides essential information for the safe and efficient operation of your SGPWATT SPH10048P 10000W 48V Solar Inverter. Please read all instructions carefully before installation and use.
The SPH10048P is an all-in-one solar charge inverter designed for split-phase (120V/240V) or single-phase (120V) output. It features two built-in MPPT solar controllers, a maximum 200A battery charging capacity, and a pure sine wave output. A WiFi module is included for remote monitoring via a mobile application.
2. Safety Instructions
Always adhere to local electrical codes and regulations. Installation should be performed by qualified personnel. Disconnect all power sources before servicing. This device operates at high voltages and currents; improper handling can result in severe injury or death.
- Do not disassemble the inverter.
- Ensure proper grounding.
- Keep away from flammable materials.
- Do not expose to rain or moisture.
- Verify correct battery polarity before connection.
3. Product Overview
The SGPWATT SPH10048P is a versatile solar inverter designed for various power needs. Key features include:
- All-in-one design: Combines solar charge controller, inverter, and battery charger.
- Dual MPPTs: Two Maximum Power Point Tracking solar controllers for efficient solar energy harvesting.
- High charging capacity: Max 200A battery charging.
- Flexible AC output: Settable 120V/240V split phase or 120V single phase.
- Pure Sine Wave: Ensures stable and clean power for sensitive electronics.
- WiFi Module: For remote monitoring and parameter adjustment via mobile app.
- Battery Compatibility: Supports 48V AGM/Sealed, Gel, Flooded, Lithium batteries and a User Mode.
- Time-slot charging/discharging: Allows setting specific periods for utility and PV energy usage based on tariffs.

Figure 3.1: Front view of the SGPWATT SPH10048P 10000W 48V Solar Inverter.
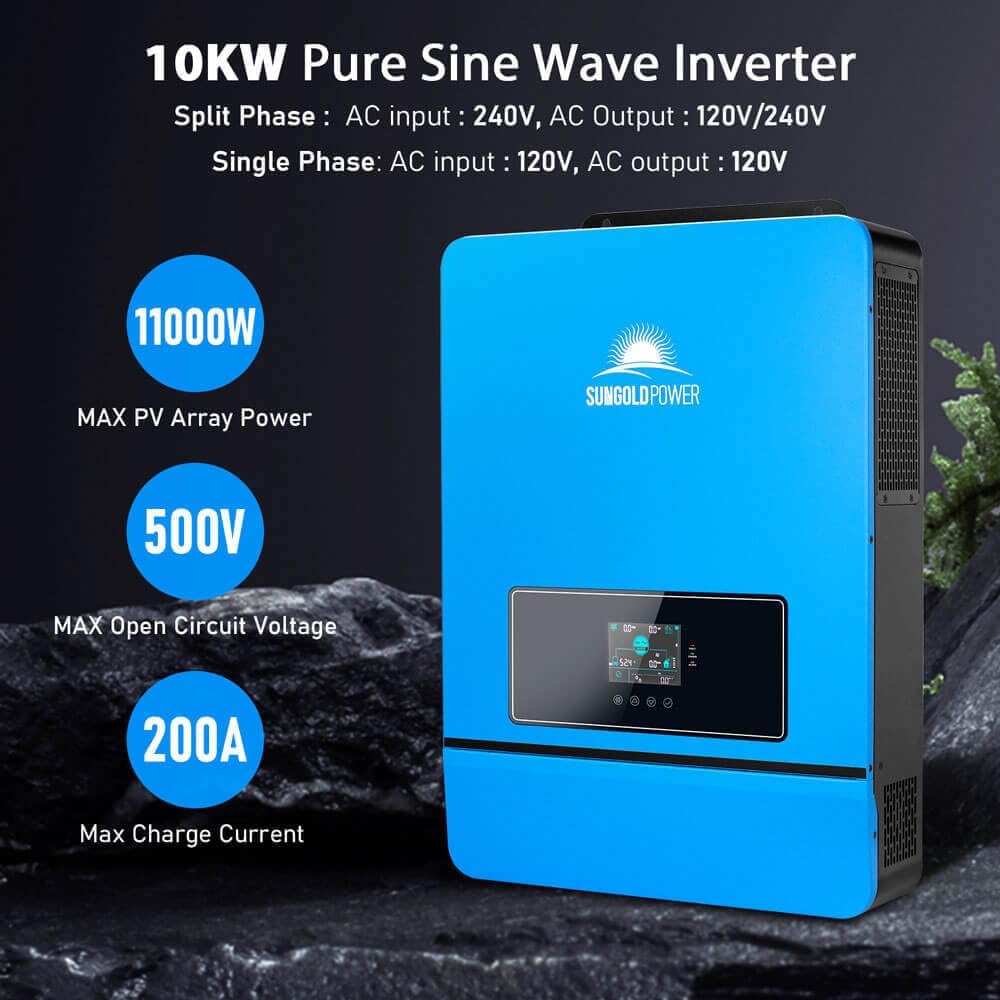
Figure 3.2: Key features of the SGPWATT SPH10048P Inverter, highlighting 11000W Max PV Array Power, 500V Max Open Circuit Voltage, and 200A Max Charge Current.
4. Setup and Installation
4.1 Unpacking and Inspection
Upon receiving your inverter, carefully unpack it and inspect for any shipping damage. Ensure all components listed in the packing list are present.
- SGPWATT SPH10048P Inverter
- WiFi module
- WiFi cable
- Communication cable
- Cable lugs & Screws
- User Manual (this document)
- Warranty Card

Figure 4.1: Dimensions of the SPH10048P inverter and included accessories.
4.2 Mounting the Inverter
Mount the inverter vertically on a sturdy, non-flammable surface. Ensure adequate clearance for ventilation (at least 20 cm on all sides). Avoid direct sunlight, high temperatures, and moisture.
4.3 Electrical Connections
All wiring must comply with national and local electrical codes. Use appropriate wire gauges for all connections.
- Battery Connection: Connect the 48V battery bank to the inverter's battery terminals. Ensure correct polarity (+ to + and - to -).
- PV Array Connection: Connect the solar panel array to the PV input terminals. Observe maximum open circuit voltage (500VDC) and current limits.
- AC Input Connection: Connect the utility grid (if applicable) to the AC input terminals.
- AC Output Connection: Connect your loads to the AC output terminals. The inverter supports 120V/240V split phase or 120V single phase output.

Figure 4.2: Diagram illustrating the system connection for the SGPWATT solar inverter, showing PV panels, generator, mains, external battery packs, and home appliances.
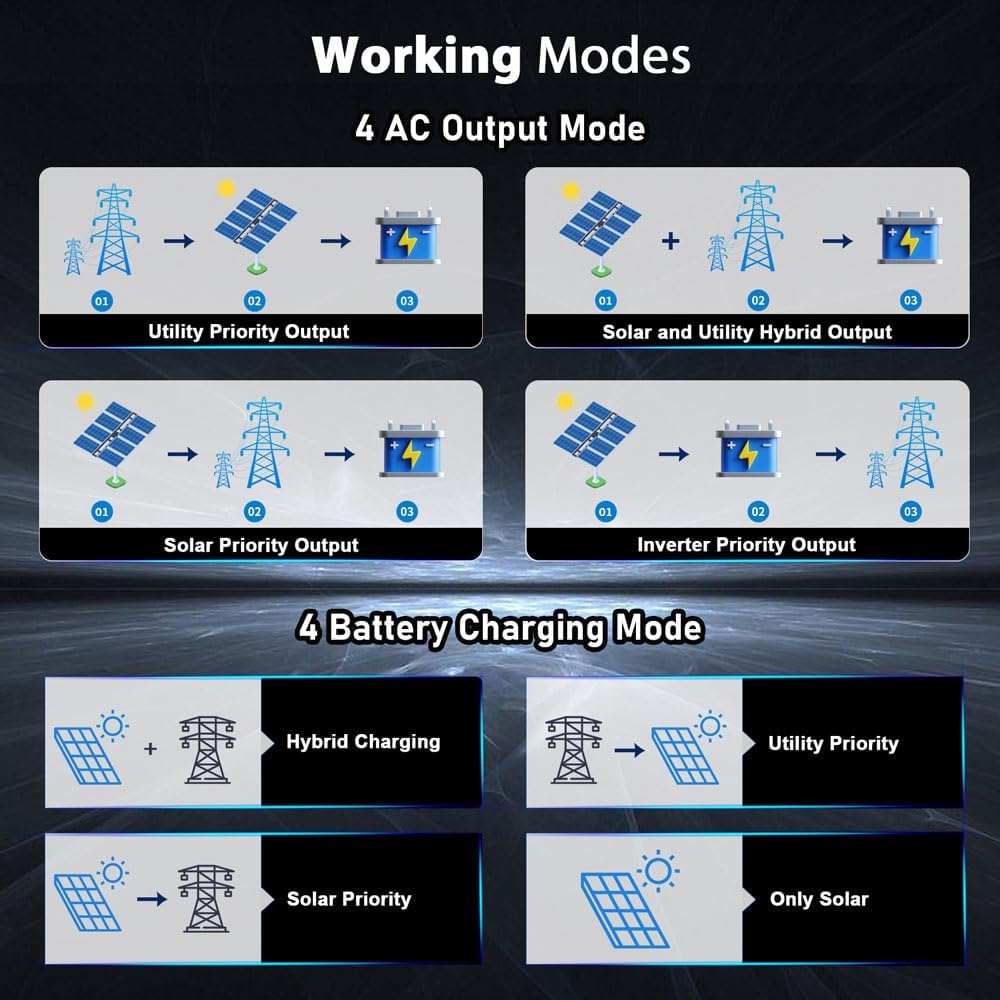
Figure 4.3: Wiring diagrams for split-phase and three-phase parallel connections of up to 6 units.
Video 4.1: This video demonstrates the connection and communication setup between the SPH8-10KW inverter and SG48100P battery. It covers the physical wiring and initial communication settings.
5. Operating Instructions
5.1 Initial Power-Up
- Ensure all connections are secure and correct.
- Turn on the battery breaker.
- Turn on the PV array breaker (if applicable).
- Turn on the AC input breaker (if applicable).
- Turn on the inverter's power switch.
- Observe the LCD display for status and any error messages.

Figure 5.1: The LCD HD display showing real-time data and parameter settings.
5.2 Operating Modes
The inverter offers various charging and output modes to suit different energy management strategies:
- Charging Modes: Hybrid Charging, Utility Priority Charging, Solar Priority Charging, Only Solar Charging.
- Output Modes: Utility Priority, Solar and Utility Hybrid, Solar Priority, Inverter Priority.
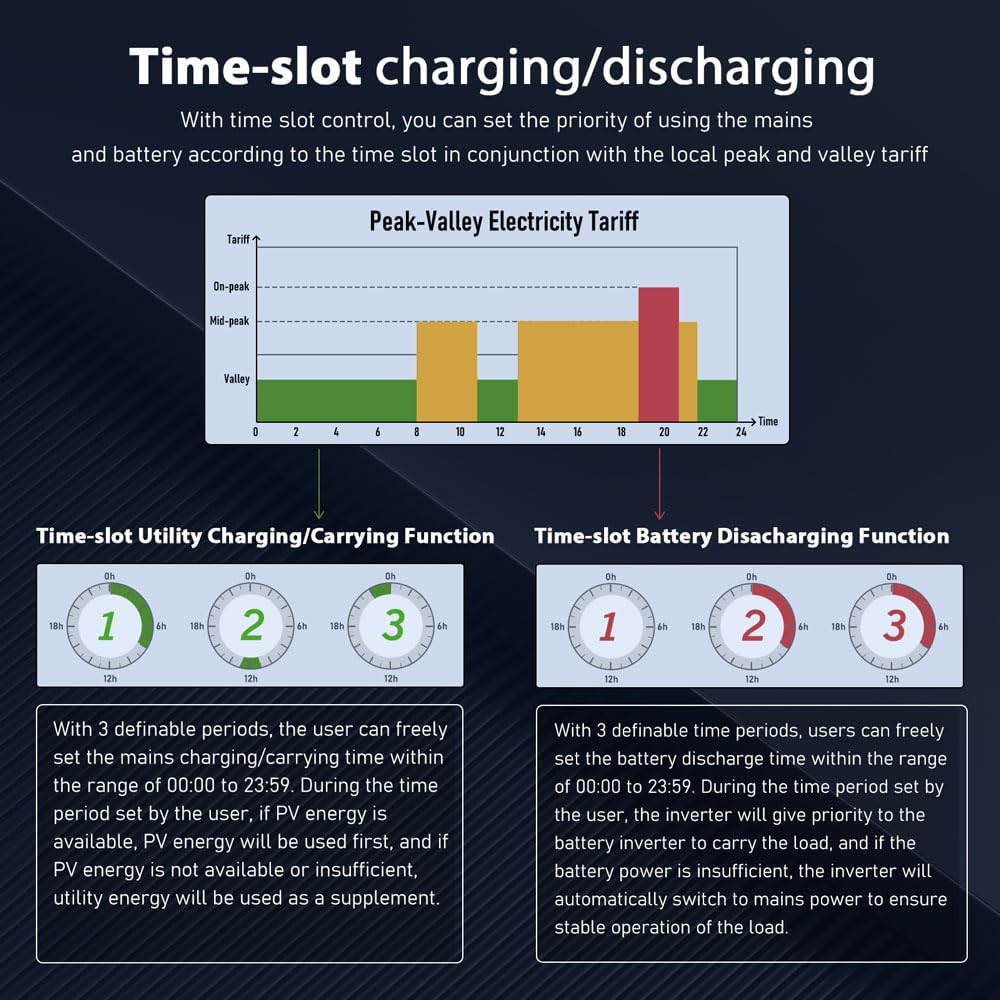
Figure 5.2: Illustration of the four AC output modes and four battery charging modes.
5.3 Time-Slot Charging/Discharging
This function allows users to set specific charging and discharging periods to optimize energy usage based on local peak and valley electricity tariffs.
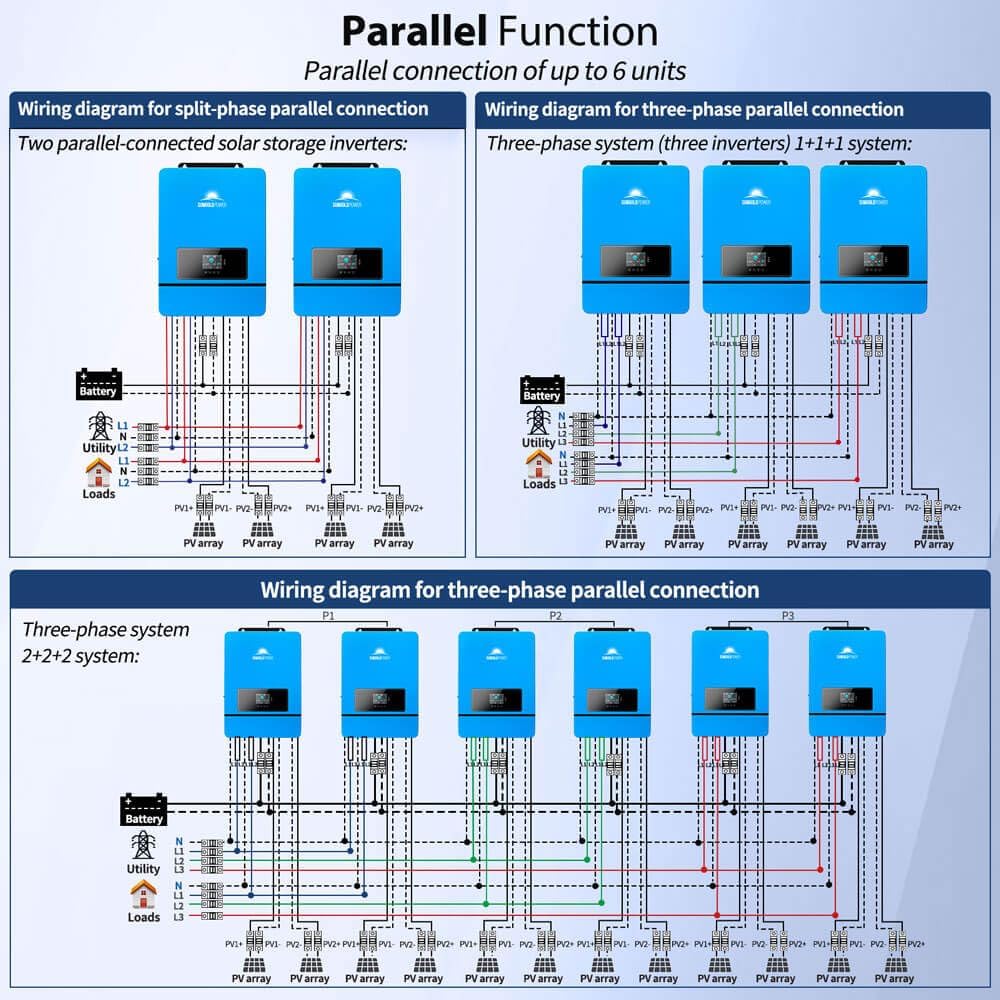
Figure 5.3: Explanation of the time-slot charging/discharging function with utility and battery examples.
6. Maintenance
Regular maintenance ensures optimal performance and longevity of your inverter.
- Cleaning: Keep the inverter clean and free from dust. Use a dry cloth for cleaning.
- Ventilation: Ensure ventilation openings are not blocked.
- Connections: Periodically check all electrical connections for tightness and corrosion.
- Battery Inspection: Inspect battery terminals for corrosion and ensure proper electrolyte levels (for flooded batteries).
7. Troubleshooting
This section provides solutions to common issues. For complex problems, contact technical support.
| Problem | Possible Cause | Solution |
|---|---|---|
| Inverter not turning on | No battery power, loose connections, faulty switch. | Check battery voltage, verify all connections, ensure power switch is ON. |
| No AC output | Overload, short circuit, battery low, inverter fault. | Reduce load, check for short circuits, charge battery, check error codes on display. |
| Solar panels not charging | Insufficient sunlight, PV connection issue, MPPT fault. | Check solar panel output, verify PV wiring, ensure MPPT settings are correct. |
| WiFi monitoring not working | WiFi module not connected, network issue, app configuration error. | Ensure WiFi module is securely connected, check network connectivity, reconfigure app settings. |
8. Specifications
| Feature | Detail |
|---|---|
| Model Name | SPH10K48SP-P |
| Rated Output Power | 10000W |
| Max Peak Power | 20000W |
| Battery Voltage | 48V DC |
| Max. MPPT Charging Current | 200A |
| Max. PV Array Power | 11000W |
| Max. Voltage of Open Circuit | 500VDC |
| AC Input/Output | 120V/240V (settable) |
| Dimensions (L x W x H) | 26 x 7.9 x 4.9 inches |
| Item Weight | 53.5 pounds |
| Certifications | UL1741 |

Figure 8.1: Detailed specifications for SPH8048P and SPH10048P models, including rated power, voltage, charging currents, and dimensions.
9. Warranty and Support
For warranty information, please refer to the included Warranty Card. For technical support or service inquiries, please contact SGPWATT customer service.
Contact Information: Refer to your product packaging or the official SGPWATT website for the most up-to-date contact details.


