1. Safety Information
Read and understand all instructions before installing or operating the RVGUARD Adjustable Sway Control Kit. Failure to follow these instructions could result in property damage, serious injury, or death.
- Always ensure all connections are secure and properly torqued.
- Inspect the sway control system before each trip for any signs of wear, damage, or loose components.
- Do not exceed the towing capacity of your vehicle or trailer hitch.
- Turn off the sway control in dangerous or icy road conditions to prevent potential handling issues.
- Seek professional assistance if you are unsure about any installation or operation steps.
2. Package Contents
Verify that all components listed below are present in your package:
- Slide bar
- Crank handle
- Spring clips (2)
- Friction plate
- Tongue ball plate
- Self-tapping screws
- Tongue ball
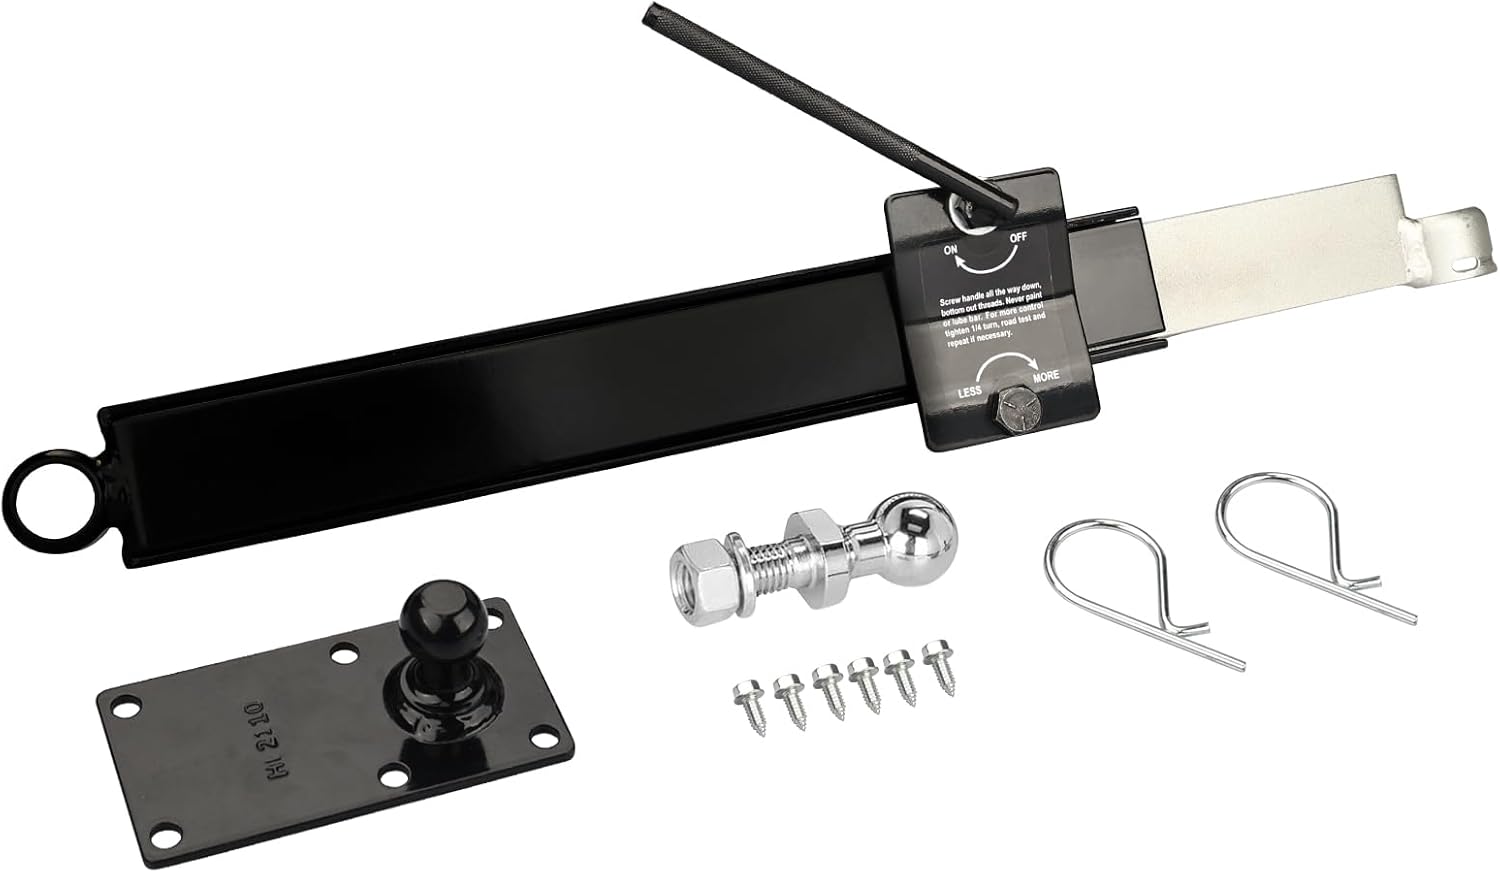
Figure 2.1: All components included in the RVGUARD Adjustable Sway Control Kit. This image displays the slide bar, crank handle, spring clips, friction plate, tongue ball plate, self-tapping screws, and tongue ball.
3. Setup and Installation
Follow these steps for proper installation of the sway control kit. Ensure your trailer is securely parked on a level surface and the tow vehicle is properly hitched before beginning.
- Mount the Tongue Ball Plate: Attach the tongue ball plate to the trailer A-frame using the provided self-tapping screws. Position it on the right-hand side of the trailer A-frame, ensuring it is securely fastened.
- Install the Tongue Ball: Secure the tongue ball onto the tongue ball plate. Ensure the nut is tightened to the manufacturer's specifications.
- Attach the Slide Bar: Mount the slide bar to the trailer A-frame. The end with the ring should be positioned towards the front of the trailer. Secure it firmly.
- Connect the Sway Control Unit: Attach the main sway control unit to the slide bar and the tongue ball. Use the spring clips to secure the connections. Ensure the friction plate is properly seated.
- Initial Adjustment: Turn the crank handle clockwise to apply initial tension. Do not overtighten. A slight resistance should be felt.

Figure 3.1: The RVGUARD sway control kit properly installed on a trailer A-frame, showing its position relative to the hitch and trailer.

Figure 3.2: A detailed view of the spring clips used to secure the sway control unit to the tongue ball, ensuring a firm connection.
4. Operating Instructions
The RVGUARD Adjustable Sway Control Kit is designed to reduce trailer sway caused by crosswinds, passing vehicles, and uneven road surfaces. Proper adjustment is crucial for optimal performance.
4.1 Adjusting Sway Control
The sway control unit features an adjustment knob and an ON/OFF lever.
- To Engage Sway Control: Ensure the lever is in the 'ON' position.
- To Adjust Friction: Use the crank handle to turn the adjustment knob. Turning it clockwise increases friction (MORE sway control), while turning it counter-clockwise decreases friction (LESS sway control).
- Initial Adjustment: Begin with a moderate setting. Perform a test drive in a safe area to determine the ideal level of sway control for your specific trailer and load. Adjust in small increments (e.g., 1/4 turn) and re-test.
- To Disengage Sway Control: Move the lever to the 'OFF' position. This is recommended for backing up, driving in dangerous or icy road conditions, or when making sharp turns at low speeds.

Figure 4.1: A close-up view of the sway control unit's adjustment mechanism, showing the ON/OFF lever and the knob for adjusting friction between 'LESS' and 'MORE'.
4.2 Sway Control Effectiveness
The diagram below illustrates the difference in trailer stability with and without the sway control system engaged.
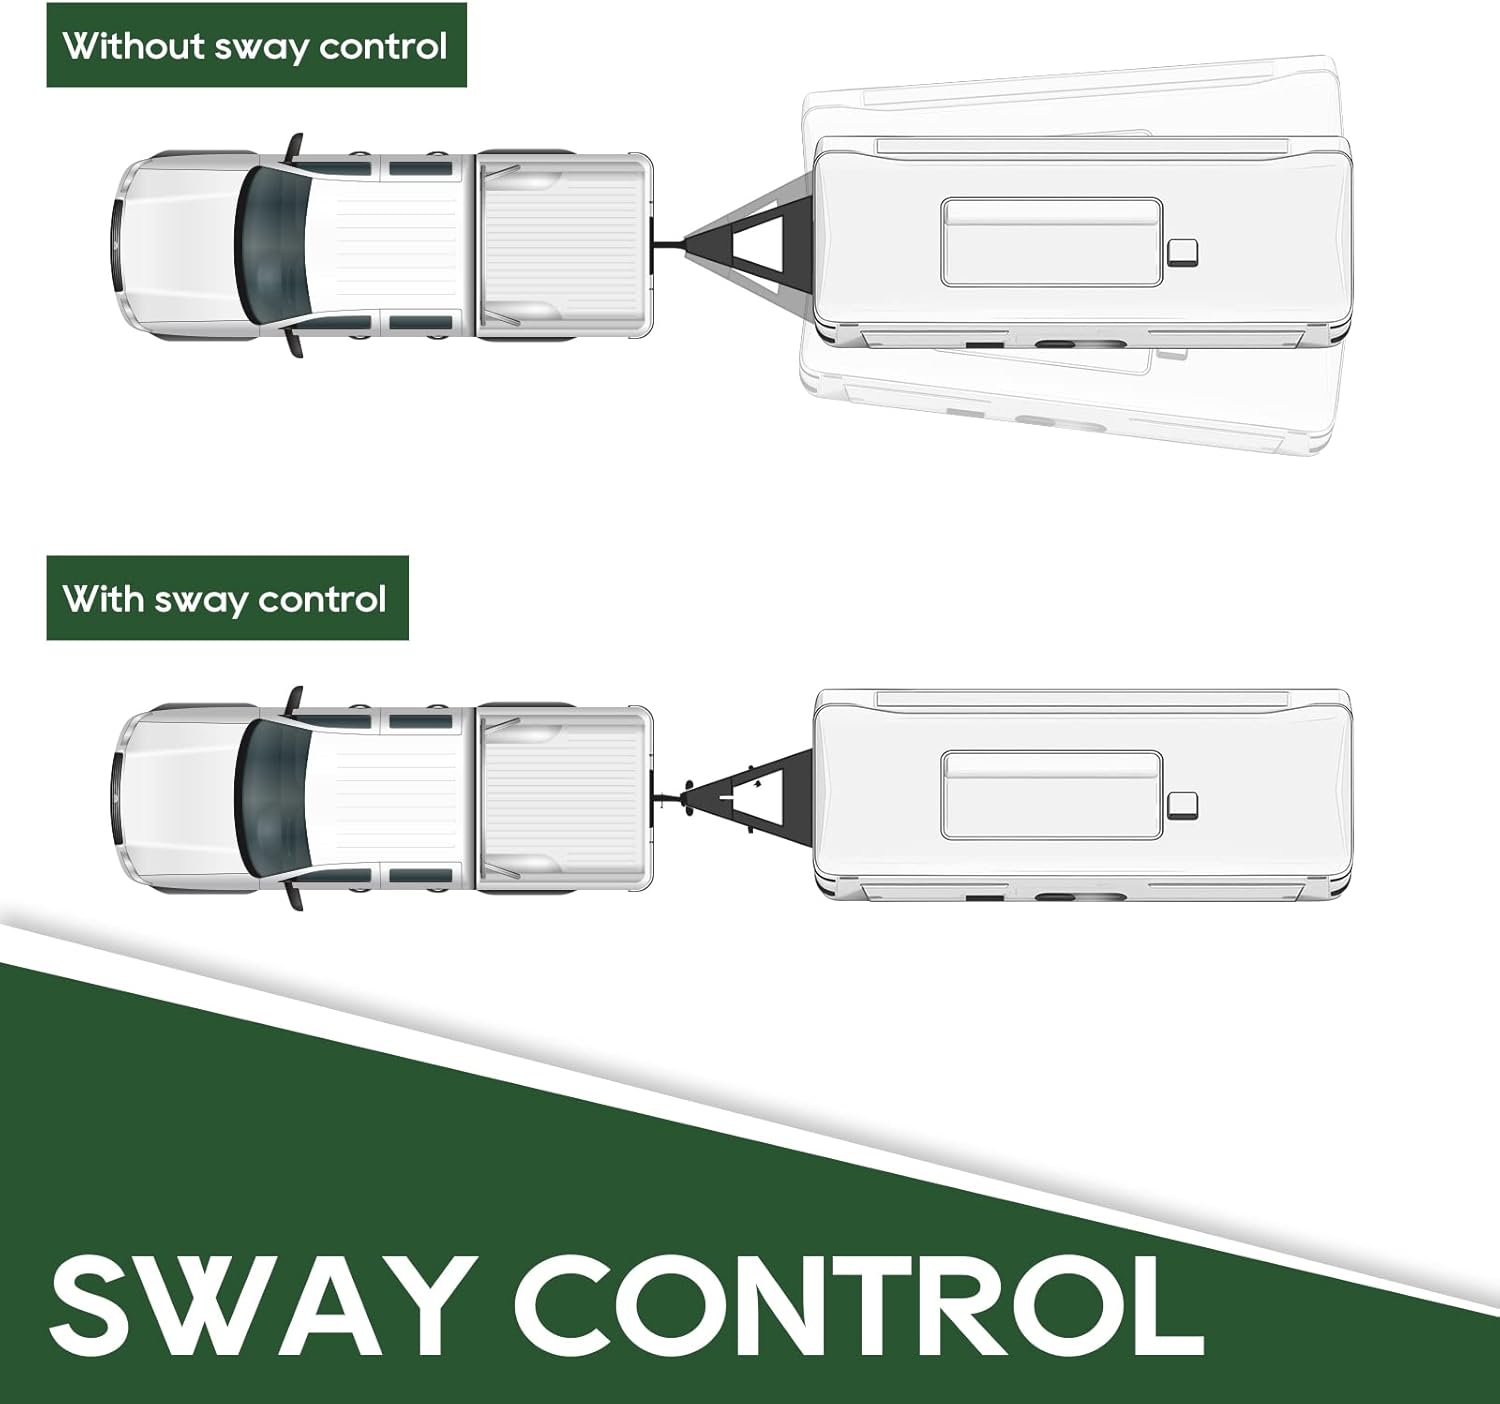
Figure 4.2: This diagram visually compares a trailer's movement without sway control (showing significant lateral movement) versus with sway control (showing stable, aligned movement behind the tow vehicle).
5. Maintenance
Regular maintenance ensures the longevity and proper function of your sway control kit.
- Inspection: Before each trip, visually inspect all components for signs of wear, corrosion, cracks, or damage. Check for loose bolts or connections.
- Cleaning: Keep the friction plate and slide bar clean and free of dirt, grease, or debris. Do not paint or lubricate the friction plate, as this will reduce its effectiveness.
- Storage: When not in use for extended periods, store the sway control kit in a dry, protected environment to prevent rust and corrosion.
6. Troubleshooting
If you encounter issues with your sway control kit, refer to the following common problems and solutions:
| Problem | Possible Cause | Solution |
|---|---|---|
| Excessive trailer sway persists | Sway control not engaged or insufficient friction. Improper weight distribution. | Ensure the ON/OFF lever is in the 'ON' position. Increase friction by turning the adjustment knob clockwise. Verify proper weight distribution in the trailer. |
| Difficulty turning or stiff handling | Too much friction applied. Sway control engaged during backing or sharp turns. | Decrease friction by turning the adjustment knob counter-clockwise. Disengage sway control (OFF position) when backing up or making sharp turns. |
| Unusual noises from the unit | Loose components. Debris on friction plate. Worn parts. | Inspect all connections and tighten if necessary. Clean the friction plate and slide bar. If noises persist or parts are worn, contact RVGUARD support. |
7. Specifications
- Model: RGWDH-SC
- Brand: RVGUARD
- Material: Metal
- Finish Type: Powder Coated
- Item Weight: Approximately 13.37 pounds (6.08 Kilograms)
- Package Dimensions: Approximately 21 x 5 x 4 inches
- Vehicle Service Type: Trailer

Figure 7.1: A diagram illustrating the approximate dimensions of the sway control unit, including a length of 20 inches and a width of 4-1/8 inches.
8. Warranty and Support
For warranty information, technical support, or assistance with your RVGUARD Adjustable Sway Control Kit, please contact RVGUARD customer service directly. Refer to the product packaging or the RVGUARD official website for contact details.
When contacting support, please have your product model number (RGWDH-SC) and purchase information readily available.


