1. Introduction
This manual provides essential instructions for the setup, operation, and maintenance of your CWWK N100 Firewall Mini PC. Please read this manual thoroughly before using the device to ensure optimal performance and longevity.
2. Product Overview
The CWWK N100 Firewall Mini PC is a compact and versatile computing device designed for various applications, including firewall, micro-router, NAS, and VPN. It features an Intel N100 processor, DDR5 memory support, and multiple 2.5GbE LAN ports for high-speed networking.
2.1. Front Panel
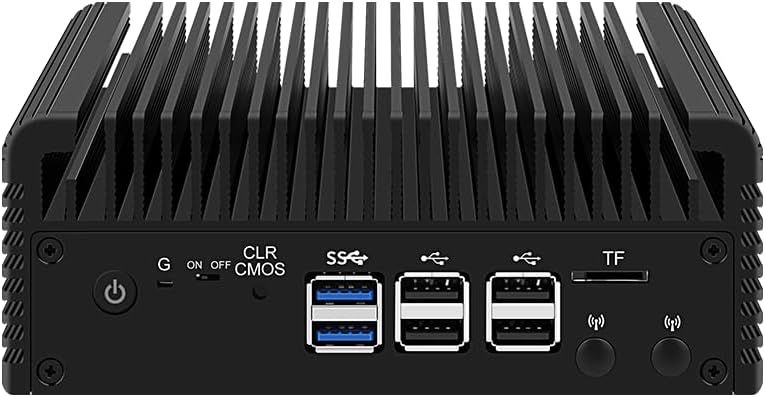
Image: Front view of the CWWK N100 Mini PC. It features a power button, multiple USB ports, and a TF card slot for data storage or system boot.
2.2. Rear Panel

Image: Rear view of the CWWK N100 Mini PC. This side includes HDMI ports, additional USB ports, four 2.5GbE LAN ports, and the DC-12V power input.
2.3. Internal Components
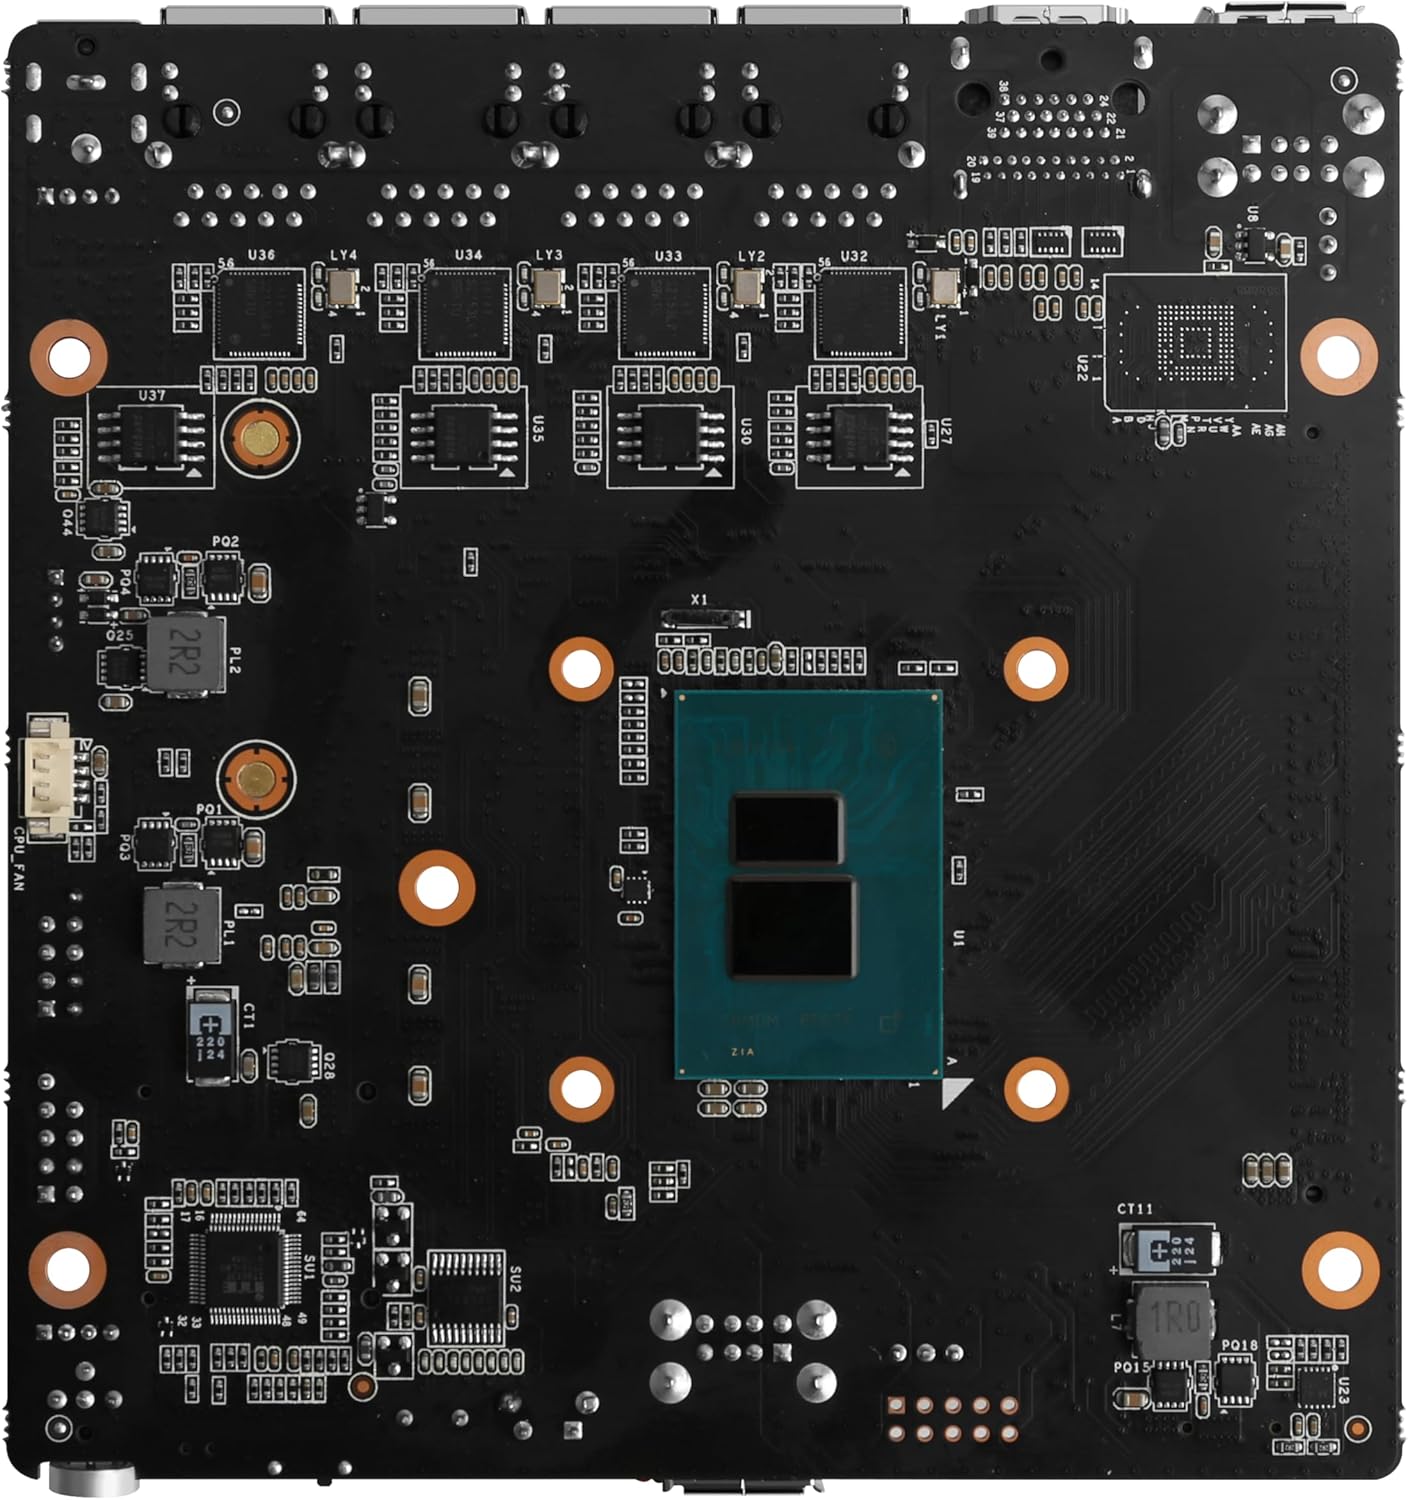
Image: Internal view of the CWWK N100 Mini PC motherboard. Key components visible include the Intel N100 processor, SO-DIMM DDR5 memory slot, and M.2 NVMe slots for storage expansion.
2.4. What's in the Box
- CWWK N100 Firewall Mini PC
- Power supply
- Mounting bracket (for wall-mounted installation, may require separate purchase)
- HDMI cable
- Screws for installation
3. Setup
3.1. Installing RAM and SSD (Barebone Models)
If you have purchased a barebone model (without pre-installed RAM or SSD), follow these steps:
- Carefully open the chassis of the Mini PC.
- Locate the SO-DIMM DDR5 memory slot. Insert the DDR5 RAM module firmly until it clicks into place.
- Identify the M.2 NVMe slot(s). Insert your M.2 NVMe SSD into the slot and secure it with the provided screw.
- Close the chassis securely.
Note: The device supports 1*SO-DIMM DDR5 memory (4800MHz, compatible with 5200/5600MHz) up to 32GB. It also supports 1*M.2 NVMe x4 storage, with options for multiple M.2 or mSATA/SATA via adapter boards.
3.2. Initial Connection
- Connect your display(s) to the HDMI2.1 or DP1.4 ports using appropriate cables. The device supports dual display at 4096x2160@60Hz.
- Connect a keyboard and mouse to the available USB ports.
- Connect an Ethernet cable from your router/modem to one of the 2.5GbE LAN ports for internet access.
- Connect the power supply to the DC-12V port on the rear panel and then plug it into a power outlet.
- Press the power button on the front panel to turn on the Mini PC.
Video: An overview of a similar mini PC model, demonstrating port locations and general setup. This video highlights the compact design and various connectivity options.
4. Operating Instructions
4.1. Operating System
The CWWK N100 Mini PC supports various operating systems, including ESXI, OPNsense, OpenWrt, Ubuntu, and Windows. If your device came with a pre-installed OS, it will boot directly into it. For barebone models or OS changes, you will need to install your preferred operating system.
Video: A quick tutorial on adjusting power limits, which can be useful for optimizing performance or power consumption depending on your operating system and workload.
4.2. BIOS Settings
To access the BIOS menu (AMI EFI BIOS), continuously press the ESC key during startup. The BIOS supports features like self-starting on power-on, GPIO, and PXE network boot.
4.3. Network Configuration
The device is equipped with 4 Intel i226-V 2.5G network cards. For firewall or router applications, configure these ports according to your network topology and chosen operating system's guidelines.
5. Maintenance
5.1. Cleaning
Regularly clean the exterior of the Mini PC with a soft, dry cloth. Ensure ventilation holes are free from dust and debris to maintain optimal passive heat dissipation. Avoid using liquid cleaners directly on the device.
5.2. Thermal Management
The CWWK N100 features a fanless design with two copper tubes for heat conduction and an aluminum shell for passive heat dissipation. While designed for silent operation, ensure adequate airflow around the device, especially in warm environments. If you experience unusual temperatures, consider checking the thermal paste application (advanced users only) or ensuring the device is not in an enclosed space.
5.3. Component Upgrades
The device allows for upgrades of RAM and M.2 SSDs. When performing upgrades, ensure the device is powered off and disconnected from all power sources. Handle components with care to avoid electrostatic discharge.
6. Troubleshooting
6.1. System Instability with OPNsense
Some users have reported system freezes or kernel panics when running OPNsense on Intel N-series CPUs due to a known Intel bug related to C-States. If you encounter stability issues, consider disabling C-States in OPNsense by adding specific tunables to the system configuration. Consult OPNsense documentation or community forums for detailed instructions on BSD system tuning.
6.2. Memory Errors
If you experience sporadic memory errors, ensure that the installed RAM module is fully compatible and properly seated. Some users have reported better stability with specific memory brands (e.g., Crucial) compared to others. Verify that your DDR5 RAM operates within the supported frequency range (4800MHz, compatible with 5200/5600MHz).
6.3. High Temperatures
While the device is passively cooled, consistently high temperatures (e.g., CPU spiking to 80-90°C under load) may indicate an issue. Ensure the device has proper ventilation and is not obstructed. For advanced users, replacing the thermal paste between the CPU and heatsink can significantly improve thermal performance.
7. Specifications
| Feature | Detail |
|---|---|
| Processor | Intel N100 (4 Cores) |
| Memory | 1* SO-DIMM DDR5 4800MHz (compatible with 5200/5600MHz), up to 32GB |
| Storage | 1*M.2 NVMe x4 (expandable via adapter board) |
| Graphics | Integrated Intel UHD Graphics |
| Display Output | HDMI2.1 (4096x2180@60Hz), DP1.4 (4096x2160@60Hz) |
| Network Card | 4*Intel i226-V 2.5G LAN |
| Wireless | 1*M.2 KEY E (supports Bluetooth/WiFi6 module) |
| USB Ports | 4*USB2.0 |
| Heat Dissipation | Fanless, passive aluminum shell with copper tubes |
| Power Consumption | 15W |
| Power Supply | DC-12V5 (5*25 connector) |
| Chassis Material | Aluminum alloy |
| Dimensions (LWH) | 145.6mm x 145.4mm x 53.6mm |
| Operating System Support | ESXI, OPNsense, OpenWrt, Ubuntu, Windows |
8. Warranty and Support
8.1. Return Policy
The product is subject to a 30-day return policy for refund or replacement. Please refer to your purchase agreement for full details.
8.2. Customer Service
For technical assistance, product inquiries, or custom LOGO requests, please contact CWWK customer service. Contact information can typically be found on the seller's page or your purchase documentation.