1. Introduction
Thank you for choosing the Goldair Ceramic Hob GCH-600E. This manual provides essential information for the safe and efficient use of your new appliance. Please read these instructions carefully before installation and use, and keep them for future reference.
The Goldair 60cm Ceramic Hob features a high-quality black vitroceramic glass surface, sensitive touch controls, a child lock, a residual heat indicator, and an automatic safety switch-off function, designed for modern kitchen environments.
2. Important Safety Instructions
WARNING: To reduce the risk of fire, electric shock, injury to persons, or damage when using the hob, follow basic precautions, including the following:
- Read all instructions before using the appliance.
- This appliance is intended for domestic use only.
- Ensure the appliance is installed by a qualified person in accordance with local regulations.
- Do not touch hot surfaces. Use handles or knobs where provided.
- To protect against electric shock, do not immerse cord, plugs, or the appliance in water or other liquid.
- Close supervision is necessary when any appliance is used by or near children.
- Unplug from outlet when not in use and before cleaning. Allow to cool before putting on or taking off parts.
- Do not operate any appliance with a damaged cord or plug, or after the appliance malfunctions or has been damaged in any manner.
- The use of accessory attachments not recommended by the appliance manufacturer may cause injuries.
- Do not use outdoors.
- Do not let cord hang over edge of table or counter, or touch hot surfaces.
- Do not place on or near a hot gas or electric burner, or in a heated oven.
- Extreme caution must be used when moving an appliance containing hot oil or other hot liquids.
- Always attach plug to appliance first, then plug cord into the wall outlet. To disconnect, turn any control to "off", then remove plug from wall outlet.
- Do not use appliance for other than intended use.
- The hob surface will remain hot after use due to residual heat. Do not touch until the indicator light turns off.
- Do not store items on the hob surface when not in use.
- Metallic objects such as knives, forks, spoons and lids should not be placed on the hob surface since they can get hot.
3. Setup and Installation
3.1 Unpacking
Carefully remove the hob from its packaging. Inspect the appliance for any signs of damage. If any damage is found, do not install or operate the hob and contact your retailer immediately.
Ensure all packaging materials are removed before installation.
3.2 Installation Requirements
IMPORTANT: Installation must be carried out by a qualified electrician or technician in accordance with current local and national wiring regulations and building codes.
- Ensure the countertop material is heat-resistant.
- Provide adequate ventilation around the hob.
- The appliance requires a dedicated electrical circuit. Refer to the specifications section for power requirements.
- Maintain minimum clearances from adjacent walls and overhead cabinets as specified in the installation diagram (not provided in this manual, refer to separate installation guide).
3.3 Electrical Connection
Connect the hob to the mains power supply using a suitable connection box and circuit breaker. The wiring diagram is typically found on the underside of the appliance or in a separate installation manual. Ensure the earth connection is properly made.
3.4 First Use
Before first use, clean the ceramic surface with a damp cloth. Some new appliance smell may be present during the initial heating; this is normal and will dissipate.
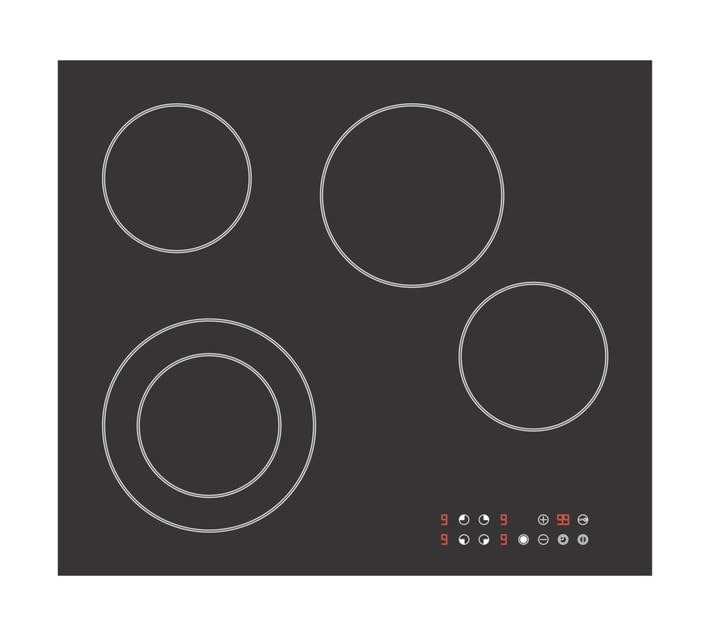
Figure 1: Goldair Ceramic Hob GCH-600E installed in a kitchen setting. This image shows the sleek black vitroceramic glass surface with touch controls.
4. Operating Instructions
4.1 Control Panel Overview
The Goldair Ceramic Hob features a sensitive touch control panel located on the front of the hob surface. The controls are activated by light touches of your finger.
- Power On/Off Button: Activates or deactivates the hob.
- Zone Selection Buttons: Selects the cooking zone to be adjusted.
- Heat Level Adjustment: Plus (+) and Minus (-) buttons or a slider to set the desired heat level (typically 1-9).
- Child Lock Button: Locks the control panel to prevent accidental operation.
- Timer Button: (If applicable) Sets a cooking timer.
4.2 Turning On and Setting Heat
- Touch the Power On/Off button (O) to turn on the hob. The display will show "0" or a similar indicator.
- Select the desired cooking zone by touching its corresponding zone selection button.
- Adjust the heat level using the (+) or (-) buttons, or by sliding your finger across the heat level control. The display will show the selected heat level (e.g., 1 to 9).
- Place suitable cookware on the selected cooking zone.
4.3 Child Lock Function
To activate the child lock:
- Ensure the hob is turned off or all cooking zones are inactive.
- Touch and hold the Child Lock button (often indicated by a key or lock icon) for a few seconds until an indicator light or "L" appears on the display.
To deactivate the child lock, touch and hold the Child Lock button again until the indicator disappears.
4.4 Residual Heat Indicator
After a cooking zone is turned off, it will remain hot for some time. The residual heat indicator (usually an "H" on the display) will illuminate to warn you that the surface is still hot and should not be touched. The indicator will turn off once the surface has cooled to a safe temperature.
4.5 Automatic Safety Switch-Off
The hob is equipped with an automatic safety switch-off function. If a cooking zone is left on for an extended period without any adjustments, it will automatically switch off. The duration before switch-off depends on the set heat level.
4.6 Suitable Cookware
Use flat-bottomed pots and pans made of materials suitable for ceramic hobs, such as stainless steel, enamel steel, or cast iron. Avoid using cookware with rough bottoms that could scratch the glass surface. Ensure the base of the cookware covers the cooking zone adequately for efficient heating.
5. Cleaning and Maintenance
Regular cleaning and maintenance will ensure the longevity and optimal performance of your Goldair Ceramic Hob.
5.1 Daily Cleaning
- Always ensure the hob is cool and switched off before cleaning.
- Wipe the ceramic surface with a soft, damp cloth and a small amount of mild dish soap.
- Rinse with a clean, damp cloth and dry thoroughly with a soft, dry cloth to prevent water spots.
5.2 Removing Stubborn Stains
- For burnt-on food or stubborn stains, use a specialized ceramic hob cleaner and a hob scraper (plastic or razor blade designed for ceramic hobs).
- Apply the cleaner as directed by the product manufacturer.
- Carefully scrape off residues at an angle, then wipe clean.
5.3 Do Not Use
- Abrasive sponges, scouring pads, or harsh chemical cleaners.
- Oven sprays or corrosive cleaning agents.
- Steam cleaners.
These can damage the ceramic glass surface.
6. Troubleshooting
Before contacting customer service, please refer to the following table for common issues and their solutions.
| Problem | Possible Cause | Solution |
|---|---|---|
| Hob does not turn on. | No power supply; Child lock activated. | Check circuit breaker. Deactivate child lock (refer to section 4.3). |
| Cooking zone not heating. | Incorrect zone selected; Cookware not suitable; Safety switch-off activated. | Ensure correct zone is selected and heat level is set. Use suitable, flat-bottomed cookware. Turn hob off and on again. |
| "H" indicator remains on. | Residual heat. | This is normal. The surface is still hot. Wait for it to cool down. |
| Hob beeps and turns off. | Spillage on control panel; Overheating. | Clean the control panel. Allow the hob to cool down before restarting. |
| Error code displayed (e.g., E0, E1). | Internal fault; Sensor issue. | Turn off the hob at the mains for a few minutes, then restart. If the error persists, contact customer service. |
7. Technical Specifications
| Model Number | GCH-600E |
| Brand | Goldair |
| Type | Ceramic Hob |
| Surface Material | Vitroceramic Glass |
| Colour | Black |
| Product Dimensions (D x W x H) | 63D x 8W x 54H centimetres |
| Control Type | Sensitive Touch Control |
| Special Features | Child Lock, Residual Heat Indicator, Automatic Safety Switch-off |
| Power Supply | Electric (Specific voltage/wattage not provided, refer to appliance rating label) |
Note: Technical specifications are subject to change without prior notice for product improvement. Always refer to the rating label on the appliance for the most accurate information.
8. Warranty and Customer Support
8.1 Warranty Information
Your Goldair Ceramic Hob GCH-600E comes with a manufacturer's warranty. The terms and conditions of this warranty are typically provided in a separate warranty card or can be found on the official Goldair website. Please retain your proof of purchase for warranty claims.
The warranty covers manufacturing defects and faults under normal domestic use. It does not cover damage caused by improper installation, misuse, neglect, accidental damage, or unauthorized repairs.
8.2 Customer Support
If you encounter any issues that cannot be resolved using the troubleshooting guide, or if you require spare parts or service, please contact Goldair customer support.
For assistance, please visit the official Goldair website or refer to the contact details provided with your purchase documentation.
- Website: www.goldair.co.za (Example, please verify official website)
- Email: support@goldair.co.za (Example)
- Phone: Refer to your product packaging or Goldair website for local contact numbers.
When contacting support, please have your model number (GCH-600E) and proof of purchase ready.