1. Introduction
This manual provides detailed instructions for the installation, operation, and maintenance of your CEMELI Wireless 433MHz Light Switch Receiver and Wall Panel Transmitter. This system allows for convenient wireless control of lighting fixtures without the need for new wiring for the switch location.
2. Safety Information
- Electrical Hazard: Installation should only be performed by a qualified electrician or a person with a thorough understanding of electrical wiring. Always turn off power at the circuit breaker before installation.
- Do not exceed the maximum load rating of the receiver.
- Ensure all wire connections are secure and properly insulated.
- Do not expose the device to moisture or extreme temperatures.
- Keep out of reach of children.
3. Package Contents
Please check the package for the following items:
- Wireless 433MHz Receiver (Controller)
- Wireless Wall Panel Transmitter (Switch)
- Mounting accessories (screws, adhesive tape)
- User Manual (this document)
4. Product Overview
The CEMELI wireless light switch system consists of a compact receiver unit that connects to your lighting fixture and a battery-powered wall panel transmitter that sends wireless signals to control the receiver.

Image 1: The CEMELI Wireless 433MHz Light Switch Receiver (top) and a single Wall Panel Transmitter (bottom).
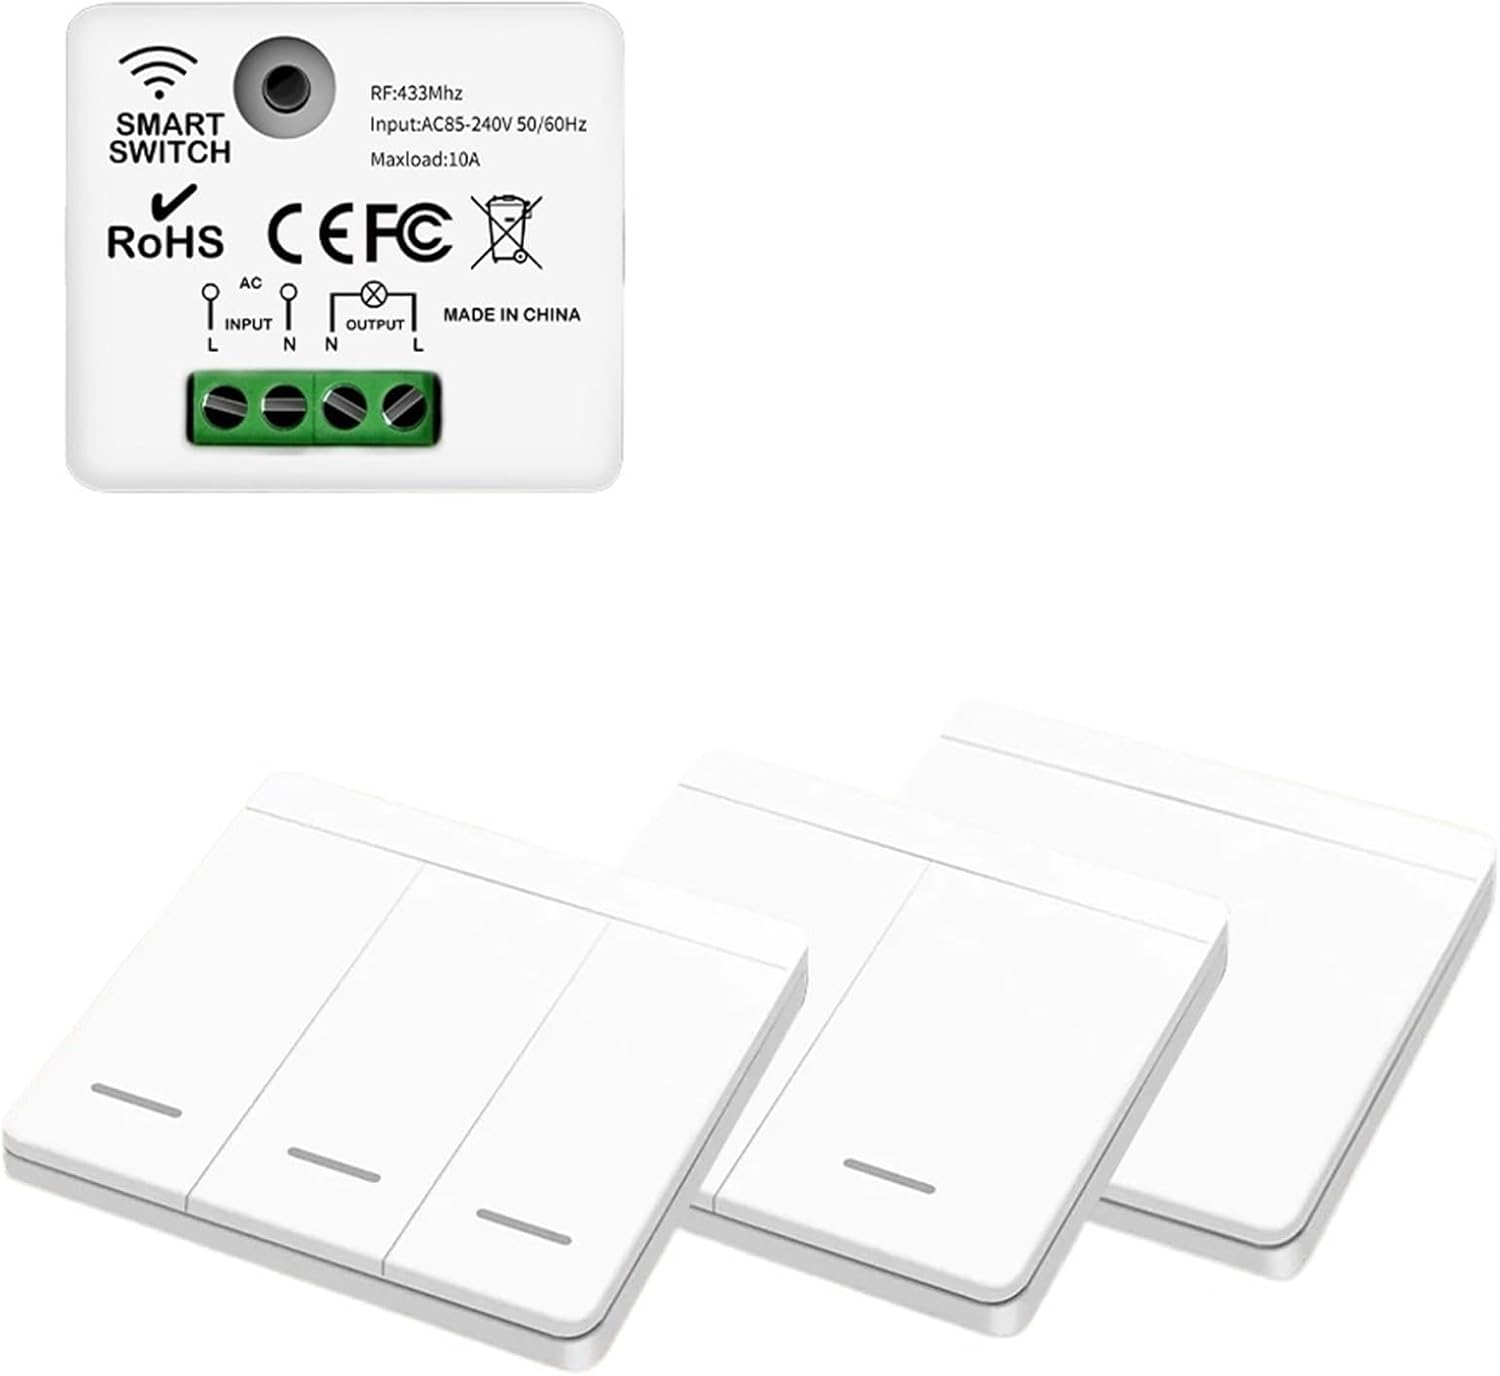
Image 2: The CEMELI Wireless 433MHz Light Switch Receiver (top) shown with multiple Wall Panel Transmitters (bottom).
5. Specifications
5.1. Wireless 433MHz Receiver (Controller)
| Working Voltage | AC85-240V 60HZ/50HZ |
| Working Frequency | 433MHZ |
| Standby Power | <0.3W |
| Max Load | <1100W |
| Receiving Sensitivity | -108dBM |
| Working Way | Wireless Control |
| Coding Way | Learning Code |
| Modulation | ASK |
| Working Temperature | -10°C ~ +70°C |
| Size | 47.4 x 42 x 22.8 mm |
5.2. Wireless Wall Panel Transmitter (Switch)
| Working Voltage | DC3.0V |
| Working Frequency | 433MHZ |
| Standby Current | <1uA |
| Transmitting Power | <10mW |
| Working Way | Wireless Control |
| Coding Way | EV1527 Learning Code |
| Modulation | ASK |
| Working Temperature | -10°C ~ +70°C |
| Size | 86 x 86 x 15 mm |
6. Setup
6.1. Wiring the Receiver
- Turn off power: Locate the circuit breaker controlling the light fixture you intend to control and turn off the power. Verify power is off using a voltage tester.
- Identify wires: In your light fixture's junction box, identify the Live (L), Neutral (N), and Load (L-out to light) wires.
- Connect input wires: Connect the AC Live wire from your power source to the 'L INPUT' terminal on the receiver. Connect the AC Neutral wire from your power source to the 'N INPUT' terminal on the receiver.
- Connect output wires: Connect the Neutral wire going to your light fixture to the 'N OUTPUT' terminal on the receiver. Connect the Live wire going to your light fixture (the load wire) to the 'L OUTPUT' terminal on the receiver.
- Secure and insulate: Ensure all connections are tight and properly insulated with wire nuts or electrical tape.
- Mount receiver: Place the receiver inside the junction box or a suitable enclosure, ensuring it does not interfere with other components.
- Restore power: Turn the power back on at the circuit breaker. The receiver should now be powered.
6.2. Pairing the Wall Switch with Receiver
The receiver and wall switch need to be paired for wireless control. The receiver typically has a learning button.
- Enter learning mode: Press the learning button on the receiver once. An indicator light on the receiver will usually illuminate or flash, indicating it is in learning mode.
- Press wall switch: Within a few seconds (typically 5-10 seconds), press any button on the wireless wall panel transmitter you wish to pair.
- Confirmation: The receiver's indicator light will usually flash or turn off, and the connected light fixture may toggle on/off, indicating successful pairing.
- Pair additional switches: Repeat steps 1-3 for any additional wall panel transmitters you wish to control the same receiver.
- Mount wall switch: The wall switch can be mounted using the provided screws or double-sided adhesive tape on any flat surface.
7. Operating
Once paired, operating the system is straightforward:
- Turn On/Off: Press the designated button on the wireless wall panel transmitter to toggle the connected light fixture on or off.
- Multiple Switches: If multiple wall switches are paired to one receiver, any paired switch can control the light.
7.1. Clearing Paired Switches (Unpairing)
To clear all paired wall switches from a receiver:
- Enter clear mode: Press and hold the learning button on the receiver for approximately 5-8 seconds until the indicator light flashes rapidly or turns off.
- Confirmation: All previously paired switches are now unpaired. You will need to re-pair any switches you wish to use again.
8. Maintenance
8.1. Cleaning
Wipe the surface of the wall panel transmitter with a soft, dry cloth. Do not use abrasive cleaners or solvents.
8.2. Battery Replacement (Wall Switch)
The wireless wall panel transmitter is powered by a DC3.0V battery (typically a coin cell battery like CR2032). When the switch's performance degrades or stops responding, the battery may need replacement.
- Carefully pry open the back cover of the wall panel transmitter.
- Remove the old battery.
- Insert a new DC3.0V coin cell battery, ensuring correct polarity (+/-).
- Snap the back cover firmly into place.
9. Troubleshooting
- Light does not respond to switch:
- Ensure the receiver has power (check circuit breaker).
- Verify the wall switch battery is not depleted.
- Re-pair the wall switch with the receiver (refer to Section 6.2).
- Check wiring connections to the receiver.
- Intermittent control:
- Ensure the wall switch is within the effective range of the receiver.
- Check for strong radio interference sources nearby.
- Replace the wall switch battery.
- Receiver indicator light not working:
- Verify the receiver is receiving power.
- Contact customer support if power is confirmed but the light remains off.
10. Warranty Information
CEMELI products are designed for reliability and performance. This product comes with a standard manufacturer's warranty against defects in materials and workmanship. Please refer to the product packaging or contact customer support for specific warranty terms and duration.
11. Customer Support
If you encounter any issues or have questions regarding your CEMELI Wireless 433MHz Light Switch system, please contact our customer support team. For the most up-to-date contact information, please visit the official CEMELI website or refer to your purchase documentation.