1. Introduction
This manual provides comprehensive instructions for the safe and efficient installation, operation, and maintenance of the BINELUCOLU SMSM-01 600W Brushless Servo Motor. This motor is designed for industrial sewing machines, offering precise speed control and energy efficiency. Please read this manual thoroughly before using the product to ensure proper function and longevity.

Figure 1: Overview of the BINELUCOLU SMSM-01 Brushless Servo Motor and Controller.
2. Safety Instructions
Always observe the following safety precautions to prevent injury or damage to the equipment:
- Read all instructions carefully before installation and operation.
- Ensure the power supply voltage matches the motor's specifications (110V).
- Disconnect power before performing any maintenance, cleaning, or adjustments.
- Keep hands, hair, and loose clothing away from moving parts during operation.
- Do not operate the motor in wet or damp conditions.
- Ensure proper grounding to prevent electrical shock.
- Only qualified personnel should perform repairs or complex installations.
3. Package Contents
Verify that all items are present in the package:
- 1x Brushless Motor
- 1x Controller
- 1x English Manual (This document)
- All Accessories for Assembly (e.g., mounting hardware, cables)
4. Specifications
| Feature | Specification |
|---|---|
| Color | Silver, White |
| Material | Copper, Aluminum, Plastic |
| Plug Type | US Standard |
| Voltage | 110V |
| Speed Range | 500-4500 RPM |
| Step Adjustment | 100 Stitches/Min |
| Power | 600W |
| Controller Power Cord Length | 85cm / 33.46inch |
| Servo Motor Size | 28 x 10.5 x 20cm / 11 x 4.1 x 7.9inch |
| Controller Size | 16 x 6 x 19cm / 6.3 x 2.4 x 7.5inch |
| Net Weight | 5kg / 11lbs |
The motor features a high-quality pure copper coil for durability and efficient performance. The controller includes an LED screen and touch-sensitive buttons for intuitive operation.
5. Installation and Setup
Follow these steps to install your brushless servo motor:
5.1 Motor Mounting
- Ensure the sewing machine is powered off and unplugged.
- Remove the old motor (if applicable) from the sewing machine table.
- Position the new servo motor on the mounting bracket. The motor is designed to be fixed with four screws in two directions for enhanced stability.
- Secure the motor to the sewing machine table using the provided mounting hardware. Ensure it is firmly attached and aligned with the machine's drive wheel.
- Attach the drive belt from the motor pulley to the sewing machine's handwheel. Adjust belt tension as needed.

Figure 2: The motor's mounting bracket, designed for stable attachment with four screws.
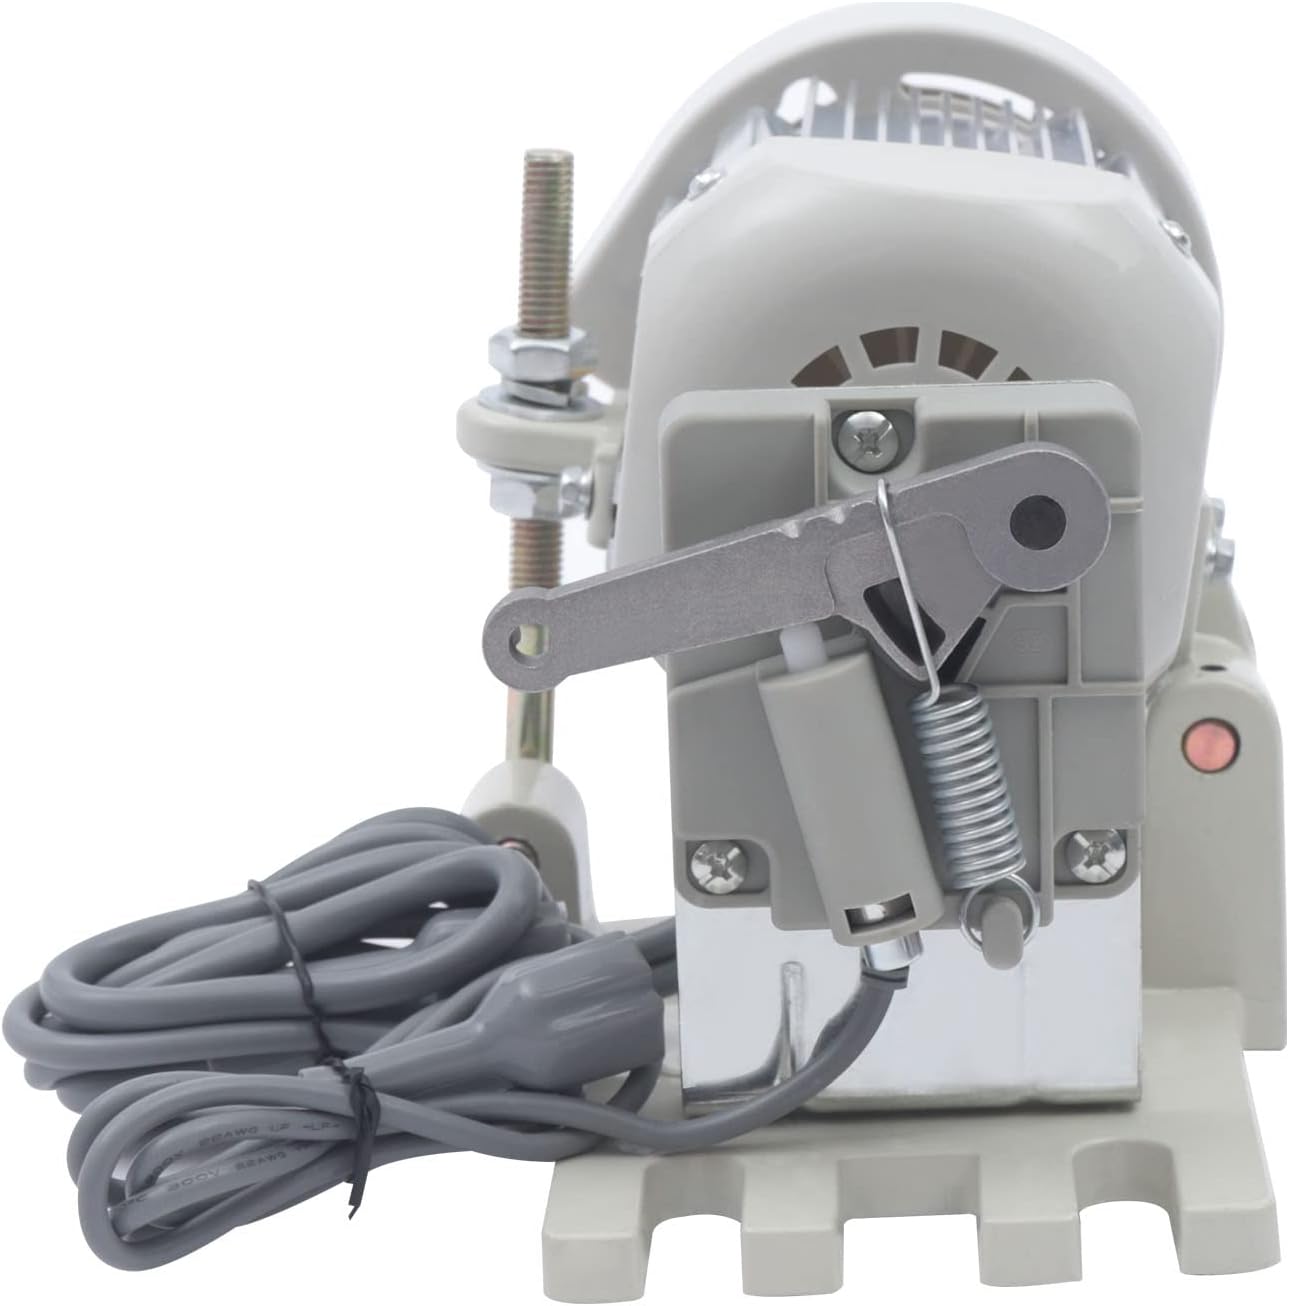
Figure 3: The motor features an independent stepless speed adjustment lever for precise control.
5.2 Controller Connection
- Mount the controller unit in a convenient location near the sewing machine, typically under the table.
- Connect the motor cable to the appropriate socket on the back of the controller. The controller has different wiring sockets to accommodate various working needs.
- Connect the foot pedal cable to its designated socket on the controller.
- If using an optional LED light (not included), connect it to the designated LED light port on the controller.
- Plug the controller's power cord into a standard 110V electrical outlet.

Figure 4: Rear view of the controller showing various wiring sockets for different connections.
6. Operation
This section details how to operate your BINELUCOLU servo motor.
6.1 Power On/Off
- To power on, flip the red switch on the controller to the 'ON' position. The LED display will illuminate.
- To power off, flip the red switch to the 'OFF' position.
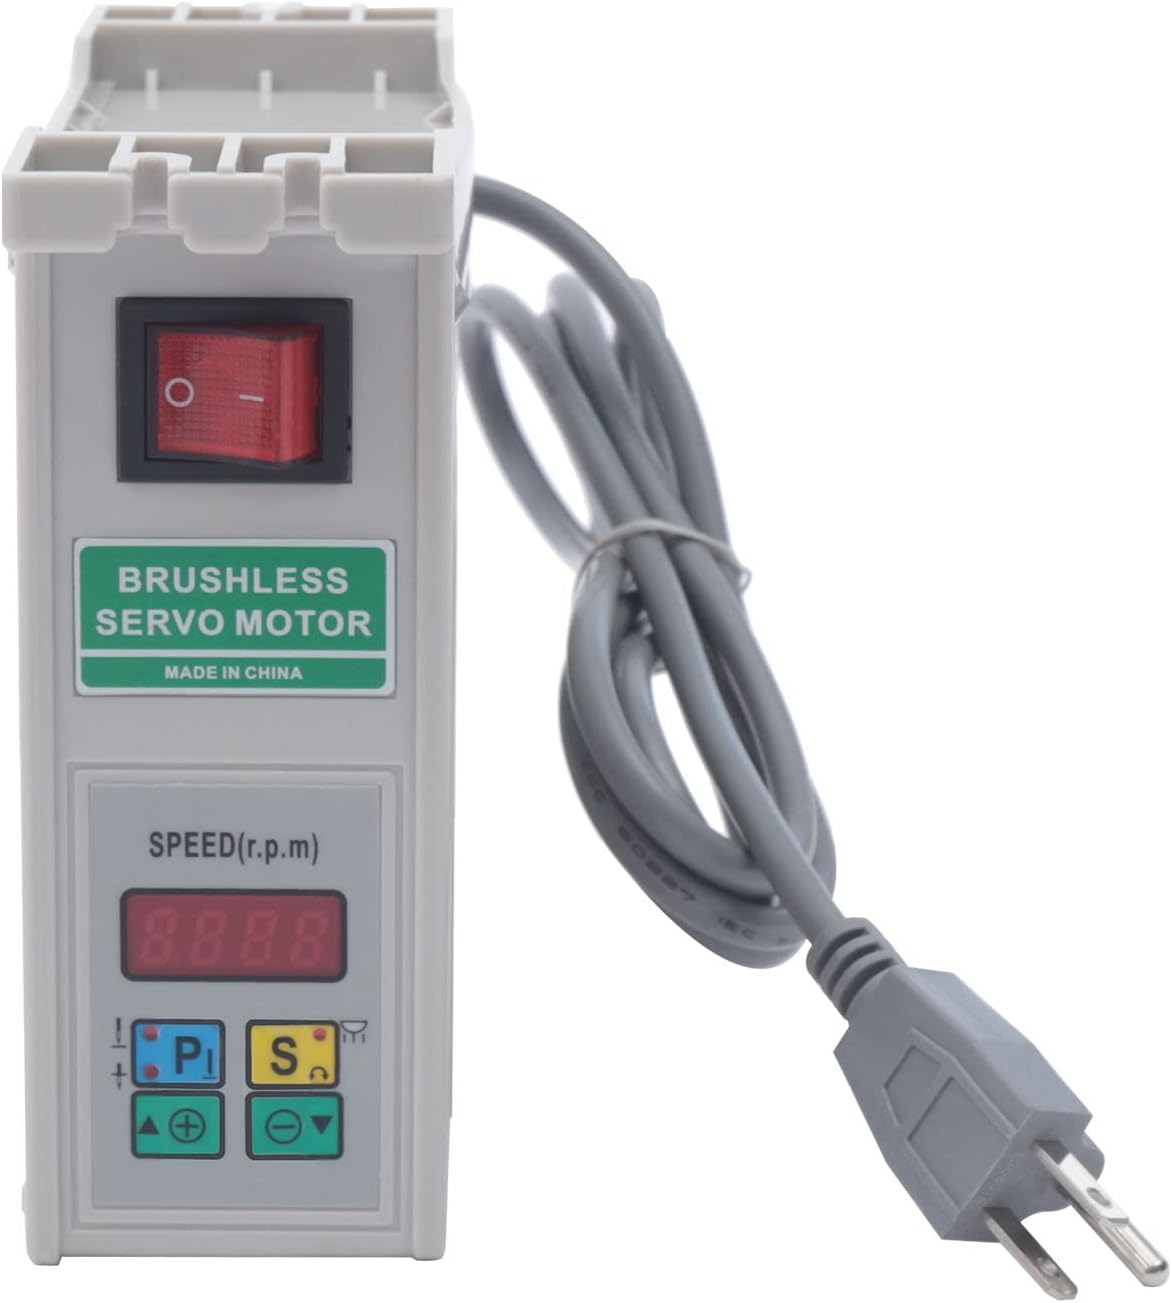
Figure 5: The controller's front panel, featuring the LED screen and red power switch for easy operation.
6.2 Speed Adjustment
- The controller features an LED screen and touch-sensitive buttons for speed adjustment.
- Use the '+' and '-' buttons to increase or decrease the motor speed. The speed can be adjusted in steps of 100 stitches/minute within the 500-4500 RPM range.
- The independent speed control lever on the motor allows for fine-tuning and increased pedal sensitivity. Adjust the spring position on the lever to modify elasticity and responsiveness.
6.3 Direction Change
The motor supports both clockwise and anti-clockwise rotation. Refer to the controller's specific buttons (e.g., 'P' or 'S' buttons, if indicated on the device) or the detailed English manual included in the package for instructions on how to change the rotation direction.
6.4 LED Light Control (Optional)
If an LED light is connected, the controller offers five adjustable brightness options. Consult the controller's interface or the detailed manual for specific button functions to control the LED light.
6.5 Operational Overview
Watch this video for a visual overview of the servo motor's features and operation.
Video 1: Features of the 110V Energy Saving Brushless Servo Motor. This video demonstrates the LED screen, touch-sensitive buttons for intuitive operation, the red power switch, various wiring sockets on the back for different needs, the magnetic steel sleeve for high-speed rotation stability, the four-screw fixing mechanism for stability, the stepless speed adjustment lever, vibration-absorbing pads to reduce noise and wear, and the high-quality copper wire motor.
7. Maintenance
Regular maintenance ensures optimal performance and extends the lifespan of your servo motor:
- Cleaning: Periodically wipe down the motor and controller with a dry, soft cloth. Do not use liquid cleaners or solvents.
- Inspection: Regularly check all connections and mounting screws to ensure they are secure. Inspect the drive belt for wear and tear.
- Ventilation: Ensure the motor's cooling vents are free from dust and debris to prevent overheating.
- Vibration-absorbing pads: The motor is equipped with vibration-absorbing pads to reduce motor vibration, noise, wear, and tear. Inspect these pads periodically for damage and replace if necessary.
8. Troubleshooting
If you encounter issues, refer to the following common problems and solutions:
| Problem | Possible Cause | Solution |
|---|---|---|
| Motor does not start | No power, loose connection, power switch off | Check power cord, ensure all cables are securely connected, turn on the power switch. |
| Irregular speed or poor control | Incorrect speed setting, foot pedal issue, motor lever adjustment | Adjust speed using controller buttons, check foot pedal connection, adjust the motor's speed control lever. |
| Unusual noise or vibration | Loose mounting, worn belt, foreign object | Tighten mounting screws, inspect and replace belt if worn, check for obstructions. |
| Overheating | Blocked ventilation, prolonged heavy use | Clear vents, allow motor to cool down, reduce load if consistently overheating. |
If the problem persists after attempting these solutions, please contact customer support.
9. Warranty and Support
The BINELUCOLU SMSM-01 600W Brushless Servo Motor comes with a standard manufacturer's warranty. For specific warranty terms, please refer to the warranty card included with your product or contact BINELUCOLU customer service. For technical support, troubleshooting assistance, or spare parts, please reach out to your retailer or the manufacturer directly.