Introduction
This manual provides detailed instructions for the installation, operation, and maintenance of your Dohaeris FRIGUS Air 400 CPU Cooler. Please read this manual thoroughly before installation to ensure proper function and longevity of your product. This CPU cooler is designed to efficiently dissipate heat from your processor, featuring 4 copper heatpipes and a 120mm RGB fan.

Image: Front view of the Dohaeris FRIGUS Air 400 CPU Cooler, showcasing its 120mm RGB fan with vibrant lighting and the heatsink structure.
Safety Information
- Ensure your computer is powered off and unplugged from the wall outlet before beginning installation.
- Handle components with care to avoid damage. Avoid touching the fan blades or heatsink fins directly to prevent injury or bending.
- Keep all small parts, such as screws and brackets, out of reach of children.
- Use only the provided mounting hardware. Using incompatible hardware may damage your CPU or motherboard.
- Static electricity can damage electronic components. Consider using an anti-static wrist strap during installation.
Package Contents
Verify that all items listed below are present in your package:
- Dohaeris FRIGUS Air 400 CPU Cooler (Heatsink with 120mm RGB Fan)
- Intel Mounting Brackets
- AMD Mounting Brackets
- Fan Clips
- Thermal Paste
- Mounting Screws and Spacers

Image: All included accessories for the CPU cooler, featuring various mounting brackets for Intel and AMD sockets, thermal paste, and screws.
Specifications
| Feature | Specification |
|---|---|
| Product Dimensions (LxWxH) | 220mm x 100mm x 157mm (8.66"L x 3.94"W x 6.18"H) |
| Fan Size | 120x120x25mm (4.72"x4.72"x0.98") |
| Heatsink Size | 125x75x158mm (4.92"x2.95"x6.22") |
| Heat Pipes | 4 Copper Heatpipes |
| Fan Speed | 800 - 1600 RPM |
| Power Interface | 4-Pin PWM |
| Air Volume | 60 CFM (max) |
| Noise Level | 26 dB (max) |
| Voltage | DC 12V |
| Cooling Method | Air Cooling |
| Material | Aluminum (fins), Copper (heatpipes) |
| Compatible CPU Sockets | Intel LGA 1151/1150/1155/1156, AMD AM4/AM3+/AM3/AM2+/AM2/FM2+/FM2/FM1 |
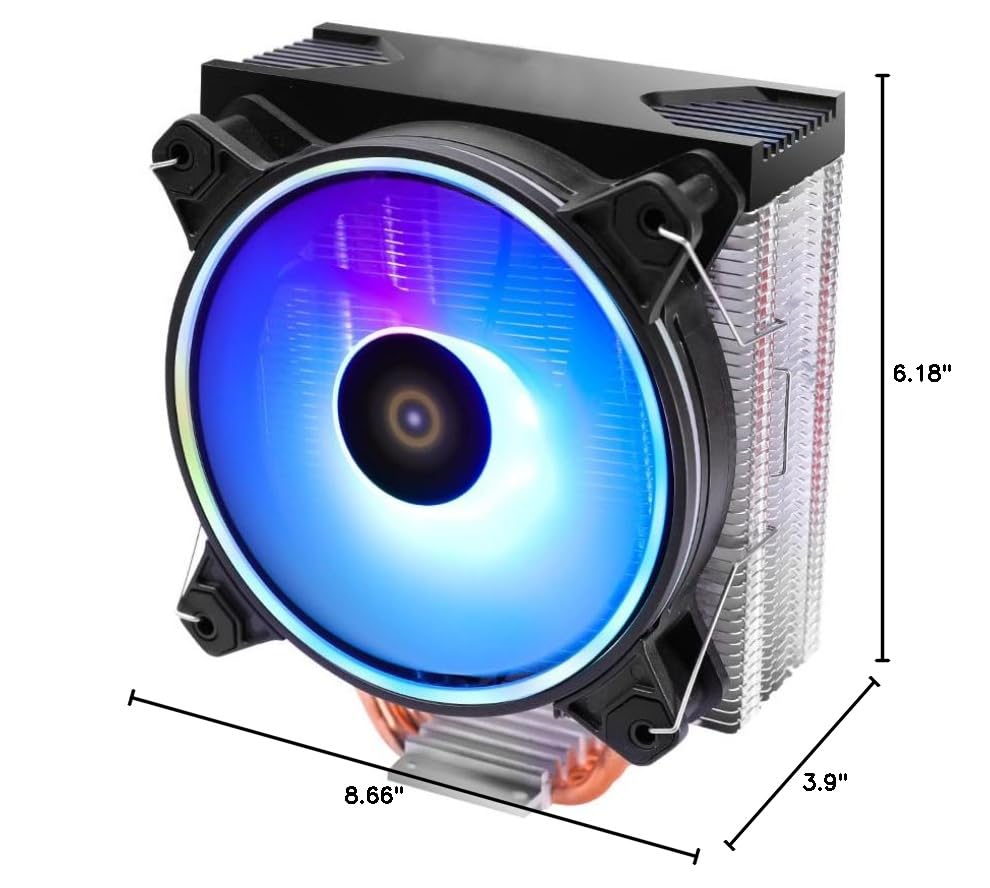
Image: Dimensional drawing of the CPU cooler, indicating its length, width, and height for compatibility checks.
Setup and Installation
Follow these general steps for installing your CPU cooler. Specific motherboard layouts may vary, so consult your motherboard manual for detailed socket access.
- Prepare the Motherboard:
Identify your CPU socket type (Intel LGA or AMD AM/FM series). Select the appropriate mounting brackets from the package contents. Remove any existing CPU cooler and clean off old thermal paste from the CPU surface using isopropyl alcohol.
- Install Backplate (if required):
For some sockets, a backplate needs to be installed on the rear of the motherboard. Align the backplate with the holes around the CPU socket and secure it with the appropriate standoffs from the front side.
- Apply Thermal Paste:
Apply a small, pea-sized amount of thermal paste to the center of the CPU's integrated heat spreader (IHS). Do not spread it manually; the pressure from the cooler will spread it evenly.
- Mount the Cooler:
Carefully place the CPU cooler onto the CPU, ensuring the base makes full contact. Align the cooler's mounting holes with the standoffs or mounting points on the motherboard. Secure the cooler using the provided screws, tightening them in a diagonal pattern until snug. Do not overtighten.
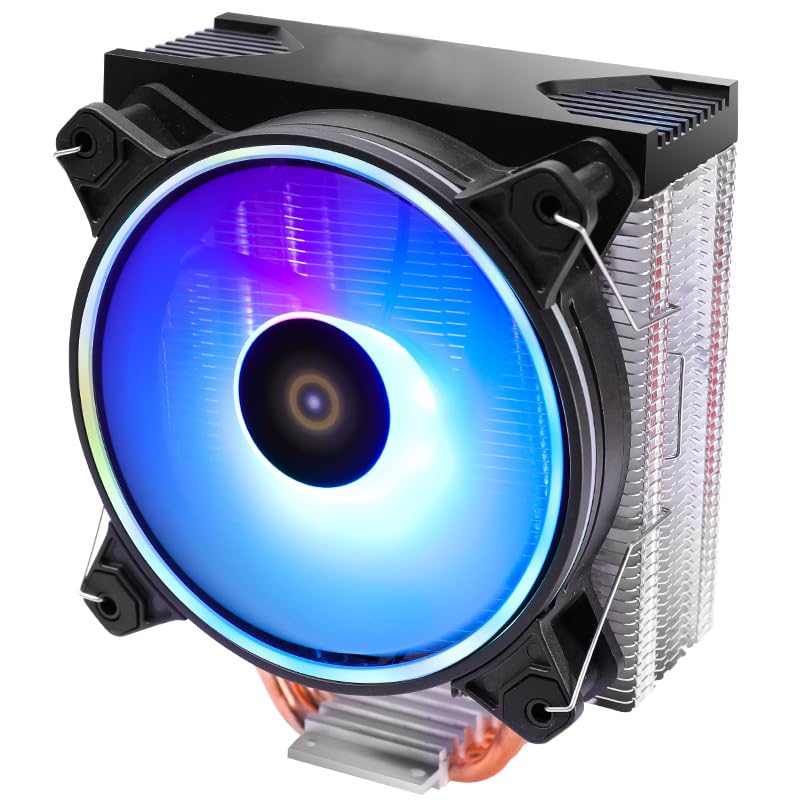
Image: Side profile of the CPU cooler, highlighting the aluminum fin stack and the four copper heatpipes extending from the base.
- Connect Fan Power:
Locate the 4-pin CPU_FAN header on your motherboard. Connect the cooler's 4-pin fan cable to this header. Ensure the connection is secure. The RGB lighting is automatically controlled via the 4-pin PWM connection.
- Cable Management:
Route the fan cable neatly to avoid interference with other components or airflow.
Operating Instructions
- Initial Power On:
After installation, power on your computer. Observe the CPU fan to ensure it spins correctly and the RGB lighting illuminates. Check your BIOS/UEFI settings to confirm the fan speed is detected and operating within expected parameters.
- Fan Speed Control:
The 4-pin PWM connection allows your motherboard to automatically control the fan speed based on CPU temperature. You can typically adjust fan curves in your motherboard's BIOS/UEFI settings or through compatible software provided by your motherboard manufacturer.
- RGB Lighting:
The RGB lighting on this cooler features automatic color conversion, meaning it cycles through various colors without requiring additional software or a dedicated RGB header. The lighting effect is pre-programmed.
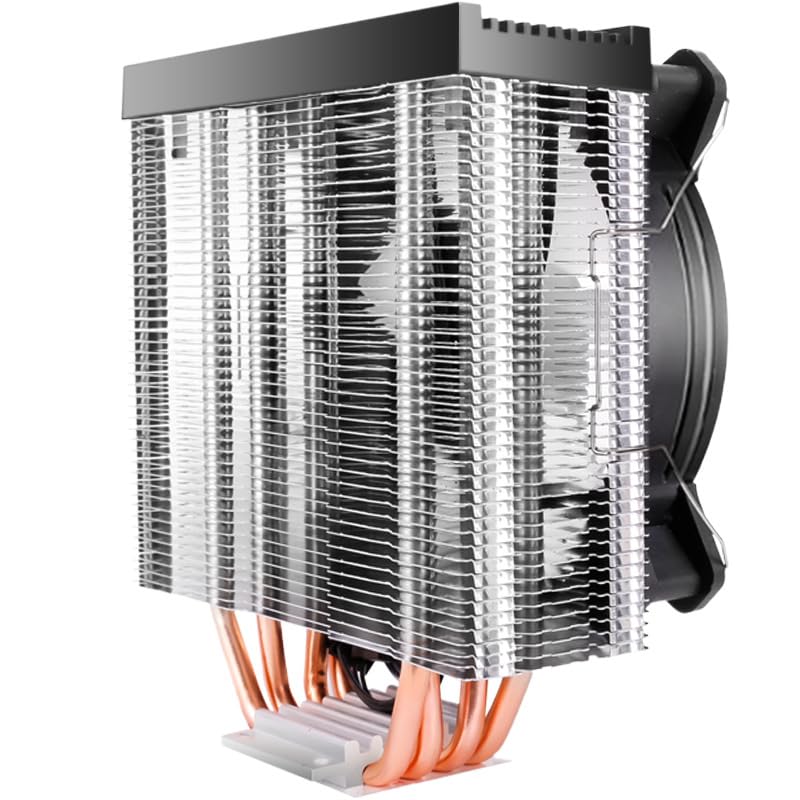
Image: The Dohaeris FRIGUS Air 400 CPU Cooler displaying its vibrant RGB lighting effects, with the product name visible.
Maintenance
Regular maintenance helps ensure optimal cooling performance and extends the lifespan of your CPU cooler.
- Dust Removal:
Periodically (every 3-6 months, or more frequently in dusty environments), power off and unplug your computer. Use compressed air to gently blow dust out of the heatsink fins and fan blades. Hold the fan blades to prevent them from spinning rapidly during cleaning, which can damage the bearings.
- Thermal Paste Reapplication:
Thermal paste can dry out over time, reducing its effectiveness. It is recommended to reapply thermal paste every 2-3 years, or if you remove the cooler for any reason. When reapplying, clean both the CPU IHS and the cooler's base thoroughly with isopropyl alcohol before applying new paste.
- Fan Inspection:
Check the fan for any signs of wear, damage, or excessive noise. If the fan becomes noisy or stops spinning, it may need replacement.
Troubleshooting
| Problem | Possible Cause | Solution |
|---|---|---|
| Fan not spinning | Loose power connection, faulty fan, incorrect BIOS settings. |
|
| High CPU temperatures | Improper cooler mounting, insufficient thermal paste, dust buildup, fan not spinning at optimal speed. |
|
| RGB lighting not working | Loose fan connection, faulty fan. |
|
Warranty Information
Specific warranty details for the Dohaeris FRIGUS Air 400 CPU Cooler are typically provided at the point of purchase or on the manufacturer's official website. Please retain your proof of purchase for warranty claims. The warranty generally covers manufacturing defects under normal use conditions.
Support
For technical assistance, troubleshooting beyond this manual, or warranty inquiries, please contact Dohaeris customer support through their official website or the retailer from whom you purchased the product. Have your product model and purchase date ready when contacting support.