1. Introduction
This manual provides essential information for the safe and effective operation, maintenance, and troubleshooting of your Parkside PAH 1300 B2 Rotary Demolition Hammer. Please read these instructions carefully before using the tool and keep them for future reference. Proper use and adherence to safety guidelines will ensure optimal performance and extend the lifespan of your device.
2. General Safety Instructions
Always observe the following safety precautions to prevent electric shock, injury, and fire.
- Work Area Safety: Keep the work area clean and well-lit. Cluttered or dark areas invite accidents. Do not operate power tools in explosive atmospheres, such as in the presence of flammable liquids, gases, or dust.
- Electrical Safety: Power tool plugs must match the outlet. Never modify the plug in any way. Avoid body contact with earthed or grounded surfaces. Do not expose power tools to rain or wet conditions.
- Personal Safety: Always wear eye protection. Use hearing protection when operating the tool. Wear a dust mask if working in dusty conditions. Dress properly; avoid loose clothing or jewelry.
- Tool Use and Care: Do not force the power tool. Use the correct power tool for your application. Disconnect the plug from the power source before making any adjustments, changing accessories, or storing power tools.
- Vibration Damping: This tool features vibration damping on the main handle. However, prolonged use can still cause vibration-related injuries. Take regular breaks and use appropriate personal protective equipment.
3. Product Overview
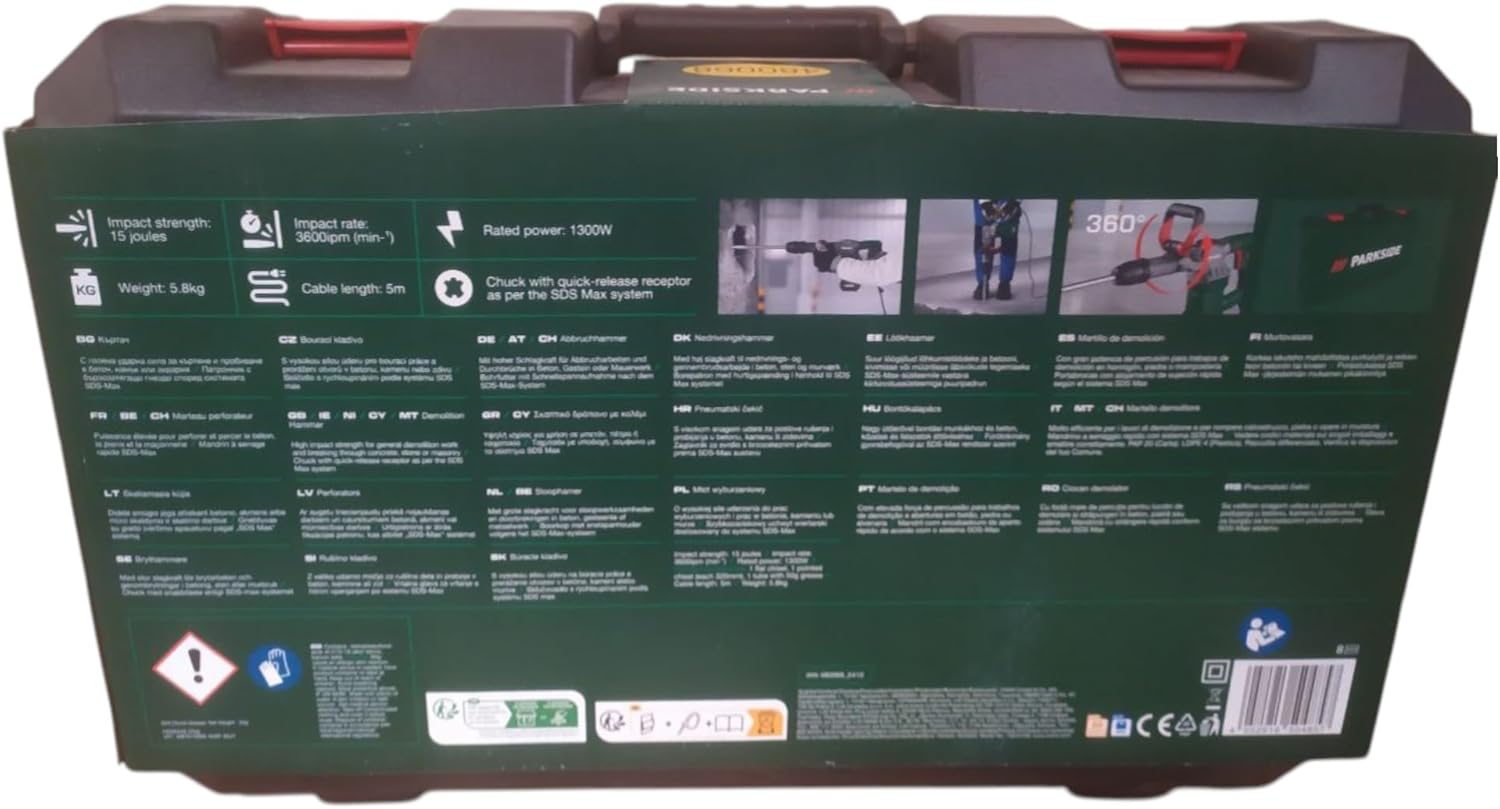
The Parkside PAH 1300 B2 is a robust rotary demolition hammer designed for demanding demolition and drilling tasks in concrete, rock, and masonry. It features a powerful 1300 W motor and an SDS-Max chuck system for quick accessory changes.
Key Features:
- High impact energy of 15 Joules.
- Impact rate of 3800 beats per minute.
- SDS-Max quick-release chuck system.
- 360° angular and rotatable auxiliary handle for optimal grip.
- Lock switch for continuous operation.
- Anti-slip Softgrip equipment.
- Vibration damping on the main handle.
Included Accessories:
- 1 Flat Chisel (320 mm)
- 1 Pointed Chisel (320 mm)
- 50 g Grease
- Practical Storage Case
Product Views:


4. Setup
4.1 Unpacking
- Carefully remove all components from the packaging.
- Check for any damage during transit. Do not use the tool if it appears damaged.
- Ensure all listed accessories are present.
4.2 Attaching the Auxiliary Handle
The auxiliary handle provides additional control and comfort. It can be rotated 360° to suit your working position.
- Loosen the clamping mechanism on the auxiliary handle.
- Slide the handle onto the tool body to your desired position.
- Tighten the clamping mechanism securely to fix the handle in place.
4.3 Inserting Chisels (SDS-Max System)
The SDS-Max system allows for quick and secure insertion of chisels.
- Clean the shank of the chisel and apply a thin layer of the provided grease.
- Pull back the locking sleeve on the chuck.
- Insert the chisel into the chuck, rotating it slightly until it engages.
- Release the locking sleeve. Pull on the chisel to ensure it is securely locked. A slight axial play is normal for SDS-Max systems.
5. Operating Instructions
5.1 Power Connection
- Ensure the power switch is in the "OFF" position before plugging the tool into a suitable 230V AC power outlet.
- Use an extension cord suitable for the tool's power rating (1300W) if necessary.
5.2 Starting and Stopping
- To Start: Press the ON/OFF switch.
- For Continuous Operation: Press the ON/OFF switch and then engage the lock switch.
- To Stop (from continuous operation): Press the ON/OFF switch again to release the lock.
- To Stop (from momentary operation): Release the ON/OFF switch.
5.3 Demolition Work
- Always wear appropriate personal protective equipment, including safety glasses, hearing protection, and heavy-duty gloves.
- Position the chisel firmly against the material to be demolished.
- Apply steady, firm pressure. Do not lean excessively on the tool; let the hammer's impact action do the work.
- Guide the tool smoothly. Avoid twisting or prying with the chisel, which can damage the tool or accessory.
- For large areas, work systematically, breaking off smaller sections.
6. Maintenance
Regular maintenance ensures the longevity and safe operation of your demolition hammer.
6.1 Cleaning
- After each use, disconnect the tool from the power supply.
- Clean the tool housing with a soft, damp cloth. Do not use harsh chemicals or abrasive cleaners.
- Remove dust and debris from ventilation openings using compressed air or a soft brush.
- Clean the SDS-Max chuck regularly to ensure smooth operation and prevent dust buildup.
6.2 Lubrication
- Apply a thin layer of the provided grease to the shank of chisels before insertion into the chuck. This reduces wear and improves performance.
- Refer to the manufacturer's guidelines for internal lubrication intervals, if applicable.
6.3 Storage
- Store the tool and accessories in the practical storage case provided.
- Store in a dry, secure place, out of reach of children.
- Ensure the power cord is neatly coiled and not kinked.
7. Troubleshooting
This section addresses common issues you might encounter. For problems not listed here, contact customer support.
| Problem | Possible Cause | Solution |
|---|---|---|
| Tool does not start. | No power supply. Power switch faulty. | Check power cord and outlet. Contact customer support. |
| Reduced impact performance. | Worn chisel. Insufficient lubrication in chuck. Internal mechanism issue. | Replace chisel. Apply grease to chisel shank. Contact customer support. |
| Excessive vibration. | Chisel not properly seated. Internal component wear. | Re-insert chisel. Contact customer support. |
8. Technical Specifications
| Specification | Value |
|---|---|
| Model | PAH 1300 B2 |
| Rated Power | 1300 W |
| Impact Energy | 15 Joules |
| Impact Rate | 3800 bpm (beats per minute) |
| Voltage | 230 V AC |
| Chuck System | SDS-Max |
| Cable Length | Approx. 5 m |
| Tool Dimensions (L x W x H) | Approx. 486.4 x 259 x 133.3 mm |
| Tool Weight | Approx. 5.8 kg |
| Material | Plastic, Aluminum |
9. Warranty and Support
For warranty claims, technical support, or spare parts, please contact the retailer or manufacturer directly. Keep your proof of purchase for any warranty-related inquiries. Information regarding spare parts availability is currently not provided in the product details.