
1. Introduction
This manual provides essential information for the safe and effective operation, maintenance, and troubleshooting of your Litheli Cordless Impact Wrench. Please read this manual thoroughly before using the tool and retain it for future reference.
2. Safety Information
Always follow basic safety precautions to reduce the risk of fire, electric shock, and personal injury. Keep your work area clean and well-lit. Do not operate power tools in explosive atmospheres, such as in the presence of flammable liquids, gases, or dust. Always wear appropriate personal protective equipment, including eye protection, hearing protection, and gloves.
Ensure the tool is switched off and the battery is removed before making any adjustments, changing accessories, or storing the tool. Do not force the power tool; use the correct tool for your application. Maintain power tools with care. Check for misalignment or binding of moving parts, breakage of parts, and any other condition that may affect the power tool’s operation. If damaged, have the power tool repaired before use.
3. Product Overview and Components
The Litheli Cordless Impact Wrench is designed for efficient fastening and loosening of nuts and bolts. It features a brushless motor for enhanced performance and durability.

Figure 3.1: Labeled Components of the Litheli Impact Wrench
This diagram illustrates the main parts of the impact wrench, including the Brushless Motor, 1/2" Square Drive, Variable Speed Trigger, Forward & Reverse Switch, 3-Speed Switch Button, LED Worklight, Battery Release Button, Battery Compartment, Removable Belt Clip, and Premium Rubber Overmold.
- Brushless Motor: Provides increased efficiency, longer runtime, and extended tool life.
- 1/2" Square Drive: Standard drive size for common impact sockets.
- Variable Speed Trigger: Allows for precise control over fastening and loosening applications.
- Forward & Reverse Switch: Changes the direction of rotation.
- 3-Speed Switch Button: Selects between different speed and torque settings.
- LED Worklight: Illuminates the work area for improved visibility.
- Battery Release Button: Used to detach the battery pack.
- Battery Compartment: Houses the rechargeable battery.
- Removable Belt Clip: Provides convenient storage and access during work.
- Premium Rubber Overmold: Enhances grip and user comfort.
4. Setup
4.1. Battery Installation and Removal
The Litheli Impact Wrench uses a 12,500 mAh (2.5 Ah) Lithium-Ion battery. To install, align the battery pack with the battery compartment on the tool handle and slide it in until it clicks securely into place. To remove, press the battery release button and slide the battery pack out.
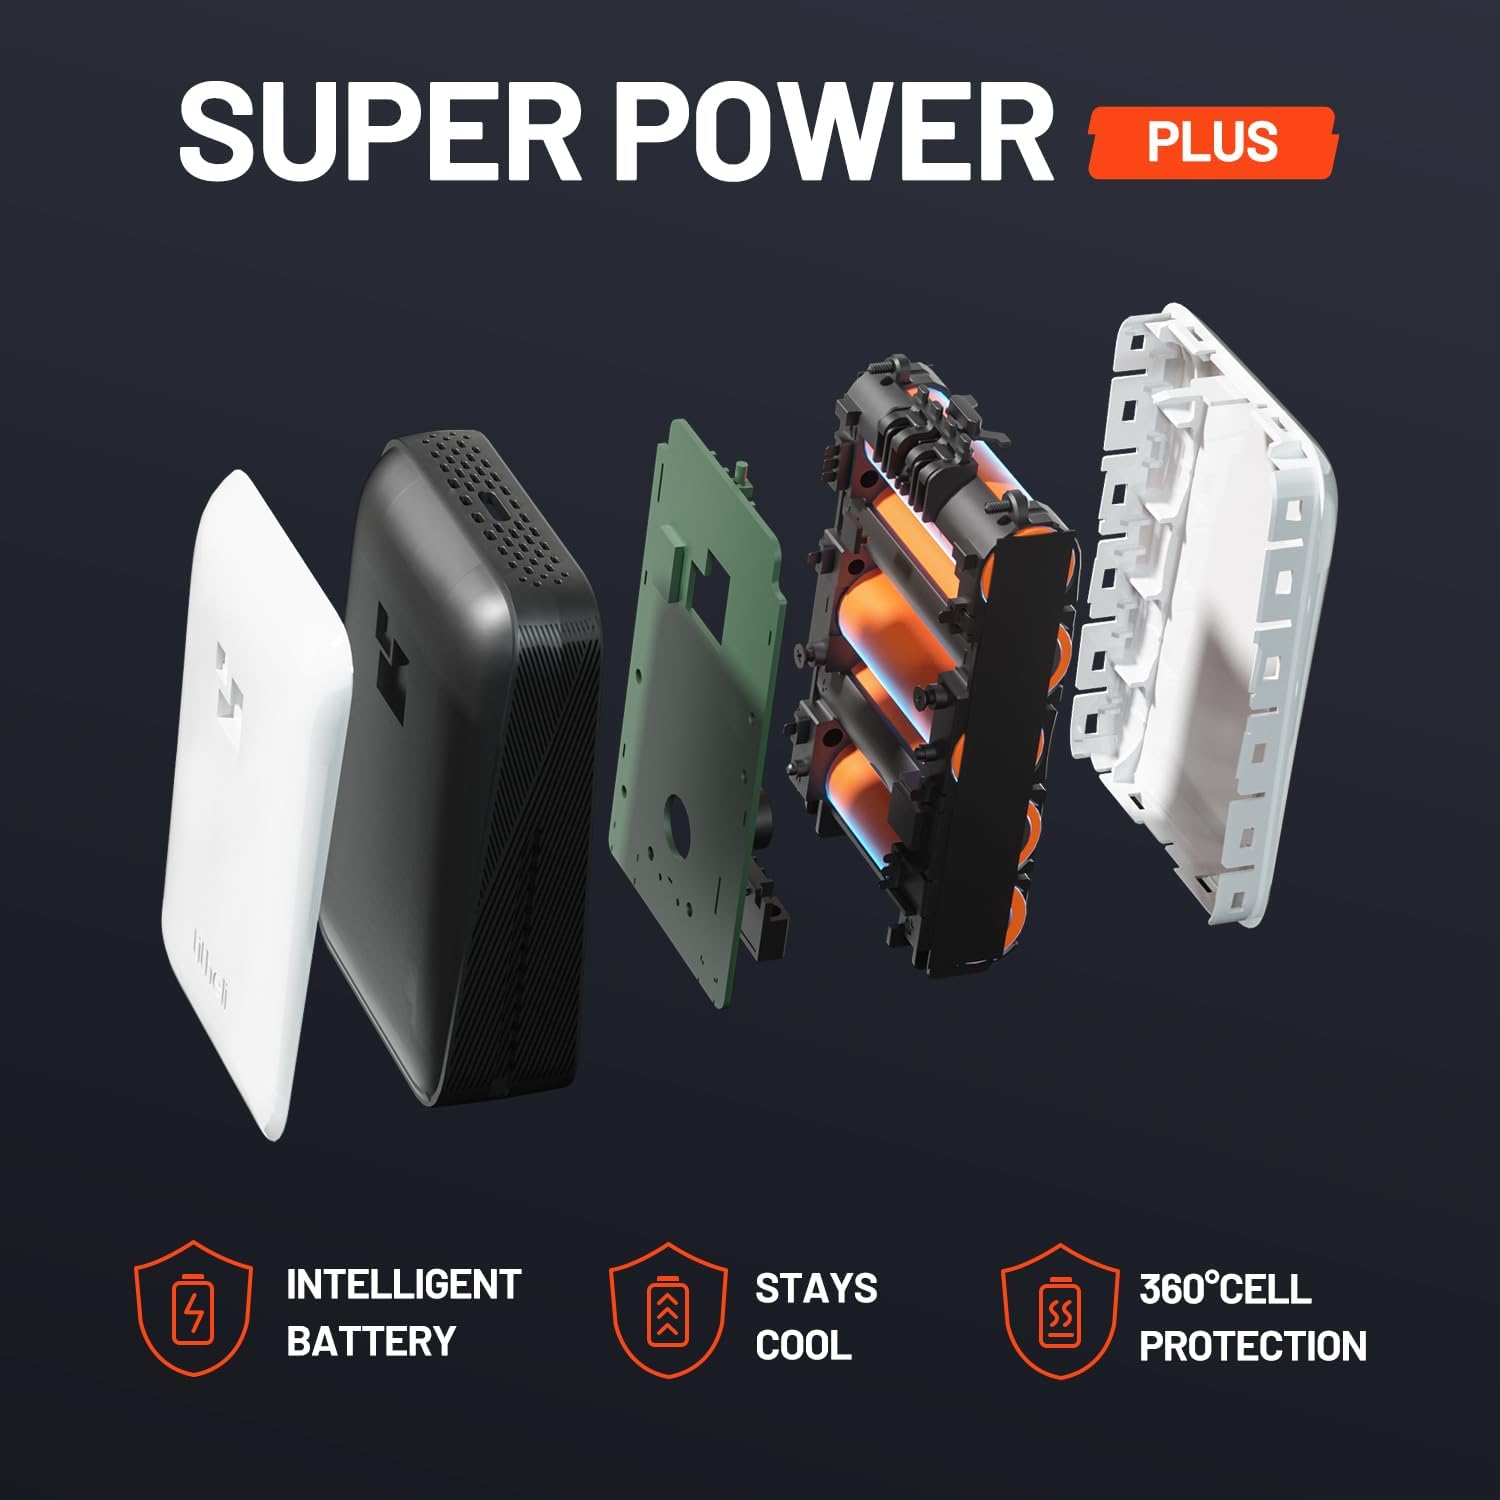
Figure 4.1: Intelligent Battery Pack Components
The battery features intelligent design for optimal performance, cooling, and 360-degree cell protection.
4.2. Charging the Battery
The battery pack can be charged via its integrated USB-C port. Connect the provided USB-C charging cable to the battery and a compatible power source. The battery indicator lights will show the charging status. A full charge typically takes approximately 1 hour with a Litheli charger (sold separately). The battery can also function as a power bank to charge other USB-compatible devices.
4.3. Attaching Sockets
To attach an impact socket, simply push the socket onto the 1/2" square drive anvil until it locks into place. Ensure the socket is fully seated before operation. To remove, pull the socket firmly off the anvil.
5. Operating Instructions
5.1. Powering On/Off and Variable Speed Control
To power on the tool, press the variable speed trigger. The LED worklight will illuminate. The tool's speed is controlled by the amount of pressure applied to the trigger. The harder you press, the faster the tool operates.
The impact wrench features three versatile speed modes, selectable via the 3-speed switch button:
- Precision Drive: 1,500 RPM (for delicate tasks)
- Normal Impacting: 2,100 RPM (for general use)
- High Speed Impacting: 2,500 RPM (for maximum power)

Figure 5.1: Three Versatile Operating Modes
Press the trigger to activate the device with the LED light on. Press the Mode Shift Button to change the desired speed (green light indicator).

Figure 5.2: Variable Speed Control up to 2,500 RPM
The tool offers precise speed control for various applications.
5.2. Forward and Reverse Function
Use the forward/reverse switch located above the trigger to select the desired rotation direction. Push the switch to the left for forward rotation (tightening) and to the right for reverse rotation (loosening). Ensure the switch is in the center position to lock the trigger and prevent accidental starting.
The tool is equipped with a reverse rotation auto-stop mode, which stops the impact and rotation in seconds when the bolt/nut gets loosened, preventing over-loosening or dropping fasteners.

Figure 5.3: Drive or Loosen Bolts with Ease
This image shows the trigger positions for forward driving, accidental starting prevention (lock), and reverse loosening of screws.
5.3. LED Work Light
The integrated LED work light automatically illuminates when the trigger is pressed, providing enhanced visibility in dimly lit work areas. This feature helps to ensure accuracy and safety during operation.

Figure 5.4: Built-in LED Work Light
The LED light helps illuminate dark spaces, improving visibility during use.
5.4. Belt Clip Usage
The removable belt clip allows for convenient and hands-free carrying of the impact wrench. Attach the clip to your belt or waistband for easy access while working.

Figure 5.5: Belt Clip for Easy & Hand-Free Access
The belt clip allows for convenient carrying of the tool on your person.
6. Maintenance
Regular maintenance ensures the longevity and optimal performance of your impact wrench.
- Cleaning: Keep the tool's ventilation openings clear and free of debris. Use a clean, dry cloth to wipe down the tool. Do not use cleaning agents or solvents that may damage plastic parts.
- Battery Care: Store the battery in a cool, dry place away from direct sunlight and extreme temperatures. Do not store the battery in a discharged state for extended periods.
- Inspection: Periodically inspect the tool for any signs of wear, damage, or loose components. If any issues are found, discontinue use and have the tool serviced by qualified personnel.
7. Troubleshooting
If you encounter issues with your Litheli Impact Wrench, refer to the following common troubleshooting steps:
| Problem | Possible Cause | Solution |
|---|---|---|
| Tool does not start | Battery not installed correctly Battery discharged Forward/Reverse switch in lock position | Reinstall battery securely Charge battery Move switch to forward or reverse position |
| Reduced power/torque | Low battery charge Incorrect speed mode selected Worn or damaged socket | Recharge battery Select a higher speed mode Replace socket |
| Overheating | Continuous heavy use Blocked ventilation openings | Allow tool to cool down Clear ventilation openings |
If the problem persists after attempting these solutions, please contact Litheli customer support for assistance.
8. Specifications
| Feature | Specification |
|---|---|
| Model Number | U20BS-Benshi |
| Drive Size | 1/2 Inch Hog Ring Square Drive |
| Max Torque | 330 Foot Pounds (450 Nm) |
| Voltage | 20 Volts |
| No-Load Speed (RPM) | 1,500 / 2,100 / 2,500 |
| Impacts Per Minute (IPM) | Up to 3,000 |
| Battery Type | Lithium Ion |
| Battery Capacity | 2.5 Amp Hours (12,500 mAh) |
| Item Weight | 0.317 ounces (tool only, without battery) |
| Product Dimensions | 10.2 x 3.9 x 8.7 inches |

Figure 8.1: Performance Overview
This image highlights the maximum torque of 332 ft-lbs and approximately 1-hour recharge time for the 2.5 Ah battery.
9. Warranty and Support
Litheli products are manufactured to high-quality standards and are warranted against defects in materials and workmanship. For detailed warranty information, product registration, or technical support, please visit the official Litheli website or contact their customer service department. Keep your purchase receipt as proof of purchase for warranty claims.