1. Introduction
Thank you for choosing the HOOBRO Computer Tower Stand. This manual provides detailed instructions for assembly, operation, and maintenance of your new stand. Please read it thoroughly before use to ensure proper setup and safe operation.
This versatile stand is designed to accommodate most PC towers, offering both mobility and stability with its dual-use modes (wheels or adjustable feet). It also features a convenient built-in charging station and cable management for an organized workspace.
2. Product Overview
2.1 Key Features
- Easy Mobility: Equipped with 4 caster wheels, 2 of which are lockable, for effortless movement.
- Versatile Use: Includes adjustable feet for stationary placement, allowing use as a printer stand, bedside table, or sofa table.
- Integrated Charging Station: Features 2 AC outlets (120V/12A), 1 USB-A port (5V/2A), and 1 USB-C port (5V/2A) for convenient device charging.
- Cable Management: Comes with cable clips to keep wires tidy and organized.
- Sturdy Construction: Made from particle board and metal for stability and durability, supporting up to 44 lbs on the lower shelf.
- Compact Design: Dimensions of 17"L x 11.4"W x 23.8"H fit most PC towers and optimize space.
2.2 Components
Please ensure all components are present before beginning assembly. Refer to the included assembly diagram for a visual representation of parts.
| Part | Description | Quantity |
|---|---|---|
| Top Shelf | Main top surface with integrated charging station. | 1 |
| Bottom Shelf | Base shelf for PC tower placement. | 1 |
| Side Frames | Metal support frames. | 2 |
| Caster Wheels | Wheels for mobility (2 with brakes). | 4 |
| Adjustable Feet | Alternative to wheels for stationary use. | 4 |
| Cable Clips | Adhesive clips for cable management. | 5 |
| Hardware Pack | Screws, Allen wrench, etc. | 1 set |
3. Setup and Assembly
Assembly typically takes 15-20 minutes. All necessary tools are included. It is recommended to assemble the stand on a soft, clean surface to prevent scratches.
3.1 Pre-Assembly Checklist
- Verify all components are present as per the component list.
- Ensure you have a Phillips head screwdriver (not included, but may be helpful).
- Clear a spacious area for assembly.
3.2 Assembly Steps
- Attach Side Frames to Bottom Shelf: Secure the metal side frames to the bottom shelf using the provided screws. Ensure they are aligned correctly.
- Install Wheels or Adjustable Feet: Decide whether you prefer mobility or stationary use.
- For Mobility: Screw the 4 caster wheels into the designated holes on the bottom of the side frames. Ensure the 2 wheels with brakes are positioned on the same side for easy access.
- For Stationary Use: Screw the 4 adjustable feet into the designated holes on the bottom of the side frames. Adjust them as needed to ensure stability on uneven surfaces.

Figure 1: Two options for use - caster wheels and adjustable feet. The image highlights the locking mechanism on the wheels and the 360-degree adjustability of the feet.
- Attach Top Shelf: Connect the top shelf to the upper part of the side frames using the remaining screws. Ensure the charging station faces the desired direction.
- Apply Cable Clips: Peel the backing from the adhesive cable clips and attach them to the designated area on the back support bar to manage your cables.

Figure 2: Attaching cable clips to organize wires. The image shows five clear adhesive clips on the back support bar, with a hand guiding a cable through one.
4. Operating Instructions
4.1 Placing Your PC Tower
Carefully place your computer tower on the bottom shelf of the stand. Ensure it is centered and stable. The stand is designed to fit most standard PC towers.

Figure 3: Computer tower positioned on the stand's lower shelf, integrated into an office environment.
4.2 Using the Charging Station
The integrated charging station on the top shelf provides convenient power access.
- Plug the stand's power cord into a standard wall outlet.
- Use the 2 AC outlets for devices requiring standard power.
- Connect your USB-A or USB-C compatible devices to the respective ports for charging.
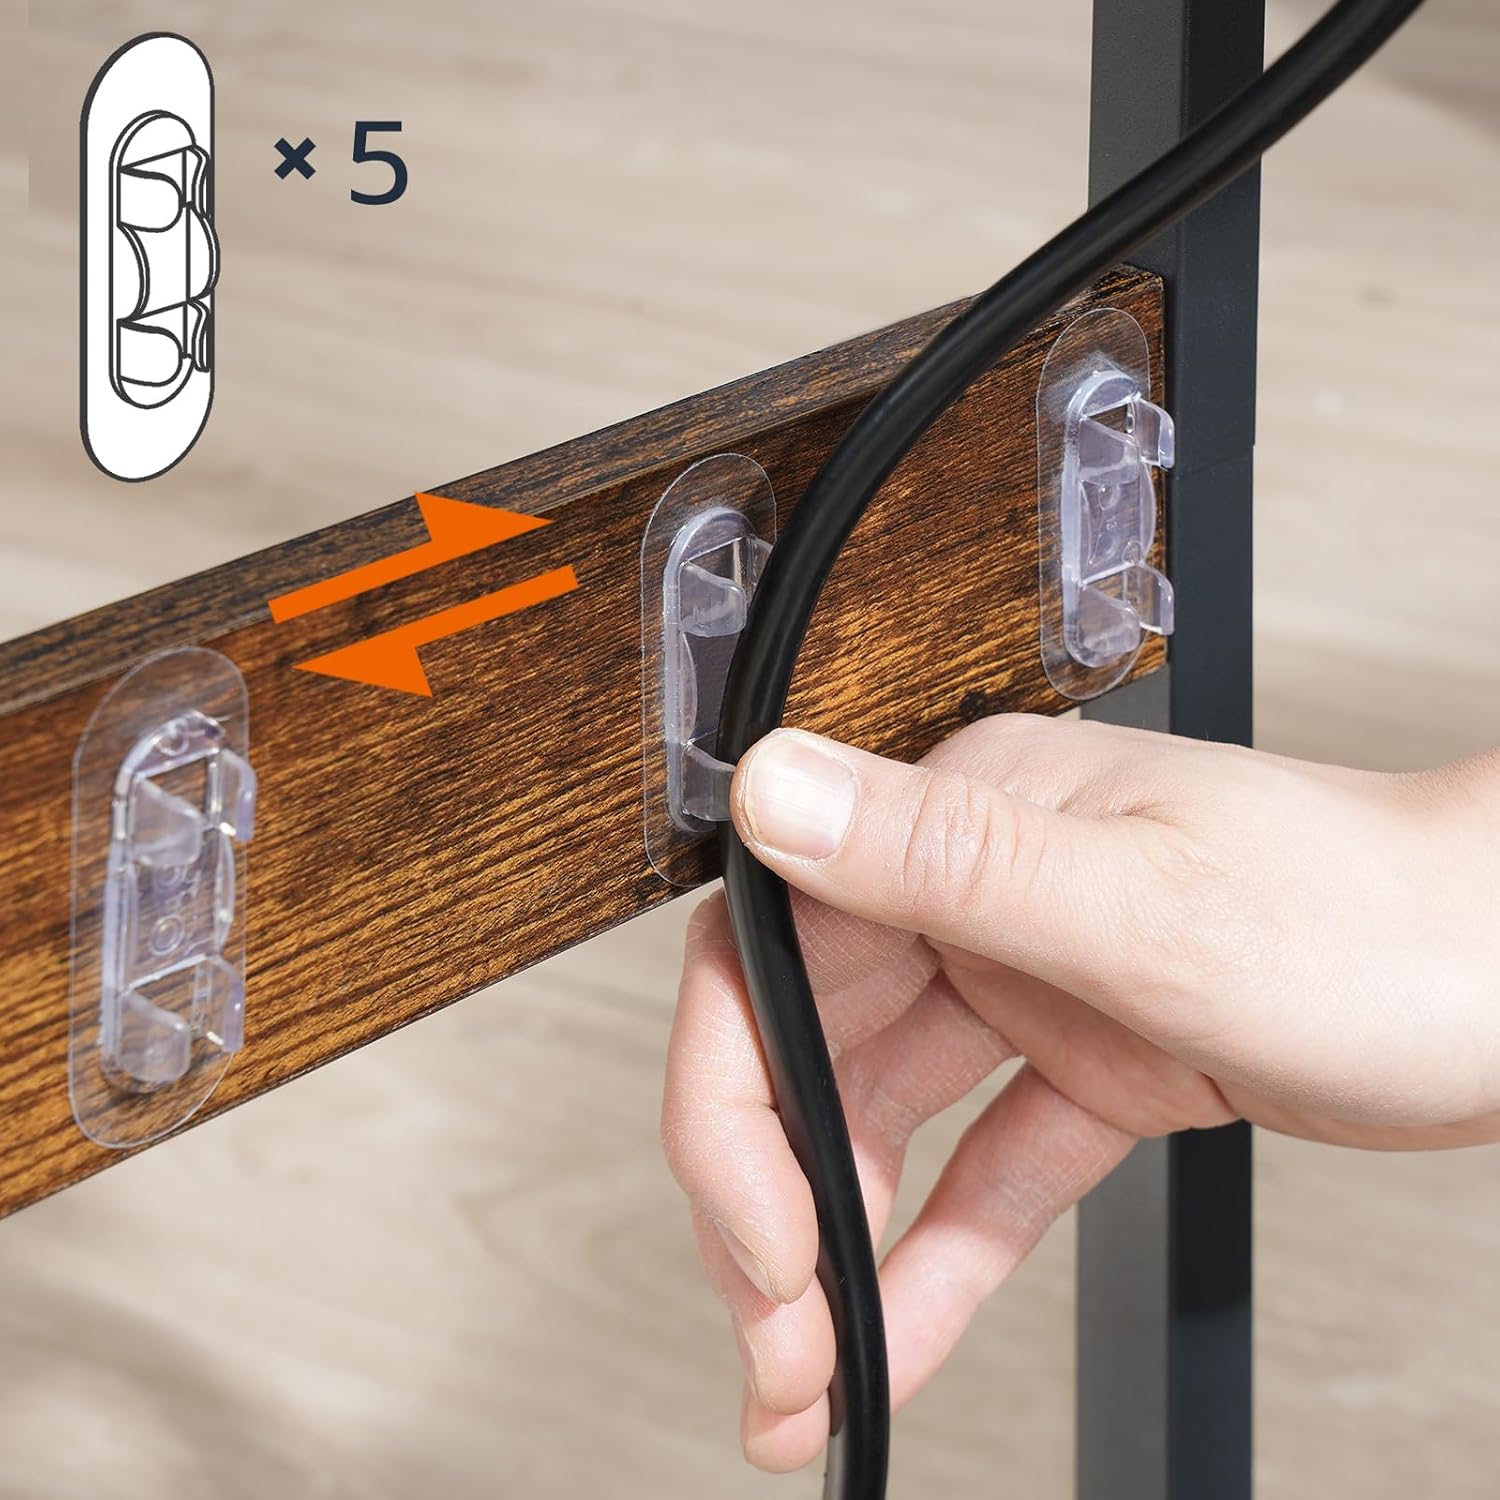
Figure 4: Detailed view of the charging station, showing 2 AC outlets, a USB-A port, and a USB-C port, with a phone charging on the top surface.
4.3 Utilizing Mobility Features
- If using wheels, unlock the brakes on the two lockable wheels before moving the stand.
- To secure the stand in place, engage the brakes on the lockable wheels.
- If using adjustable feet, ensure they are properly tightened and adjusted to prevent wobbling.
Video 1: Demonstration of the HOOBRO Computer Tower Stand's features, including its mobility options (wheels and adjustable feet), integrated charging station, and cable management. This video highlights the versatility and convenience of the stand in various settings.
5. Maintenance
- Cleaning: Wipe the surfaces with a soft, damp cloth. Avoid harsh chemicals or abrasive cleaners that could damage the finish.
- Stability Check: Periodically check all screws and connections to ensure they remain tight. Retighten if necessary.
- Weight Limit: Do not exceed the maximum weight capacity of 44 lbs on the lower shelf to prevent damage or instability.
- Environmental Conditions: Keep the stand away from direct sunlight, excessive moisture, and extreme temperatures.
6. Troubleshooting
| Problem | Possible Cause | Solution |
|---|---|---|
| Stand is wobbly. | Loose screws or uneven adjustable feet. | Ensure all screws are tightened. If using adjustable feet, adjust them until the stand is stable on the floor. |
| Wheels do not roll smoothly. | Brakes engaged or debris in wheels. | Disengage wheel brakes. Clean any debris from the wheels. |
| Charging station not working. | Power cord not plugged in or outlet issue. | Ensure the stand's power cord is securely plugged into a functional wall outlet. Test the outlet with another device. |
| Cables are messy. | Cable clips not used or insufficient. | Utilize the provided cable clips to secure cables. Additional clips can be purchased if needed. |
7. Specifications
- Brand: HOOBRO
- Model: BF01UCJ01 Computer Tower Stand
- Product Dimensions (L x W x H): 17" x 11.4" x 23.8" (43cm x 29cm x 60.5cm)
- Material: Engineered Wood, Metal
- Color: Rustic Brown, Black
- Max. Load Capacity (Lower Shelf): 44 lbs (20 kg)
- Charging Station:
- AC Outlets: 2 (120V/12A)
- USB-A Port: 1 (5V/2A)
- USB-C Port: 1 (5V/2A)
- Power Cord Length: 4.9 feet
- Assembly Time: Approximately 15-20 minutes
- Included Tools: Yes

Figure 5: Dimensional diagram of the computer tower stand, indicating length, width, height, and weight capacity.
8. Warranty and Support
This product comes with a limited warranty. For detailed warranty information, please refer to the documentation included with your purchase or visit the official HOOBRO website.
For customer support, assembly assistance, or to report missing/damaged parts, please contact HOOBRO customer service:
- Website: Visit the HOOBRO Store on Amazon
- Email: (Refer to product packaging for specific contact email)
- Phone: (Refer to product packaging for specific contact phone number)
Please have your model number (BF01UCJ01) and purchase date ready when contacting support.
9. Important Safety Warnings
- Keep the computer tower stand away from water, fire, and high-temperature environments.
- Do not put overweight items on the stand. Adhere to the 44 lbs (20 kg) weight limit for the lower shelf.
- Ensure the stand is placed on a stable, level surface to prevent tipping.
- Do not allow children to climb on or play with the stand.
- Only use the charging station for devices within its specified voltage and amperage limits.
- Unplug the power cord from the wall outlet when not in use or before cleaning.