1. Introduction
This manual provides detailed instructions for the safe and correct installation, operation, and maintenance of your Sunrosa Frameless Tub Shower Door. Please read all instructions carefully before beginning installation to ensure proper function and longevity of the product. Retain this manual for future reference.

Image 1.1: Overview of the Sunrosa Frameless Tub Shower Door in a bathroom setting.
2. Safety Information
- Always wear safety glasses during installation.
- Handle glass panels with extreme care. Tempered glass, while strong, can shatter if struck at the edges.
- Ensure all mounting surfaces are structurally sound and capable of supporting the weight of the shower door.
- Do not overtighten screws, as this can damage components or glass.
- If you are unsure about any part of the installation process, consult a qualified professional.
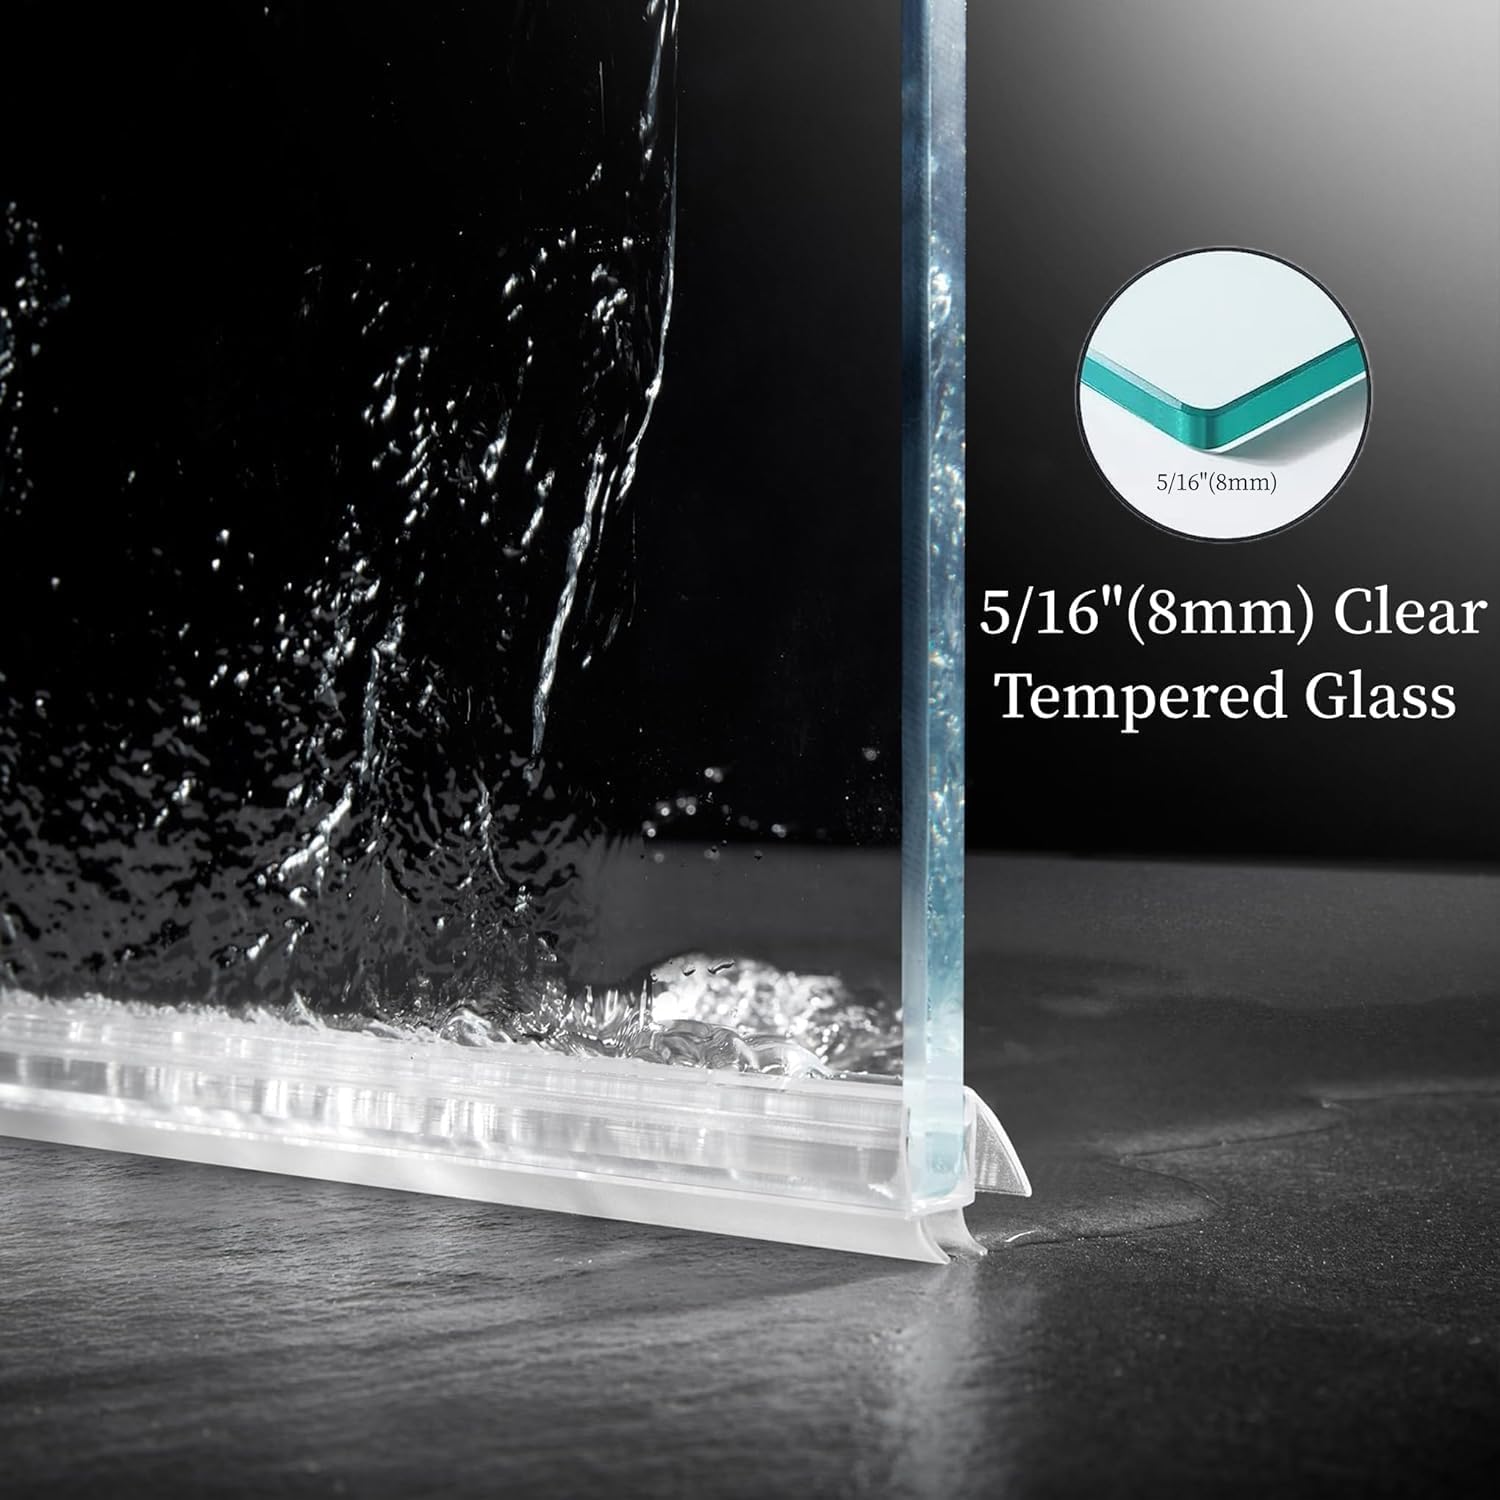
Image 2.1: Detail of the 5/16" (8mm) SGCC certified clear tempered glass, highlighting its thickness and clarity.
3. Before Installation (Setup)
3.1 Package Contents Verification
Unpack all components and verify against the parts list (not provided in this document, refer to your product packaging) to ensure all items are present and undamaged. Do not proceed with installation if any parts are missing or damaged.
3.2 Tools Required
While specific tools may vary, general tools typically required include: measuring tape, level, drill, drill bits (e.g., 3/8" and 5/16" for tile, as noted by users), screwdriver set, caulk gun, silicone sealant, pencil, and utility knife.
3.3 Measurement and Layout
Measure your wall spacing carefully before installation. The shower door is adjustable for widths between 56 1/8" and 60" (1424-1524 mm) and has a height of 60" (1524 mm). The walk-in opening ranges from 21 4/8" to 25 3/8" (545-645 mm).

Image 3.1: Detailed dimensions of the shower door for accurate measurement.
3.4 Reversible Installation
This shower door is designed for reversible installation, allowing for either a right or left door opening to fit your specific bathroom layout. Plan your preferred orientation before drilling or permanent assembly.

Image 3.2: Reversible installation options for the sliding door.
4. Installation Instructions (Setup)
While specific steps are not detailed here, the general process involves:
- Prepare the Area: Ensure the tub or shower base is clean, level, and ready for installation.
- Install the Top Track: Secure the top track to the wall, ensuring it is perfectly level. User feedback suggests using a 3/8" tile bit for the main rail assembly.
- Install Fixed Glass Panel: Carefully position and secure the fixed glass panel according to your chosen left or right configuration.
- Install Rollers and Handle: Attach the rollers to the sliding glass panel and the handle to the appropriate panel.
- Mount Sliding Glass Panel: Hang the sliding glass panel onto the top track, ensuring smooth operation.
- Install Bottom Guide and Seal Strips: Secure the bottom guide (cleat) to the tub edge or shower base. User feedback suggests using a 5/16" bit for the cleat. Install the full-length glass seal strips to ensure water containment.
- Seal with Silicone: Apply a waterproof silicone sealant along all exterior seams where the frame meets the wall and tub/base to prevent leaks.

Image 4.1: Detail of the smooth-gliding rollers on the top track.

Image 4.2: Detail of the matte black handle for the sliding door.

Image 4.3: Detail of the bottom guide mechanism.
5. Operation
To operate the Sunrosa Frameless Tub Shower Door, grasp the handle firmly and slide the door along the top track. The rollers are designed for smooth and quiet movement. Ensure the door is fully closed when showering to prevent water from escaping the enclosure. The full-length glass seal strip is designed to effectively keep bathwater inside.
6. Maintenance
6.1 Cleaning the Glass
The tempered glass features a generous nano-coating for stain resistance and easy cleaning. To maintain its clarity and prevent water spots, wipe down the glass panels after each use with a soft cloth or squeegee. For deeper cleaning, use a non-abrasive glass cleaner. Avoid harsh chemicals or abrasive pads that could damage the nano-coating or glass surface.

Image 6.1: Illustration of the nano-coating's stain resistance.
6.2 Cleaning the Frame and Hardware
The frame and handle are made from high-quality stainless steel, resistant to corrosion and rust. Clean these components with a soft, damp cloth and mild soap. Avoid abrasive cleaners or scouring pads, which can scratch the finish. Regularly check and clean the bottom track to ensure smooth sliding operation and prevent debris buildup.
7. Troubleshooting
- Door not sliding smoothly: Check the top track and bottom guide for any obstructions or debris. Ensure rollers are clean and properly aligned.
- Water leakage: Verify that all seal strips are properly installed and intact. Check silicone sealant along all seams for any gaps or deterioration. Reapply sealant if necessary.
- Door not closing completely: Inspect the alignment of the fixed and sliding panels. Ensure the top track is level. Adjustments may be needed.
For issues not resolved by these steps, please contact customer support.
8. Specifications
| Feature | Specification |
|---|---|
| Brand | Sunrosa |
| Model Number | NKI6121-6060B |
| Color | Matte Black |
| Material | Glass, Stainless Steel |
| Glass Thickness | 5/16" (8mm) SGCC Tempered Glass |
| Product Dimensions | 0.31 x 60 x 60 inches |
| Adjustable Width | 56 1/8" - 60" (1424-1524 mm) |
| Height | 60" (1524 mm) |
| Walk-in Opening | 21 4/8" - 25 3/8" (545-645 mm) |
| Item Weight | 103 Pounds |
| Assembly Required | Yes |
9. Warranty and Support
Sunrosa is committed to providing quality products and customer satisfaction. For any questions, concerns, or issues with your product, please contact our customer support team. We recommend reading the instructions carefully before installation.
9.1 How to Contact Customer Support for Product Issues:
- Navigate to your order history.
- Click on "Problem with order."
- Select "Contact seller."
- Attach images showing the product issue in the message chat and provide a detailed description of the problem.
- Our team will provide a solution, such as complimentary replacement of damaged or missing parts or other appropriate resolutions.

Image 9.1: Steps to contact customer support for product issues.