1. Introduction
Thank you for choosing the techno line WT2600 Digital Calendar. This device provides accurate time, date, indoor temperature, and humidity readings, along with alarm functions. This manual will guide you through the setup, operation, and maintenance of your new digital calendar.
2. Safety Information
- Do not expose the device to extreme temperatures, direct sunlight, or high humidity.
- Avoid dropping the device or subjecting it to strong impacts.
- Do not attempt to disassemble or repair the unit yourself. Refer to qualified service personnel.
- Dispose of used batteries responsibly according to local regulations.
- Keep the device out of reach of children.
3. Package Contents
Please check that all items are present in your package:
- techno line WT2600 Digital Calendar Unit
- User Manual (this document)
- Batteries (may be included depending on region)
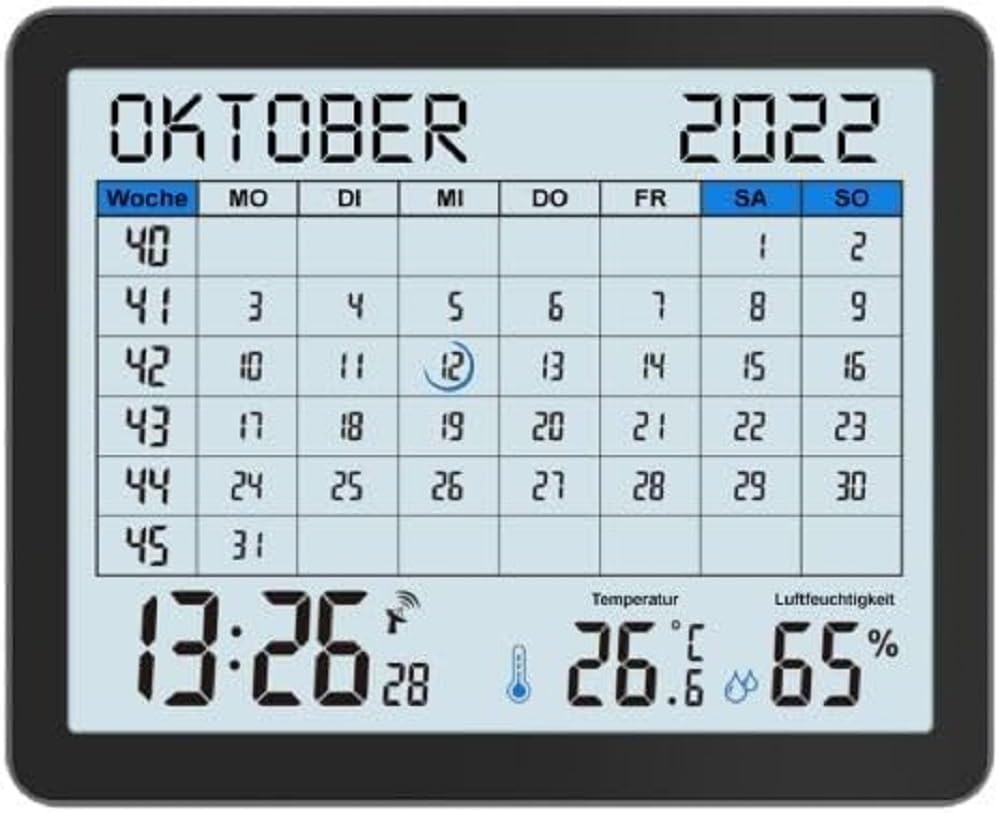
Image of the techno line WT2600 Digital Calendar packaging, showing the device and its key features.
4. Product Features
The techno line WT2600 Digital Calendar offers the following key features:
- DCF-77 Radio-Controlled Clock: Automatic time synchronization for precise timekeeping, with an option for manual setting.
- 12/24 Hour Time Display: Select your preferred time format.
- Calendar Display: Shows the current date, day of the week, and month.
- 7-Language Month Display: Choose from seven languages for the month display.
- Indoor Temperature Display: Shows indoor temperature in Celsius (°C) or Fahrenheit (°F).
- Indoor Humidity Display: Displays the current indoor humidity level.
- MIN/MAX Display: Records and displays the minimum and maximum temperature and humidity values.
- Dual Alarms with Snooze: Set two independent alarms with a convenient snooze function.
- Low Battery Indicator: Alerts you when batteries need replacement.
- Versatile Placement: Designed for both wall mounting and table standing.

Front view of the techno line WT2600 Digital Calendar display, showing the calendar grid, current time, temperature, and humidity.
5. Setup
5.1 Battery Installation
- Locate the battery compartment on the back of the unit.
- Open the battery compartment cover.
- Insert the required batteries (e.g., 2 x AAA, not specified in data, common for such devices) according to the polarity markings (+ and -).
- Close the battery compartment cover securely.
5.2 Initial Power On and DCF-77 Signal Reception
Upon battery insertion, the device will power on and automatically begin searching for the DCF-77 radio signal. This process may take several minutes. For optimal reception, place the unit near a window and away from electronic interference.
- A signal icon (e.g., an antenna symbol) will flash during signal search.
- Once the signal is received, the time and date will be set automatically, and the signal icon will become solid.
- If no signal is received after 10-15 minutes, try repositioning the unit.
5.3 Manual Time and Date Setting
If automatic synchronization is not desired or unsuccessful, you can set the time and date manually.
- Press and hold the 'SET' button (or similar, refer to device buttons) for a few seconds to enter manual setting mode.
- Use the '+' or '-' buttons to adjust the flashing value (e.g., hour, minute, year, month, day).
- Press 'SET' again to confirm the current setting and move to the next adjustable parameter.
- Repeat until all settings are complete.
5.4 Language Setting
To change the display language for the month:
- Enter the setting mode (e.g., by pressing 'SET').
- Navigate through the settings until the language option appears.
- Use the '+' or '-' buttons to cycle through the available 7 languages.
- Confirm your selection.
6. Operating
6.1 Viewing Time, Date, Temperature, and Humidity
The main display continuously shows the current time, date, indoor temperature, and indoor humidity. You can switch between 12-hour and 24-hour time formats by pressing a dedicated button (e.g., '12/24H' or 'MODE').
6.2 Setting Alarms
The device features two independent alarms.
- Press the 'ALARM' button (or similar) to view Alarm 1 time.
- Press and hold 'ALARM' to enter Alarm 1 setting mode.
- Use '+' or '-' to adjust the hour and minute, pressing 'ALARM' to confirm each.
- Repeat for Alarm 2.
- To activate/deactivate an alarm, press 'ALARM' repeatedly until the alarm icon appears/disappears.
6.3 Using Snooze
When an alarm sounds, press the 'SNOOZE' button (or similar, often a large button on top) to temporarily silence the alarm. The alarm will sound again after a few minutes (typically 5-10 minutes). To stop the alarm completely, press any other button.
6.4 MIN/MAX Display Function
The device records the minimum and maximum temperature and humidity values since the last reset.
- Press the 'MIN/MAX' button (or similar) once to view the maximum recorded values.
- Press it again to view the minimum recorded values.
- To reset the MIN/MAX records, press and hold the 'MIN/MAX' button while viewing the records.

Close-up of the techno line WT2600 Digital Calendar display, highlighting the time, temperature, and humidity readings.
7. Maintenance
7.1 Cleaning
Wipe the device with a soft, damp cloth. Do not use abrasive cleaners or solvents, as these may damage the display or casing.
7.2 Battery Replacement
When the low battery indicator appears on the display, replace all batteries with new ones of the same type. Follow the battery installation steps in Section 5.1.
8. Troubleshooting
- No Display: Check battery polarity and ensure batteries are fresh.
- Incorrect Time/Date: Ensure the DCF-77 signal icon is solid. If not, reposition the unit or set the time manually (Section 5.3). Check your time zone setting if applicable (not explicitly mentioned in data, but common).
- Temperature/Humidity Readings Seem Inaccurate: Ensure the unit is placed in a location with good air circulation, away from direct heat sources or drafts. Allow some time for readings to stabilize after initial setup or relocation.
- Alarm Not Sounding: Verify that the alarm is activated (alarm icon displayed) and the alarm time is set correctly.
9. Specifications
| Feature | Specification |
|---|---|
| Model Number | WT2600 |
| Dimensions (L x W x H) | 17.3 x 3.81 x 14 cm |
| Weight | 380 g |
| Color | Black |
| Material | Plastic |
| Power Source | Battery powered |
| Display Type | Digital |
| Indoor/Outdoor Use | Indoor |
10. Warranty and Support
Information regarding product warranty and customer support was not available in the provided product data. Please refer to the retailer or manufacturer's official website for details on warranty coverage and support options.