1. Introduction
This manual provides comprehensive instructions for the safe and effective operation, maintenance, and troubleshooting of your HayWHNKN U3 Universal Grinding Sharpening Machine, Model JH141065. This machine is designed for precision sharpening of various cutting tools, including drills, end mills, and lathe tools. Please read this manual thoroughly before initial use to ensure proper handling and to maximize the lifespan of your equipment.
2. Safety Instructions
Always adhere to the following safety guidelines to prevent injury and damage to the machine:
- Personal Protective Equipment: Always wear safety glasses or a face shield, hearing protection, and appropriate work gloves when operating the machine.
- Work Area: Ensure your work area is clean, well-lit, and free from obstructions. Keep children and unauthorized personnel away from the machine during operation.
- Power Connection: Connect the machine only to a grounded 110V power outlet. Do not use extension cords unless absolutely necessary, and ensure they are rated for the machine's power requirements.
- Machine Stability: Securely mount the machine on a stable workbench to prevent movement during operation.
- Tool Handling: Ensure tools are properly secured in the collets or fixtures before grinding. Never attempt to sharpen a tool freehand.
- Emergency Stop: Familiarize yourself with the location and operation of the emergency stop switch.
- Maintenance: Disconnect power before performing any maintenance, adjustments, or cleaning.
- Inspection: Regularly inspect the grinding wheels for damage or wear. Replace damaged wheels immediately.
3. Package Contents
Verify that all items listed below are included in your package:
- 1 x HayWHNKN U3 Universal Grinding Sharpening Machine
- 5 x R8 Collets (4mm, 6mm, 8mm, 10mm, 12mm)
- 1 x White Steel Grinding Wheel (for high-speed steel tools)
- 1 x Alloy Grinding Wheel (for tungsten steel and carbide milling cutters)
- Accessories for drill bits, end mills, and lathe bits
- Necessary tools for assembly and adjustment

Figure 3.1: Included accessories for the HayWHNKN U3 Grinding Machine.
4. Product Overview and Components
The HayWHNKN U3 Universal Grinding Sharpening Machine features a robust design with precise controls for various sharpening tasks. Understanding its components is crucial for effective operation.
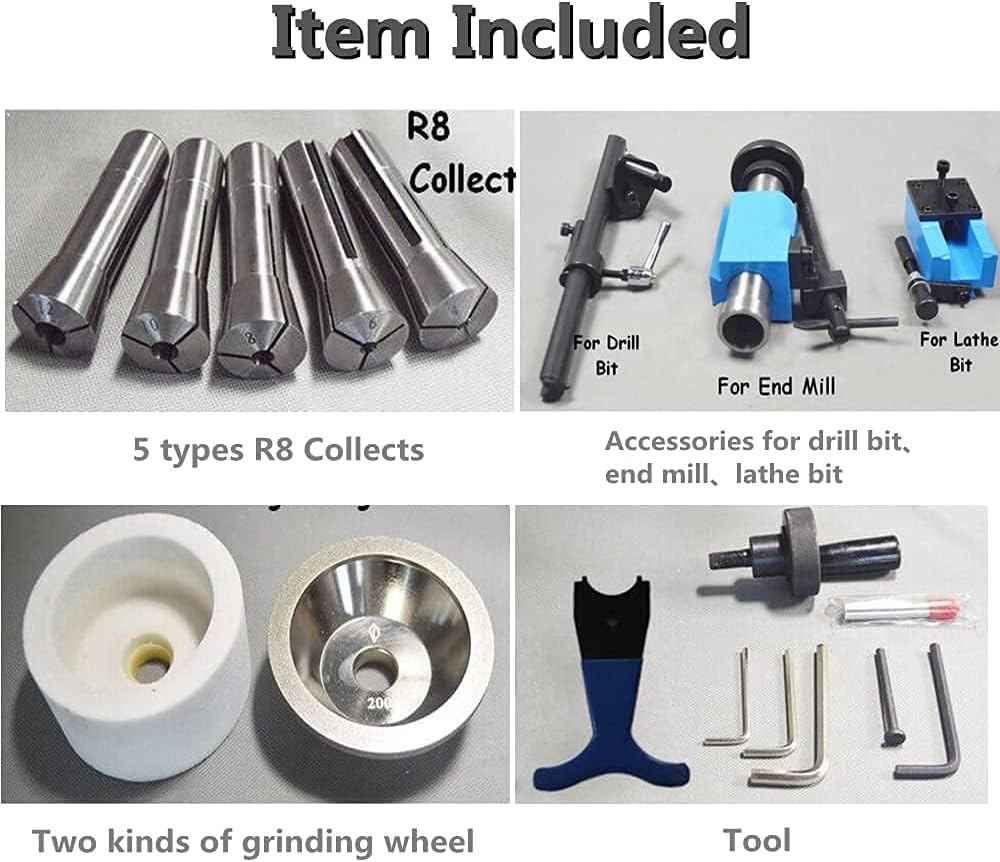
Figure 4.1: Key components of the HayWHNKN U3 Grinding Machine.
- Grinding Wheels and Spindles: The core sharpening mechanism.
- Stop Lever: Used to control movement and positioning.
- Floodlights: Provides illumination for precise work.
- Feed Adjustment: Controls the depth of cut during grinding.
- Switches: Power on/off and operational controls.
- Bearing Fine Adjustment: Allows for precise control over bearing movement.
- Multi-angle Adjustment: Enables setting various grinding angles.
- Clamp Lock: Secures components in place during operation.

Figure 4.2: Machine features overview.
5. Setup
- Unpacking: Carefully remove all components from the packaging. Retain packaging for future transport or storage.
- Placement: Position the machine on a sturdy, level workbench capable of supporting its weight (approximately 128.7 lbs). Ensure adequate clearance around the machine for safe operation and ventilation.
- Mounting: Secure the machine to the workbench using appropriate fasteners to prevent movement during operation.
- Power Connection: Connect the power cord to a dedicated 110V grounded electrical outlet. Ensure the power switch on the machine is in the 'OFF' position before connecting.
- Grinding Wheel Installation: Select the appropriate grinding wheel (white steel for HSS, alloy for carbide) for your task and install it securely according to the machine's design. Refer to the detailed instructions for grinding wheel replacement if necessary.
6. Operating Instructions
The U3 Universal Grinding Sharpening Machine is designed for versatility and precision. Follow these general steps for sharpening various tools:

Figure 6.1: HayWHNKN U3 Grinding Machine ready for operation.
- Tool Selection and Preparation: Choose the correct R8 collet (4mm, 6mm, 8mm, 10mm, or 12mm) for your tool. Clean the tool thoroughly before sharpening.
- Mounting the Tool: Insert the tool into the appropriate collet and secure it firmly in the tool holder. Ensure the tool is correctly aligned for the desired grind.
- Angle Adjustment: Use the multi-angle adjustment mechanisms to set the required taper angle (0°-180°), relief angle (0°-45°), and negative angle (0°-26°) for your specific tool type. The machine allows for precise adjustments to achieve optimal sharpness and geometry.
- Precision Setting: Utilize the high-precision adjustment knob, which offers 0.01mm per grid scale, to fine-tune the grinding depth and avoid material waste.
- Power On: Turn on the machine using the main power switch. The floodlight will illuminate the work area.
- Grinding Process: Slowly and steadily feed the tool into the grinding wheel using the feed adjustment. Maintain consistent pressure and movement. The tool holder part is equipped with bearings for smooth, wear-resistant operation.
- 360° Rotation: For complex tool geometries, the machine's 360° rotation feature, combined with the high brightness LED work light, allows for convenient and thorough grinding from multiple angles.
- Inspection: Periodically stop the machine and inspect the tool for sharpness and correct geometry. Repeat grinding as necessary.
- Power Off: Once sharpening is complete, turn off the machine and allow the grinding wheel to come to a complete stop before removing the tool.

Figure 6.2: High precision adjustment for minimal material waste.
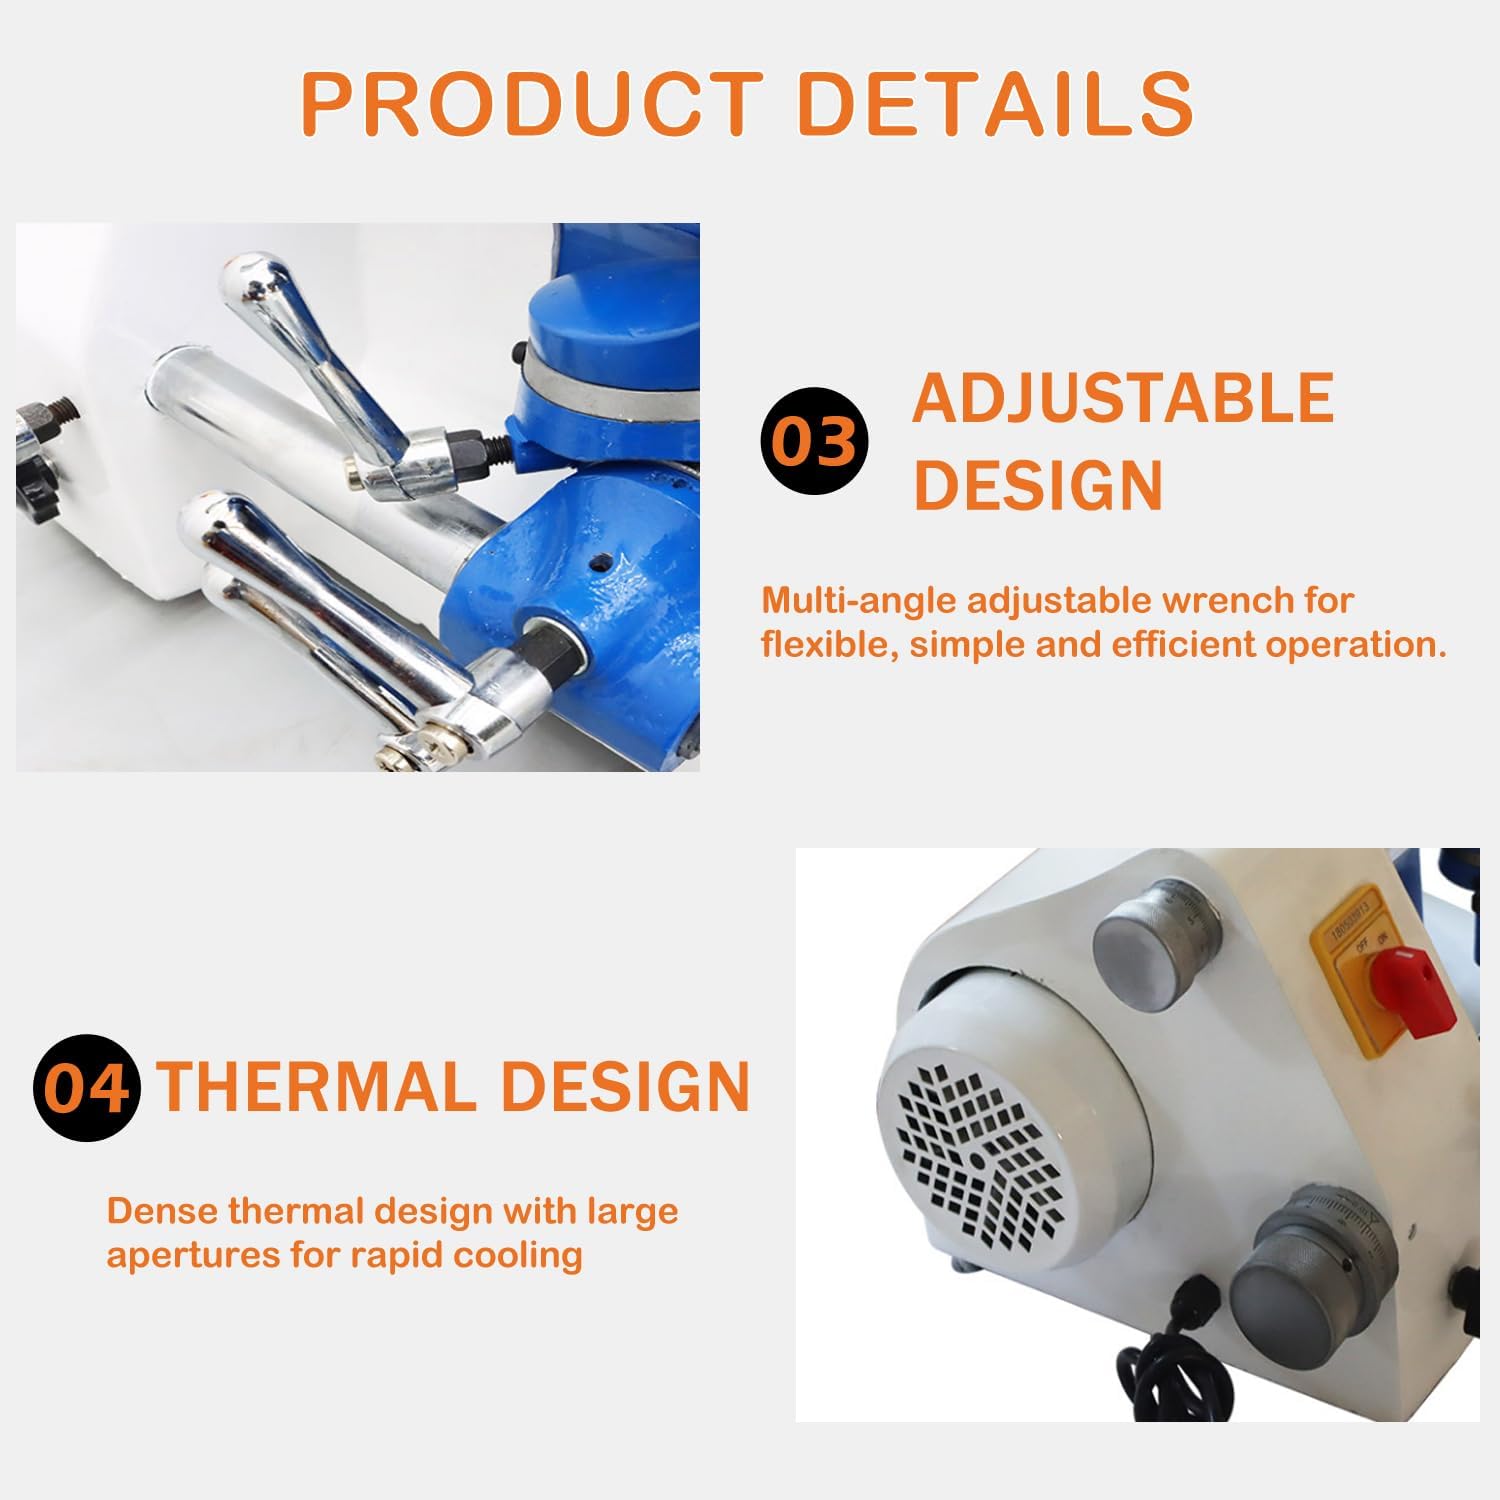
Figure 6.3: 360° rotation and LED work light for enhanced visibility.

Figure 6.4: Multi-angle adjustable design for flexible operation.

Figure 6.5: Wide application for various cutting tools.
7. Maintenance
Regular maintenance ensures the longevity and optimal performance of your grinding machine.
- Cleaning: After each use, disconnect the power and clean the machine thoroughly. Remove all grinding dust and debris using a brush or vacuum. Do not use compressed air directly on bearings or electrical components.
- Grinding Wheel Inspection: Regularly check grinding wheels for wear, cracks, or damage. Replace worn or damaged wheels immediately. Ensure wheels are balanced.
- Lubrication: Periodically lubricate moving parts and adjustment screws as recommended by the manufacturer (refer to specific lubrication points if detailed in a separate diagram).
- Electrical Inspection: Inspect the power cord and plug for any signs of damage. Ensure all electrical connections are secure.
- Thermal Design: The machine features a dense thermal design with large apertures for rapid cooling. Ensure these vents are kept clear of dust and debris to maintain efficient cooling.
- Storage: Store the machine in a clean, dry environment when not in use.
8. Troubleshooting
This section addresses common issues you might encounter with your grinding machine.
| Problem | Possible Cause | Solution |
|---|---|---|
| Machine does not power on | No power supply; Power switch off; Damaged power cord | Check power outlet and connection; Ensure switch is ON; Inspect and replace damaged cord. |
| Grinding is uneven or imprecise | Tool not securely clamped; Incorrect angle settings; Worn grinding wheel; Excessive play in mechanism | Ensure tool is firmly clamped; Re-adjust angles carefully; Replace grinding wheel; Inspect for loose components and tighten. |
| Excessive vibration or noise | Unbalanced grinding wheel; Loose mounting; Foreign object in mechanism | Check and balance/replace grinding wheel; Securely mount machine; Disconnect power and inspect for obstructions. |
| Overheating | Blocked ventilation; Continuous heavy use | Clear ventilation apertures; Allow machine to cool down; Reduce load or operating time. |
9. Specifications
| Parameter | Value |
|---|---|
| Model | JH141065 |
| Brand | HayWHNKN |
| Voltage | 110 Volts |
| Material | Alloy Steel |
| Max Grinding Diameter | 0-100mm (0-3.94") |
| Taper Angle | 0°-180° |
| Relief Angle | 0°-45° |
| Negative Angle | 0°-26° |
| Grinding Spindle Speed | 5200 r.p.m. |
| Cup Grinding Wheel Dimensions | 100x50x20mm (3.9"x2.0"x0.8") |
| Item Weight | 128.7 pounds |
| Package Dimensions | 22.23 x 20.47 x 20.08 inches |
10. Warranty and Support
For warranty information, please refer to the documentation provided at the time of purchase or contact your seller directly. HayWHNKN is committed to providing quality products and customer satisfaction.
If you encounter any issues or require technical assistance, please contact HayWHNKN customer support through the retailer where the product was purchased or via the official HayWHNKN contact channels.