BALDR WG0102P-V1
RAINPOINT WG0102P-V1 Water Timer User Manual
Model: WG0102P-V1
Introduction
Thank you for choosing the RAINPOINT Water Timer. This device is designed to automate your garden watering, providing precise control over irrigation schedules to help maintain a healthy garden while conserving water. Please read this manual thoroughly before installation and operation to ensure proper use and longevity of your product.
Safety Information
- Do not immerse the timer in water. It is water-resistant, not submersible.
- Use only with cold water.
- Do not use with appliances.
- Do not mix old and new batteries. Do not mix alkaline, standard (carbon-zinc), or rechargeable (nickel-cadmium) batteries.
- Remove batteries when the timer is not in use for extended periods or during freezing temperatures.
- Keep out of reach of children.
Package Contents
- RAINPOINT Water Timer (1)
- User Manual (1)
- PTFE Thread Seal Tape (1 roll)
Product Overview
The RAINPOINT Water Timer features a simple one-button control for setting watering schedules. It is designed for easy installation and reliable performance.

Image: Front view of the RAINPOINT Water Timer, showing the green control dial and grey body.
Key Components:
- Inlet Connector: Connects to your outdoor faucet.
- Control Dial: Used to set watering frequency and duration.
- Manual/OFF Button: For manual watering or turning the timer off.
- Battery Compartment: Houses 3 AAA batteries.
- Outlet Connector: Connects to your garden hose.
Setup
1. Battery Installation
- Rotate the green control dial counter-clockwise to detach the battery compartment from the main unit.
- Insert 3 new AAA alkaline batteries (not included) into the compartment, ensuring correct polarity (+/-).
- Reattach the battery compartment by aligning it and rotating clockwise until secure. Ensure the seal is tight to prevent water ingress.

Image: Close-up of the battery compartment, showing where to insert three AAA batteries.
2. Connecting the Timer
- Ensure your outdoor faucet is turned off.
- Apply the included PTFE thread seal tape to the threads of your faucet for a watertight seal.
- Screw the timer's inlet connector onto your outdoor faucet. Hand-tighten only. Do not overtighten.
- Screw your garden hose onto the timer's outlet connector. Hand-tighten only.
- Slowly turn on your outdoor faucet completely.

Image: The water timer installed on an outdoor faucet, with a garden hose connected and a sprinkler watering a lawn.
Operation
Automatic Watering Mode
The RAINPOINT Water Timer offers predefined watering plans. To set an automatic watering schedule:
- Rotate the green control dial to select your desired watering frequency and duration. The dial has sections for "12H" (every 12 hours), "24H" (every 24 hours), "48H" (every 48 hours), and "WEEK" (once a week).
- Within each frequency section, you can choose a specific watering duration (e.g., 3 min, 5 min, 10 min for 12H; 30 min, 60 min, 90 min for 24H/48H; 60 min, 90 min, 120 min for WEEK).
- Once a setting is selected, the timer will begin its cycle according to the chosen plan.

Image: Diagram illustrating the automatic watering mode options on the timer's dial, showing various frequency and duration settings.
Manual Watering Mode
To water manually outside of the programmed schedule:
- Ensure the control dial is set to "OFF" or any automatic program.
- Press and hold the center button for approximately 3 seconds. The timer will activate and begin watering.
- To stop manual watering, press the center button again.

Image: A hand pressing the central button on the water timer to initiate manual watering.
Turning Off the Timer
To completely stop all watering functions, rotate the control dial to the "OFF" position.
Maintenance
Cleaning the Filter
The timer includes a built-in filter to prevent debris from entering the unit. Periodically check and clean the filter to ensure optimal water flow and prevent blockages.
- Turn off the water supply at the faucet.
- Unscrew the timer from the faucet.
- Remove the filter screen from the inlet.
- Rinse the filter screen under running water to remove any accumulated debris.
- Reinsert the clean filter screen and reattach the timer to the faucet.
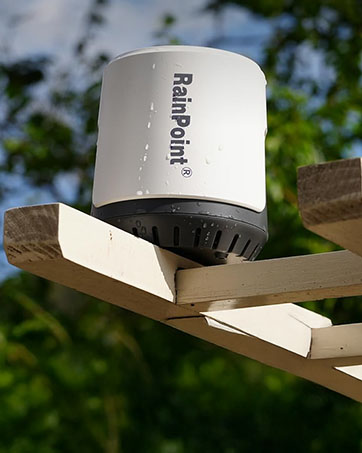
Image: A detailed view of the water timer's inlet, showing the mesh filter screen.
Winterization
Before the first frost, remove the water timer from the faucet. Remove the batteries and store the timer indoors in a dry, frost-free location. Failure to do so may result in damage to the unit due to freezing water.
Troubleshooting
| Problem | Possible Cause | Solution |
|---|---|---|
| Timer does not turn on/off. | Dead or incorrectly installed batteries. | Replace batteries with new AAA alkaline batteries, ensuring correct polarity. |
| Water does not flow. | Faucet is off; clogged filter; low water pressure. | Ensure faucet is fully open. Clean the filter screen. Check water pressure. |
| Timer leaks from connections. | Loose connections; missing or damaged washer; insufficient thread tape. | Tighten connections (hand-tighten only). Ensure washers are properly seated. Apply PTFE thread seal tape. |
| Automatic program not working. | Dial set to "OFF" or "MANUAL"; incorrect program selection. | Ensure the dial is set to a desired automatic watering program. Verify battery level. |
Specifications
- Model: WG0102P-V1
- Watering Frequency: 12 Hours / 24 Hours / 48 Hours / Weekly
- Watering Duration: 3-120 minutes (depending on frequency setting)
- Max Working Pressure: 8 Bar (120 PSI)
- Working Temperature: 3℃-50℃ (38℉-120℉)
- Waterproof Rating: IP54
- Max Flow Rate: 35 L/Min
- Power Source: 3 x AAA Alkaline Batteries (not included)
- Dimensions: 2.5 x 2 x 1 inches (approximate)
- Weight: 7.8 ounces (approximate)
Warranty and Support
RAINPOINT products are designed for reliability and performance. For warranty information, technical support, or customer service inquiries, please refer to the contact information provided with your purchase or visit the official RAINPOINT website.
Website: www.rainpointonline.com (Example link, actual link may vary)
Ask a question about this manual
Ask about setup, troubleshooting, compatibility, parts, safety, or missing instructions. Manuals+ will review the question and use this page’s manual context to help answer it.