
1. Introduction
Thank you for choosing the OBERSTER 11-in-1 USB-C Docking Station. This device is designed to expand the connectivity of your laptop or tablet, providing multiple ports for data transfer, video output, network connection, and power delivery through a single USB-C connection. This manual provides essential information for proper setup, operation, and maintenance of your docking station.
2. Product Overview
The OBERSTER 11-in-1 USB-C Docking Station integrates various essential ports into a compact design, enhancing your productivity and connectivity.

Figure 2.1: OBERSTER 11-in-1 USB-C Docking Station with labeled ports.
Port Functions:
- 3 x USB 3.1 Gen2 Type-A Ports: For high-speed data transfer up to 10Gbps. Connect USB drives, mice, keyboards, and other peripherals.
- 2 x DisplayPort (DP) 1.4: Supports video output up to 4K@60Hz.
- 2 x HDMI 2.0 Ports: Supports video output up to 4K@60Hz.
- 1 x Gigabit Ethernet Port: Provides stable wired network connection up to 1Gbps.
- 1 x 3.5mm Audio In & Out Jack: For connecting headphones, speakers, or microphones.
- 1 x USB-C PD 3.0 Port: For power input up to 100W to charge the host device. Note: This port supports one-way charging only and does not handle data, audio, or video transmission.
- 1 x USB-C Host Connection Cable: Integrated cable to connect the docking station to your laptop or tablet.
3. Setup Guide
3.1. What's in the Box
Before you begin, ensure all components are present:

Figure 3.1: Package contents: Docking Station, User Manual, USB-C to C Cable, USB-C to A Cable.
3.2. Connecting to Your Host Device
- Connect the integrated USB-C cable from the docking station to an available USB-C port on your laptop or tablet.
- For devices with only USB-A ports, use the provided USB-C to A adapter cable to connect the docking station.

Figure 3.2: Universal compatibility: Connect to USB-A or USB-C/Thunderbolt 3/4 laptops.
3.3. Power Connection
To provide power to your host device and ensure stable operation of the docking station, connect your laptop's power adapter to the USB-C PD 3.0 port on the docking station.
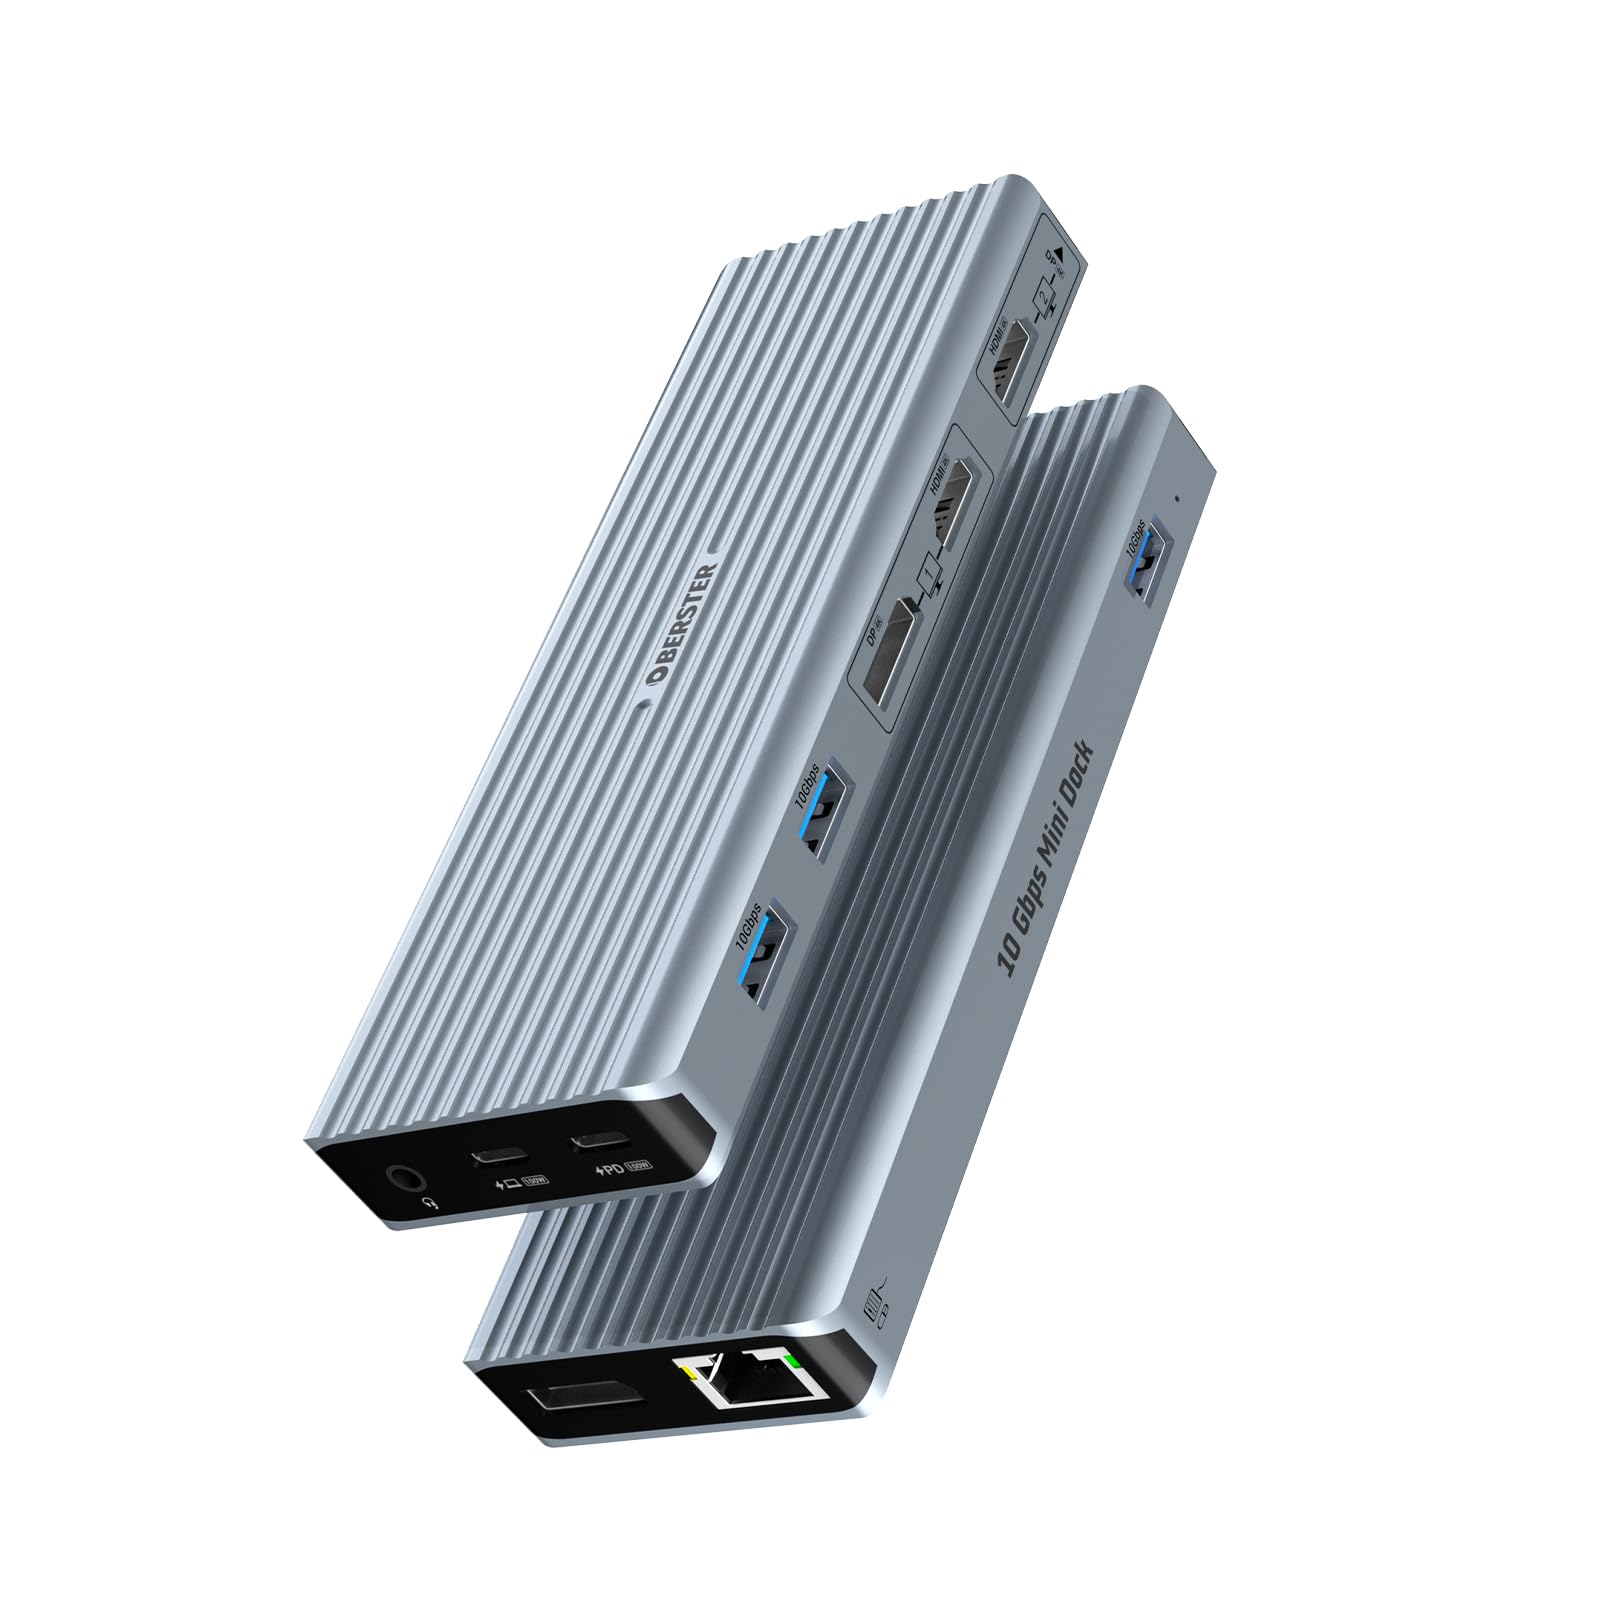
Figure 3.3: 100W Power Delivery input to the dock, providing up to 85W output to the laptop.
3.4. DisplayLink Driver Installation
For optimal performance and multi-monitor support, especially with certain operating systems, it is recommended to install the DisplayLink driver.
- Go to the official DisplayLink website: www.displaylink.com/downloads
- Download the appropriate driver for your operating system (Windows, macOS, Chrome OS, etc.).
- Install the driver and follow the on-screen instructions.
- Restart your computer if prompted.

Figure 3.4: Steps for DisplayLink driver installation.
4. Operating Instructions
4.1. High-Speed Data Transfer
Utilize the three USB 3.1 Gen2 Type-A ports for connecting external storage devices, flash drives, or other peripherals requiring high data transfer speeds. These ports support speeds up to 10Gbps, allowing for quick transfer of large files.

Figure 4.1: High-velocity 10Gbps data transfer via USB 3.1 Gen2 ports.
4.2. Dual/Triple Monitor Setup
The docking station supports dual 4K@60Hz video outputs via its HDMI and DisplayPort interfaces. You can extend or mirror your desktop across multiple external displays.
- Connect your monitors to the available HDMI and/or DisplayPort outputs on the docking station.
- Ensure your monitors are powered on and set to the correct input source.
- Adjust display settings (resolution, orientation, mirror/extend mode) through your operating system's display settings.

Figure 4.2: Example of a 4K@60Hz triple display setup (laptop screen + two external monitors).

Figure 4.3: Various combinations for 4K@60Hz triple display configurations.
4.3. Gigabit Ethernet Connection
For a stable and fast internet connection, connect an Ethernet cable from your router or modem to the Gigabit Ethernet port on the docking station. This provides speeds up to 1000Mbps.

Figure 4.4: Gigabit Ethernet port for stable wired internet connection.
4.4. Audio Connectivity
Connect your headphones, speakers, or microphone to the 3.5mm Audio In & Out jack for integrated audio functionality.

Figure 4.5: 3.5mm Audio & Mic jack for audio peripherals.
5. Compatibility
The OBERSTER 11-in-1 USB-C Docking Station offers broad compatibility with various devices and operating systems:
Compatible Devices:
- MacBook Pro/Air M1
- iPad Pro/Air/Mini
- Surface Pro
- Dell XPS
- Samsung Smartphones
- Other laptops/tablets with a full-featured USB-C port or Thunderbolt 3/4 port.
Supported Operating Systems:
- Windows
- macOS
- Linux
- Chromebook OS
- Android
- iOS
- Google OS
6. Troubleshooting
If you encounter issues with your docking station, refer to the following common solutions:
- No Display Output:
- Ensure the docking station is securely connected to your host device and power adapter.
- Verify that your monitors are powered on and set to the correct input source (HDMI/DP).
- Check your computer's display settings to detect and configure external monitors.
- Install or update the DisplayLink driver as described in Section 3.4.
- Try different HDMI/DP cables or ports.
- No Power Delivery to Laptop:
- Ensure your laptop's original power adapter is connected to the USB-C PD port on the docking station.
- Verify the power adapter is functioning correctly.
- Note that the USB-C PD port is for power input only and does not support data transfer.
- USB Devices Not Recognized or Slow Data Transfer:
- Ensure USB devices are properly inserted into the USB 3.1 ports.
- Try connecting the device directly to your laptop to rule out device issues.
- Disconnect and reconnect the docking station from your host device.
- No Internet Connection via Ethernet:
- Check if the Ethernet cable is securely connected to both the docking station and your router/modem.
- Verify that your network connection is active and working independently.
- Check network settings on your computer.
- Audio Issues:
- Ensure headphones/speakers are correctly plugged into the 3.5mm audio jack.
- Check your computer's sound settings to ensure the docking station's audio output is selected.
7. Specifications
| Feature | Specification |
|---|---|
| Model Number | OB-DC021-E-020 |
| Product Dimensions | 6.81 x 4.49 x 0.87 inches |
| Item Weight | 9.4 ounces |
| USB Ports | 3 x USB 3.1 Gen2 Type-A (10 Gbps) |
| Video Output | 2 x HDMI 2.0, 2 x DisplayPort 1.4 (up to 4K@60Hz) |
| Ethernet | 1 x Gigabit Ethernet (10/100/1000 Mbps) |
| Audio | 1 x 3.5mm Audio In & Out |
| Power Delivery | 1 x USB-C PD 3.0 (100W input, up to 92W output to host) |
| Hardware Interface | 3.5mm Audio, HDMI, USB 3.0, USB 3.0 Type A, microSDXC (Note: microSDXC not explicitly listed as a port on the device diagram, but in specifications. Focus on diagram ports for user instructions.) |
| Compatible OS | Windows, macOS, Linux, Chromebook OS, Android, iOS, Google OS |
8. Maintenance
To ensure the longevity and optimal performance of your docking station, follow these maintenance guidelines:
- Cleaning: Use a soft, dry cloth to wipe the surface of the docking station. Avoid using liquid cleaners or aerosols, which may damage the device.
- Storage: Store the docking station in a cool, dry place away from direct sunlight and extreme temperatures.
- Handling: Avoid dropping or subjecting the device to strong impacts. Do not attempt to disassemble or modify the docking station.
- Heat Management: The docking station is designed with intelligent heat management. Ensure it is placed in a well-ventilated area to prevent overheating during extended use.
9. Warranty and Support
OBERSTER products are designed for reliability and performance. For warranty information or technical support, please refer to the contact details provided with your purchase or visit the official OBERSTER website. Keep your proof of purchase for warranty claims.

