1. Introduction
The Nikon COOLSHOT PROII STABILIZED is a high-performance laser distance meter designed for golf. It incorporates advanced technology to provide accurate and stable distance measurements. Key features include a stabilization system to reduce shake, a dual locked-on echo function for precise target acquisition, and a fast measurement response time.

Image 1.1: Side view of the Nikon COOLSHOT PROII STABILIZED Golf Laser Distance Meter. This image shows the overall design of the device, highlighting its compact form factor.
2. Setup
2.1 Battery Installation
The COOLSHOT PROII STABILIZED requires one CR2 lithium battery (not included). Ensure correct polarity when inserting the battery.
- Locate the battery compartment cap on the underside of the device.
- Turn the cap counter-clockwise to open.
- Insert one CR2 lithium battery, ensuring the positive (+) and negative (-) terminals align with the indicators inside the compartment.
- Replace the battery compartment cap and turn it clockwise until securely fastened.
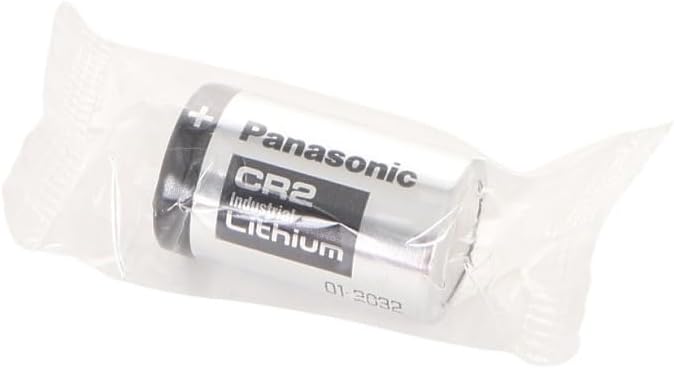
Image 2.1: A CR2 Lithium battery. This type of battery is required for the COOLSHOT PROII STABILIZED device.

Image 2.2: Bottom view of the device, illustrating the location of the battery compartment cap.
2.2 Initial Power On
After battery installation, press the PWR ON button to power on the device. The display will illuminate.
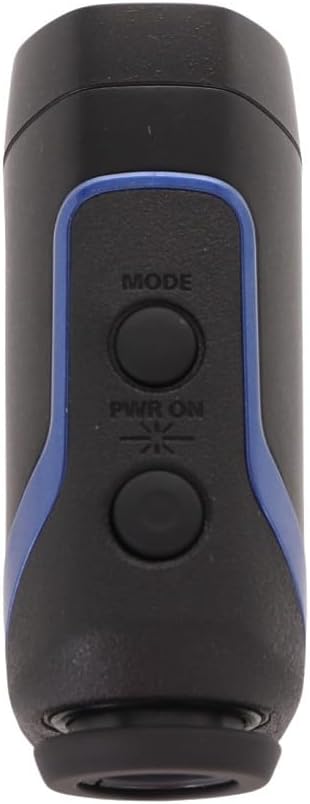
Image 2.3: Top view of the device, showing the 'MODE' and 'PWR ON' buttons.
3. Operating Instructions
3.1 Power On/Off
- To power on, press the PWR ON button.
- The device will automatically power off after approximately 8 seconds of inactivity to conserve battery life.
3.2 Measuring Distance (HYPER READ)
The HYPER READ technology provides quick and stable measurement responses. To measure a distance:
- Look through the eyepiece.
- Align the target reticle with the object you wish to measure.
- Press and hold the PWR ON button. The measurement will be displayed in approximately 0.3 seconds or less.

Image 3.1: Front view of the device, showing the objective lens and laser emitter/receiver.
3.3 STABILIZED Function
The STABILIZED function reduces hand shake and environmental factors by approximately 80%, providing a steady viewfinder field and stable laser measurement. This is particularly useful for targeting small objects like flagsticks.
3.4 DUAL LOCKED ON ECHO
When measuring objects with overlapping backgrounds (e.g., a flagstick in front of trees), the DUAL LOCKED ON ECHO function identifies the nearest object. A "LOCKED ON SIGN" will appear on the viewfinder display, accompanied by an electronic sound notification, confirming that the distance to the flagstick has been measured.
3.5 ID TECHNOLOGY (Slope Adjustment)
The ID TECHNOLOGY provides a slope-adjusted distance, taking into account incline or decline shooting angles. This feature helps in selecting the correct club for your shot. The device offers four measuring display modes; the D mode (straight line distance) will show a flashing straight mode sign.
3.6 Display and Modes
The COOLSHOT PROII STABILIZED features a red interior OLED display. The brightness of the display automatically adjusts to ambient light conditions, ensuring readability in various environments. Use the MODE button to cycle through available display modes.
4. Maintenance
4.1 Cleaning
- Lenses: Use a soft, clean cloth specifically designed for optical lenses. Gently wipe the lens surfaces to remove dust or smudges. Avoid using abrasive materials or excessive force.
- Body: Wipe the device body with a soft, dry cloth. For stubborn dirt, a slightly damp cloth can be used, followed by a dry cloth. Do not use organic solvents like paint thinner or benzene.
4.2 Storage
When not in use, store the COOLSHOT PROII STABILIZED in its protective carrying case in a cool, dry place, away from direct sunlight and extreme temperatures. Remove the battery if the device will not be used for an extended period.

Image 4.1: The protective carrying case for the Nikon COOLSHOT PROII STABILIZED.

Image 4.2: The device stored securely within its carrying case.
4.3 Battery Replacement
Replace the CR2 lithium battery when the low battery indicator appears on the display or if the device fails to power on. Refer to Section 2.1 for battery installation instructions.
5. Troubleshooting
| Problem | Possible Cause | Solution |
|---|---|---|
| Device does not power on. | Battery is depleted or incorrectly installed. | Replace the battery with a new CR2 lithium battery, ensuring correct polarity. |
| Inaccurate or inconsistent measurements. | Obstruction of laser path, dirty lenses, or extreme weather conditions. | Ensure a clear line of sight to the target. Clean the lenses. Avoid use in heavy fog or rain if possible. |
| Display is dim or unreadable. | Low battery, or display brightness needs adjustment (though automatic). | Replace the battery. If the issue persists, contact support. |
| "LOCKED ON SIGN" does not appear. | Target is too small, too far, or there is no clear distinction from the background. | Ensure the target is within range and clearly visible. Try aiming at a larger part of the target if possible. |
6. Specifications
| Feature | Detail |
|---|---|
| Brand | Nikon |
| Model Number | COOLSHOT PROII |
| Color | Black |
| Item Weight | 0.8 Pounds (approx. 363 grams) |
| Magnification | 7x |
| Measuring Range | 8-1,200 yd. (7.5-1,090m) |
| Water Resistance Level | Waterproof |
| Battery Type | CR2 Lithium (disposable) |
| Item Dimensions (L x W x H) | 1.7"L x 8"W x 3.9"H (approx. 4.3cm x 20.3cm x 9.9cm) |
| International Protection Rating | IPX4 |

Image 6.1: Dimensions of the Nikon COOLSHOT PROII STABILIZED device.
7. Warranty and Support
7.1 Warranty Information
Please note that warranty coverage may vary by region. According to available information, this unit may not be warranted by Nikon for the US market as it might not be intended for that specific distribution channel. It is recommended to verify warranty details with your point of purchase or local Nikon distributor.
7.2 Customer Support
For technical assistance, service, or further inquiries regarding your Nikon COOLSHOT PROII STABILIZED, please refer to the official Nikon website or contact Nikon customer support in your region. Keep your purchase receipt and product serial number available when contacting support.


