Introduction
This manual provides essential instructions for the safe and efficient operation, setup, and maintenance of your Oiveinya Industrial Leather Sewing Machine, Model 8700. Please read this manual thoroughly before initial use to ensure proper function and longevity of the machine.
Important Note: This product is the sewing machine head only. It excludes the motor and tabletop rack. Users must purchase a motor with power exceeding 550W and an 8700 model industrial flat-bed sewing machine tabletop rack for installation and use. Professional knowledge is recommended for installation.
Safety Instructions
- Always read the operating manual completely before use, paying particular attention to all safety instructions.
- Ensure all parts are present and correctly installed. Missing parts may cause personal injury.
- Wear appropriate safety devices (not included) during operation.
- Disconnect the machine from the power source before performing any maintenance, cleaning, or when replacing parts.
- Keep hands and fingers clear of the needle and moving parts during operation.
- This machine is designed for sewing and repairing materials such as bags, dolls, canvas, and is suitable for nylon, polyester, and cotton threads. Do not use for purposes other than its intended use.
Product Overview
The Oiveinya Industrial Leather Sewing Machine Model 8700 is a robust straight stitch sewing machine head designed for heavy-duty applications. Its construction from high-quality iron with a high-temperature spray paint treatment ensures durability and wear resistance.


Key Components
- Thread Guide: This component allows for precise selection and routing of the thread according to specific sewing requirements.
- Adjusting Stitch Clamp: Used to regulate the tightness of the bottom thread. Turning the clamp clockwise increases tension (shorter stitch appearance), while turning it counter-clockwise loosens the tension (longer stitch appearance).

A hand adjusting the stitch length dial, which features numerical markings from 0 to 5 for precise control over stitch size. - Oil Quantity Monitoring Port: A transparent port designed for convenient visual inspection of the oil level, ensuring adequate lubrication during machine operation.
- Replaceable Presser Foot: The machine is equipped with a presser foot that can be interchanged with various functional presser feet (one included) to accommodate diverse sewing tasks and materials.

A detailed view of the presser foot and needle area, showing fabric positioned for sewing, highlighting the precision components. - Small Attachment Mount Base: This integrated base improves the stability and performance when installing small attachments, contributing to the overall durability of the machine setup.
- Handwheel: The large handwheel on the right side of the machine allows for manual control of the needle's up and down movement, useful for precise positioning or troubleshooting.

A close-up view of the machine's handwheel, a crucial component for manual needle positioning and control.
Setup
Unpacking and Inspection
Carefully unpack all components. Verify that all items listed in the "Package Contents" section are present. Inspect the machine head for any signs of damage during transit.
Required Additional Components (Not Included)
- Motor: A motor with a power output of more than 550W is required.
- Tabletop Rack: An 8700 model industrial sewing machine tabletop rack (general flat-bed sewing machine tabletop rack) is necessary.
- Clutch Motor or Energy-Saving Belt Motor: The machine can be used with either type of motor.
Installation
Due to the specialized nature of industrial sewing machines, it is highly recommended that personnel with professional knowledge and experience perform the installation of the machine head onto the motor and tabletop rack. Incorrect installation can lead to malfunction or injury.
Refer to the separate installation instructions provided with your motor and tabletop rack for detailed assembly steps.
Operating Instructions
Powering On
Once the machine is fully assembled and connected to a suitable power source via the motor, turn on the motor's power switch.
Threading the Machine
Follow the threading path indicated on the machine. Ensure the thread is correctly seated in all guides and tension discs.
Adjusting Stitch Length and Direction
The machine features clearly marked gauge chucks from 1-5 for stitch length adjustment.
- To adjust stitch length, rotate the gauge chuck to the desired setting (1-5).
- The reverse stitch switch allows you to change the sewing direction for back-tacking or reinforcing stitches.
Adjusting Thread Tension
The adjusting stitch clamp controls the tightness of the bottom thread.
- Turn the clamp clockwise to make the bottom thread tighter (shorter stitch appearance).
- Turn the clamp counter-clockwise to loosen the bottom thread (longer stitch appearance).
- Test on a scrap piece of fabric to achieve balanced tension.
Lifting the Presser Foot
Use the manual presser foot wrench to lift the presser foot. Turn it 90° to the right to raise the foot, allowing for fabric placement or removal.
Sewing
Place your fabric under the presser foot. Lower the presser foot. Begin sewing by gently pressing the foot pedal (if using a foot pedal motor) or engaging the motor. Guide the fabric smoothly.
Maintenance
Cleaning
The surface of the machine is smooth and flat, making it easy to clean.
- Regularly wipe the machine's exterior with a damp cloth.
- Remove lint and dust from the bobbin area and feed dogs using a small brush or vacuum cleaner.
- Ensure the machine is unplugged before cleaning any internal components.
Lubrication
Monitor the oil quantity through the Oil Quantity Monitoring Port. Refer to your motor's manual for specific lubrication requirements and recommended oil types. Proper lubrication is crucial for the machine's smooth operation and longevity.
Troubleshooting
This section provides general guidance for common issues. For complex problems, consult a qualified technician.
- Machine Not Starting: Check power connections, motor switch, and ensure the motor is functioning correctly.
- Skipped Stitches: Verify needle insertion, ensure the correct needle type for the fabric, and check thread tension.
- Thread Breakage: Inspect for incorrect threading, burrs on thread path, improper tension, or a damaged needle.
- Uneven Stitches: Adjust thread tension (both upper and lower), ensure consistent fabric feeding, and check for proper stitch length setting.
- Noise/Vibration: Ensure all components are securely fastened. Check for lubrication levels.
Specifications

| Feature | Detail |
|---|---|
| Brand | Oiveinya |
| Machine Head Model | 8700 |
| Material | Iron |
| Process | High-temperature Spray Painting |
| Color | White |
| Mounting Type | Freestanding (requires separate table) |
| Sewing Line Type | Straight Line |
| Maximum Sewing Length | 0.5 cm (0.197 in) |
| Product Dimensions (L x W x H) | 48 x 18 x 25 cm (18.89 x 7.08 x 9.84 in) |
| Item Weight | 28 kg (61 lbs) |
| UPC | 796713537185 |
Package Contents
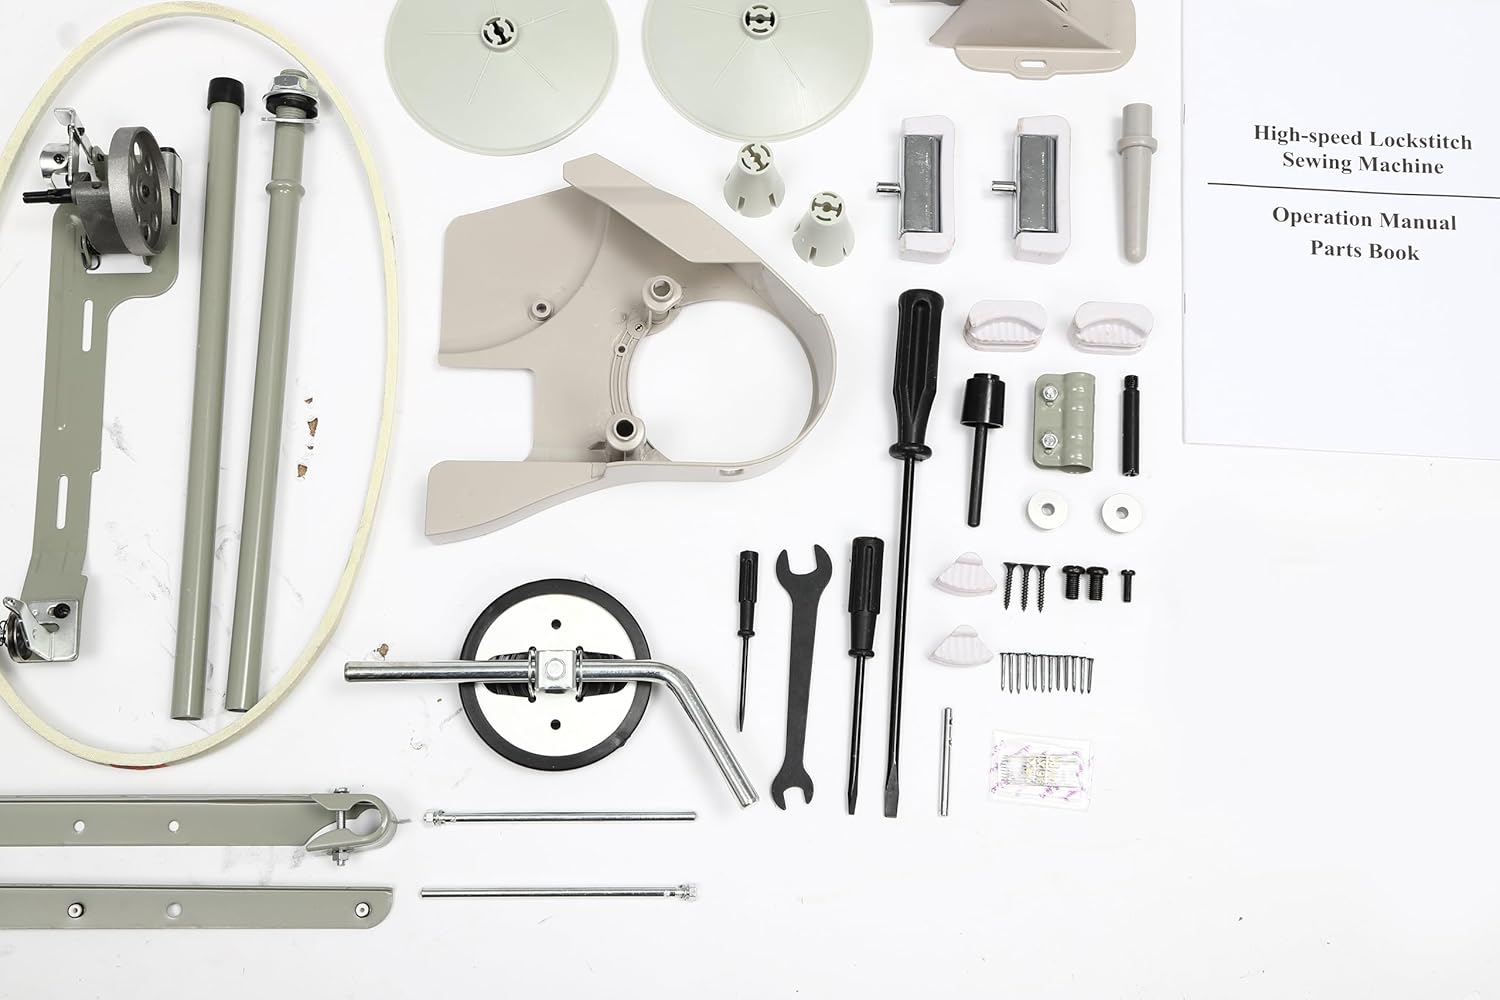
Upon opening the package, you should find the following items:
- 1x Straight Stitch Sewing Machine Head
- 1x English Operation Manual
- Other Accessories for Assembly (as pictured in the setup section)
Warranty and Support
For warranty information, technical support, or to inquire about replacement parts, please contact the manufacturer, Oiveinya, or your authorized dealer. Keep your purchase receipt as proof of purchase.
Note: Please be aware that the product description mentions protection plans available for purchase separately. These plans are offered by third parties and are not directly part of the manufacturer's warranty.