GuliTech G-Guide-TR420
User Manual for GuliTech TR Series Thermal Imaging Scopes
Models: TR420, TR430, TR450, TR620, TR630, TR650
1. Introduction
This user manual provides comprehensive instructions for the operation, maintenance, and troubleshooting of your GuliTech TR Series Thermal Imaging Scope. The TR series includes models TR420, TR430, TR450, TR620, TR630, and TR650. These devices are designed for advanced thermal observation, offering high-resolution imaging and robust performance in various conditions.
2. Product Overview and Components
The GuliTech TR Series Thermal Imaging Scope is a compact and portable device. Familiarize yourself with its components and controls for optimal use.
2.1. Unboxing and Included Accessories
Upon opening the package, verify that all components are present. The following items are typically included:
Video 2.1: Unboxing and overview of the GuliTech TR Series Thermal Imaging Scope and its accessories.
- GuliTech TR Series Thermal Imaging Scope
- Sight Base
- Rechargeable Battery (18650 type)
- Battery Charger
- Type-C USB Cable
- Power Adapter
- Various Plugs (for different regions)
- User Manual (this document)
2.2. Device Features and Controls
Identify the key operational parts of your thermal imaging scope:
- Power Button: Located on the top, used for turning the device on/off.
- Menu Knob: A rotary knob for navigating menus and confirming selections.
- Shutter Button: Used for capturing photos or starting/stopping video recording.
- Type-C Port: For charging and data transfer.
- Diopter Adjustment: Adjusts the eyepiece focus to match your vision.
- Focus Ring: Adjusts the objective lens focus for clear thermal images.
- Battery Compartment: Houses the rechargeable battery.
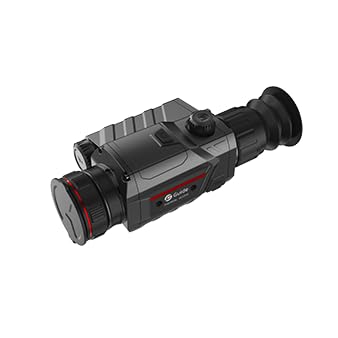
Image 2.2.1: Side view of the GuliTech TR Series Thermal Imaging Scope, showing its compact design.
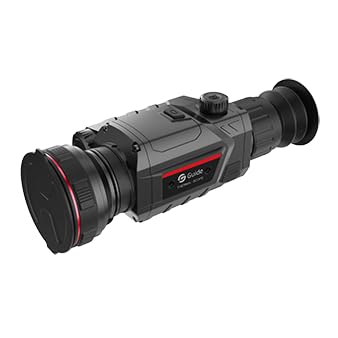
Image 2.2.2: Front view of the thermal imaging scope, highlighting the objective lens.
3. Setup
3.1. Battery Installation and Charging
The TR Series scope uses a standard 18650 rechargeable battery. Ensure the battery is fully charged before first use.
- Locate the battery compartment on the side of the device.
- Open the compartment cover.
- Insert the 18650 battery with the correct polarity (+/-) as indicated inside the compartment.
- Close the battery compartment cover securely.
- To charge, connect the Type-C USB cable to the scope's Type-C port and the other end to the power adapter. Plug the adapter into a power outlet. The charging indicator will show the charging status.

Image 3.1.1: Proper installation of the 18650 battery into the thermal imaging scope.
The standard 18650 battery provides up to 8 hours of continuous operation, ensuring extended observation time.

Image 3.1.2: Visual representation of the 8-hour super long battery life.
3.2. Mounting (Optional)
If using the scope with a sight base, attach it securely according to the base's instructions. The device supports Picatinny Mounts.
4. Operating Instructions
4.1. Power On/Off
Press and hold the Power Button for a few seconds to turn the device on or off. The OLED display will illuminate upon startup.
4.2. Focus and Diopter Adjustment
- Diopter Adjustment: Rotate the diopter adjustment ring near the eyepiece until the on-screen display (OSD) text appears sharp and clear to your eye.
- Focus Ring: Rotate the focus ring on the objective lens to bring the thermal image of your target into sharp focus. This is crucial for clear image detail.
4.3. Menu Navigation and Settings
Use the Menu Knob to navigate through the device's settings. Press the knob to enter a menu or confirm a selection, and rotate it to scroll through options.
The device features a 1024x768 resolution HD OLED display for superior image detail.
4.4. Color Palettes
The TR Series offers six distinct color palettes to optimize thermal image viewing based on environmental conditions and user preference. These include White Hot, Black Hot, Red Hot, Iron Red, Green Hot, and Blue Hot.

Image 4.4.1: Example of thermal imaging in a snowy mountain environment.

Image 4.4.2: Example of thermal imaging in a forest environment.
4.5. Photo and Video Recording
The scope supports photo and video recording, allowing you to capture and share observations. Press the Shutter Button to take a photo or to start/stop video recording.
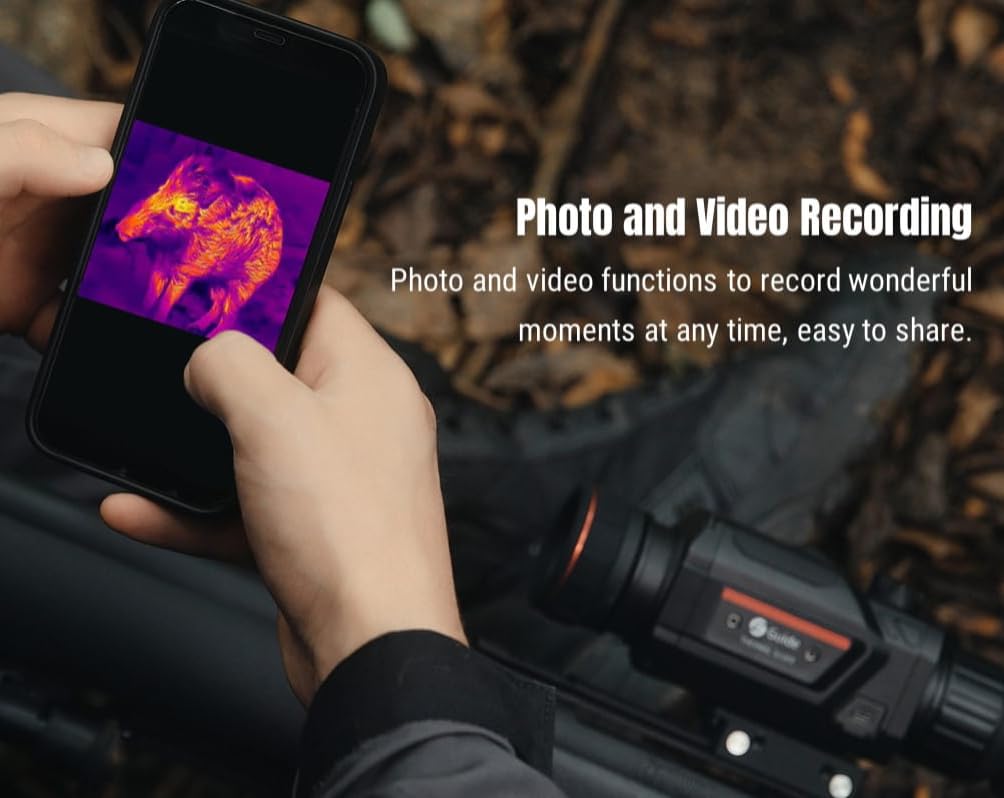
Image 4.5.1: The scope supports photo and video recording, which can be viewed on a connected smartphone.

Image 4.5.2: The photo and video recording function allows users to capture and share moments.
4.6. Zeroing and Laser Ranging
- Screen Freezing: The device supports screen freezing for quick and easy zeroing, aiding in precise calibration.
- Laser Ranging: Achieve precise distance measurements up to 600 meters with the integrated laser ranging feature.
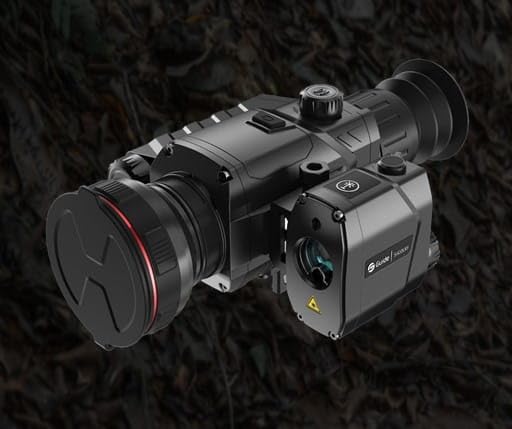
Image 4.6.1: The thermal imaging scope equipped with a laser ranging module for accurate distance measurement.
4.7. Firmware Updates (TargetIR APP)
Keep your device up-to-date by supporting firmware updates via the TargetIR APP. This ensures you have the latest features and performance enhancements.
5. Maintenance
5.1. Cleaning
- Use a soft, lint-free cloth to clean the lens and display.
- For stubborn smudges, use a lens cleaning solution specifically designed for optics.
- Do not use abrasive materials or harsh chemicals.
- Clean the device body with a damp cloth.
5.2. Environmental Protection
The TR Series scopes are IP67 dustproof and waterproof rated, providing protection against dust ingress and immersion in water up to 1 meter for 30 minutes. While robust, proper care extends the device's lifespan.
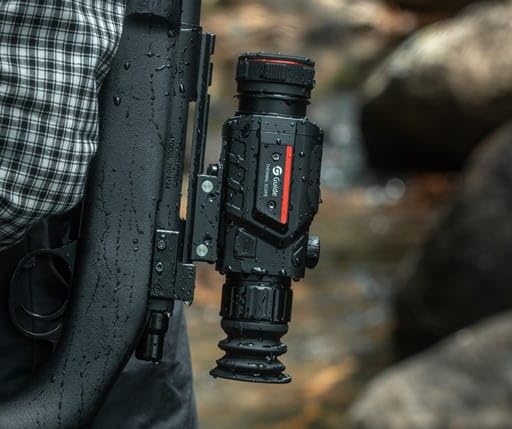
Image 5.2.1: The IP67 rating ensures the scope can withstand wet conditions.
5.3. Storage
When not in use, store the device in a cool, dry place, away from direct sunlight and extreme temperatures. Remove the battery if storing for extended periods.
6. Troubleshooting
If you encounter issues with your GuliTech TR Series Thermal Imaging Scope, refer to the following common problems and solutions:
| Problem | Possible Cause | Solution |
|---|---|---|
| Device does not power on. | Low or depleted battery; incorrectly installed battery. | Charge the battery fully. Ensure the battery is inserted with correct polarity. |
| Image is blurry or out of focus. | Improper focus ring or diopter adjustment. | Adjust the diopter for your vision, then rotate the focus ring until the image is sharp. |
| Cannot record photos/videos. | Insufficient storage space; recording function not enabled. | Check available storage. Ensure recording is enabled in settings. |
| Device freezes or becomes unresponsive. | Software glitch; extreme operating conditions. | Perform a soft reset by holding the power button. If persistent, check for firmware updates. |
If the problem persists, please contact GuliTech customer support.
7. Specifications
The following table provides detailed technical specifications for the GuliTech TR Series Thermal Imaging Scopes:

Image 7.1: Comprehensive technical specifications for the TR Series models.
Note: Technical parameters are subject to change without notice. For the latest information, please visit the official GuliTech website.
| Feature | TR420 / TR430 / TR450 | TR620 / TR630 / TR650 |
|---|---|---|
| Infrared Detector Resolution | 384×288 IR | 640×480 IR |
| NETD | ≤40 mk | ≤40 mk |
| Frame Rate | 50 Hz | 50 Hz |
| Lens Focal Length | 25mm, 35mm, 50mm | 25mm, 35mm, 50mm |
| Display Resolution | 1024×768 OLED | 1024×768 OLED |
| Battery Life | Up to 8 hours (18650 battery) | Up to 8 hours (18650 battery) |
| IP Rating | IP67 | IP67 |
| Detection Range (Human) | TR420: 1000m, TR430: 1400m, TR450: 2000m | TR620: 1000m, TR630: 1400m, TR650: 2000m |
| Storage | 32GB | 32GB |
| Dimensions (L×W×H) | 209×88×66 mm | 209×88×66 mm |
| Weight | ≤540 g | ≤540 g |
8. Warranty and Support
GuliTech products are covered by a manufacturer's warranty. Please refer to the warranty card included in your product packaging for specific terms and conditions. For technical support, service, or inquiries, please contact GuliTech customer service through their official website or the contact information provided with your purchase.
EU Spare Part Availability Duration: 1 Year.