1. Introduction
This manual provides detailed instructions for the safe and effective use of the GuliTech Victor 8145C Digital Bench Multimeter. The Victor 8145C is a high-precision digital bench-type multimeter featuring a 4 ½ digit (22000 count) LCD display with backlight. It is designed for accurate measurements in both laboratory and mobile service environments.
Key features include True RMS measurement, relative value measurement, MIN/MAX/AVG functions, and a DATA hold function. The device also offers an optical USB interface and accompanying computer software for data display, recording, and analysis of test processes.
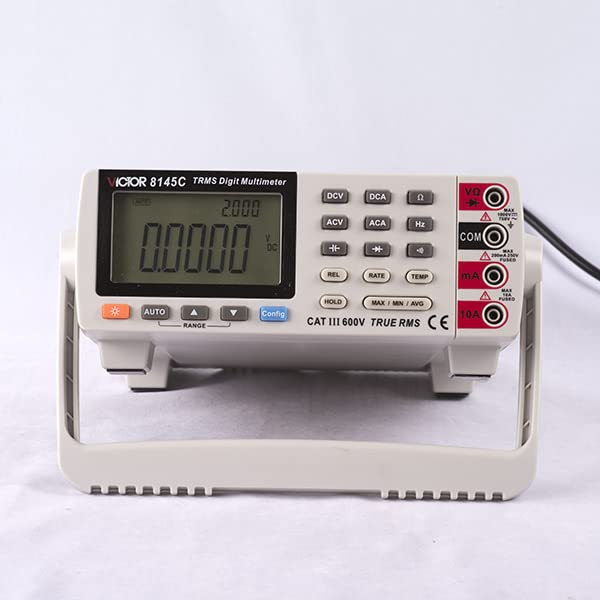
Figure 1: Front view of the Victor 8145C Digital Bench Multimeter.
2. Key Features
- 4 ½ digits (22000 count) 21mm TRMS Frequency Meter with USB.
- Large LCD display with backlight for clear readings.
- True RMS measurement for accurate readings of non-sinusoidal waveforms.
- MIN/MAX/AVG and DATA hold functions for capturing and analyzing measurements.
- Auto Range capability for simplified operation.
- Optical USB interface and computer software for data logging and real-time display.
- Measures up to 1000V and 10A.
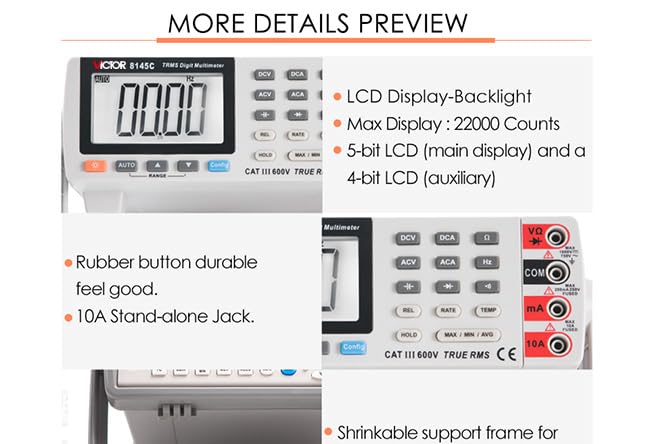
Figure 2: Detailed view of the multimeter's display and control buttons.
3. Setup
3.1 Unpacking and Inspection
Carefully unpack the multimeter and all accessories. Inspect the device for any signs of damage during transit. If any damage is found, contact your supplier immediately.
3.2 Power Supply
The Victor 8145C can be powered via its AC power input or by the included Lithium Ion battery for mobile use.
- AC Power: Connect the provided AC power cord to the power input on the rear of the device and then to a suitable mains outlet. Ensure the power switch is in the OFF position before connecting.
- Battery Power: The device includes a Lithium Ion battery. Ensure it is charged for optimal mobile operation. Refer to the Maintenance section for battery replacement instructions.
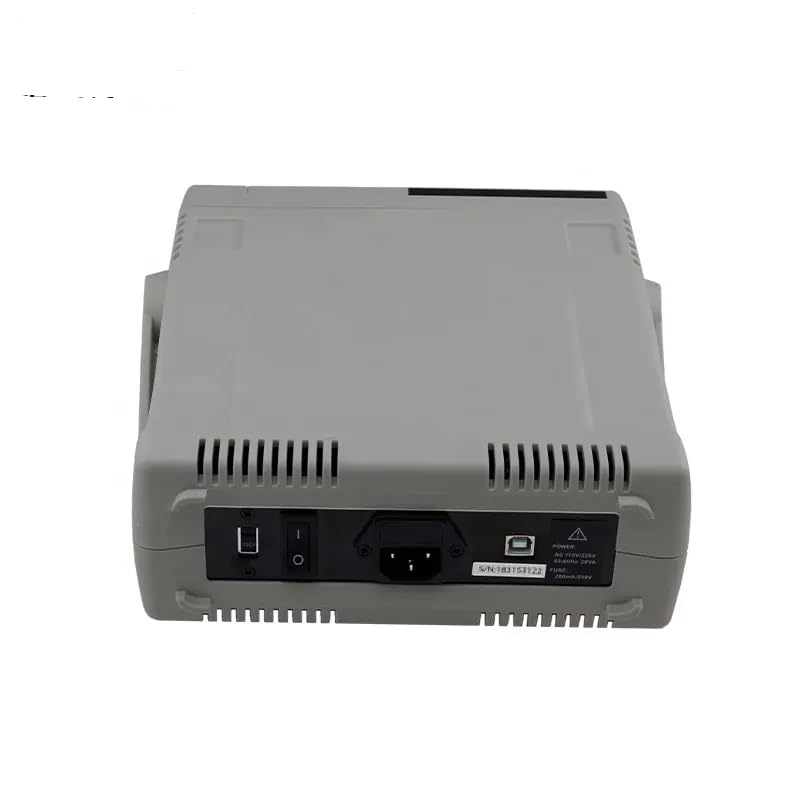
Figure 3: Rear view of the multimeter, highlighting power input and USB port.
3.3 Test Lead Connection
Connect the test leads to the appropriate input jacks on the front panel based on the measurement function you intend to use.
- COM Jack: Always connect the black test lead to the COM (common) jack.
- VΩHz Jack: Connect the red test lead for voltage, resistance, frequency, and capacitance measurements.
- mA Jack: Connect the red test lead for current measurements up to 200mA.
- 10A Jack: Connect the red test lead for high current measurements up to 10A.
4. Operating Instructions
4.1 Basic Operation
- Ensure the multimeter is properly powered and test leads are connected.
- Turn on the device using the power switch.
- Select the desired measurement function using the function buttons (DCV, ACV, DCA, ACA, Ω, Hz, Temp).
- The multimeter features an AUTO RANGE function. Press the RANGE button to switch between auto and manual ranging if needed.
- Press the LIGHT button to activate or deactivate the display backlight.
4.2 Measurement Functions
- DC Voltage (DCV): Press the DCV button. Connect leads in parallel with the DC voltage source.
- AC Voltage (ACV): Press the ACV button. Connect leads in parallel with the AC voltage source. The device supports True RMS measurement.
- DC Current (DCA): Press the DCA button. Connect leads in series with the DC circuit. Use the appropriate current input jack (mA or 10A).
- AC Current (ACA): Press the ACA button. Connect leads in series with the AC circuit. Use the appropriate current input jack (mA or 10A). Supports True RMS.
- Resistance (Ω): Press the Ω button. Ensure the circuit is de-energized before measuring resistance.
- Frequency (Hz): Press the Hz button.
- Capacitance (F): Press the Config button repeatedly until the capacitance symbol appears.
- Diode Test (→|): Press the Config button repeatedly until the diode symbol appears.
- Continuity Test (♫): Press the Config button repeatedly until the continuity symbol appears.
- Temperature (Temp): Press the TEMP button. Connect a K-type thermocouple to the appropriate inputs.
4.3 Special Functions
- DATA HOLD: Press the HOLD button to freeze the current reading on the display. Press again to release.
- MIN/MAX/AVG: Press the MAX / MIN / AVG button to cycle through minimum, maximum, and average readings captured since the function was activated.
- Relative Value (REL): Press the REL button to store the current reading as a reference value. Subsequent measurements will be displayed as the difference from this reference.
- USB Interface: Connect the multimeter to a computer using the provided USB cable. Install the accompanying software to enable real-time data display, logging, and analysis. The software features a dynamic scale for observing small parameter changes.
5. Maintenance
5.1 Cleaning
To clean the multimeter, wipe the case with a damp cloth and a mild detergent. Do not use abrasives or solvents. Ensure the device is powered off and disconnected from all power sources and test circuits before cleaning.
5.2 Battery Replacement
The Victor 8145C uses a Lithium Ion battery. If the low battery indicator appears on the display, the battery needs to be recharged or replaced.
- Ensure the multimeter is powered off and disconnected from all test circuits and AC power.
- Locate the battery compartment on the device (typically on the underside or rear).
- Open the compartment using a screwdriver if necessary.
- Carefully remove the old battery and replace it with a new, identical Lithium Ion battery. Observe correct polarity.
- Close the battery compartment securely.
5.3 Fuse Replacement
If the current measurement function fails, the fuse may need replacement. Refer to the specifications for the correct fuse type and rating.
- Ensure the multimeter is powered off and disconnected from all test circuits and AC power.
- Locate the fuse compartment (often near the current input jacks or inside the battery compartment).
- Open the compartment and carefully remove the blown fuse.
- Replace with a fuse of the exact same type and rating. Using an incorrect fuse can damage the meter or pose a safety hazard.
- Close the fuse compartment securely.
6. Troubleshooting
| Problem | Possible Cause | Solution |
|---|---|---|
| No display or faint display | Low battery; No AC power; Device off | Recharge/replace battery; Connect to AC power; Turn on device |
| Incorrect readings | Wrong function selected; Improper lead connection; Damaged leads; Out of range | Select correct function; Connect leads properly; Replace leads; Check range setting or use auto-range |
| Current measurement not working | Blown fuse; Incorrect input jack | Replace fuse (refer to 5.3); Ensure lead is in 10A or mA jack |
| USB software not connecting | Driver not installed; Incorrect USB port; Software issue | Install USB drivers; Try different USB port; Reinstall software |
7. Specifications
The following table details the technical specifications of the Victor 8145C Digital Bench Multimeter.

Figure 4: Detailed technical specifications table.
| Project | Parameter | Value |
|---|---|---|
| DC Voltage | Range | 200mV/2V/20V/200V/1000V |
| Basic accuracy | ±(0.05%+4dgt) | |
| AC Voltage | Range | 200mV/2V/20V/200V/750V |
| Basic accuracy | ±(0.5%+40dgt) | |
| DC Current | Range | 0.2mA/2mA/20mA/200mA/10A |
| Basic accuracy | ±(0.2%+10dgt) | |
| AC Current | Range | 0.2mA/2mA/20mA/200mA/10A |
| Basic accuracy | ±(0.2%+5dgt) | |
| Resistance | Range | 200Ω/2kΩ/20kΩ/200kΩ/2MΩ/20MΩ/60MΩ |
| Basic accuracy | ±(0.8%+30dgt) | |
| Capacitance | Range | 10nF/100nF/1000nF/10uF/100uF/1000uF |
| Basic accuracy | ±(5%+5dgt) | |
| Frequency | Range | 10Hz ~ 10MHz |
| Basic accuracy | ±(0.02%+4dgt) | |
| Thermocouple | Range | K indexing: -200.0℃ ~ 1372.0℃ |
| Basic accuracy | ±(0.5%+5℃) | |
| Display words | 22000 | |
| The measurement rate | Quick | 20 times / sec |
| Slow | 2.5 times / sec | |
| Automatic / manual range | √ | |
| True RMS | √ | |
| Bandwidth | 1kHz | |
| Diode test | √ | |
| Continuity beeper | √ | |
| MAX/MIN/AVG | √ | |
| Data Hold | √ | |
| The reference junction compensation | √ | |
| °C / °F conversion | √ |
General Specifications:
- Manufacturer: Victor
- Part number: G-VICTOR 8145C
- Item Weight: 500 g
- Product Dimensions: 22 x 15 x 12 cm
- Batteries: 1 Lithium Ion battery (included)
- Power source type: Battery Powered / AC
- Wattage: 5 watts
- Measurement System: Metric
- Measurement Accuracy: 1% (general)
- Specifications Met: EMC, ISO 9001, RoHS
- Special Features: CE, light, timer
- Upper temperature rating: 50 Degrees Celsius
- Country of origin: China
8. Warranty and Support
8.1 Warranty Information
Specific warranty details for the GuliTech Victor 8145C Digital Bench Multimeter may vary by region and retailer. Please refer to the warranty card included with your product or contact your point of purchase for detailed warranty terms and conditions.
8.2 Customer Support
For technical assistance, troubleshooting, or service inquiries, please contact your retailer or the manufacturer's customer support. Contact information can typically be found on the product packaging or the manufacturer's official website.