XENOCAM XENOCAM-SOMETHING
Xenocam 16CH 1080N Hybrid 5-in-1 AHD DVR User Manual
Model: XENOCAM-SOMETHING
Introduction
This manual provides comprehensive instructions for the installation, operation, and maintenance of your Xenocam 16CH 1080N Hybrid 5-in-1 AHD DVR. This Digital Video Recorder (XVR) serves as the central component of your surveillance system, enabling recording, archiving, live viewing, remote monitoring, and motion detection. Designed for 24/7 operation, it ensures continuous surveillance.
Package Contents
Please verify that all items listed below are included in your package:
- 1 x Xenocam 16CH AHD DVR XVR (Hard Disk Drive not pre-installed)
- 1 x USB Mouse
- 1 x User Manual
- 1 x Power Supply Adapter
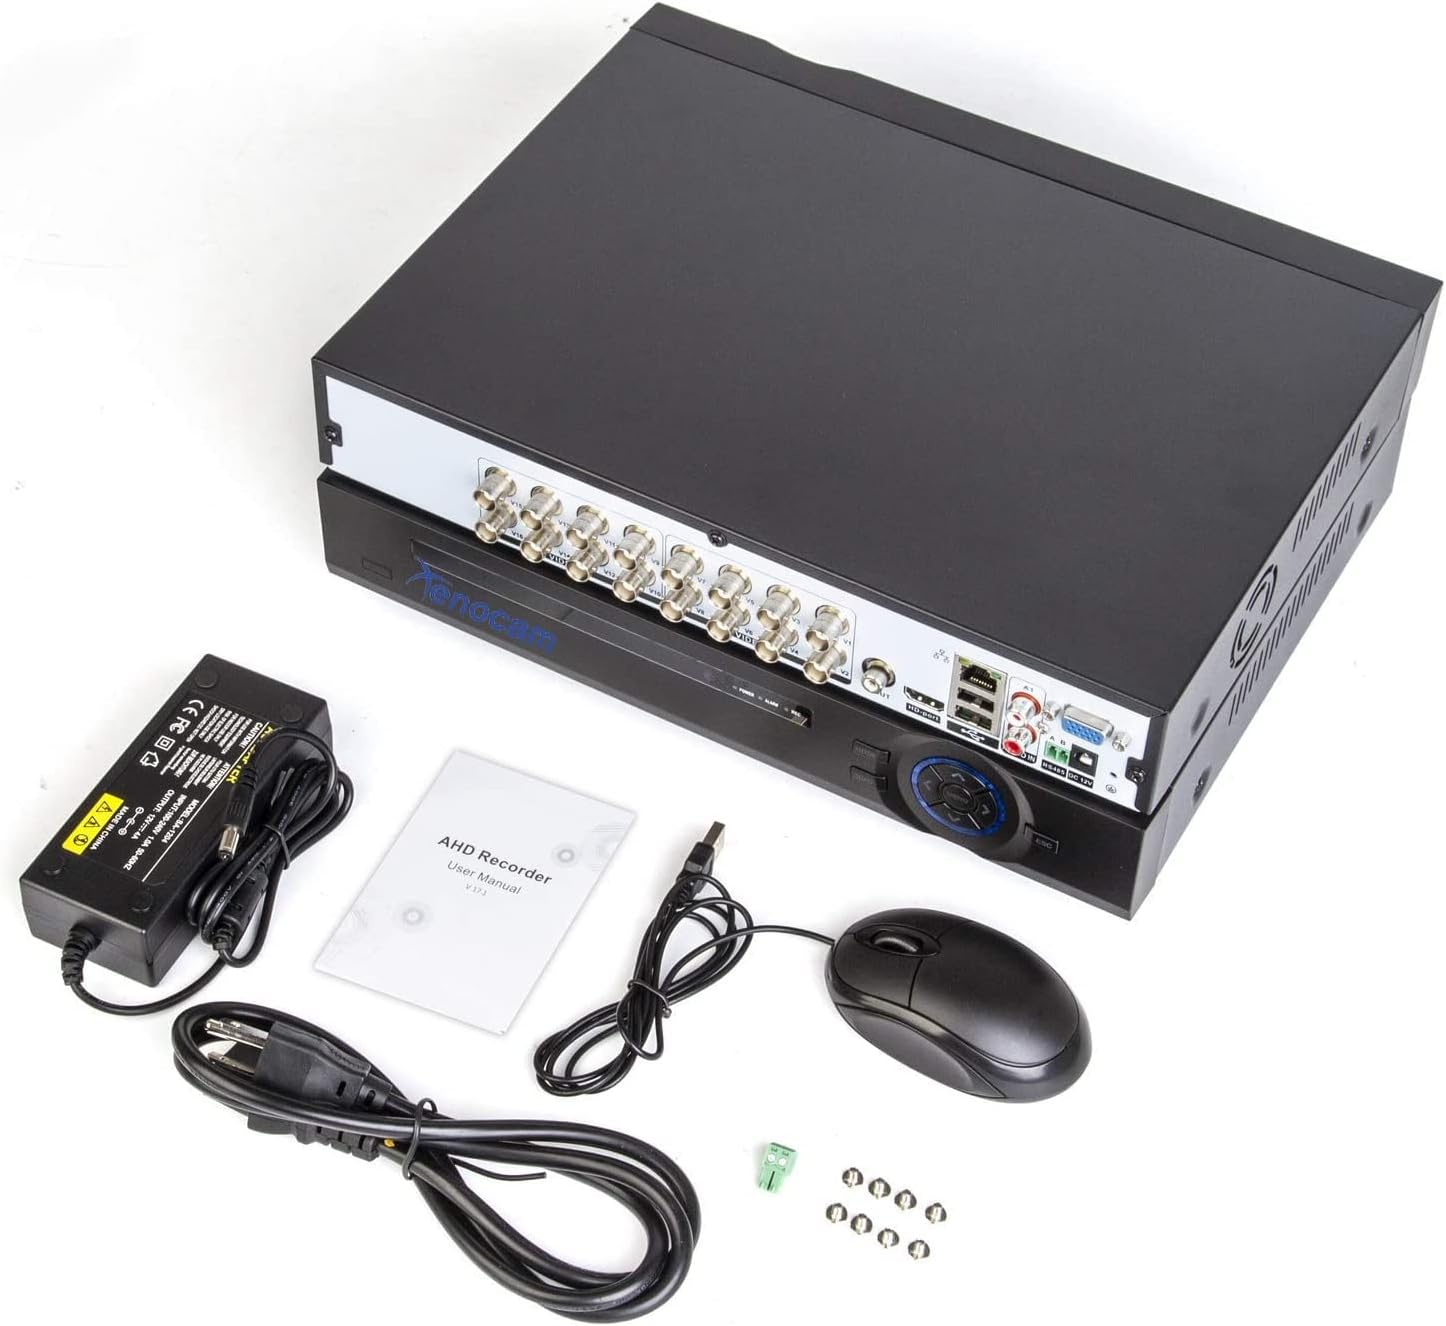
Image: Contents of the Xenocam 16CH DVR package. Shown are the DVR unit, a USB mouse, a power adapter, and the user manual, indicating all items included for initial setup.
Setup Guide
Follow these steps to set up your DVR system:
1. Hard Disk Drive (HDD) Installation (Optional for Recording)
The DVR does not include a pre-installed HDD. While the unit can preview video without an HDD, recording requires one. The DVR supports up to a 4TB HDD.
- Unscrew the top cover of the DVR unit.
- Connect the SATA power and data cables from the DVR to the HDD.
- Secure the HDD inside the DVR chassis using the provided screws.
- Replace and secure the top cover.

Image: Underside view of the Xenocam DVR, illustrating the internal layout and mounting points for hard disk drive installation. The image indicates support for two hard disk drives.
2. Physical Connections
Connect all necessary cables before powering on the device.
- Camera Connection: Connect your analog security cameras to the BNC video input ports (V1-V16) on the rear of the DVR using BNC video power cables.
- Monitor Connection: Connect a PC monitor or TV to the DVR using either an HDMI or VGA cable (cables not included).
- Network Connection: Connect the DVR to your router using an Ethernet network cable. Ensure your router has WAN access for remote viewing.
- USB Devices: Connect the included USB mouse to a USB 2.0 port for local control. Additional USB ports can be used for U-Disk backup.
- Audio Input/Output: Connect audio devices to the A1/A2 audio input and A-OUT audio output ports if required.
- Power Connection: Connect the provided power supply adapter to the DVR's DC 12V power input.

Image: Top and rear views of the Xenocam 16CH Hybrid DVR. The top view shows the front panel controls and indicators. The rear view displays all connectivity ports, including 16 BNC video inputs, HDMI, VGA, Ethernet, USB, audio inputs/outputs, and power input.

Image: Detailed rear panel view of the Xenocam 16CH DVR. This image highlights the arrangement and labeling of all input/output ports, including the 16 BNC video inputs (V1-V16), HDMI, VGA, Ethernet, USB, audio ports (A1, A2, A-OUT), and RS485 for PTZ control.
3. Power On
Once all connections are secure, plug the power supply adapter into an electrical outlet. The DVR will power on automatically.
Operating Instructions
Local Operation
- Live View: Upon startup, the DVR will display the live feed from connected cameras on the connected monitor. Use the USB mouse to navigate the on-screen menu.
- Recording: If an HDD is installed, the DVR will begin recording based on its default settings (typically continuous recording). Recording status is indicated by the "REC" LED on the front panel.
- Playback: Access recorded footage through the DVR's main menu. You can search by date, time, and event (e.g., motion detection).
- Backup: Connect a U-Disk (USB flash drive) to a USB 2.0 port. Navigate to the backup option in the menu to export recorded video files.
Remote Access
Monitor your surveillance system remotely using dedicated applications:
- Mobile App: Download and install the "XMeye" app on your iPhone, iPad, or Android device. Follow the in-app instructions to add your DVR using its unique ID or QR code.
- Computer Software: Install the "CMS" application on your computer. This software allows for remote viewing and management of your DVR system.
- Web Browser: The DVR supports remote access via Internet Explorer (IE) browser. Enter the DVR's IP address in the browser to access the web interface.
Smart Features
- Motion Detection: Configure motion detection zones and sensitivity through the DVR's menu. When motion is detected, the DVR can trigger recording and send email alarms.
- Email Alarm: Set up email notifications to receive alerts when specific events, such as motion detection, occur.
Maintenance
- Hard Disk Drive Management: Regularly check the status of your HDD through the DVR's menu. If the HDD becomes full, the DVR will typically overwrite the oldest footage. Consider formatting the HDD periodically if you wish to erase all data.
- Cleaning: Keep the DVR unit clean and free from dust to ensure proper ventilation and prevent overheating. Use a soft, dry cloth for cleaning. Do not use liquid cleaners.
- Firmware Updates: Periodically check the manufacturer's website for available firmware updates. Firmware updates can improve system performance, add new features, or resolve known issues. Follow the provided instructions carefully when performing updates.
Troubleshooting
This section addresses common issues you might encounter. For more complex problems, please refer to the support section.
| Problem | Possible Cause | Solution |
|---|---|---|
| No video display on monitor. | Incorrect cable connection (HDMI/VGA), monitor input not selected, DVR not powered on. | Ensure HDMI/VGA cable is securely connected. Select correct input source on monitor. Verify DVR power adapter is connected and unit is on. |
| No recording. | No HDD installed, HDD full, HDD not initialized/formatted, recording schedule not set. | Install a compatible HDD (max 4TB). Check HDD status in DVR menu; format if necessary. Verify recording settings. |
| Cannot access DVR remotely. | Network cable disconnected, incorrect network settings, router firewall blocking access, app/software not configured correctly. | Ensure Ethernet cable is connected to DVR and router. Check DVR's network settings (IP address, gateway, DNS). Configure port forwarding on your router if necessary. Verify app/software settings. |
| Motion detection not working. | Motion detection not enabled, sensitivity too low, detection area not set. | Enable motion detection in DVR settings. Adjust sensitivity and define detection zones. |
Specifications
| Feature | Detail |
|---|---|
| Model | XENOCAM-SOMETHING |
| Channels | 16 Channels |
| Video Input | 16 x BNC (5-in-1 Hybrid: 1080N AHD, 960H Analog, TVI, CVI, 1080P NVR) |
| Video Resolution | 1080N (Analog/AHD), 1080P (NVR) |
| Video Output | HDMI, VGA |
| Audio Input/Output | Yes (A1/A2 In, A-OUT) |
| HDD Support | Max 4TB (HDD not included) |
| Connectivity | Wired (Ethernet, USB 2.0) |
| Remote Access | XMeye App (iOS/Android), CMS Software (PC), IE Browser |
| Special Features | Motion Detection, Email Alarm, Night Vision (camera dependent) |
| Power Source | Corded Electric (DC 12V) |
Warranty and Support
Your Xenocam 16CH 1080N Hybrid 5-in-1 AHD DVR comes with a 12-month warranty from the date of purchase.
If you encounter any issues or have questions regarding the installation, operation, or maintenance of your DVR, please contact Xenocam customer support. Refer to the contact information provided on the product packaging or the official Xenocam website for assistance.
Ask a question about this manual
Ask about setup, troubleshooting, compatibility, parts, safety, or missing instructions. Manuals+ will review the question and use this page’s manual context to help answer it.