Introduction
Thank you for choosing the Sweetcrispy 3-Drawer Vertical File Cabinet. This versatile storage solution is designed to organize your office machinery, papers, files, and supplies efficiently. Its mobile design and adjustable features make it suitable for various spaces, including home offices, living rooms, kids' rooms, and small bedrooms. This manual provides detailed instructions for assembly, operation, maintenance, and troubleshooting to ensure you get the most out of your new cabinet.
Product Features
- Multifunction Design: This stylish cabinet offers open storage spaces and file drawers, perfect for organizing office equipment, documents, and supplies. It can function as a printer stand, a storage unit in a living room, or a compact organizer in an entryway or kids' room.
- Large Capacity: Features a sturdy wooden top for printers or scanners, open shelves for flexible storage, and three drawers. The two smaller top drawers are ideal for small items, while the bottom drawer provides ample space for large-sized folders with full extension slides, adjustable to fit various file sizes.
- Convenient Operation: Equipped with steel ball-bearing full-extension drawer slides for quiet and smooth operation. Recessed handles ensure easy and safe drawer opening.
- Durable Construction: Constructed from 0.63-inch thick MDF board, supporting up to 150 lbs. The premium finish is resistant to water and scratches. Five heavy-duty casters (two lockable) allow for easy movement and rearrangement without damaging floors.
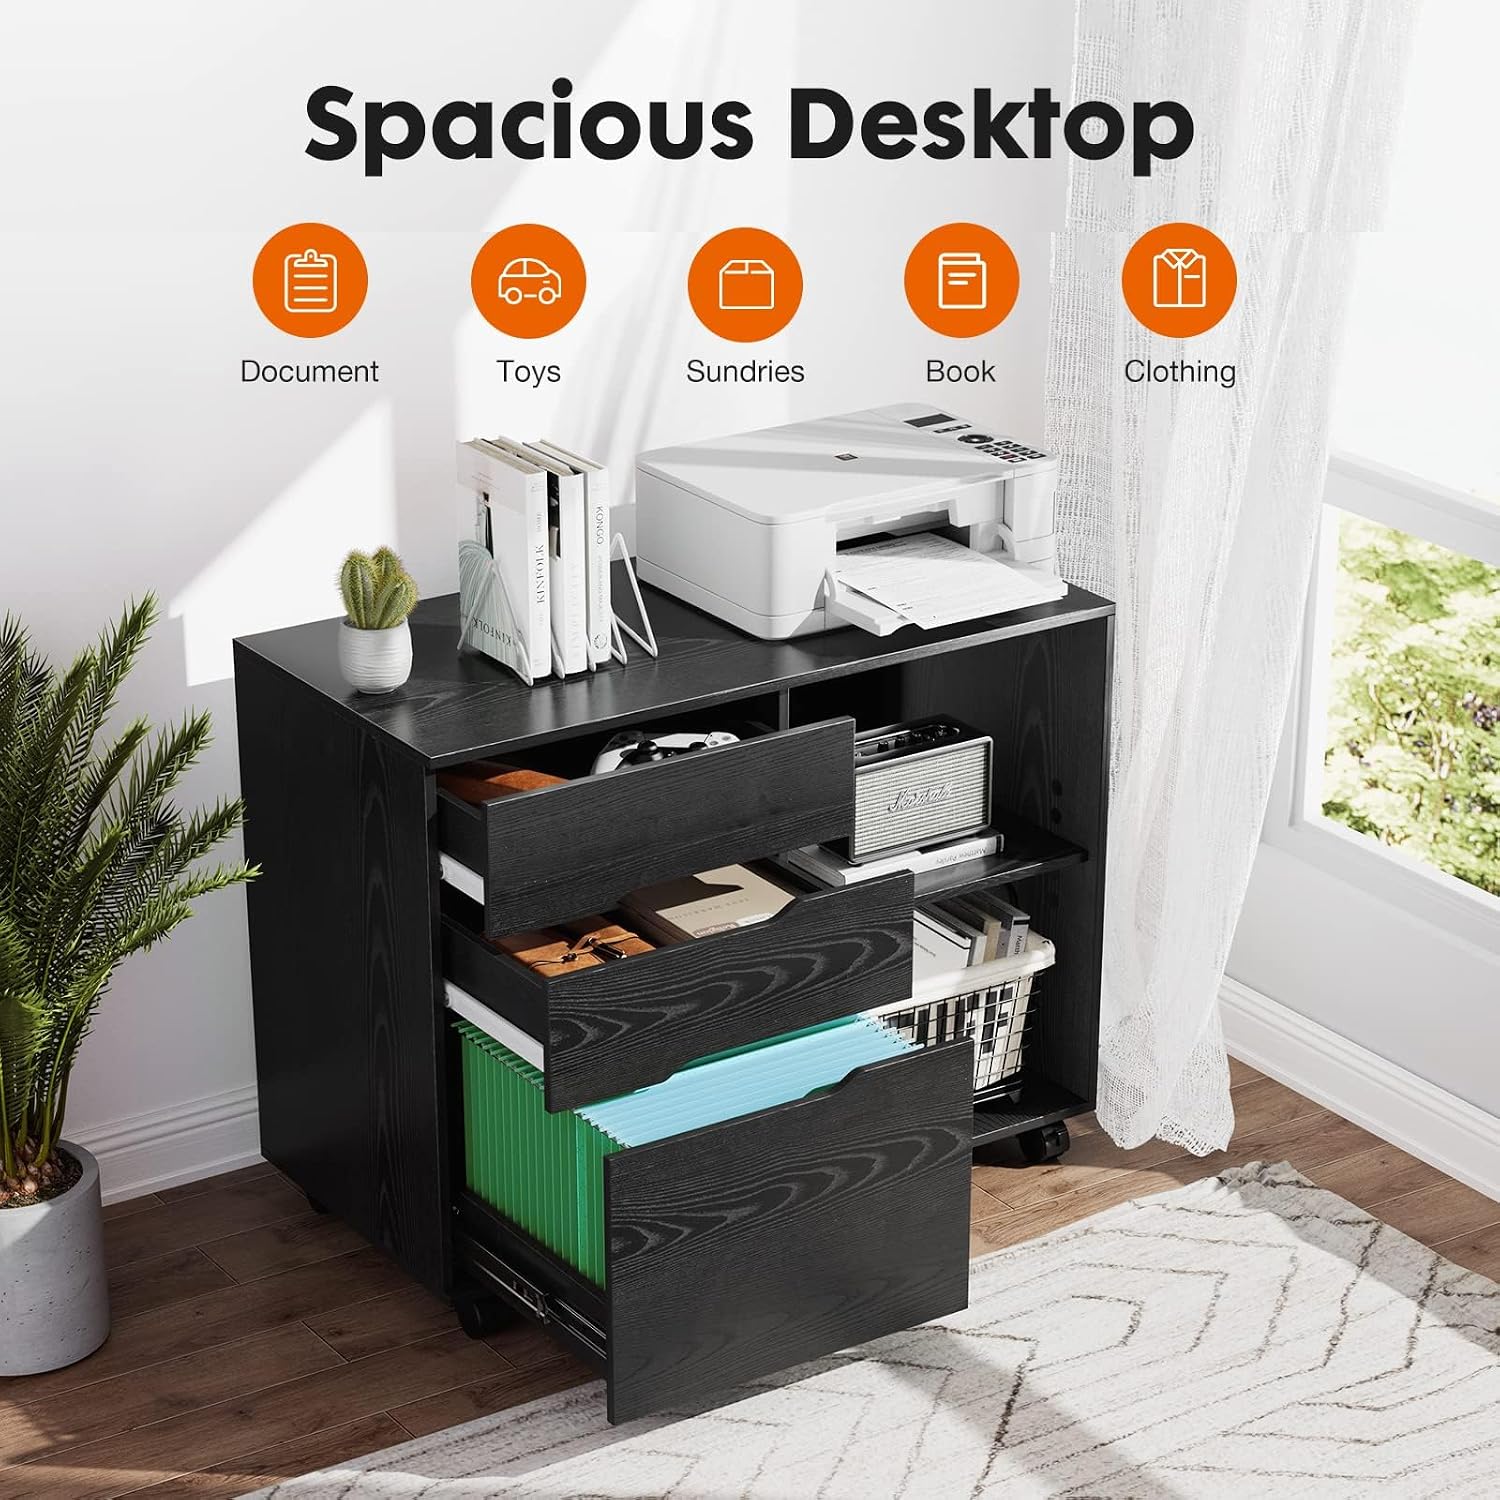
Image: The cabinet's spacious desktop can hold a printer and other items, while drawers and open shelves provide versatile storage for documents, toys, sundries, books, and clothing.

Image: The bottom drawer features full extension slides and adjustable hanging rails, accommodating A4 and Letter size files for easy access.

Image: The cabinet is equipped with swivel casters for easy movement and lockable casters to secure its position, allowing for flexible office area rearrangement.

Image: Key design elements include dual cable management holes for tidy wiring, an adjustable shelf for customized storage, recessed handles for a sleek look, and smooth drawer slides for quiet operation.

Image: The cabinet's wooden board construction is water-proof, wear-resistant, heat-resistant, and designed for safety and reliability.
Specifications
| Color | Black Wood |
| Material | Engineered Wood |
| Brand | Sweetcrispy |
| Product Dimensions | 31.34"D x 15.75"W x 24.41"H |
| UPC | 729767844442 |
| Model Number | A12A-3CHBK |
| Included Components | 3 Drawers, Wheel |
| Item Weight | 49.4 Pounds |
| Number of Drawers | 3 |
| Required Assembly | Yes |
Setup and Assembly
For a smooth assembly process, please follow the steps outlined below. It is recommended to use a powered screwdriver for faster installation. Ensure all parts are present before beginning.
Video: Detailed installation guide for the Sweetcrispy 3-Drawer File Cabinet. This video demonstrates each step of the assembly process, from attaching dowels and slide rails to installing casters and drawers.
Assembly Steps:
- Step 1: Prepare Base Board (Board 5)
Fix Dowel (A)*6 to Board (5). Attach Wooden Dowel (B)*4 to Board (4) as shown. - Step 2: Attach Slide Rails to Side Boards (Boards 2 & 3)
Attach Wooden Dowel (B)*8 to Boards (2 & 3). Attach Slide Rail (CL)*2 to Board (2), and Slide Rail (CR)*2 to Board (3) with Screws (G)*8. - Step 3: Separate Slide Rail (E)
As shown, press Slide Rail (E) in the indicated direction to separate it into the E1 and E2 parts. Grip the E1 part while sliding the E2 part. - Step 4: Install Slide Rail (E1) to Side Boards
Locate the holes from the back of Slide Rail (E1). Then install Slide Rail (E1)*2 to Boards (2 & 3) with Screws (G)*4. - Step 5: Attach Side Boards to Base Board
Fix Dowel (A)*6 to Board (5). According to the Board position as shown, attach Boards (4, 3 & 2) to Board (5) with Eccentric Wheel (C)*6. - Step 6: Install Wire Holes and Back Board (Board 14)
Attach Wire Hole (O)*2 completely to Board (14). Insert Boards (14 & 6) into the grooves of Boards (2, 3 & 4). - Step 7: Attach Top Board (Board 1)
Attach Board (1) to Boards (2, 3 & 4) with Eccentric Wheel (C)*6. - Step 8: Attach Casters
Attach Lockable Casters (I)*2 to the front side of Board (1) and 360° Swivel Casters (H)*3 to its back side with Screws (G)*16. - Step 9: Prepare Drawer Side Boards (Board 11)
Fix Dowel (A)*4 to Boards (11). - Step 10: Assemble Drawer Frame (Board 8 & 11)
Fix Board (9)*2 to both sides of Board (8) with Screws (P)*4 and slide Board (10) into the installed Board groove. Then fix Board (9)*2 to both sides of Board (11) with Eccentric Wheel (C)*4. - Step 11: Attach Slide Rails to Drawer Frame (Board 9)
Turn the installed Drawer over. Attach Slide Rails (DL & DR)*2 on each side of the drawer with Screws (G)*4. - Step 12: Assemble Second Drawer Frame (Board 8 & 12)
Fix Dowel (A)*8 to Boards (8 & 12). Fix Board (9)*2 to both sides of Board (8) with Eccentric Wheel (C)*4, and slide Board (10) into the installed Board groove. Then fix Board (9)*2 to both sides of Board (12) with Eccentric Wheel (C)*4. - Step 13: Attach Slide Rails to Second Drawer Frame (Board 9)
Turn the installed Drawer over. Attach Slide Rails (DL & DR)*2 on each side of the drawer with Screws (G)*4. - Step 14: Assemble Third Drawer Frame (Board 15 & 16)
Fix Dowel (A)*8 to Boards (15 & 16). Fix Board (13)*2 to both sides of Board (16) with Eccentric Wheel (C)*4, and slide Board (10) into the installed Board groove. - Step 15: Insert Rods and Fix Board (15)
Insert the Rod (F)*2 into the hole of the Boards (15 & 16) to secure them. Fix Board (13)*2 to both sides of the Board (15) with Eccentric Wheel (C)*4. As shown in Fig. (1) installation method, the A4 Size file can be hung after installation. As shown in Fig. (2) installation method, the Letter Size file can be hung after installation. - Step 16: Fix Board (15)
Fix Board (13)*2 to both sides of the Board (15) with Eccentric Wheel (C)*4. - Step 17: Attach Slide Rails to Third Drawer Frame (Board 13)
Attach Slide Rail (E2)*2 to Board (13)*2 on both sides of the Drawer with Screws (G)*4. - Step 18: Install Drawers into Cabinet
Please full extend the Slide Rail (E1)*2. Simply push the Ball Bearing cart all the way to the end of the slide. - Step 19: Align and Insert Drawers
Align the Slide Rail on the Drawer with the unit and push it carefully inside until it stops. - Step 20: Install Shelf Pins
Attach Shelf Pin (K)*4 to the Boards (3 & 4). - Step 21: Insert Adjustable Shelf (Board 7)
Put the Board (7) into it, make the groove on Board (7) match with the Shelf Pin (K). - Step 22: Cover Exposed Screws
Using Cover-up Sticker (J)*28 to cover the exposed part of Screws. - Step 23: Secure Back Panel
As shown, fix Buckle (L)*8 on the back of the installed Mobile Lateral Filing Cabinet with Screws (M)*8.
Operating Instructions
- Drawers: Pull the recessed handles to open the drawers. The full-extension slides ensure smooth and quiet operation. For the bottom file drawer, adjust the hanging rails to fit A4 or Letter size files as needed.
- Adjustable Shelf: The shelf in the open storage area can be adjusted to different heights by repositioning the shelf pins (K) in the pre-drilled holes.
- Casters: The cabinet is equipped with 360° swivel casters for easy mobility. To secure the cabinet in place, engage the locks on the two lockable casters located at the front. To move, unlock these casters.
- Cable Management: Utilize the dual cable management holes on the back panel to route power cords and cables neatly, keeping your workspace organized.
Maintenance
- Cleaning: Wipe the cabinet surfaces with a soft, damp cloth. Avoid using harsh chemicals or abrasive cleaners, which can damage the finish.
- Spills: Promptly clean up any spills to prevent water damage to the MDF board.
- Hardware: Periodically check all screws and eccentric wheels to ensure they are tight. Re-tighten if necessary to maintain stability.
- Drawer Slides: If drawers become stiff, apply a small amount of silicone-based lubricant to the slide rails.
- Casters: Keep casters free of dust and debris to ensure smooth movement.
Troubleshooting
- Cabinet is Wobbly: Ensure all eccentric wheels and screws are fully tightened. Check that the cabinet is on a level surface.
- Drawers Not Sliding Smoothly: Verify that the drawer slides (E1 and E2 parts) are correctly installed and aligned. Check for any obstructions in the slide mechanism.
- Casters Not Rolling: Ensure the lockable casters are in the unlocked position. Check for any hair or debris caught in the wheels and clean if necessary.
- Parts Missing or Damaged: Refer to the Warranty & Support section for assistance.
Warranty & Support
The package includes all necessary hardware, accessories, installation tools, and this manual. For any assistance or if you encounter issues, our service team offers 24-hour support. Please contact us via Amazon by navigating to [Your Account] > [Your Orders] > [Contact Seller].