1. Introduction
This manual provides essential information for the proper setup, operation, and maintenance of your Allone Super Mini Controller. Please read this manual thoroughly before use to ensure optimal performance and longevity of the product.
The Allone Super Mini Controller is a compact, wireless gamepad designed for use with various devices, including Nintendo Switch, Switch Lite, Switch OLED, PCs, tablets, and smartphones. Its palm-sized design and retro button layout offer a unique gaming experience.
2. Package Contents
- Allone Super Mini Controller Unit
- Wrist Strap
- Instruction Manual (includes Warranty Information)
- Type-C Charging/Communication Cable

Image: The mint-colored Allone Super Mini Controller with its attached wrist strap.
3. Specifications
| Model Number | ALGA-NSWCSMMT |
| Brand | Allone |
| Controller Type | Gamepad |
| Connectivity | Wireless (Bluetooth), Wired (USB Type-C) |
| Compatible Devices | Nintendo Switch, Switch Lite, Switch OLED, PC, Tablets, Smartphones (iOS 16.5.1+, Android 13+) |
| Battery Capacity | 130mAh |
| Charging Time | Approx. 2 hours |
| Continuous Use Time | Approx. 8 hours |
| Main Material | ABS |
| Product Dimensions | 7.2 x 0.8 x 3.5 cm (approximate) |
| Product Weight | 80 g (approximate) |
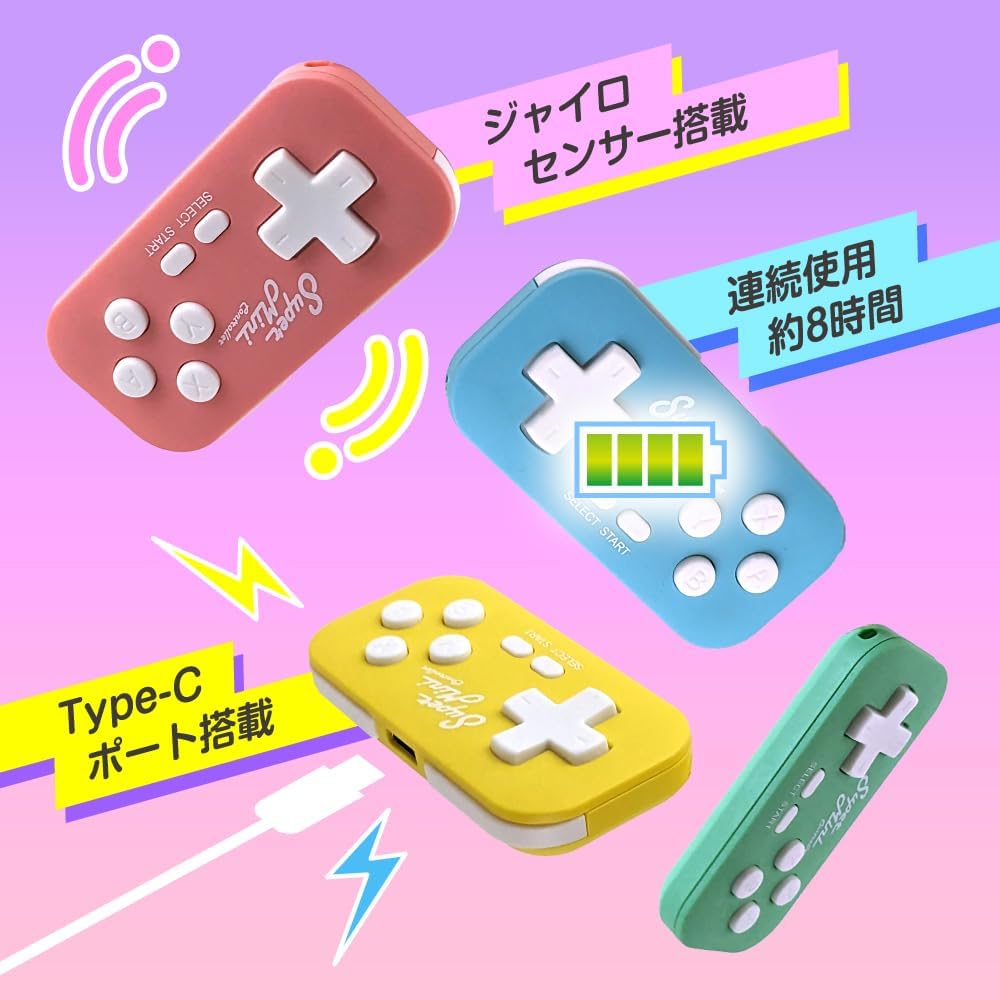
Image: The controller features a gyro sensor, approximately 8 hours of continuous use, and a Type-C charging port.
4. Setup
4.1 Charging the Controller
- Connect the supplied Type-C cable to the charging port on the controller.
- Connect the other end of the cable to a USB power source (e.g., computer USB port, USB wall adapter).
- The controller's indicator light will show charging status. A full charge typically takes approximately 2 hours.
- Once fully charged, the controller provides approximately 8 hours of continuous use.
4.2 Bluetooth Pairing
To connect the controller wirelessly via Bluetooth, follow the instructions specific to your device:
- For Nintendo Switch: Press and hold the B + START buttons simultaneously until the indicator light flashes, then follow the pairing instructions on your Switch console.
- For iOS Devices (iPhone/iPad): Press and hold the X + START buttons simultaneously until the indicator light flashes, then select the controller from your device's Bluetooth settings. (Verified with iOS 16.5.1 and above)
- For Android Devices: Press and hold the Y + START buttons simultaneously until the indicator light flashes, then select the controller from your device's Bluetooth settings. (Verified with Android 13 and above)
- For PC/Keyboard Mode: Press and hold the R + START buttons simultaneously until the indicator light flashes, then select the controller from your PC's Bluetooth settings.
4.3 Wired Connection
For PC and Android devices, the controller can also be connected directly using the supplied Type-C USB cable. Simply plug the cable into the controller and your device. The device should recognize the controller as a direct input device.
5. Operating Instructions
5.1 Basic Controls
The controller features a classic button layout:
- D-Pad: Directional input (Up, Down, Left, Right).
- A, B, X, Y Buttons: Action buttons.
- SELECT Button: Typically used for menu selection or specific game functions.
- START Button: Typically used to pause games or confirm selections.
Note: This controller features a retro button count and does not include ZL/ZR shoulder buttons. It is ideal for games that do not require these specific inputs or for users seeking a nostalgic gaming experience.
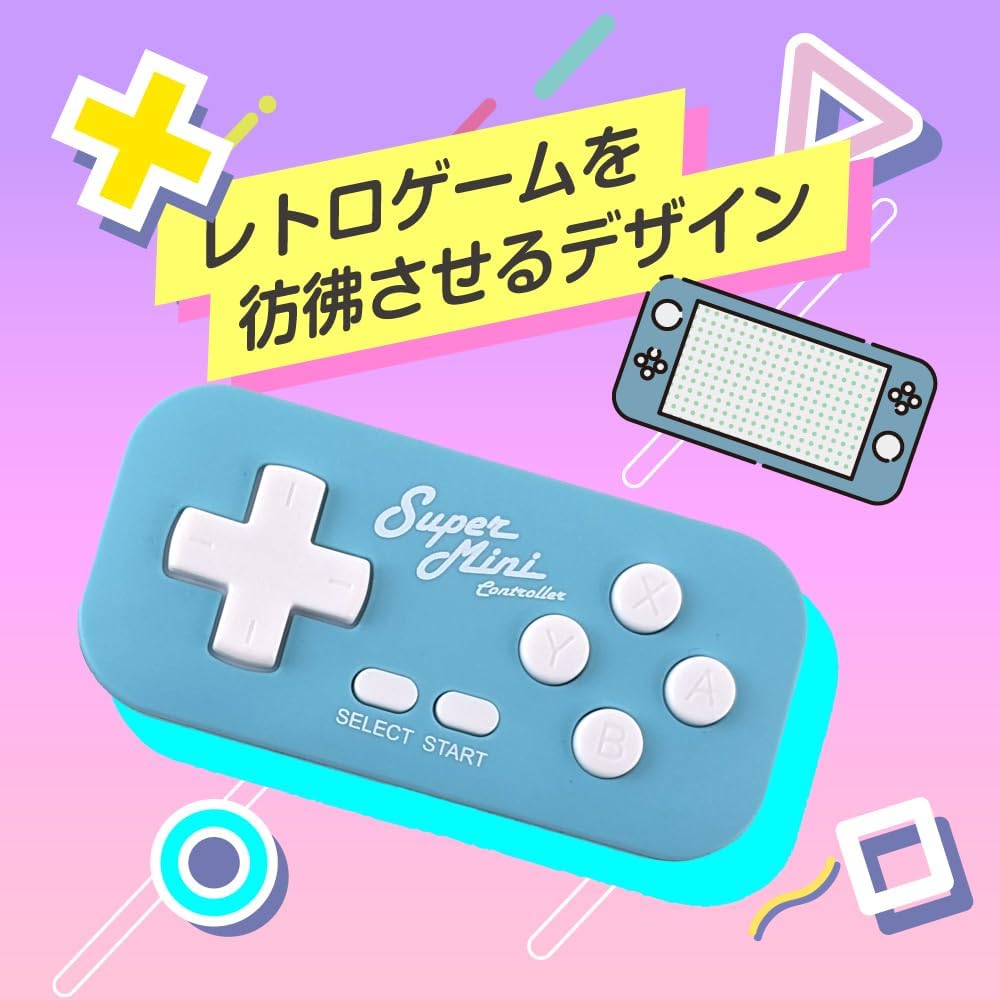
Image: The light blue controller showcasing its retro-inspired design.
5.2 Left-Hand Device Functionality
The controller can be utilized as a left-hand device, offering shortcut key functionality for applications on PCs, tablets, and smartphones. This allows for convenient one-handed operation for specific tasks or creative applications.

Image: The pink controller being used as a left-hand device for various application shortcuts on a tablet.
5.3 Gyro Sensor
The controller is equipped with a gyro sensor, which may provide motion control capabilities in compatible games or applications. Refer to your game or application's settings to enable and configure motion controls.
6. Maintenance
- Cleaning: Use a soft, dry cloth to clean the controller. Do not use abrasive cleaners or solvents.
- Storage: Store the controller in a cool, dry place away from direct sunlight and extreme temperatures.
- Battery Care: To prolong battery life, avoid fully discharging the battery frequently. Charge the controller regularly, even if not in use for extended periods.
7. Troubleshooting
7.1 Connectivity Issues
- Controller not pairing: Ensure the controller is in the correct pairing mode for your device (refer to Section 4.2). Make sure Bluetooth is enabled on your device and the controller is sufficiently charged.
- Interference: Bluetooth devices operate on the 2.4 GHz frequency band, which can sometimes interfere with Wi-Fi signals on the same band. If you experience connection drops or slow network speeds while using the controller, try moving closer to your Wi-Fi router or switching your Wi-Fi network to a 5 GHz band if available.
- Unstable connection: Try re-pairing the controller with your device. Ensure no other Bluetooth devices are causing interference.
7.2 Button/Input Issues
- Buttons not responding: Ensure the controller is properly connected. Try restarting the controller and your device.
- Incorrect input in PC/Keyboard mode: When connected to PC in keyboard mode, the button mapping may be non-standard. Common mappings observed are: D-Pad Up=c, Down=d, Left=e, Right=f; SELECT=n, START=o; A=g, B=j, X=h, Y=i; R=m, L=k. You may need to remap these in your application settings.
7.3 Charging Issues
- Controller not charging: Verify that the Type-C cable is securely connected to both the controller and the power source. Try using a different USB port or power adapter.
8. Warranty and Support
This product includes a warranty. Please refer to the warranty information provided within this instruction manual for details on coverage and duration.
Allone conducts thorough product inspections before shipment to ensure customer satisfaction. Should you encounter any issues or defects with your product, please contact our dedicated support center for assistance. Our support team is committed to providing prompt and helpful service.
For support inquiries, please visit the official Allone website or refer to the contact information provided in the warranty section of this manual.