1. Introduction
This manual provides detailed instructions for the assembly, operation, and maintenance of your TABKER MD4090 Metal Detector. Designed for treasure hunting, gold/mineral prospecting, and general metal detection, the MD4090 features a digital display, waterproof search coil, and high accuracy. Please read this manual thoroughly before using the device to ensure proper function and safety.
2. Safety Information
- Always obtain permission before searching on private property.
- Avoid areas where underground utilities (cables, pipes) may be present. Contact local authorities if unsure.
- Exercise caution when digging to prevent injury or damage to property.
- Do not operate the metal detector in thunderstorms or severe weather conditions.
- Keep the control unit dry. The search coil is waterproof, but the control unit is not.
- Dispose of batteries responsibly according to local regulations.
3. Product Overview and Components
Familiarize yourself with the various parts of your MD4090 Metal Detector.

Figure 3.1: Main Components of the MD4090 Metal Detector
This image illustrates the primary parts of the metal detector, including the armrest for comfortable use, the handle for grip, the control unit housing the electronics and display, fixing screws for assembly, the adjustable lock nut for stem length, and the search coil for detecting metals.

Figure 3.2: Detailed Components and Power Supply
This image provides a closer look at the comfortable armrest, the anti-slip handle for secure grip, the lock nut for adjusting the detector's length, the search coil, and the battery compartment which requires two 9V 6F22 alkaline batteries (not included).
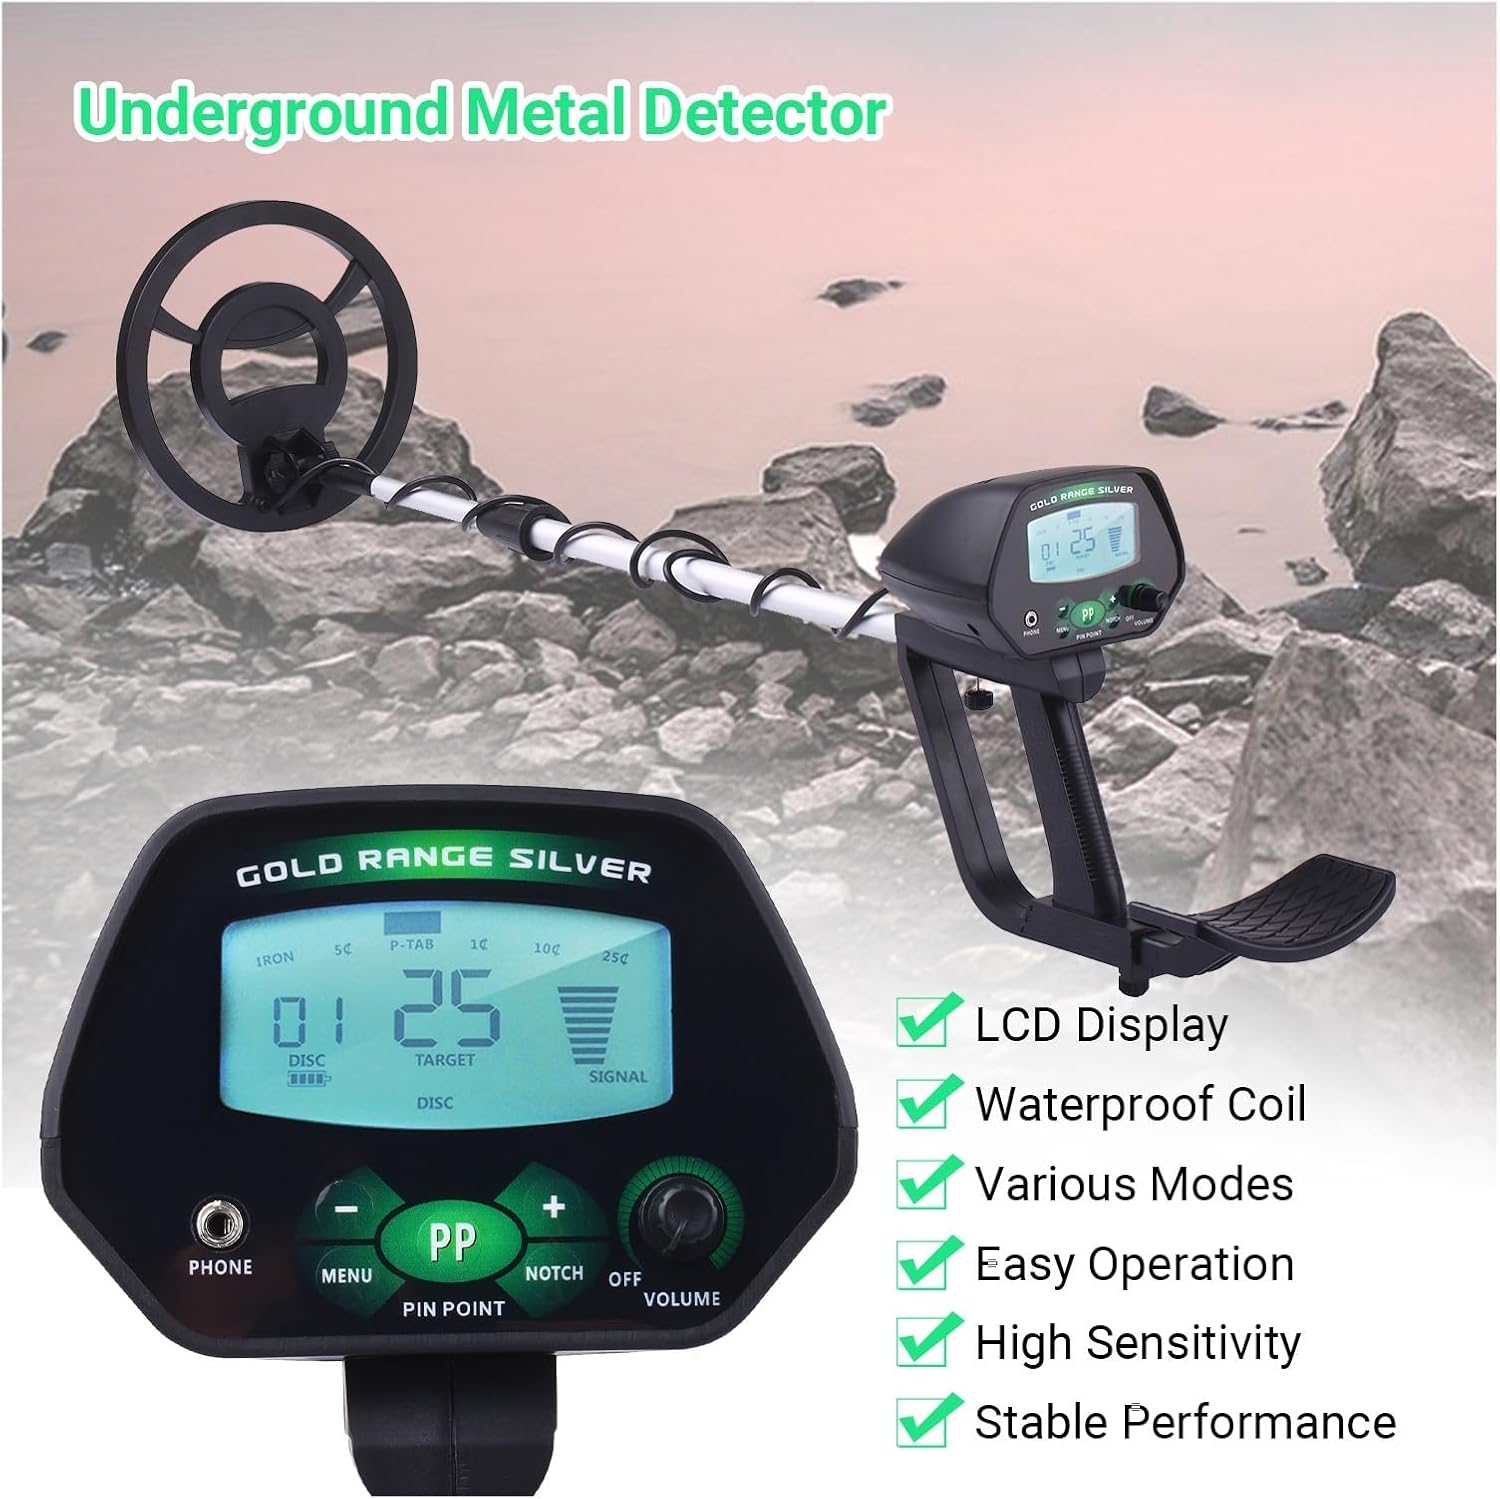
Figure 3.3: Control Panel Overview
This diagram details the control panel, highlighting the digital display with target indicators, discrimination/notch settings, sensitivity/signal strength, and battery level. It also shows the headphone jack, menu navigation buttons, pinpoint button, notch button, and the combined volume/power knob.
4. Assembly and Setup
Follow these steps to assemble your metal detector:
- Attach the Search Coil: Connect the search coil to the lower stem using the provided bolt and wing nut. Ensure it is securely fastened but not overtightened.
- Connect the Stems: Insert the lower stem into the middle stem, and then the middle stem into the upper stem. Adjust the length to a comfortable operating position and secure with the lock nuts.
- Mount the Control Unit: Slide the control unit onto the upper stem and secure it with the fixing screw.
- Wrap the Cable: Carefully wrap the search coil cable around the stem, ensuring it is not pinched or strained. Plug the coil connector into the corresponding port on the control unit.
- Install Batteries: Open the battery compartment on the control unit. Insert two 9V 6F22 alkaline batteries, observing the correct polarity. Close the compartment securely.
- Adjust Armrest: Position the armrest for comfortable use, ensuring your forearm rests naturally.
5. Operating Instructions
5.1 Power On/Off and Volume
- To power on the detector, rotate the Volume/Power Knob clockwise until you hear a click.
- Continue rotating the knob clockwise to increase the volume, and counter-clockwise to decrease it.
- To power off, rotate the knob counter-clockwise until it clicks off.
5.2 Basic Operation
- Hold the detector with the search coil parallel to the ground, approximately 1-2 inches above the surface.
- Sweep the search coil slowly from side to side in overlapping motions.
- When a target is detected, the detector will emit an audible tone, and the display will show target information.
5.3 Control Panel Functions
- MENU Button: Press to cycle through different settings options on the display (e.g., DISC, SENS).
- Increase (+) / Decrease (-) Buttons: Use these buttons to adjust the values of the selected setting.
- DISC (Discrimination): This function allows you to eliminate unwanted metal types from detection. Adjust the DISC level using the (+) and (-) buttons. Higher DISC values will ignore more ferrous (iron) targets. The display will show the DISC numeric indicator.
- NOTCH Button: Press the NOTCH button to select specific target categories (e.g., 5¢, 10¢, 25¢) to be ignored. Use the (+) and (-) buttons to toggle the notch on or off for each category. This is useful for filtering out specific trash items.
- SENS (Sensitivity): Adjust the sensitivity level to control the detection depth and stability. Higher sensitivity can detect deeper targets but may also increase false signals in mineralized ground. Adjust using the (+) and (-) buttons.
- P-P (PINPOINT) Button: Press and hold this button to activate pinpoint mode. This mode helps you precisely locate the center of a detected target by providing a continuous tone that peaks directly over the object.
- Headphone Jack: Connect standard 3.5mm headphones for private listening and to better hear subtle target signals, especially in noisy environments.
6. Maintenance
- Cleaning: Wipe the search coil and stem with a damp cloth after each use. Keep the control unit clean and dry. Do not use abrasive cleaners or solvents.
- Battery Care: Remove batteries if the detector will not be used for an extended period to prevent leakage and damage.
- Storage: Store the detector in a cool, dry place, away from direct sunlight and extreme temperatures.
- Cable Inspection: Periodically check the search coil cable for any signs of wear or damage.
7. Troubleshooting
| Problem | Possible Cause | Solution |
|---|---|---|
| No power | Dead or incorrectly installed batteries | Replace batteries with fresh 9V alkaline batteries. Check polarity. |
| False signals / Erratic behavior | High sensitivity, electromagnetic interference, mineralized ground, loose coil cable | Reduce SENS. Move away from power lines or other electronics. Re-tighten coil cable. |
| Poor detection depth | Low sensitivity, high discrimination, deeply buried target | Increase SENS. Reduce DISC level. Sweep slower and closer to the ground. |
| No audio from headphones | Headphones not plugged in correctly, faulty headphones | Ensure headphones are fully inserted. Test with another pair of headphones. |
8. Specifications

Figure 8.1: MD4090 Dimensions
This image provides key measurements for the MD4090, including the search coil diameter, control unit size, and the adjustable length of the detector's stem.
- Model: MD4090
- Brand: TABKER
- Power Source: 2 x 9V 6F22 Alkaline Batteries (not included)
- Search Coil: Waterproof
- Display: Digital LCD
- Operating Modes: Discrimination, Notch, Pinpoint
- Adjustable Length: Approximately 32.2 inches (82cm) to 42.1 inches (107cm)
- Search Coil Diameter: 8.66 inches (22cm)
- Recommended Uses: Gold/Mineral Prospecting, Metal Detection, Treasure Hunting
9. Warranty and Support
For warranty information or technical support regarding your TABKER MD4090 Metal Detector, please refer to the documentation provided at the time of purchase or contact your retailer. You may also visit the official TABKER website for further assistance.