Introduction
This user manual provides comprehensive instructions for the safe and efficient operation, maintenance, and troubleshooting of your Smeg 50's Style BCC12BLMUK Espresso Coffee Machine. Please read this manual thoroughly before first use and keep it for future reference.

Figure 1: Front view of the Smeg 50's Style BCC12BLMUK Espresso Coffee Machine.
Safety Information
Always observe the following safety precautions to reduce the risk of fire, electric shock, personal injury, or damage to the appliance.
- Ensure the appliance is connected to a grounded power outlet with the correct voltage (240 Volts).
- Do not immerse the appliance, power cord, or plug in water or other liquids.
- Keep hands and utensils away from moving parts during operation.
- Exercise caution when handling hot surfaces, steam, and hot liquids.
- Unplug the machine from the power outlet before cleaning and when not in use.
- Do not operate the appliance with a damaged cord or plug, or if it malfunctions or has been damaged in any manner.
- This appliance is for household use only.
Setup
1. Unpacking and Placement
Carefully remove all packaging materials. Place the coffee machine on a stable, flat, heat-resistant surface, away from water sources and heat. Ensure adequate ventilation around the appliance. Avoid placing it directly under kitchen cabinets due to steam release and access requirements for refilling the water tank.
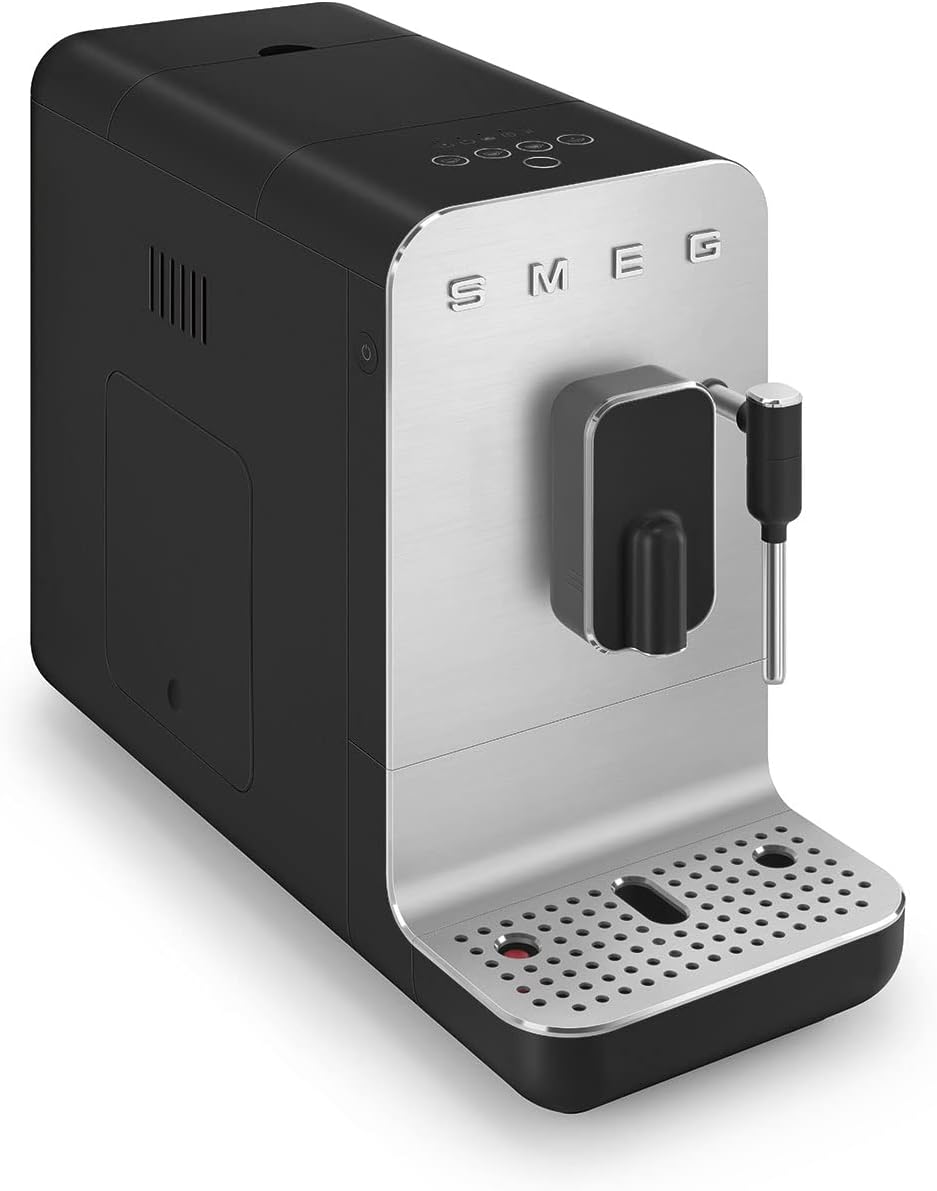
Figure 2: Side view of the coffee machine, illustrating its form factor.
2. Initial Cleaning
Before first use, clean the water tank, drip tray, and coffee grounds container with warm soapy water. Rinse thoroughly and dry all parts. Wipe the exterior of the machine with a damp cloth.
3. Filling the Water Tank
Locate the removable water tank, typically at the back or side of the machine. Fill it with fresh, cold drinking water up to the MAX line. Ensure the tank is securely seated in its position.

Figure 3: Rear view of the coffee machine, indicating the water tank location.
4. Adding Coffee Beans
Open the lid of the bean hopper located on top of the machine. Pour fresh, whole coffee beans into the hopper. Do not overfill. Close the lid securely to maintain bean freshness.

Figure 4: Coffee bean hopper with grind adjustment dial.
5. Power Connection
Plug the power cord into a suitable grounded electrical outlet. The machine will typically perform an initial self-check and warm-up cycle.
Operating Instructions
1. Control Panel Overview
The intuitive control panel features one-touch functions for various beverages and machine status indicators.
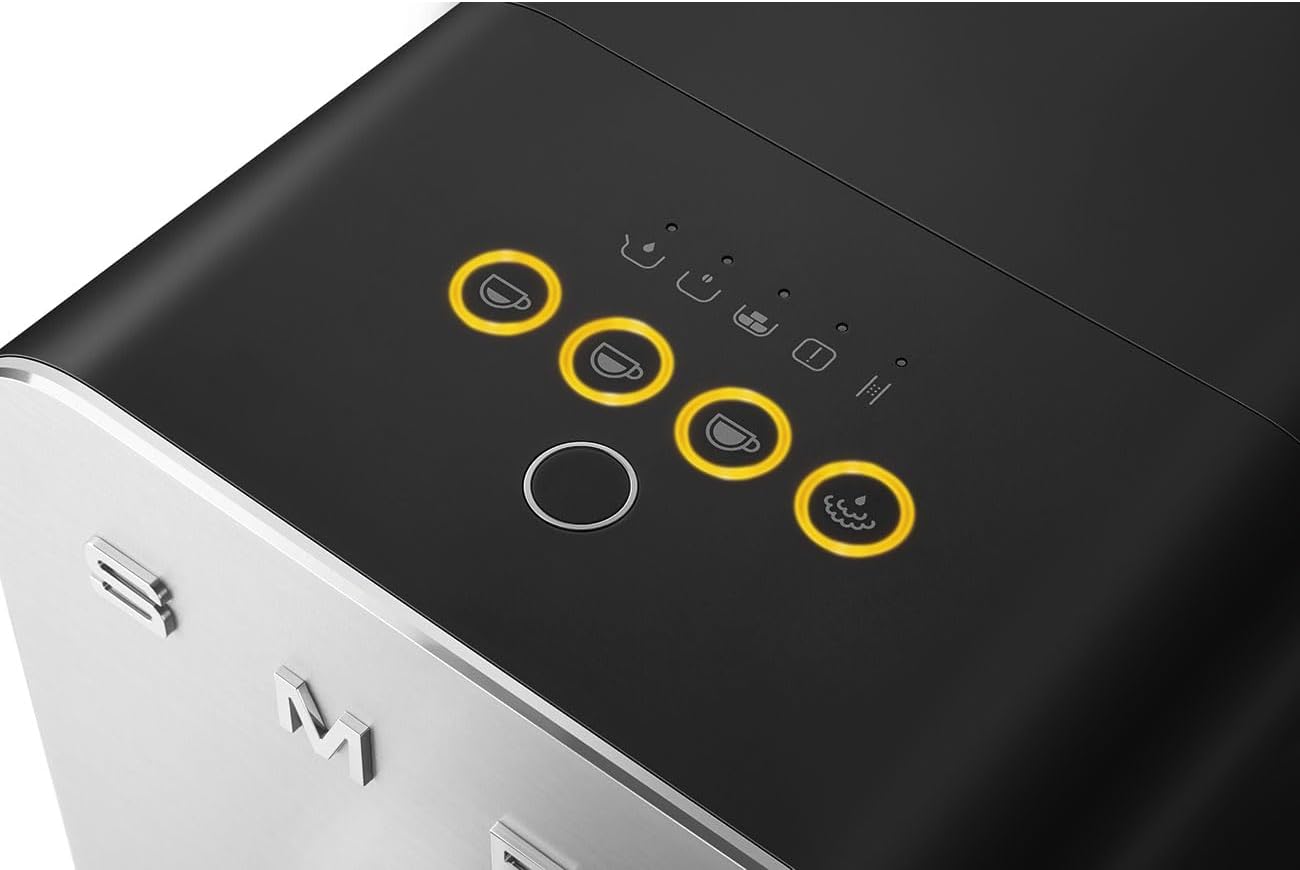
Figure 5: Illuminated control panel with beverage selection buttons.
2. Making Coffee
Place a cup under the coffee dispenser. Select your desired beverage (e.g., Espresso, Americano, Black Coffee) by pressing the corresponding button on the control panel. The machine will automatically grind the beans, brew, and dispense the coffee.

Figure 6: Coffee being dispensed into a cup.

Figure 7: Close-up of the coffee dispenser.
3. Using the Steam Wand for Milk Frothing
To prepare cappuccinos or latte macchiatos, use the integrated steam wand. Fill a pitcher with cold milk. Position the steam wand just below the surface of the milk. Activate the steam function via the control panel. Move the pitcher up and down to create desired froth. Turn off the steam function once done and wipe the wand immediately after use.

Figure 8: Steam wand in use for milk frothing.
4. Adjusting Grind Settings
The integrated coffee grinder allows for grind size adjustment. Refer to Figure 4 for the location of the grind adjustment dial within the bean hopper. Adjusting the grind size can impact coffee strength and extraction. Finer grinds are typically for espresso, while coarser grinds are for longer coffees.
Maintenance
1. Daily Cleaning
- Drip Tray and Coffee Grounds Container: Empty and clean these components daily to prevent mold and odors. Wash with warm soapy water and rinse thoroughly.
- Steam Wand: Immediately after each use, wipe the steam wand with a damp cloth to remove any milk residue. Purge a small amount of steam to clear the nozzle.
- Exterior: Wipe the exterior surfaces with a soft, damp cloth. Do not use abrasive cleaners or solvents.
2. Descaling
Regular descaling is crucial to maintain machine performance and longevity, especially in areas with hard water. The machine will typically indicate when descaling is required. Follow the instructions provided with your descaling solution, or refer to the full Smeg manual for the specific descaling procedure for this model.
3. General Care
Ensure the water tank is always filled with fresh water. Use quality coffee beans for optimal results. Do not leave water in the tank for extended periods if the machine is not in use.
Troubleshooting
| Problem | Possible Cause | Solution |
|---|---|---|
| No coffee dispensed | Water tank empty; coffee beans empty; machine not warmed up. | Fill water tank; add coffee beans; wait for machine to warm up. |
| Weak coffee | Grind too coarse; insufficient coffee dose; old beans. | Adjust grind to finer setting; ensure sufficient beans; use fresh beans. |
| Machine leaking | Water tank not seated correctly; drip tray full. | Reseat water tank; empty and clean drip tray. |
| Steam wand not producing steam | Wand clogged; machine not at steaming temperature. | Clean wand nozzle; wait for machine to reach steaming temperature. |
For more complex issues, please refer to the comprehensive troubleshooting guide in the full product manual or contact Smeg customer support.
Specifications
- Brand: Smeg
- Model Number: BCC02BLMUK (Note: Product title indicates BCC12BLMUK, but specifications list BCC02BLMUK. Please verify model number on your appliance.)
- Colour: Matte Black
- Product Dimensions: 25.9D x 48.9W x 43.9H cm (8.4 kg)
- Voltage: 240 Volts
- Special Features: Auto Shut-Off, Integrated Coffee Grinder
- Coffee Maker Type: Espresso Machine

Figure 9: Product dimensions.
Warranty and Support
This Smeg product comes with a 2-year guarantee. To activate your guarantee and for any warranty claims, please register your appliance directly with Smeg. Details for registration are typically provided in the packaging or on the official Smeg website.
For technical assistance, spare parts, or further support, please visit the official Smeg website or contact their customer service department. Always have your model number (BCC12BLMUK or BCC02BLMUK) and purchase details ready when contacting support.