
Important Safety Information
Please read all instructions carefully before assembly and use. Keep this manual for future reference.
- Ensure all parts are present and undamaged before beginning assembly.
- Assemble on a soft, clean surface to prevent scratches.
- Do not overtighten screws, as this may damage the material.
- Keep small parts away from children during assembly.
- Always use the product on a level surface to prevent tipping.
- Do not exceed the recommended weight capacity for shelves and drawers.
Package Contents
Verify that all components listed below are included in your package. If any parts are missing or damaged, please contact customer support.
- Sideboard Panels (Top, Bottom, Sides, Back)
- Drawer Components (Fronts, Sides, Backs, Bottoms)
- Cabinet Doors
- Shelves
- Legs and Support Structure
- Hardware Kit (Screws, dowels, cam locks, hinges, drawer slides, handles)
- Assembly Tools (e.g., Allen wrench - if included)
Note: A Phillips head screwdriver and a hammer (not included) may be required for assembly.
Setup: Assembly Instructions
Follow these steps carefully to assemble your 3d3s Sideboard. It is recommended to have two people for assembly.
- Prepare the Workspace: Clear a spacious area and lay out all components and hardware. Separate similar parts to avoid confusion.
- Assemble the Base Frame: Attach the side panels to the bottom panel using the provided cam locks and dowels. Ensure the grooves for the back panel are facing the correct direction.
- Install Drawer Slides: Secure the drawer slides to the interior side panels of the sideboard frame using the designated screws. Pay attention to the left and right slide orientation.
- Construct Drawers: Assemble each drawer by attaching the side panels to the front and back panels, then slide the drawer bottom into the grooves. Secure with screws. Attach drawer handles.
- Insert Drawers: Carefully slide the assembled drawers onto the installed drawer slides. Test for smooth operation.
- Attach Cabinet Hinges: Secure the hinges to the cabinet doors and then to the sideboard frame. Adjust hinges as needed for proper door alignment.
- Install Shelves: Place the adjustable shelves into the desired positions within the cabinet sections.
- Attach Back Panel: Slide the back panel into the grooves and secure it with small nails or screws provided.
- Mount Legs: Attach the metal legs to the underside of the sideboard using the provided screws. Ensure they are securely fastened.
- Final Inspection: Check all connections to ensure they are tight and secure. Gently move the sideboard to its final position.

Figure 1: Internal view of the 3d3s Sideboard with doors and drawers open, illustrating the storage compartments and shelves. This image helps visualize the placement of internal components during assembly.
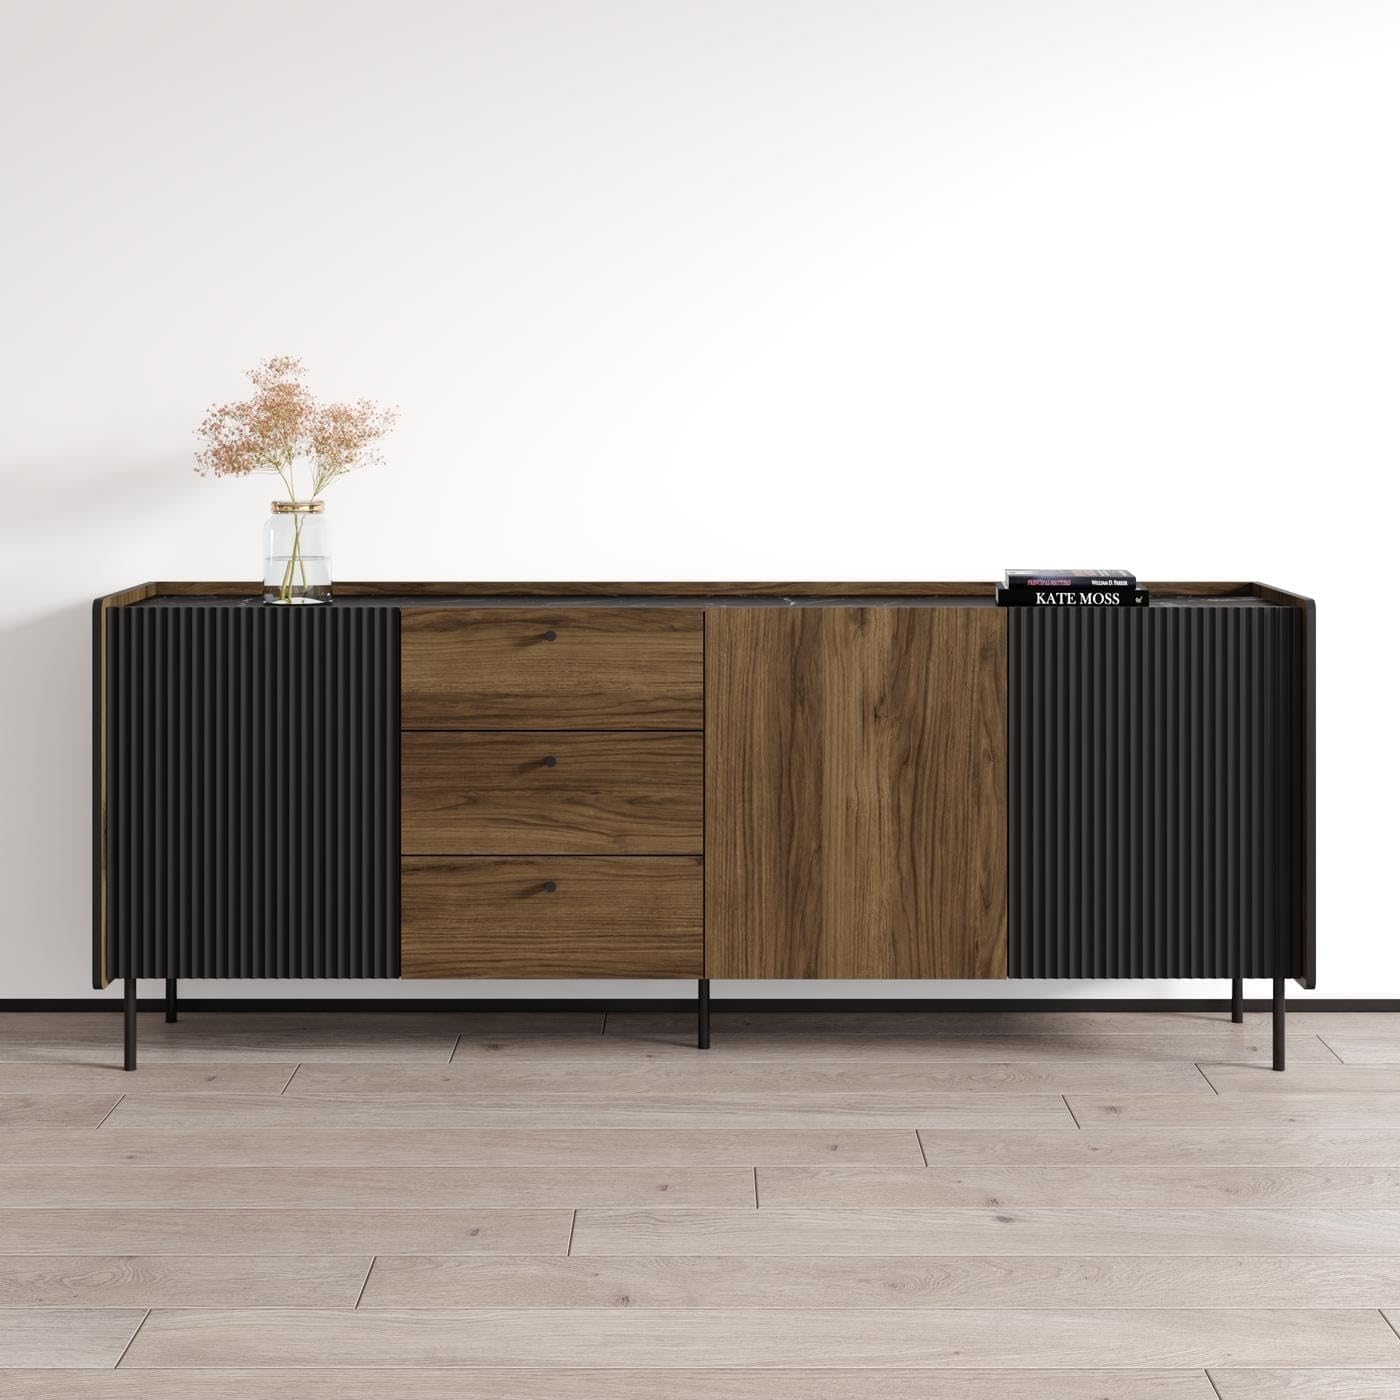
Figure 2: The fully assembled 3d3s Sideboard, showcasing its Mid-Century Modern design, brown finish, and black metal legs. This image represents the final appearance of the product after successful assembly.
Operating Instructions
The 3d3s Sideboard is designed for storage and display. Follow these guidelines for optimal use:
- Drawers: Pull drawers gently to open and push firmly to close. Avoid slamming to prevent damage to the slides.
- Cabinet Doors: Open and close cabinet doors smoothly. Do not force them if they feel stiff; check hinge alignment.
- Weight Distribution: Distribute weight evenly across shelves and within drawers. Avoid placing excessively heavy items on one side or in one compartment.
- Top Surface: The top surface can be used for display. Use coasters under drinks and protective pads under decorative items to prevent scratches or stains.
- Ventilation: Ensure adequate air circulation around the sideboard, especially if placing electronic devices inside.
Maintenance
Proper care will extend the life and appearance of your sideboard.
- Cleaning: Wipe surfaces with a soft, damp cloth. Avoid abrasive cleaners or harsh chemicals, as these can damage the matte finish.
- Spills: Clean spills immediately to prevent staining, especially on the MDF surfaces.
- Sunlight: Avoid prolonged exposure to direct sunlight, which can cause fading or discoloration.
- Humidity: Maintain a stable room temperature and humidity level to prevent warping or cracking of the wood material.
- Hardware Check: Periodically check all screws and fasteners to ensure they remain tight. Retighten if necessary.
Troubleshooting
| Problem | Possible Cause | Solution |
|---|---|---|
| Sideboard is wobbly. | Loose fasteners or uneven floor. | Ensure all screws are tightened. Adjust leveling feet (if present) or place shims under legs on an uneven floor. |
| Drawer does not close smoothly. | Misaligned drawer slides or obstruction. | Check that drawer slides are correctly installed and aligned. Remove any obstructions in the drawer path. |
| Cabinet door is crooked or does not close properly. | Misaligned hinges. | Adjust the screws on the hinges to align the door. Refer to hinge adjustment instructions if available. |
| Scratches on surface. | Sharp objects or abrasive cleaning. | Use furniture polish or repair kits for minor scratches. Always use soft cloths for cleaning. |
Specifications
| Model | 3d3s Sideboard |
| Brand | Generic1 |
| Material | MDF (Medium-Density Fiberboard) |
| Finish | Matte |
| Color | Brown |
| Dimensions (W x H x D) | 78.7 In. W X 30.9 In. H X 15.7 In. D |
| Assembly Required | Yes |
| Included Components | Shelves, Hardware |
Warranty and Support
For warranty information or technical support, please refer to the retailer's policy or contact the manufacturer directly. Keep your proof of purchase for any warranty claims.
For assistance with missing parts or assembly questions, please contact customer service at the point of purchase.