
1. Introduction
The Wagner Control Spray QX2 is a high-volume, low-pressure (HVLP) handheld stain sprayer designed for efficient application of light-bodied materials such as transparent, semi-transparent, and solid stains, as well as water-based lacquers. It is ideal for small to medium-sized projects including outdoor furniture, lattice, small fences, and decks. This sprayer provides a smooth, consistent finish, significantly reducing application time compared to traditional brushes or rollers.

Figure 1: Wagner Control Spray QX2 HVLP Handheld Stain Sprayer
2. Safety Information
Always prioritize safety when operating any power tool. Please observe the following precautions:
- Avoid contact with eyes.
- Use in a well-ventilated area to prevent inhalation of fumes.
- Do not spray towards face or eyes. Always wear appropriate personal protective equipment (PPE), including eye protection and a respirator.
- Keep out of reach of children.
- Ensure the work area is free from ignition sources when using flammable materials.
- Always disconnect the power supply before cleaning or performing maintenance.
3. Product Overview
The Control Spray QX2 features a lightweight handheld design for easy maneuverability and adjustable settings to achieve optimal results for various projects.

Figure 2: Detailed view of the Control Spray QX2
Key Features:
- HVLP Technology: Delivers a fine finish with minimal overspray.
- Adjustable Spray Patterns: Easily switch between horizontal, vertical, and round patterns.
- Material Flow Control: Dial allows precise adjustment of material output.
- Easy Clean-up: Designed with few removable parts for quick and simple cleaning.

Figure 3: Available Spray Patterns
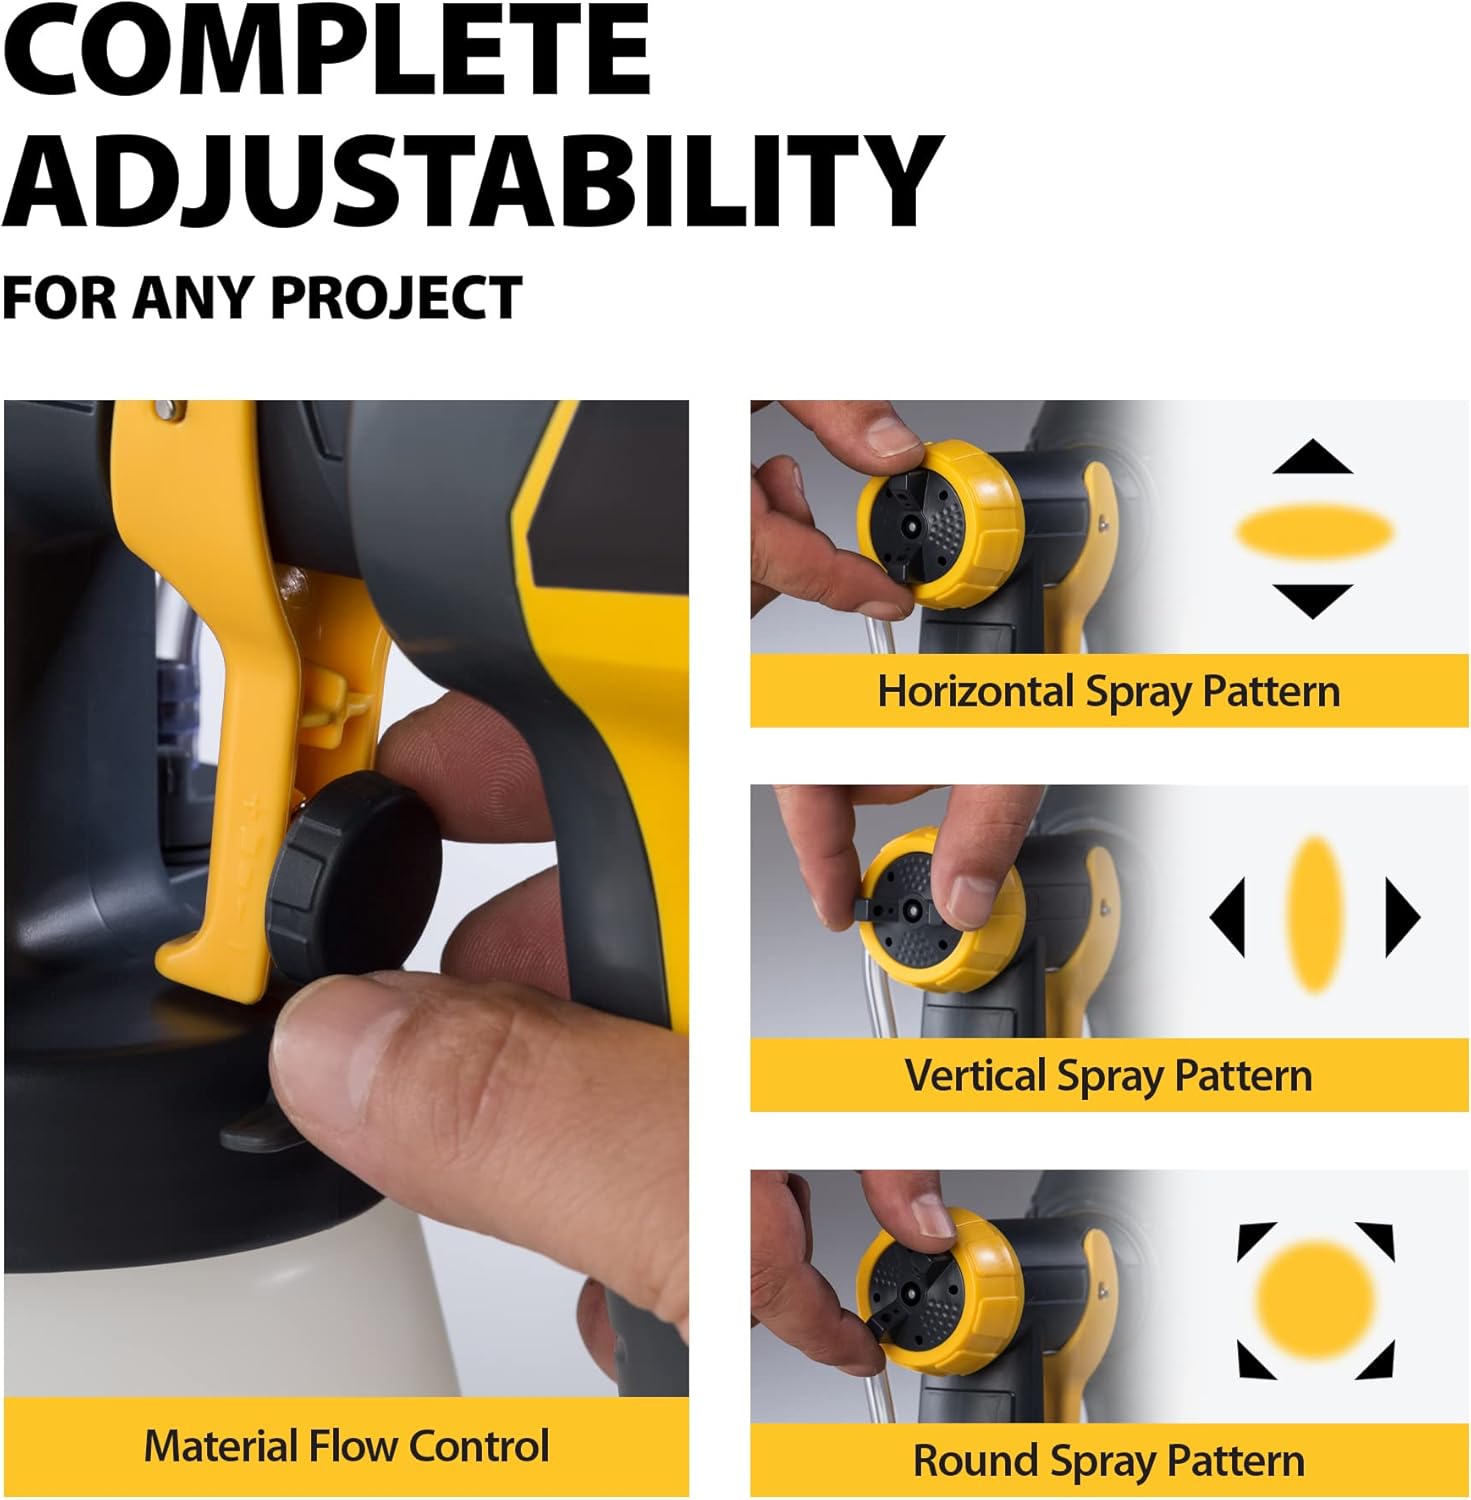
Figure 4: Material Flow and Spray Pattern Adjustments
4. Setup
Proper setup ensures optimal performance and a smooth finish.
4.1 Preparing the Material
- Ensure your staining material is suitable for HVLP sprayers. The Control Spray QX2 is designed for light-bodied materials.
- If necessary, thin your material according to the stain manufacturer's instructions. Use a viscosity cup (not included) to test the material's thickness.
- Strain the material through a paint filter to remove any particles that could clog the sprayer.
4.2 Filling the Material Cup
- Unscrew the material cup from the sprayer assembly by turning it counter-clockwise.
- Pour the prepared stain into the cup, ensuring not to overfill. Do not exceed the maximum fill line.
- Carefully reattach the material cup to the sprayer assembly, turning clockwise until secure.
4.3 Adjusting Spray Settings
- Spray Pattern: Rotate the air cap ears to select your desired spray pattern: horizontal for up-and-down movement, vertical for side-to-side movement, or diagonal for a narrow, circular pattern.
- Material Flow: Use the material flow dial located on the trigger to adjust the amount of material sprayed. Start with a lower setting and increase as needed.
For a visual guide on the sprayer's features and setup, watch this overview video:
Video 1: Wagner QX2 Stain Sprayer Overview (Source: Wagner Spray Tech Corp)
5. Operating Instructions
Follow these steps for effective and consistent application.
5.1 Preparing the Work Area
- Cover and mask any areas not intended for staining to protect them from overspray.
- Ensure the surface to be stained is clean, dry, and free of debris.
5.2 Spraying Technique
- Hold the sprayer approximately 6-8 inches (15-20 cm) from the surface.
- Begin moving the sprayer before pulling the trigger and release the trigger before stopping movement. This prevents uneven application.
- Apply material in smooth, even passes, overlapping each pass by about 50% to ensure full coverage.
- Maintain a consistent speed and distance from the surface for uniform results.

Figure 5: Applying stain to a wooden lattice

Figure 6: Staining a wooden deck surface
6. Maintenance and Cleaning
Thorough cleaning after each use is crucial for maintaining sprayer performance and longevity.
6.1 Immediate Cleaning
- Empty any remaining material from the cup back into its original container.
- Fill the cup with an appropriate cleaning solution (water for water-based materials, mineral spirits for oil-based materials).
- Spray the cleaning solution through the sprayer until it runs clear.
6.2 Detailed Cleaning
- Disassemble the front end of the sprayer, including the air cap, nozzle, and material tube.
- Clean all disassembled parts thoroughly with the appropriate cleaning solution and the provided cleaning brush. Pay close attention to the nozzle and air cap to remove any dried material.
- Rinse all parts with clean water and allow them to dry completely before reassembly.
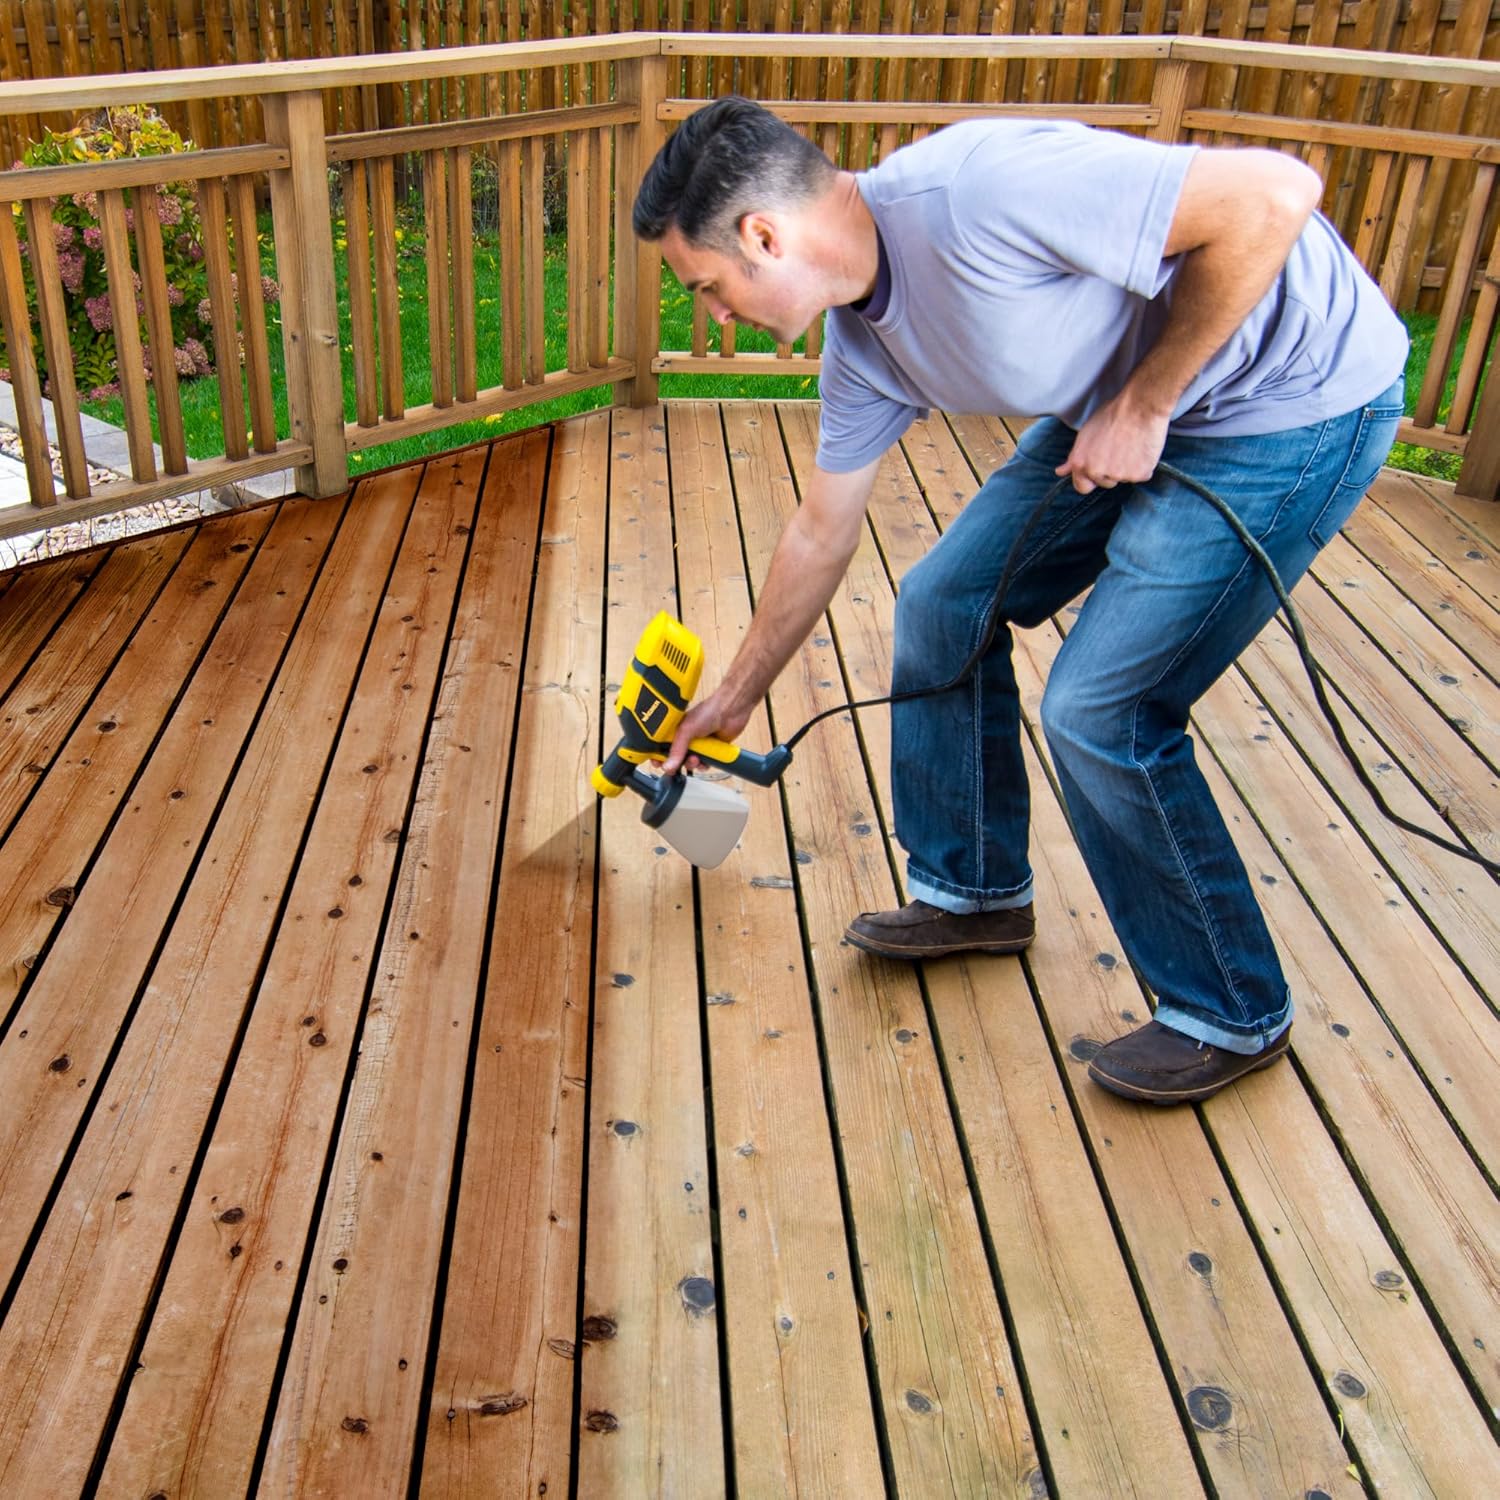
Figure 7: Disassembled parts ready for cleaning
7. Troubleshooting
If you encounter issues with your sprayer, refer to the following common problems and solutions:
| Problem | Possible Cause | Solution |
|---|---|---|
| No spray or weak spray | Clogged nozzle, material too thick, low material in cup, air cap not tight. | Clean nozzle, thin material, refill cup, tighten air cap. |
| Uneven spray pattern | Incorrect spray pattern setting, dirty air cap, inconsistent spraying technique. | Adjust air cap, clean air cap, practice consistent movement. |
| Material leaking | Loose material cup, damaged O-rings, worn seals. | Tighten cup, inspect and replace O-rings/seals if damaged. |
For more detailed troubleshooting, please refer to the comprehensive manual provided with your product or visit the Wagner support website.
8. Specifications
- Brand: Wagner
- Model Name: Control Spray
- Model Number: 2419326
- Item Type Name: HVLP Stain Sprayer
- Color: Yellow
- Material: Plastic
- Item Weight: 1.54 Kilograms
- Power Source: AC
- Included Components: Instruction Guide, Nozzle
- UPC: 024964298983
9. Warranty and Support
For warranty information, product registration, and additional support resources, please visit the official Wagner website or contact their customer service. You can also find helpful videos, tips, and project ideas on the Wagner Store on Amazon.


