JUKI SL-100
JUKI SL-100 Industrial Sewing Machine Instruction Manual
Model: SL-100 | Brand: JUKI
1. Introduction
Thank you for purchasing the JUKI SL-100 Industrial Sewing Machine. This manual provides essential information for the safe and efficient operation, maintenance, and troubleshooting of your new sewing machine. Please read this manual thoroughly before using the machine and keep it in a safe place for future reference.
2. Safety Instructions
Always follow these basic safety precautions to reduce the risk of fire, electric shock, or injury:
- Ensure the machine is unplugged before cleaning, servicing, or when not in use.
- Keep fingers away from all moving parts, especially the needle and handwheel.
- Use only accessories recommended by the manufacturer.
- Never operate the machine if it has a damaged cord or plug, or if it is not working properly.
- Do not allow children to operate the sewing machine unsupervised.
- Always use the correct needle type and size for your fabric and thread.
3. Product Overview
The JUKI SL-100 is a high-performance industrial sewing machine designed for durability and precision. It features a robust aluminum die-cast frame, ensuring low vibration and quiet operation, and is built with industrial-grade components for long-term reliability.
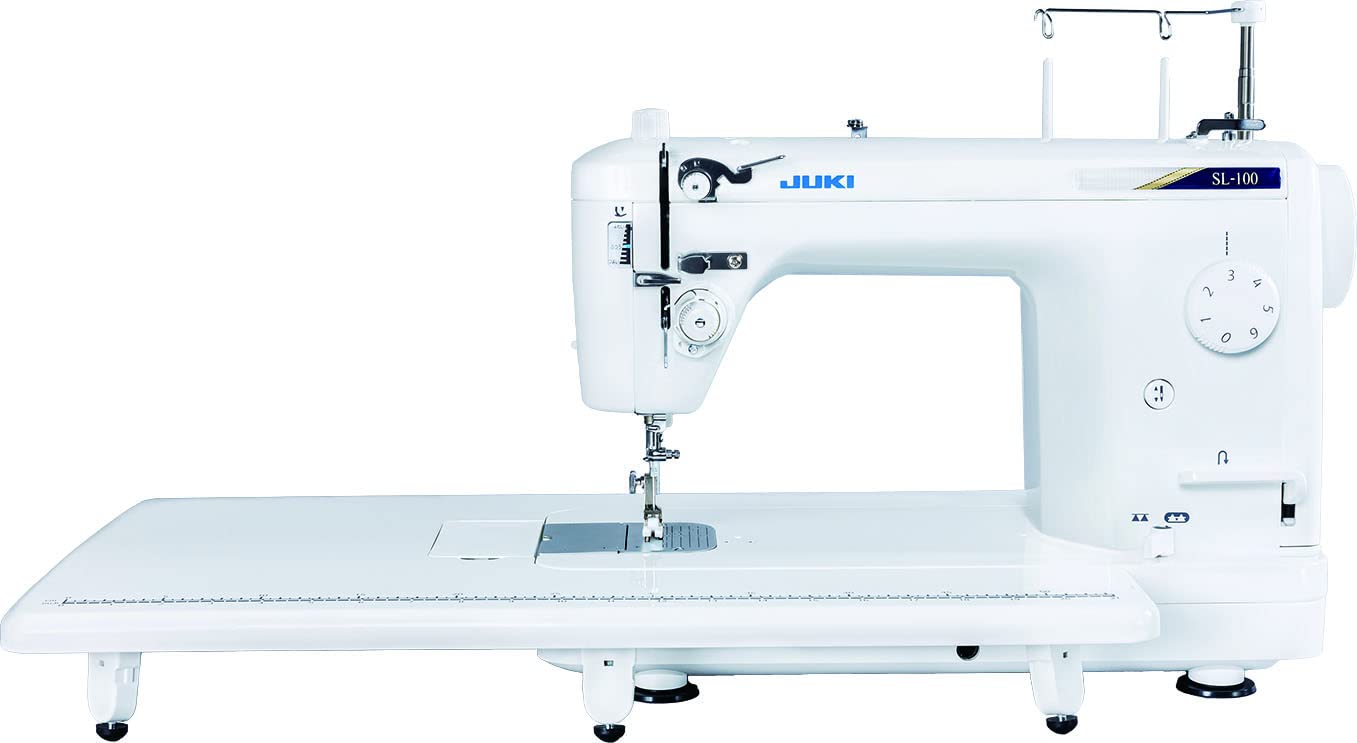
Figure 3.1: JUKI SL-100 Industrial Sewing Machine. This image shows the overall view of the JUKI SL-100 sewing machine, highlighting its robust design and key components.
Video 3.1: 360 Degree View of the JUKI SL-100. This video provides a comprehensive rotating view of the JUKI SL-100 sewing machine, allowing users to see all angles and details of the product.
Key Features:
- Heavy-Duty Sewing Capability: Equipped with features for sewing thick materials such as leather, synthetic leather, denim, and canvas. Supports thick threads up to size 20, ensuring smooth feeding and clean stitches without tangling.
- High-Speed Vertical Full-Rotary Hook: Uses a vertical full-rotary hook, also adopted in industrial sewing machines. Achieves stable, beautiful stitches and secure thread interlocking even at high-speed operation of 1500 stitches per minute.
- Durable Aluminum Die-Cast Frame: The sewing machine body, including the arm cover, is made of an aluminum die-cast frame. This results in low vibration and quiet operation. By adopting the same parts and technology as industrial sewing machines, it maintains performance for a long period.
4. Setup
4.1 Unpacking and Placement
Carefully remove the sewing machine from its packaging. Place the machine on a stable, flat surface. Ensure there is adequate space around the machine for comfortable operation and material handling.
4.2 Attaching the Extension Table
For larger projects, attach the included extension table. Align the table's pins with the corresponding holes on the machine's base and gently push until it clicks into place.

Figure 4.1: Foot Controller. This image displays the foot controller, which is used to control the sewing speed of the machine. Connect it to the designated port on the machine.
4.3 Power Connection
Connect the power cord to the machine and then to a suitable electrical outlet. Ensure the power switch is in the OFF position before plugging in.
5. Operating Instructions
5.1 Threading the Machine
Follow the numbered threading path indicated on the machine. Ensure the thread is properly seated in all guides and tension discs for optimal stitch quality.
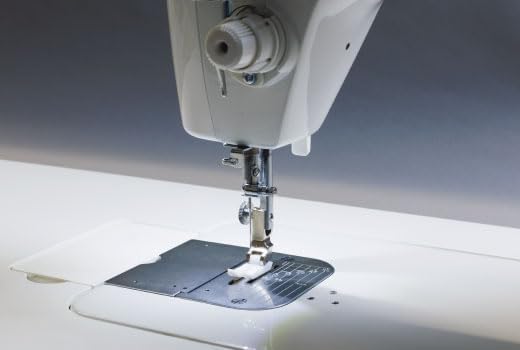
Figure 5.1: Needle and Presser Foot Area. This image shows a close-up of the needle and presser foot, crucial for guiding the fabric and forming stitches.
5.2 Winding the Bobbin
Place an empty bobbin onto the bobbin winder spindle. Guide the thread from the spool through the bobbin winding tension disc and around the bobbin. Engage the winder and press the foot controller to start winding. Stop when the bobbin is full.
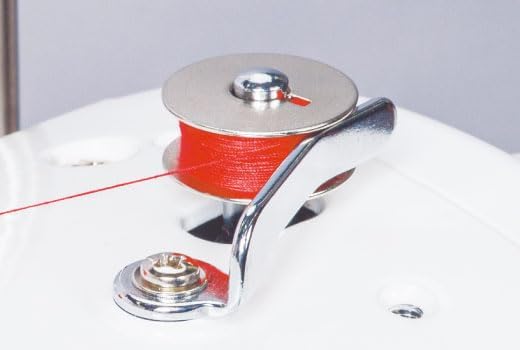
Figure 5.2: Bobbin Winder. This image illustrates the bobbin winder mechanism, used to prepare the lower thread for sewing.
5.3 Inserting the Bobbin
Open the bobbin cover. Insert the wound bobbin into the bobbin case, ensuring the thread feeds in the correct direction. Close the bobbin cover securely.
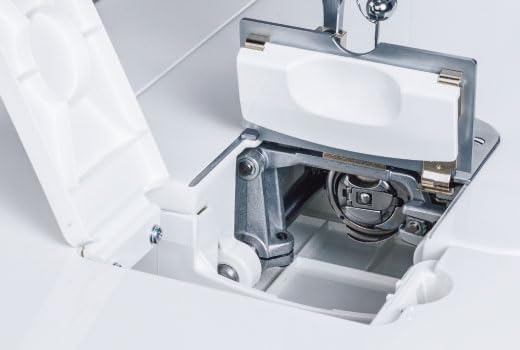
Figure 5.3: Bobbin Case Area. This image shows the area where the bobbin is inserted, critical for the lower thread supply during sewing.
5.4 Sewing Thick Materials
The JUKI SL-100 excels at sewing thick materials. Ensure you use an appropriate needle (e.g., size 16 or 18) and strong thread (e.g., size 20) for materials like leather or denim. Adjust the presser foot pressure if necessary for smooth feeding.
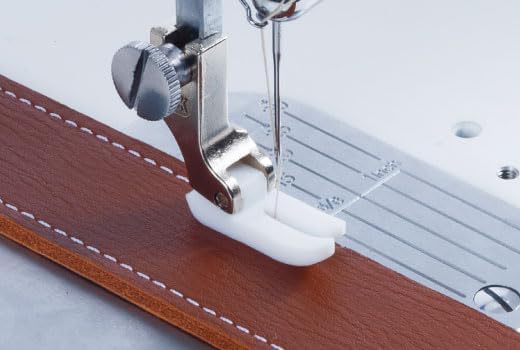
Figure 5.4: Sewing Thick Material. This image demonstrates the machine sewing through a thick piece of leather, showcasing its capability with heavy-duty fabrics.
6. Maintenance
6.1 Cleaning
Regularly clean lint and dust from the bobbin area, feed dogs, and tension discs using a small brush. Unplug the machine before cleaning.
6.2 Oiling
Refer to the machine's oiling points diagram (usually found inside the machine or in a separate diagram) and apply a small drop of high-quality sewing machine oil to each point as recommended. Frequency depends on usage.
6.3 Needle Replacement
Replace the needle frequently, especially when sewing different materials or if it becomes dull or bent. Loosen the needle clamp screw, remove the old needle, insert the new needle with the flat side facing the back, and tighten the screw.
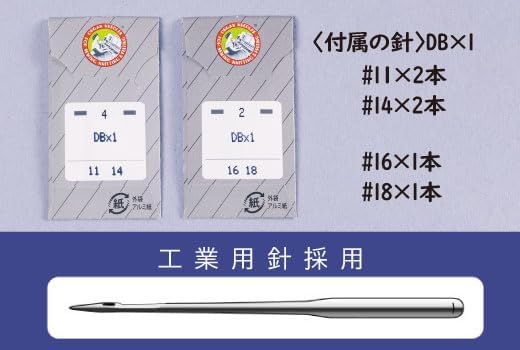
Figure 6.1: Included Needle Types. This image shows the various needle sizes (DBx1 #11, #14, #16, #18) included with the machine, suitable for different fabric thicknesses.
7. Troubleshooting
| Problem | Possible Cause | Solution |
|---|---|---|
| Skipped Stitches | Incorrect needle, bent needle, improper threading. | Replace needle with correct type/size, re-thread machine. |
| Thread Breaking | Incorrect tension, poor quality thread, burr on needle plate. | Adjust tension, use quality thread, check for burrs. |
| Fabric Not Feeding | Feed dogs lowered, lint in feed dogs, presser foot pressure too low. | Raise feed dogs, clean feed dogs, increase presser foot pressure. |
8. Specifications
- Manufacturer: JUKI
- Model Number: SL-100
- Package Dimensions: 65 x 47 x 36 cm
- Material: Aluminum, Acrylonitrile Butadiene Styrene
- Power Source: Corded Electric
- Package Weight: 18 Kilograms
- Battery Usage: No
- Product Weight: 10.4 Kilograms
- ASIN: B0CK1CGFR9
- First Available Date: 2023/9/28
9. Warranty and Support
For warranty information and customer support, please refer to the warranty card included with your product or visit the official JUKI website. Keep your purchase receipt as proof of purchase for any warranty claims.
For further assistance, you may contact JUKI customer service through their official channels. Details can typically be found on the manufacturer's website or in the product packaging.