VEVOR outdoor handrail
VEVOR Arch #2 Outdoor Wrought Iron Handrail for 2-3 Steps (Style1 - Bending, Black)
Instruction Manual
1. Introduction
This manual provides detailed instructions for the installation, operation, and maintenance of your VEVOR Arch #2 Outdoor Wrought Iron Handrail, designed for 2-3 steps. This handrail is constructed from durable wrought iron with a powder-coated finish, offering stability and resistance to outdoor elements. Please read this manual thoroughly before installation and use to ensure proper function and safety.

Figure 1: VEVOR Arch #2 Outdoor Wrought Iron Handrail installed on concrete steps, showcasing its design and placement.
2. Safety Information
- Always wear appropriate personal protective equipment (PPE) during installation, including safety glasses and gloves.
- Ensure the installation surface is structurally sound and capable of supporting the handrail and any applied force.
- Verify all fasteners are securely tightened after installation and periodically check for any loosening.
- Do not use the handrail for purposes other than providing support on stairs.
- Keep children and pets away from the installation area during setup.
3. Package Contents
Verify that all components listed below are present before beginning installation:
- 1 x Handrail Assembly
- 2 x M6 Bolts
- 2 x M8 Bolts
- 8 x Expansion Screws
- 8 x Self-Tapping Screws
- 2 x Wrenches (10-14mm)
- 1 x Carbide-tipped drill bit (10mm)

Figure 2: Image displaying the complete set of accessories included with the handrail, such as bolts, screws, wrenches, and a drill bit.
4. Specifications
| Attribute | Value |
|---|---|
| Brand | VEVOR |
| Material | Wrought Iron |
| Color | Black |
| Item Weight | 23.1 Pounds (10.5 kg) |
| Product Dimensions | 28.8"L x 38.5"W (73.15 cm L x 97.79 cm W) |
| Style | Style1 - Bending (Arch #2) |
| Finish Type | Powder Coated |
| Steps Supported | 2-3 Steps |
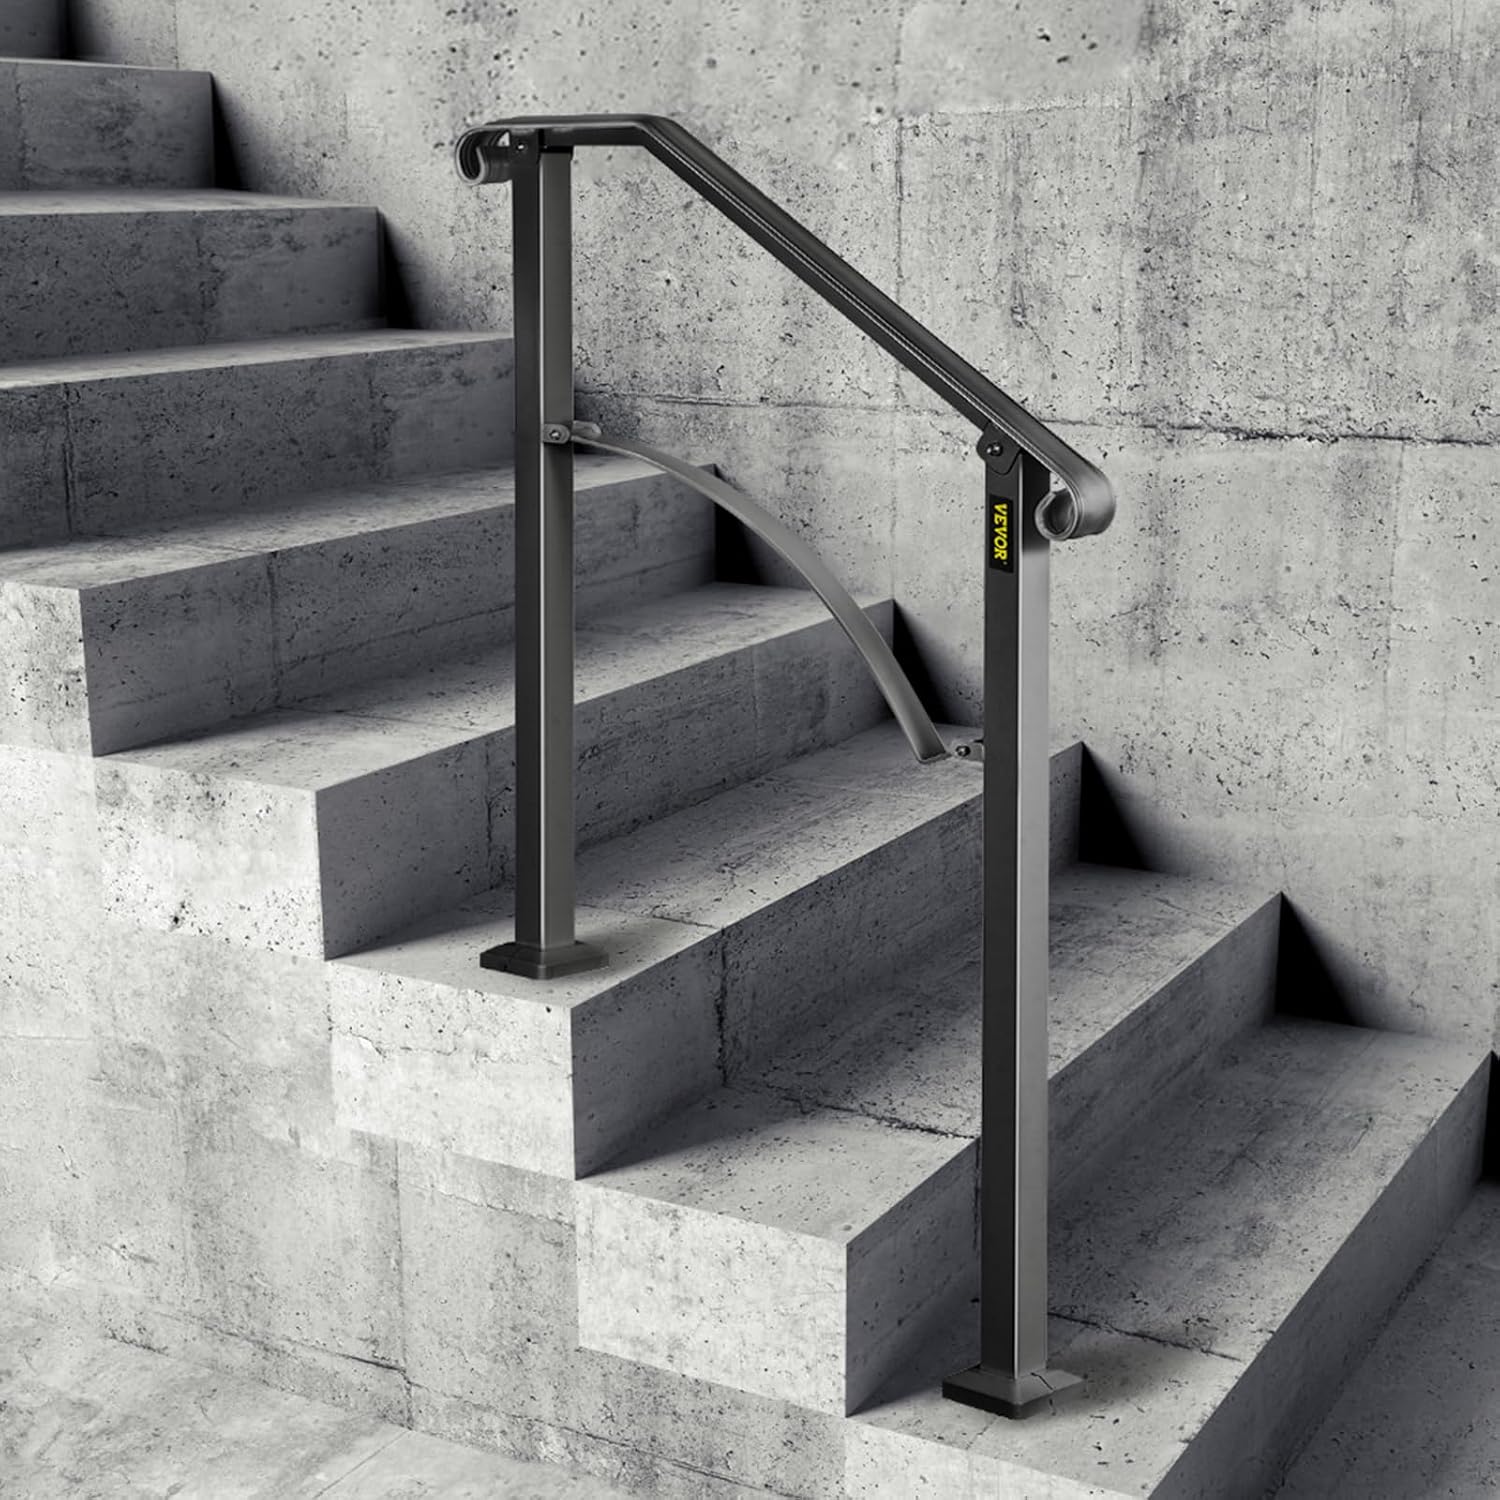
Figure 3: A diagram illustrating the key product dimensions and specifications, including height, length, and step compatibility.
5. Setup and Installation
Follow these steps for proper installation of your VEVOR handrail. The handrail is designed for direct installation on most surfaces, including concrete, wooden floors, ceramic tiles, and marble.
5.1 Tools Required (Not all included)
- Power Drill (Hammer drill recommended for concrete)
- Hammer or Mallet
- Marker (e.g., Sharpie)
- Ratchet
- Measuring Tape
5.2 Installation Steps
- Pre-assemble and Position: Loosely assemble the handrail components. Position the handrail on your steps to determine the optimal placement. The handrail is adjustable to fit 2 to 3 steps.
- Mark Hole Positions: Once the handrail is in the desired position, use a marker to accurately mark the locations for drilling on the mounting surface through the base plates.
- Drill Holes: Using a power drill (a hammer drill is highly recommended for concrete surfaces) and the provided 10mm carbide-tipped drill bit, drill holes at the marked locations. Ensure the holes are drilled to the appropriate depth for the expansion screws.
- Install Fasteners: Insert the expansion screws into the drilled holes. Place the handrail posts over the screws. Tap in the metal bolt sleeves and bolts.
- Secure Handrail: Tighten all bolts with a ratchet until the handrail is firmly secured to the surface. Ensure there is no wobble or movement.

Figure 4: Visual guide to the 4-step installation process: marking, drilling, installing bolts, and securing with metal anchors.
5.3 Important Installation Notes
- Drill Bit Compatibility: The included drill bit is a metric 10mm carbide-tipped bit with a 9.3mm square shank. If you are renting a hammer drill, especially one designed for SAE sizes (e.g., a Makita impact hammer drill), ensure it can accommodate this metric square shank or acquire a compatible 3/8 inch concrete drill bit. Using an incompatible drill bit can lead to inefficient drilling or damage.
- Horizontal Piece Assembly: It is crucial to fit the horizontal pieces of the handrail together and loosely thread their bolts before securing the second vertical post to the ground. Failure to do so may require disassembly and reassembly to align the components correctly.
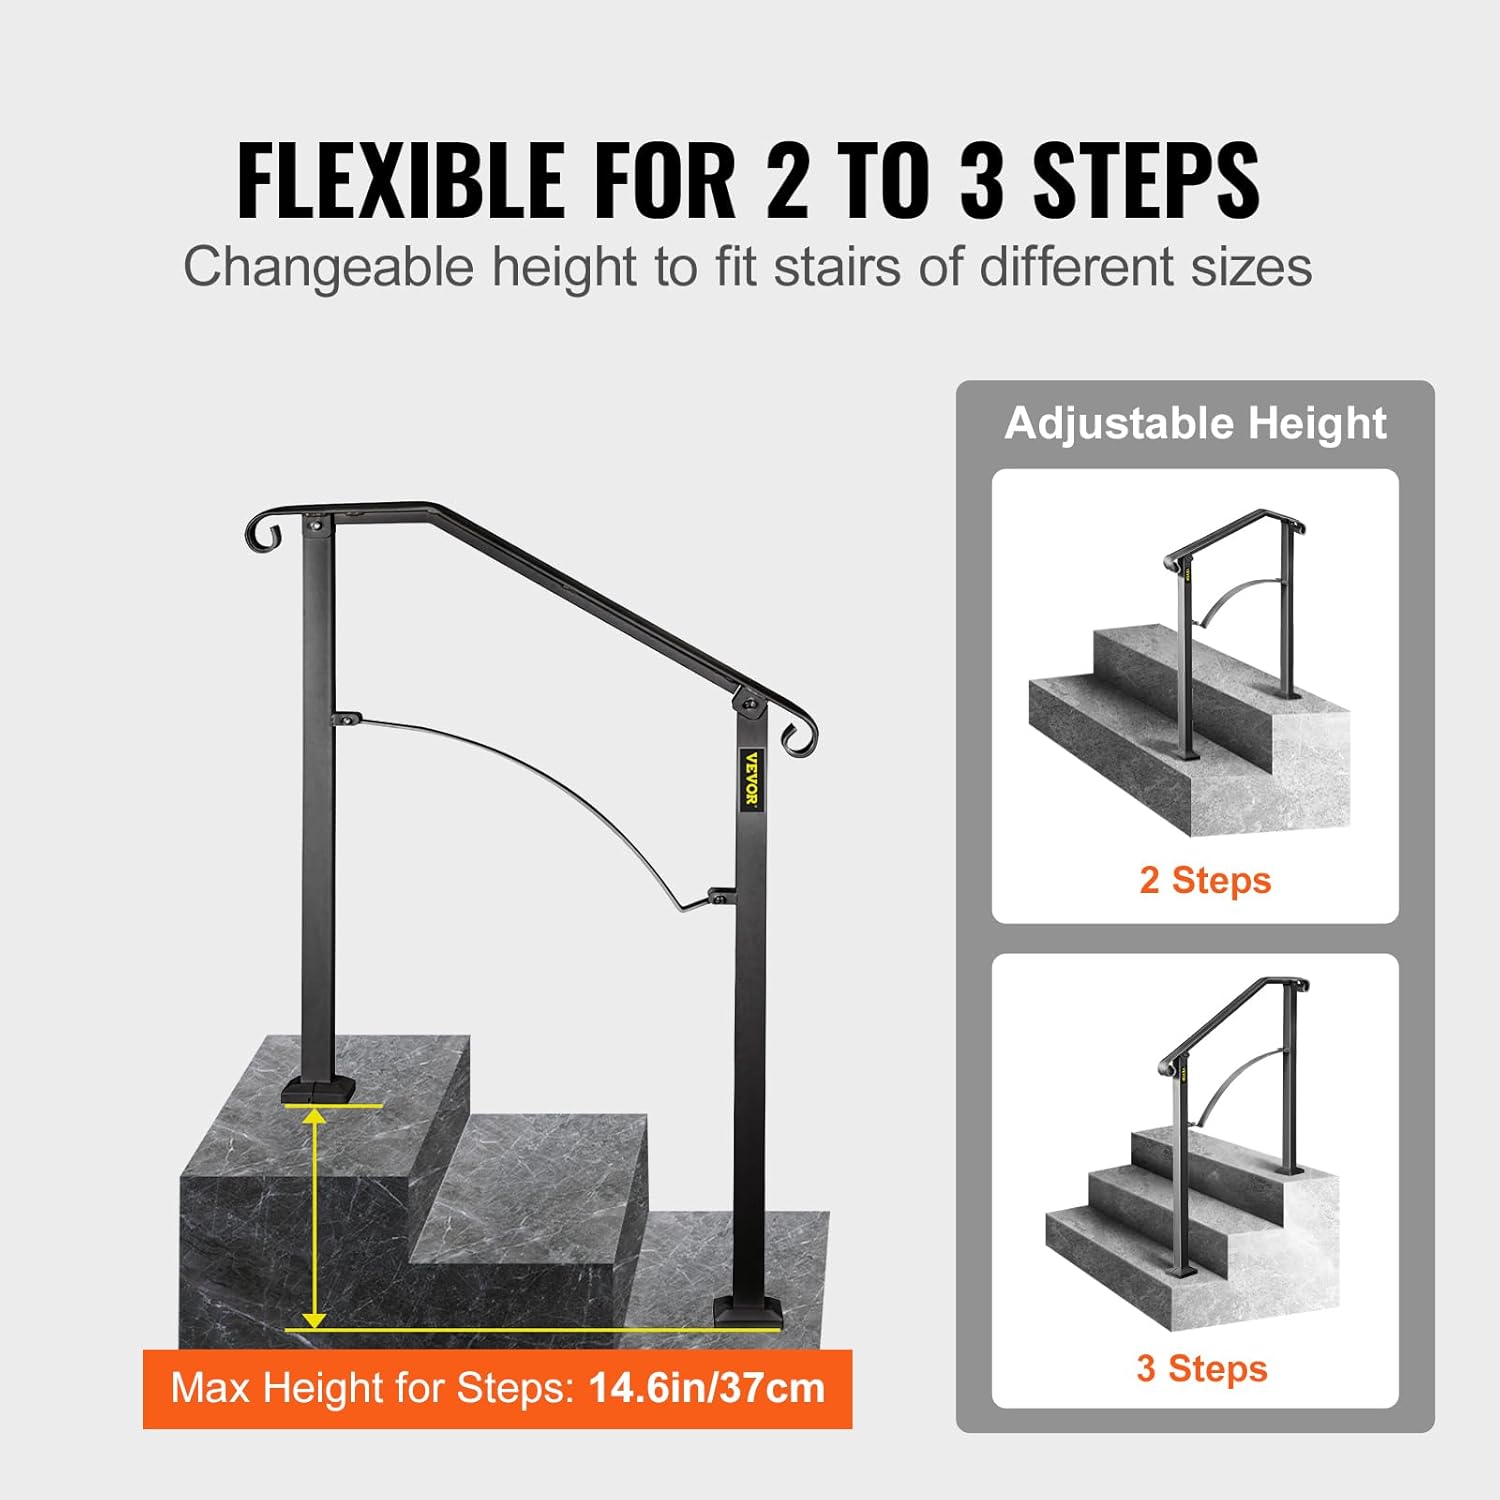
Figure 5: This image demonstrates the handrail's flexibility to accommodate both 2-step and 3-step configurations, highlighting its adjustable height.
6. Operating Instructions
The VEVOR handrail is designed to provide stable support when ascending or descending stairs. Simply grasp the handrail firmly for balance and assistance. Its robust wrought iron construction ensures reliable support.

Figure 6: Close-up of the handrail material, emphasizing its heatproof, rust-proof, and corrosion-resistant properties due to specialized carbon steel construction.
7. Maintenance
To ensure the longevity and appearance of your VEVOR handrail, regular maintenance is recommended:
- Cleaning: Wipe the handrail regularly with a soft, damp cloth to remove dust, dirt, and debris. For stubborn grime, a mild soap solution can be used, followed by rinsing with clean water and drying thoroughly.
- Inspection: Periodically inspect all bolts and fasteners to ensure they remain tight. Re-tighten any loose connections to maintain stability.
- Finish Protection: The powder-coated finish provides excellent protection. Avoid using abrasive cleaners or tools that could scratch or damage the coating.
8. Troubleshooting
- Handrail Feels Loose: Check all mounting bolts and screws. If any are loose, tighten them securely using the appropriate wrench or ratchet. If the anchors in the concrete are failing, consider using stronger anchors or consulting a professional.
- Surface Rust Appears: Although made of wrought iron with a powder coating for rust resistance, prolonged exposure to harsh conditions or damage to the coating can lead to rust. Clean the affected area, gently remove any surface rust with fine-grit sandpaper or a wire brush, and apply a rust-inhibiting primer followed by a suitable outdoor metal paint to match the original finish.
- Difficulty Aligning Components During Assembly: Refer to the installation notes regarding pre-assembly of horizontal pieces. Ensure all components are loosely fitted before final tightening to allow for minor adjustments.
9. VEVOR Support
For technical support, warranty information, or any inquiries regarding your VEVOR product, please visit the official VEVOR website or contact their customer service department. Keep your purchase receipt and product model number handy for faster assistance.
Model Number: outdoor handrail
UPC: 197988463887
Ask a question about this manual
Ask about setup, troubleshooting, compatibility, parts, safety, or missing instructions. Manuals+ will review the question and use this page’s manual context to help answer it.