HOOBRO BF86TS01 Over The Toilet Storage
HOOBRO Over-The-Toilet Storage Instruction Manual
Model: BF86TS01 Over The Toilet Storage
1. Introduction
This manual provides detailed instructions for the assembly, usage, maintenance, and troubleshooting of your HOOBRO 8-Tier Over-The-Toilet Storage unit. Designed to maximize space in your bathroom or other areas, this freestanding organizer offers ample storage with a versatile design.

Figure 1: HOOBRO 8-Tier Over-The-Toilet Storage Unit
This image displays the fully assembled HOOBRO 8-Tier Over-The-Toilet Storage unit, showcasing its rustic brown shelves and sturdy black metal frame. The unit is designed to fit over a standard toilet, providing vertical storage space.
2. Safety Information
Please read and understand all safety warnings before assembly and use. Failure to follow these instructions may result in injury or damage to the product.
- Always ensure the product is assembled correctly according to the provided instructions.
- The anti-tip kit must be engaged and securely fastened to the wall to prevent accidental tipping, especially in households with children or pets.
- Do not overload shelves. Distribute weight evenly to maintain stability.
- Keep the product away from direct heat sources, open flames, and excessive moisture.
- Do not use the unit for supporting heavy or sharp objects that could compromise its structural integrity.
- Regularly check all connections and fasteners to ensure they remain tight.
3. Package Contents
Before beginning assembly, verify that all components listed below are present and undamaged. If any parts are missing or damaged, please contact customer support.
| Component | Quantity |
|---|---|
| Metal Frame Components | Various (as per assembly diagram) |
| Wooden Shelves | 8 |
| Toilet Paper Holder Hook | 1 |
| Hardware Kit (screws, nuts, L-key) | 1 set |
| Anti-Tip Kit (strap, screws, anchors) | 1 set |
| Assembly Instructions Manual | 1 |
4. Assembly Instructions
Assembly of the HOOBRO Over-The-Toilet Storage unit is designed to be straightforward. Please follow these steps carefully.
- Unpack and Identify Parts: Lay out all components on a clean, soft surface to prevent scratches. Compare each part with the component list and diagrams in the included assembly guide.
- Assemble the Main Frame: Begin by connecting the vertical metal frame components using the provided screws and L-key. Ensure all connections are finger-tight at this stage.
- Install Shelves: Attach the wooden shelves to the main frame. Note that the side frame with the toilet paper holder can be installed on either the left or right side, depending on your bathroom layout and preference.
- Attach Toilet Paper Holder: Secure the toilet paper holder hook to the designated shelf on the side frame.
- Tighten All Connections: Once all components are in place, gradually tighten all screws. Do not overtighten to avoid damaging the materials.
- Install Anti-Tip Kit: Position the assembled unit behind your toilet. Secure the anti-tip strap to the top rear of the unit and then to a wall stud or using appropriate wall anchors. This step is crucial for stability and safety.
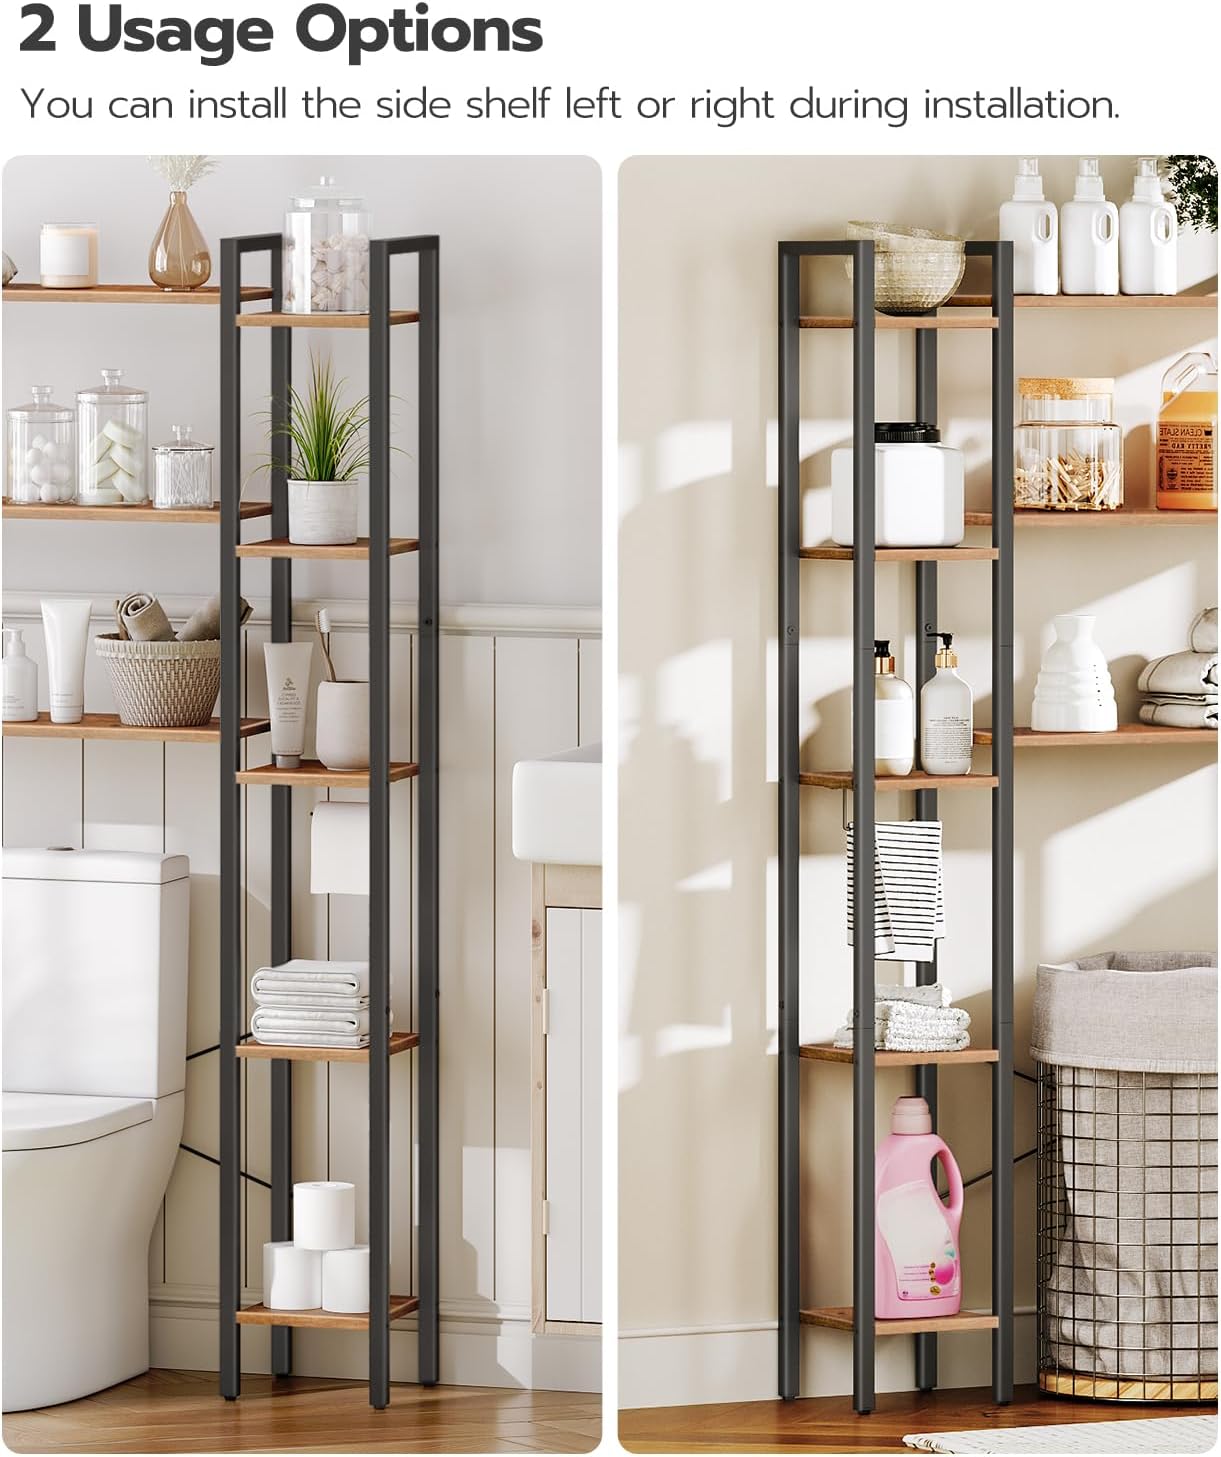
Figure 2: Flexible Side Shelf Installation Options
This diagram illustrates the two possible configurations for the side shelf, allowing you to choose between left or right placement during assembly to best suit your space.

Figure 3: Integrated Toilet Paper Holder
A detailed view of the toilet paper holder, showing how it integrates into one of the side shelves for convenient access.
For a visual guide to assembly, please refer to the official product video:
Video 1: HOOBRO 8-Tier Over The Toilet Storage BF86TS01 Assembly Guide
This official video from HOOBRO demonstrates the assembly process for the BF86TS01 Over-The-Toilet Storage unit, providing a step-by-step visual aid.
5. Usage and Features
The HOOBRO 8-Tier Over-The-Toilet Storage unit is designed for versatile use and efficient organization.
- Outstanding Storage Capacity: With 8 shelves, this unit provides ample space for toiletries, towels, cleaning supplies, and decorative items. The integrated toilet paper hook offers convenient access to paper rolls.
- Flexible Placement: The side storage open shelf can be positioned on either the left or right during assembly, adapting to your specific bathroom layout or space constraints.
- Versatile Role Switching: While ideal for bathrooms, this freestanding organizer can also function as a general storage shelf in hallways, a coffee bar in living rooms, or a plant stand on balconies, offering flexible utility throughout your home.

Figure 4: Large Storage Capacity Overview
This graphic highlights the diverse items that can be stored on the unit's shelves, including towels, toiletries, and toilet paper, emphasizing its spacious design.

Figure 5: Unit in a Laundry Room Setting
This image shows the HOOBRO storage unit utilized in a laundry room, demonstrating its adaptability for organizing various household items beyond typical bathroom use.
6. Maintenance
Proper care will ensure the longevity and appearance of your HOOBRO storage unit.
- Cleaning: Wipe the surfaces with a dry, soft cloth. For stubborn marks, a slightly damp cloth can be used, followed immediately by a dry cloth to prevent moisture damage.
- Avoid Harsh Chemicals: Do not use abrasive cleaners, strong detergents, or chemical solvents, as these can damage the finish of the wood and metal components.
- Regular Checks: Periodically inspect all screws and connections to ensure they are tight. Retighten if necessary.
- Moisture Protection: While suitable for bathrooms, avoid prolonged exposure to excessive moisture or standing water to prevent warping or rust.
7. Troubleshooting
If you encounter any issues with your HOOBRO storage unit, refer to the common problems and solutions below.
- Unit is Wobbly/Unstable:
- Ensure all screws are fully tightened.
- Verify that the unit is placed on a flat, level surface.
- Confirm the anti-tip kit is securely installed and engaged with the wall.
- Check if the X-shaped back structure is properly installed and tightened, as this contributes to stability.
- Parts Do Not Align During Assembly:
- Do not fully tighten screws until all components are loosely assembled. This allows for minor adjustments.
- Double-check that you are using the correct parts for each step as per the assembly diagram.
- Ensure components are oriented correctly (e.g., holes facing the right direction).
- Missing or Damaged Parts:
- Carefully re-check all packaging materials. Small parts can sometimes be overlooked.
- Contact HOOBRO customer support with details of the missing or damaged part(s) and your purchase information.
8. Specifications
Key specifications for the HOOBRO 8-Tier Over-The-Toilet Storage unit:
| Attribute | Detail |
|---|---|
| Model Name | Over The Toilet Storage |
| Item Model Number | BF86TS01 Over The Toilet Storage |
| Brand | HOOBRO |
| Product Dimensions (D x W x H) | 9.3"D x 33.9"W x 64.2"H (23.5cm D x 86cm W x 163cm H) |
| Item Weight | 25.2 pounds |
| Number of Shelves | 8 |
| Room Type | Bathroom, Living Room, Hallway, Balcony |
| Style | Modern |
| Finish Type | Metal (frame), Rustic Brown (shelves) |
| Installation Type | Freestanding |
| Assembly Required | Yes |
| Product Care Instructions | Wipe with Dry Cloth |

Figure 6: Product Dimensions
This diagram provides precise measurements of the storage unit, including overall height, width, and depth, as well as shelf spacing, in both metric and imperial units.
9. Warranty Information
Specific warranty details for your HOOBRO Over-The-Toilet Storage unit are typically provided with the product packaging or can be found on the official HOOBRO website. Please retain your proof of purchase for any warranty claims.
10. Customer Support
For further assistance, missing parts, or inquiries regarding your HOOBRO product, please refer to the contact information provided in your product packaging or visit the official HOOBRO website for support resources.
You can also visit the HOOBRO store on Amazon for more information: HOOBRO Amazon Store
Ask a question about this manual
Ask about setup, troubleshooting, compatibility, parts, safety, or missing instructions. Manuals+ will review the question and use this page’s manual context to help answer it.