1. Introduction
Thank you for choosing the Bewinner Star Projector. This device is designed to project high-definition celestial scenes, creating an immersive starry sky experience. Please read this manual thoroughly before use to ensure proper operation and to maximize your enjoyment of the product.
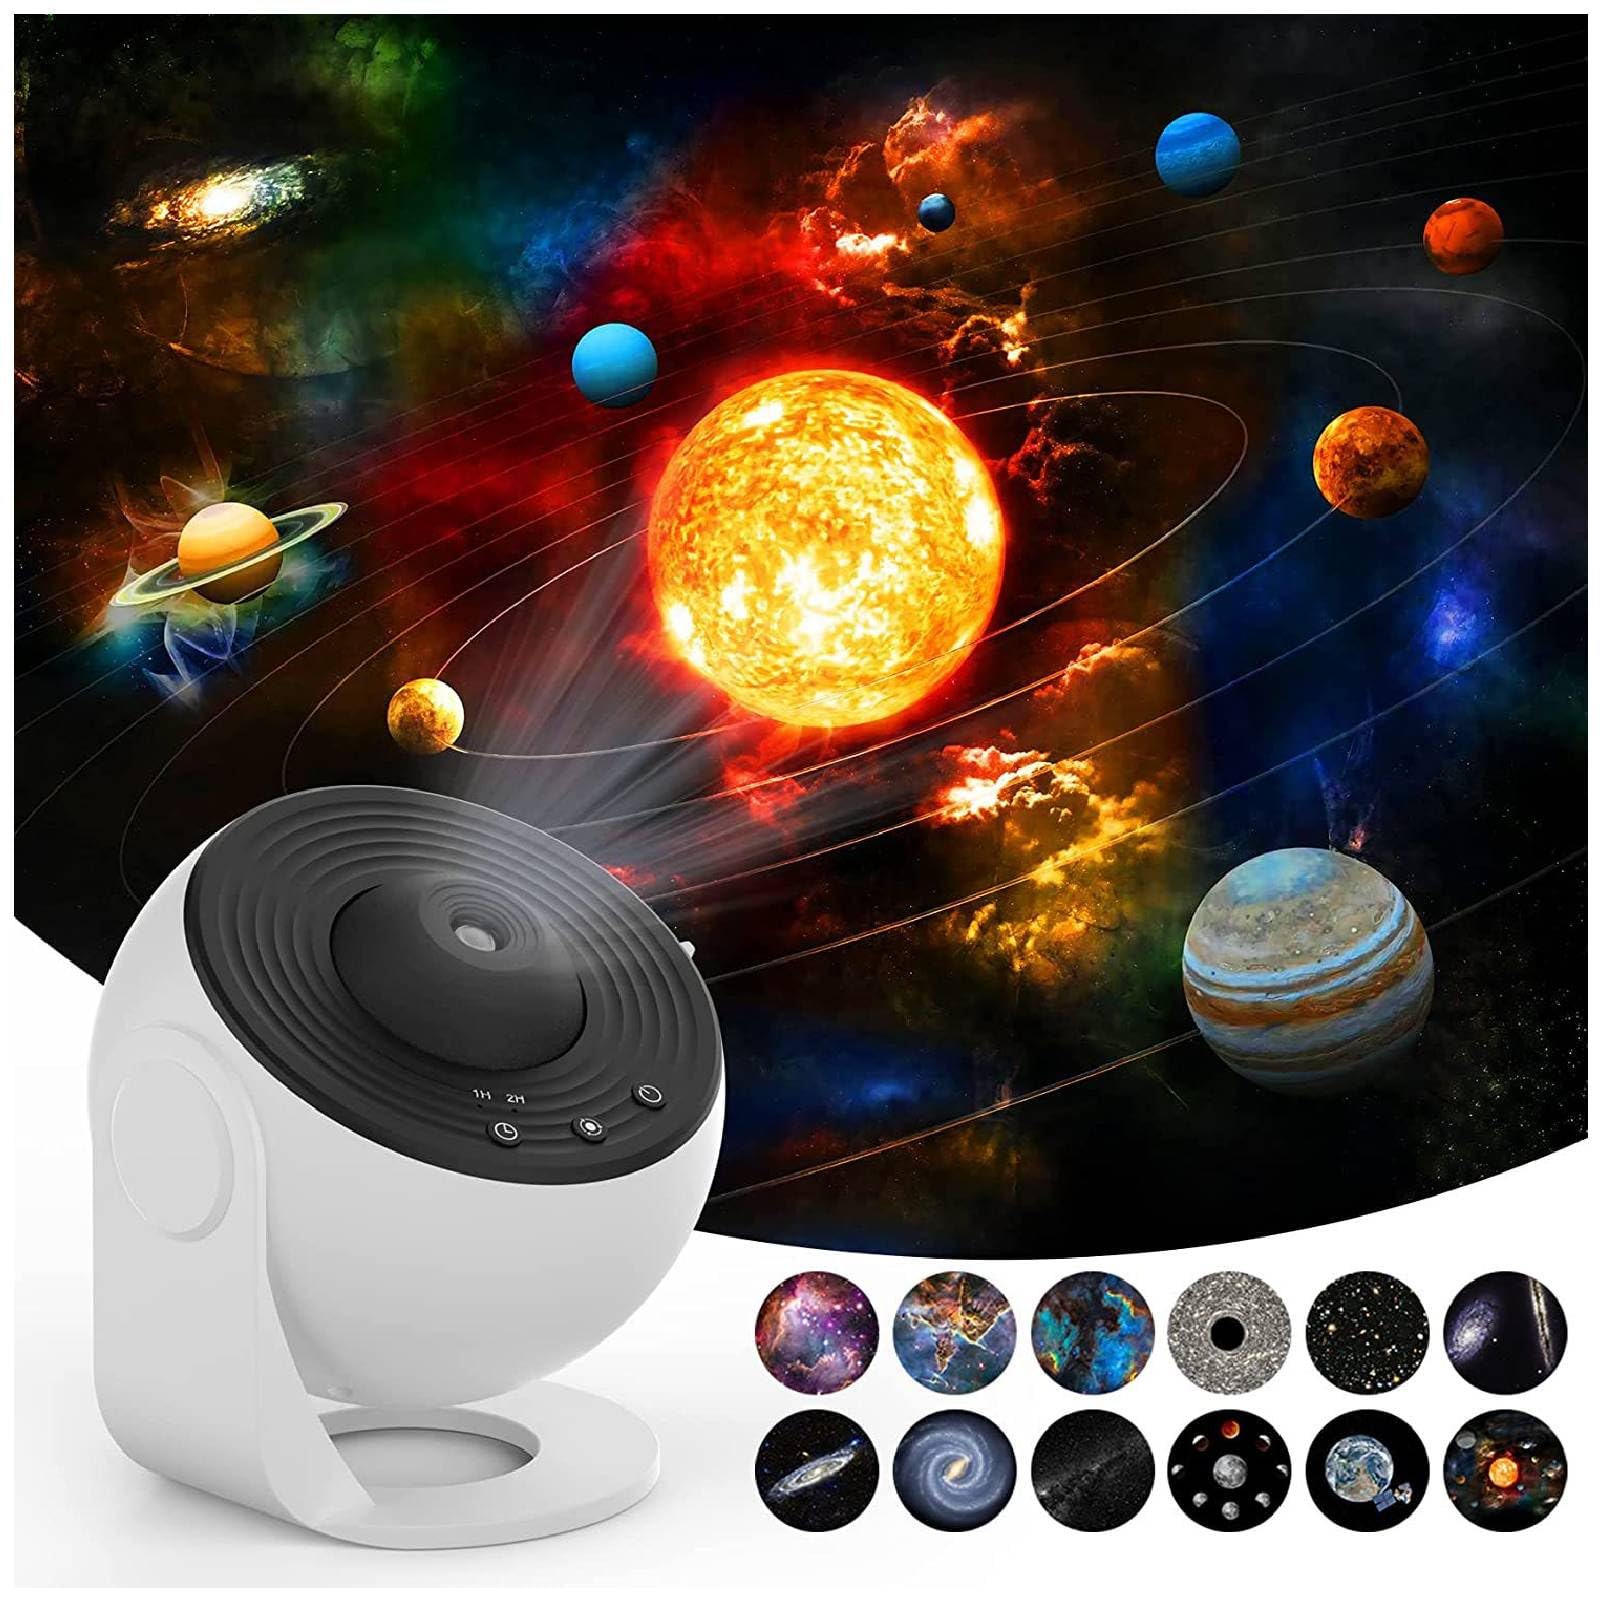
2. Product Overview
2.1. Components
- Star Projector Unit
- 12 Film Discs (various celestial themes)
- USB Power Cable
- User Manual
2.2. Key Features
- High Definition Projection: Advanced lens for clear and detailed celestial images.
- Focusing Design: Manual focus adjustment for optimal clarity at various distances.
- Multiple Scenes: Includes 12 film discs featuring different astronomical views.
- Quiet Operation: Designed for minimal noise during use.
- Timer Function: Built-in timer for automatic shutdown.
- USB Powered: Convenient power source.
2.3. Product Diagram


3. Setup Instructions
- Unpack: Carefully remove all components from the packaging.
- Power Connection: Connect the provided USB cable to the projector's DC 5V port and plug the other end into a compatible USB power adapter (not included) or a USB port.
- Insert Film Disc:
- Gently open the film disc slot cover on the side of the projector.
- Select your desired film disc.
- Insert the film disc into the slot, ensuring it is properly seated.
- Close the slot cover securely.
- Placement: Place the projector on a stable, flat surface. For optimal projection, ensure the room is dark.

4. Operating Instructions
- Power On/Off: Press the power button (usually indicated by a universal power symbol) on the top of the projector to turn it on or off.
- Adjust Focus: Rotate the focus ring around the projection lens to achieve a clear image on your desired surface.
- Change Film Disc: To change the projected scene, turn off the projector, open the film disc slot, replace the current disc with a new one, and close the slot.
- Rotation Control: The projector features a silent rotation mechanism. Use the designated button (if available, refer to specific model controls) to activate or deactivate the rotation of the projected image.
- Timer Setting: Use the timer button (often labeled "1H" or "2H") to set an automatic shutdown time for 1 or 2 hours.


5. Maintenance
- Cleaning: Use a soft, dry cloth to clean the exterior of the projector. Do not use abrasive cleaners or solvents.
- Lens Care: For the projection lens, use a lens cleaning cloth to gently wipe away dust or smudges. Avoid touching the lens directly with your fingers.
- Film Discs: Handle film discs by their edges to avoid fingerprints. Store them in their protective cases when not in use.
- Storage: When not in use for extended periods, store the projector in a cool, dry place away from direct sunlight.
6. Troubleshooting
| Problem | Possible Cause | Solution |
|---|---|---|
| No projection/Power not turning on | Power cable not connected properly; No power from USB source. | Check USB cable connection. Ensure USB power source is active. |
| Image is blurry | Focus not adjusted; Projector too far/close to projection surface. | Rotate the focus ring until the image is clear. Adjust distance to projection surface. |
| Image not rotating | Rotation function is off. | Press the rotation control button to activate rotation. |
| Dim projection | Room is not dark enough; Lens or film disc is dirty. | Ensure the room is sufficiently dark. Clean the lens and film disc. |
7. Specifications
| Feature | Detail |
|---|---|
| Brand | Bewinner |
| Model Number | Bewinnertfk9sm0inu |
| Power Source | Corded Electric |
| Voltage | 5 Volts |
| Light Source Type | LED |
| Material | Acrylonitrile Butadiene Styrene |
| Color | White |
| Included Components | Projection Light, 12 x Film |
| Indoor/Outdoor Usage | Indoor |
| Control Method | Remote Control (or direct buttons) |
| Connectivity Technology | USB |
| Connectivity Protocol | Bluetooth |
| Additional Features | Remote Control |
| Water Resistance Level | Not Water Resistant |
8. Warranty and Support
For warranty information and customer support, please refer to the product packaging or contact Bewinner customer service directly. Keep your purchase receipt for any warranty claims.
For additional support or to explore other products, visit the official Bewinner Store: Bewinner Store on Amazon.