1. Introduction
This manual provides comprehensive instructions for the safe and efficient use of the Shanrya GFQ3-125 4P Dual Power Automatic Transfer Switch (ATS). This device is designed to automatically switch between two power sources, ensuring continuous power supply to critical loads in the event of a primary power failure. Please read this manual thoroughly before installation and operation.
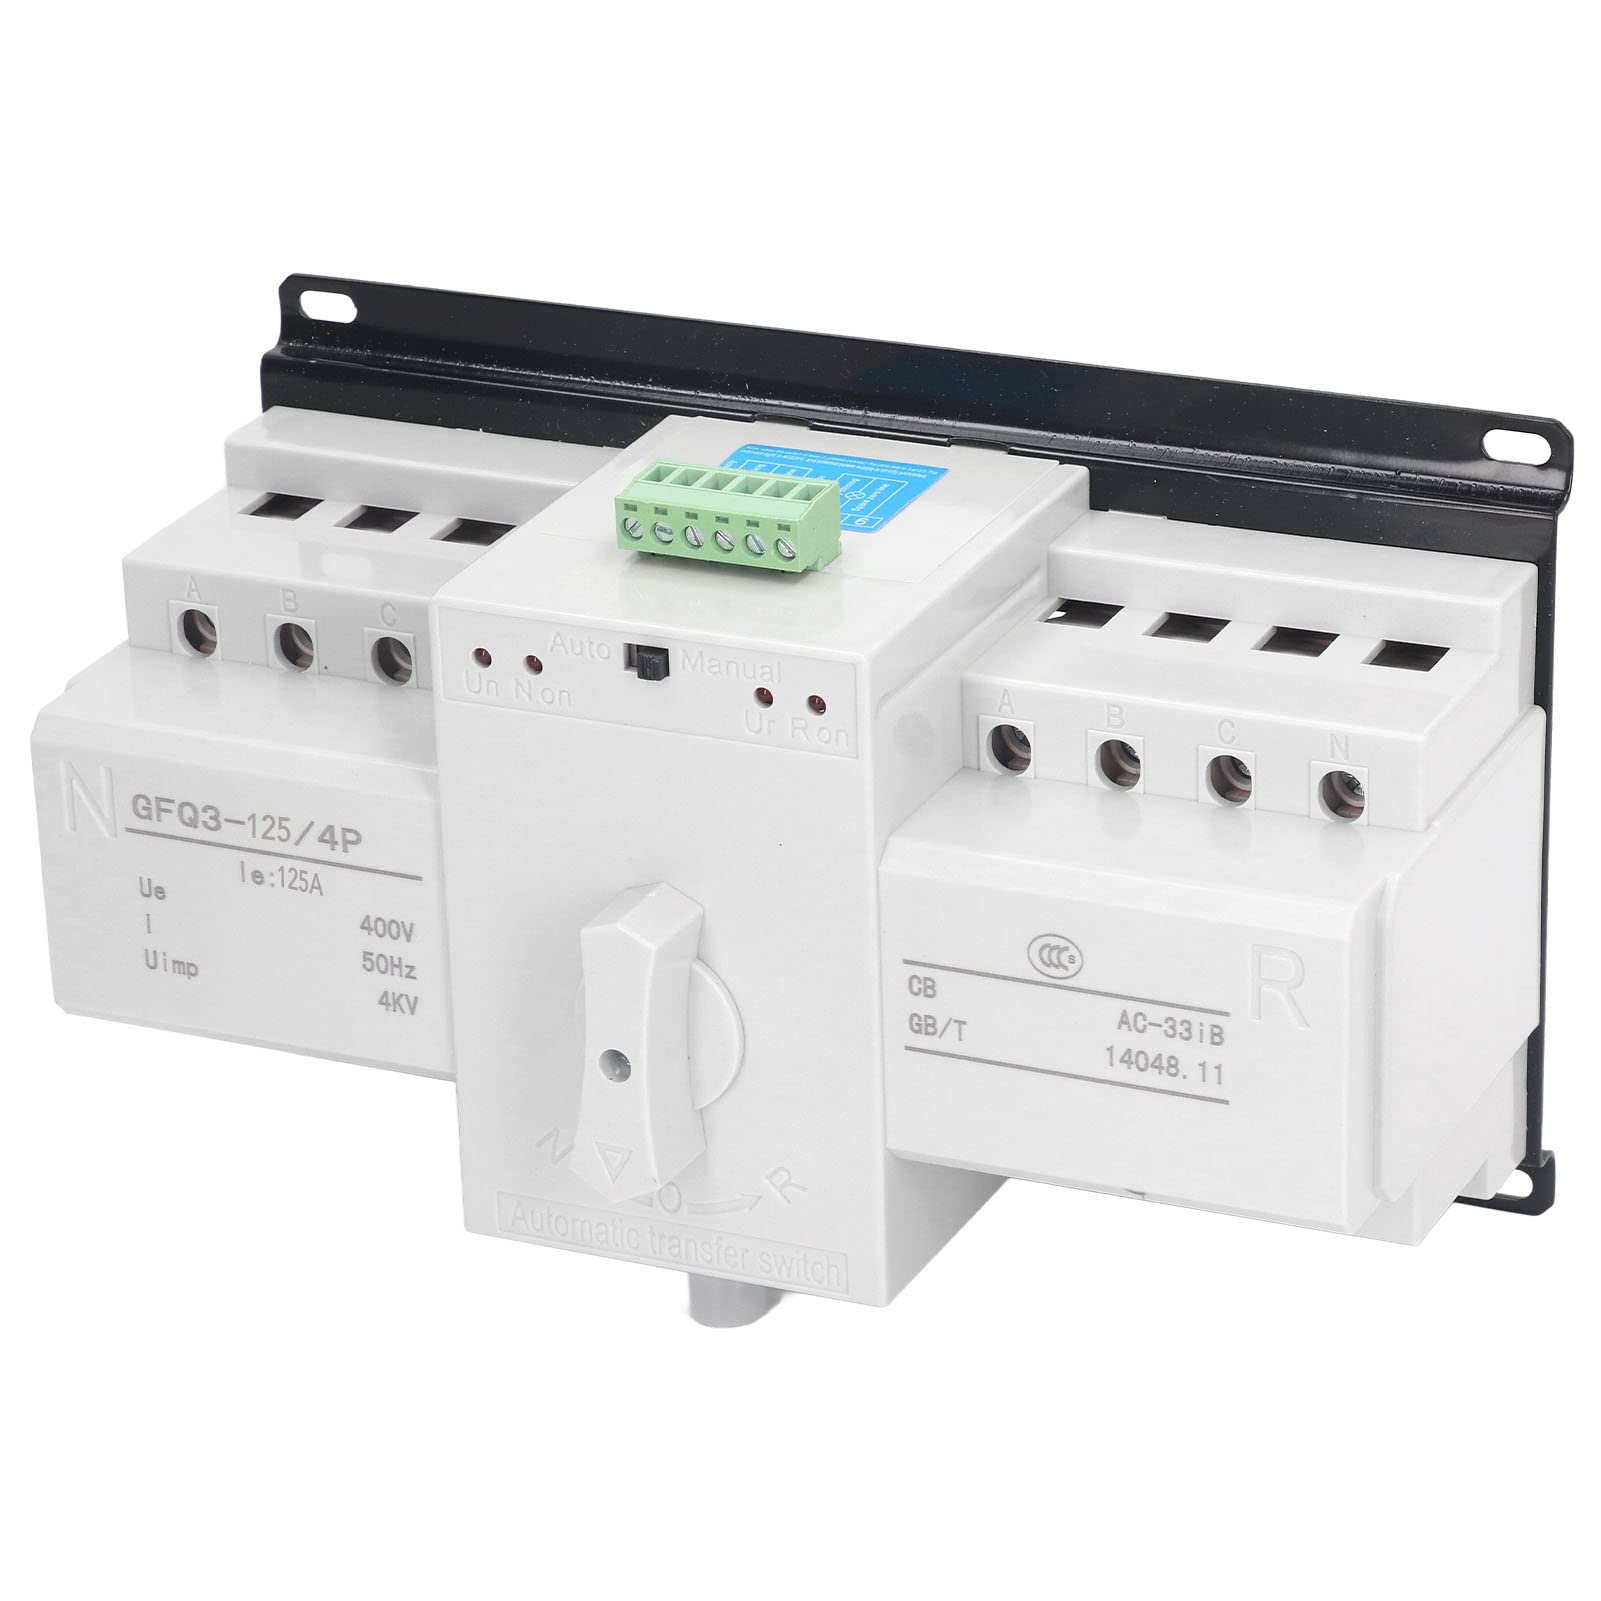
Figure 1: Shanrya GFQ3-125 4P Dual Power Automatic Transfer Switch.
2. Safety Information
WARNING: Installation and maintenance must be performed by qualified personnel only. Failure to follow these instructions may result in electric shock, fire, or serious injury.
- Always disconnect all power sources before installing or servicing the ATS.
- Ensure proper grounding of the device.
- Verify that the voltage and current ratings of the ATS match your application requirements.
- Do not operate the switch if it is damaged or appears to be malfunctioning.
- Keep children and unauthorized personnel away from the installation area.
3. Product Features
- Dual Control Modes: Supports both automatic and manual operation for flexible power management.
- Automatic Transfer: Automatically switches to a secondary power source upon failure of the primary source, ensuring uninterrupted power to the load.
- High Performance: Features a large load capacity and a fast switching speed of less than 2 seconds.
- Multiple Protections: Includes built-in protection against short circuits, overloads, phase loss, and undervoltage for enhanced safety and reliability.
- Compact Design: Space-saving structure with screw mounting for easy vertical or horizontal installation.

Figure 2: The ATS is designed for strong load power and fast switching speed.
4. Specifications
| Parameter | Value |
|---|---|
| Model | GFQ3 125 4P |
| Current | 125A |
| Operating Frequency | 50Hz |
| Rated Voltage | AC400V |
| Working Voltage | AC380V |
| Display Function | Indicator Light Display |
| Operation Mode | Automatic, Manual |
| ATS Level | CB Level |
| Conversion Time | ≤2 Seconds |
| Utilization Category | AC 33iB |
| Conversion Method | Automatic Transfer and Automatic Recovery |
| Mechanical Life | Automatic: 3000 cycles, Manual: 1500 cycles |
| Compliance Standard | IEC947-6-1GB14048.11 |
| Item Weight | 1.7 Kilograms |
| Package Dimensions | 24 x 15 x 12 cm |

Figure 3: Product dimensions for installation planning.
5. Setup and Installation
The ATS features a compact structure and is designed for screw mounting. It can be installed either vertically or horizontally. Ensure adequate ventilation and clearance around the unit.
5.1 Wiring Diagram
Refer to the following diagram for correct wiring connections. All wiring must comply with local electrical codes and standards.

Figure 4: Wiring diagram showing connections for common firewire, common neutral line, standby firewire, standby neutral line, and load.
5.2 Installation Steps
- Mounting: Securely mount the ATS to a stable surface using appropriate screws. Ensure the mounting orientation (vertical or horizontal) allows for proper access and ventilation.
- Power Source 1 Connection: Connect the primary power source (Common Firewire, Common Neutral Line) to the designated terminals on the ATS.
- Power Source 2 Connection: Connect the secondary/standby power source (Standby Firewire, Standby Neutral Line) to its designated terminals.
- Load Connection: Connect the load circuit to the output terminals of the ATS.
- Control Circuit Connection: Connect any necessary control wiring as per the wiring diagram.
- Verification: Double-check all connections for tightness and correctness before applying power.
6. Operating Instructions
The ATS offers both automatic and manual operation modes.

Figure 5: Control panel showing Auto/Manual switch and indicator lights.
6.1 Automatic Mode
- Set the control switch to the "Auto" position.
- The ATS will continuously monitor both power sources.
- If the primary power source fails or drops below acceptable levels, the ATS will automatically switch the load to the secondary power source within 2 seconds.
- When the primary power source is restored, the ATS will automatically switch the load back to the primary source (automatic recovery).
- Indicator lights will show the active power source (e.g., "Un Non" for primary, "Ur Ron" for secondary).
6.2 Manual Mode
- Set the control switch to the "Manual" position.
- In manual mode, the transfer between power sources is controlled by the manual handle.
- Rotate the handle to select the desired power source (e.g., "N" for normal/primary, "R" for reserve/secondary).
- Ensure the handle is fully engaged in the selected position.
- Manual operation should only be performed by trained personnel.
7. Maintenance
Regular maintenance ensures the longevity and reliable operation of your ATS. Always disconnect power before performing any maintenance.
- Periodic Inspection: Visually inspect the unit for any signs of damage, loose connections, or overheating at least once every six months.
- Cleaning: Keep the unit clean and free from dust and debris. Use a dry, soft cloth for cleaning. Do not use liquid cleaners.
- Terminal Tightness: Periodically check and tighten all electrical connections to prevent arcing and overheating.
- Functional Test: Test the automatic transfer function periodically by simulating a primary power failure (if safe to do so and permitted by your system design).
8. Troubleshooting
This section provides solutions to common issues. For problems not listed here, contact qualified service personnel.
| Problem | Possible Cause | Solution |
|---|---|---|
| ATS does not transfer automatically. |
|
|
| No power to load. |
|
|
| Indicator lights not working. |
|
|
9. Applications
The Shanrya GFQ3-125 4P ATS is suitable for various applications requiring reliable and continuous power supply, including:
- Hotels
- Factories
- Ships
- Fire Fighting Systems
- Bank Offices
- Other critical infrastructure

Figure 6: Diverse applications for the automatic transfer switch.
10. Warranty and Support
For warranty information or technical support, please refer to the product packaging or contact your local distributor. Keep your purchase receipt for warranty claims.

