1. Introduction
Thank you for choosing the Armocity 4-Tier AV Media Stand. This manual provides detailed instructions for the assembly, setup, operation, and maintenance of your new media stand. Please read this manual thoroughly before beginning assembly and retain it for future reference. This media stand is designed to organize your audio-visual equipment, offering ample storage with integrated power and LED lighting.

Image 1.1: The Armocity 4-Tier AV Media Stand, featuring a rustic brown finish and open shelving for various media components.
2. Safety Information
WARNING: Failure to follow these safety instructions may result in injury or damage to the product.
- Do not overload shelves. The maximum weight limit per shelf is 15 lbs (6.8 kg). Exceeding this limit can cause the stand to collapse, leading to injury or damage to your equipment.
- Ensure all connections are secure before placing items on the stand.
- Keep small parts away from children during assembly.
- Place the stand on a flat, stable surface to prevent tipping.
- Do not stand or climb on the unit.
- Avoid exposing the stand to excessive moisture or direct sunlight.
3. Package Contents
Before assembly, verify that all parts are present and undamaged. If any parts are missing or damaged, please contact Armocity customer support.
- A. Top Shelf (1)
- B. Middle Shelves (2)
- C. Bottom Shelf (1)
- D. Left Frame (1)
- E. Right Frame (1)
- F. Power Strip with USB Ports (1)
- G. LED Light Strip (1)
- H. Hardware Pack (Screws, Allen Wrench, Screwdriver)
- I. Instruction Manual (1)

Image 3.1: Product dimensions, illustrating the size of each shelf and the overall structure.
4. Assembly Instructions
Assembly is straightforward and typically takes less than 30 minutes. All necessary tools (Allen wrench, screwdriver) are included in the hardware pack. Follow these steps carefully:
- Step 1: Attach Frames to Bottom Shelf. Lay the bottom shelf (C) on a clean, soft surface to prevent scratches. Attach the left frame (D) and right frame (E) to the bottom shelf using the designated screws from the hardware pack. Ensure the frames are oriented correctly, with the wider base facing outwards.
- Step 2: Install Middle Shelves. Carefully slide the two middle shelves (B) into the grooves on the frames. These shelves are adjustable; choose your desired height for each shelf. Secure them in place using the provided screws.
- Step 3: Attach Top Shelf. Place the top shelf (A) onto the assembled frames and secure it with screws. Ensure all screws are tightened for stability.
- Step 4: Install Power Strip. Locate the pre-drilled holes on the underside of one of the middle shelves. Mount the power strip (F) using the short screws provided. Ensure the power cord can reach an outlet.
- Step 5: Apply LED Light Strip. Clean the desired surface (e.g., underside of a shelf or along the frame) where you want to install the LED light strip (G). Peel off the adhesive backing and firmly press the strip into place. Connect the LED strip to the power strip's USB port.

Image 4.1: The integrated power strip and adjustable shelf feature, highlighting convenience for electronic devices.

Image 4.2: A closer look at the power strip, demonstrating its functionality for charging and powering devices.
5. Setup
Once assembled, follow these steps to set up your media stand:
- Placement: Choose a flat, level surface for the media stand. Ensure there is enough space around it for proper ventilation of your electronic devices.
- Cable Management: Utilize the open design to route cables neatly. The stand's structure allows for easy access to the rear of your equipment.
- Connect Power: Plug the power strip's cord into a wall outlet.
- Arrange Equipment: Place your audio-visual components on the shelves. Consider the weight distribution and ensure no single shelf exceeds the 15 lbs (6.8 kg) limit. The adjustable shelves allow for customization to fit various component sizes.

Image 5.1: The adjustable shelves provide flexibility for accommodating different sizes of audio-visual equipment.
6. Operating Instructions
6.1. Power Strips
The integrated power strip provides convenient access to power for your devices.
- Plug your AV equipment, chargers, or other electronics into the 4 AC receptacles.
- Use the 2 USB ports to charge smartphones, tablets, or other USB-powered devices.
- Ensure the total power draw of all connected devices does not exceed the power strip's maximum rating.
6.2. LED Lights
The LED light strip enhances the ambiance of your media setup.
- The LED strip is powered via a USB connection to the integrated power strip.
- Control the LED lights using the inline controller or remote (if included).
- Options typically include static colors and various dynamic modes to suit your preference.

Image 6.1: The LED light strip provides customizable lighting for your entertainment area.
7. Maintenance
To ensure the longevity and appearance of your Armocity Media Stand, follow these simple maintenance guidelines:
- Cleaning: Wipe with a dry cloth to remove dust and fingerprints. For stubborn marks, use a slightly damp cloth and immediately dry the surface. Avoid harsh chemicals or abrasive cleaners, as these can damage the finish.
- Inspection: Periodically check all screws and connections to ensure they remain tight. Re-tighten if necessary to maintain stability.
- Environmental Care: Keep the stand away from direct heat sources and prolonged exposure to sunlight to prevent warping or fading of the wood finish.
8. Troubleshooting
If you encounter any issues with your media stand, refer to the following common problems and solutions:
| Problem | Possible Cause | Solution |
|---|---|---|
| Stand is wobbly or unstable. | Loose screws; uneven floor. | Ensure all screws are fully tightened. Move the stand to a level surface or use shims under the feet. |
| Power strip is not working. | Not plugged into wall; wall outlet not active; power strip switch off; overloaded. | Check if the power strip is securely plugged into a live wall outlet. Verify the power strip's switch is ON. Reduce the number of connected devices if overloaded. |
| LED lights are not turning on. | USB connection loose; power strip off; LED strip faulty. | Ensure the LED strip's USB connector is firmly plugged into the power strip. Verify the power strip is active. Test the LED strip with another USB power source if possible. |
| Shelves are difficult to adjust. | Screws too tight; obstruction. | Loosen the screws holding the shelves slightly before attempting to adjust. Ensure no items are obstructing the shelf movement. |
9. Specifications
| Feature | Detail |
|---|---|
| Model | B0CJTH1MRH |
| Brand | Armocity |
| Dimensions (Overall) | 20.5"D x 23.6"W x 30.7"H |
| Number of Shelves | 4 (Adjustable) |
| Shelf Material | Engineered Wood (15mm thickness) |
| Frame Material | Metal |
| Color | Rustic Brown |
| Special Features | Integrated Power Strip (4 AC outlets, 2 USB ports), LED Lights |
| Max Weight Capacity per Shelf | 15 lbs (6.8 kg) |
| Item Weight | 33.8 pounds |
| Assembly Required | Yes |
| Care Instructions | Wipe with Dry Cloth |
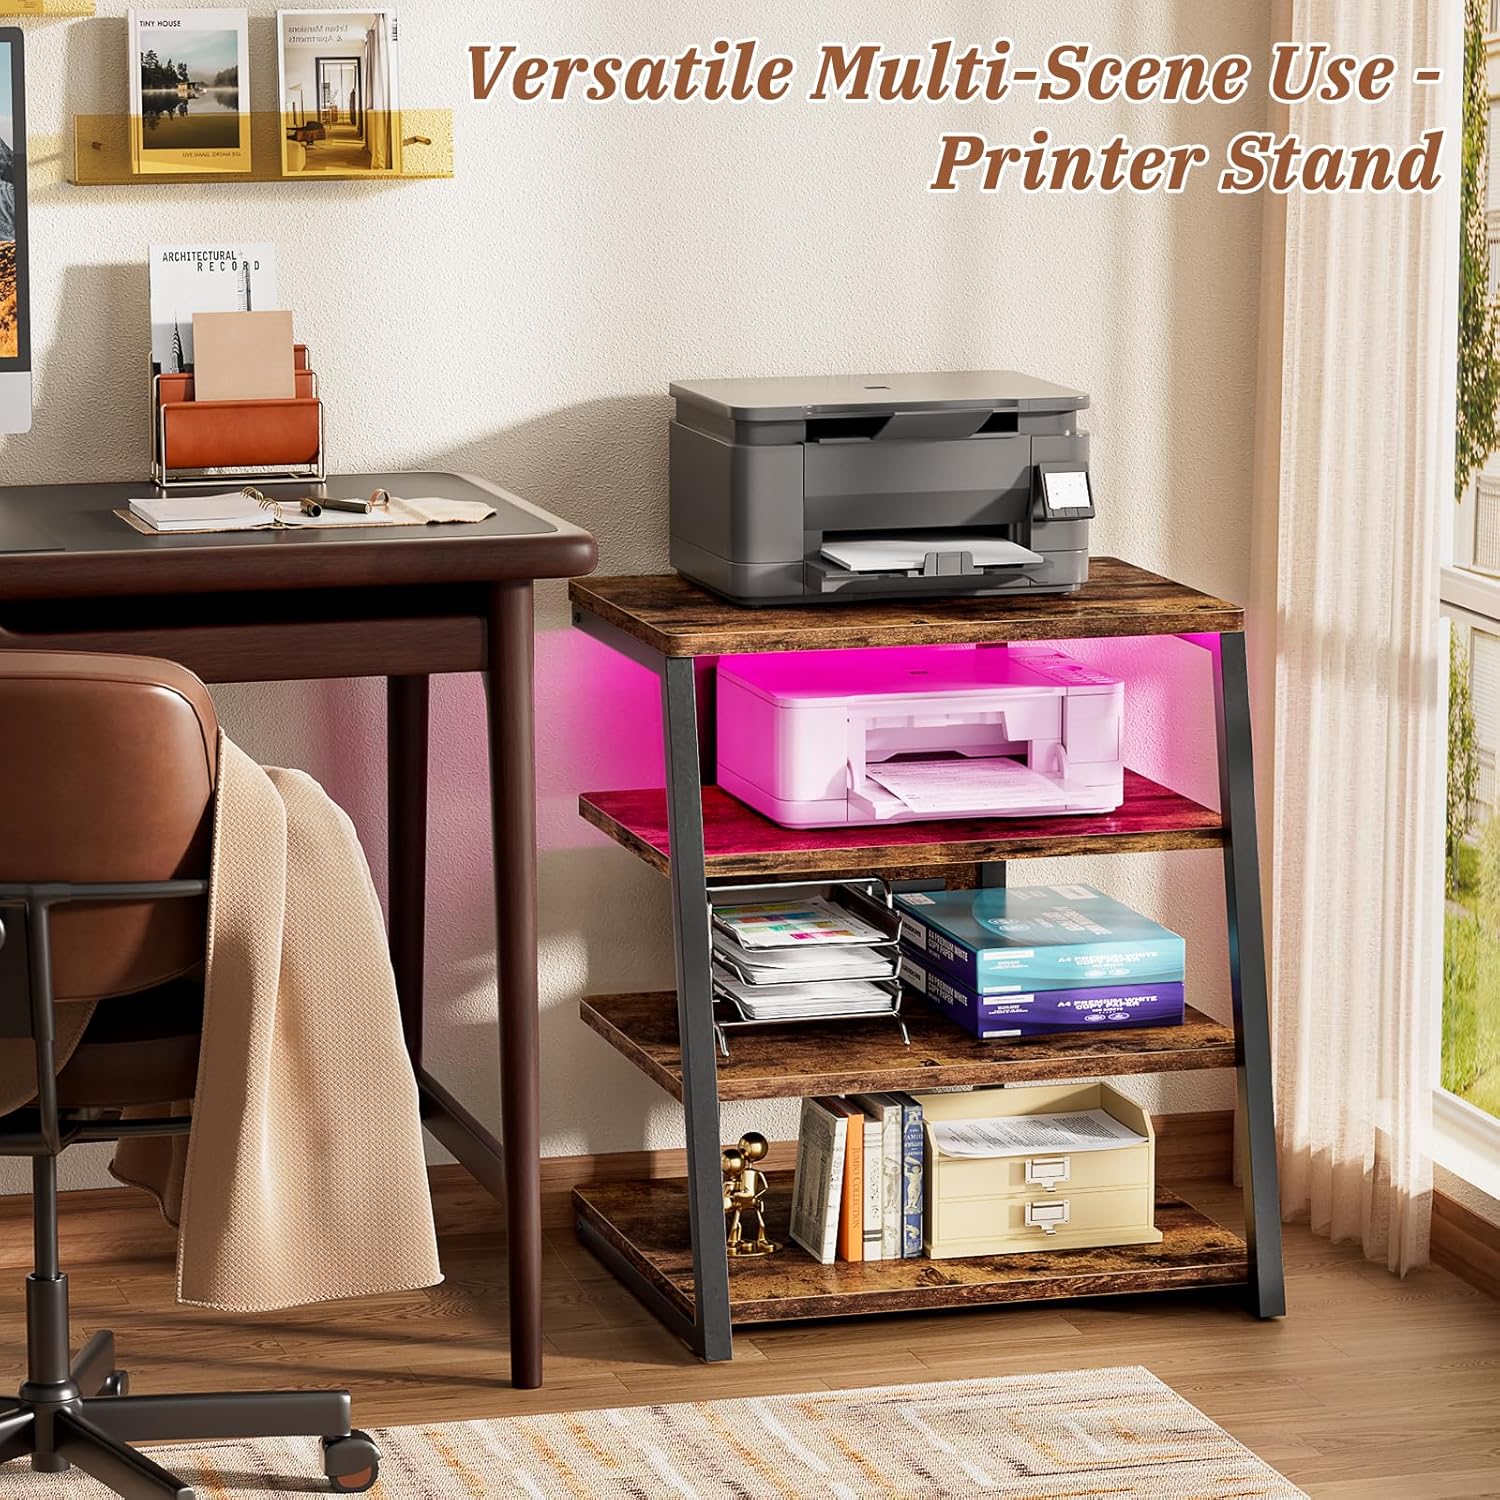
Image 9.1: The trapezoid design contributes to the stand's stability and aesthetic appeal, with a shelf thickness of 0.79 inches.
10. Warranty and Support
Armocity products are designed for quality and durability. For specific warranty details, please refer to the product packaging or contact Armocity customer support directly. If you have any questions, require assistance with assembly, or need to report missing/damaged parts, please reach out to our support team.
Contact Information: Please visit the official Armocity website or refer to your purchase documentation for the most current customer support contact details.