1. Introduction
This manual provides essential information for the proper installation, operation, and maintenance of your HECASA LED Headlights. These headlights are designed for specific Peterbilt truck models to enhance visibility and driving safety. Please read this manual thoroughly before installation and use.
Compatibility: Compatible with Peterbilt 357, 359, 365, 367, 378, 379, 389, and 567 trucks. Note: Only fits trucks with lights on the hood side.
2. Safety Information
- Professional installation is recommended to ensure proper function and safety.
- Always disconnect the vehicle's battery before performing any electrical work.
- Ensure all wiring connections are secure and properly insulated to prevent short circuits.
- Verify that the headlights are correctly aimed after installation to avoid blinding oncoming traffic.
- Wear appropriate personal protective equipment (PPE) during installation.
3. Package Contents
Verify that all items are present in the package:
- 1 Pair of HECASA LED Headlights (Left & Right)
- Wiring Harness
- Mounting Arms
- Mounting Hardware (bolts, washers, connectors)

Image: Included components of the HECASA LED Headlight kit, showing the headlights, mounting arms, and installation hardware.
4. Installation
Follow these steps for installing your HECASA LED Headlights. Some modifications may be required during installation.
- Preparation: Park the truck on a level surface, engage the parking brake, and turn off the engine. Disconnect the negative terminal of the battery.
- Remove Old Headlights: Carefully remove the existing headlight assemblies. This typically involves unscrewing mounting bolts and disconnecting the wiring harness.
- Install Mounting Arms: Attach the provided mounting arms to the new HECASA LED Headlights using the supplied hardware. Ensure they are securely fastened.
- Position New Headlights: Carefully place the new LED headlight assemblies into the headlight openings. Align them with the existing mounting points.
- Secure Headlights: Use the provided mounting hardware to secure the headlights to the truck. Tighten all bolts firmly but do not overtighten.
- Connect Wiring: Connect the wiring harness of the new LED headlights to the truck's electrical system. Ensure correct polarity and secure connections. The wiring harness is designed for direct connection, but some trucks may require minor wiring adjustments.
- Adjust Headlight Aim: After installation, adjust the headlight aim to ensure optimal visibility and compliance with road regulations. Adjustments can typically be made using screws on the back of the housing. Turn clockwise/counter-clockwise within two turns to meet requirements. If adjustment encounters resistance, stop to avoid damage.
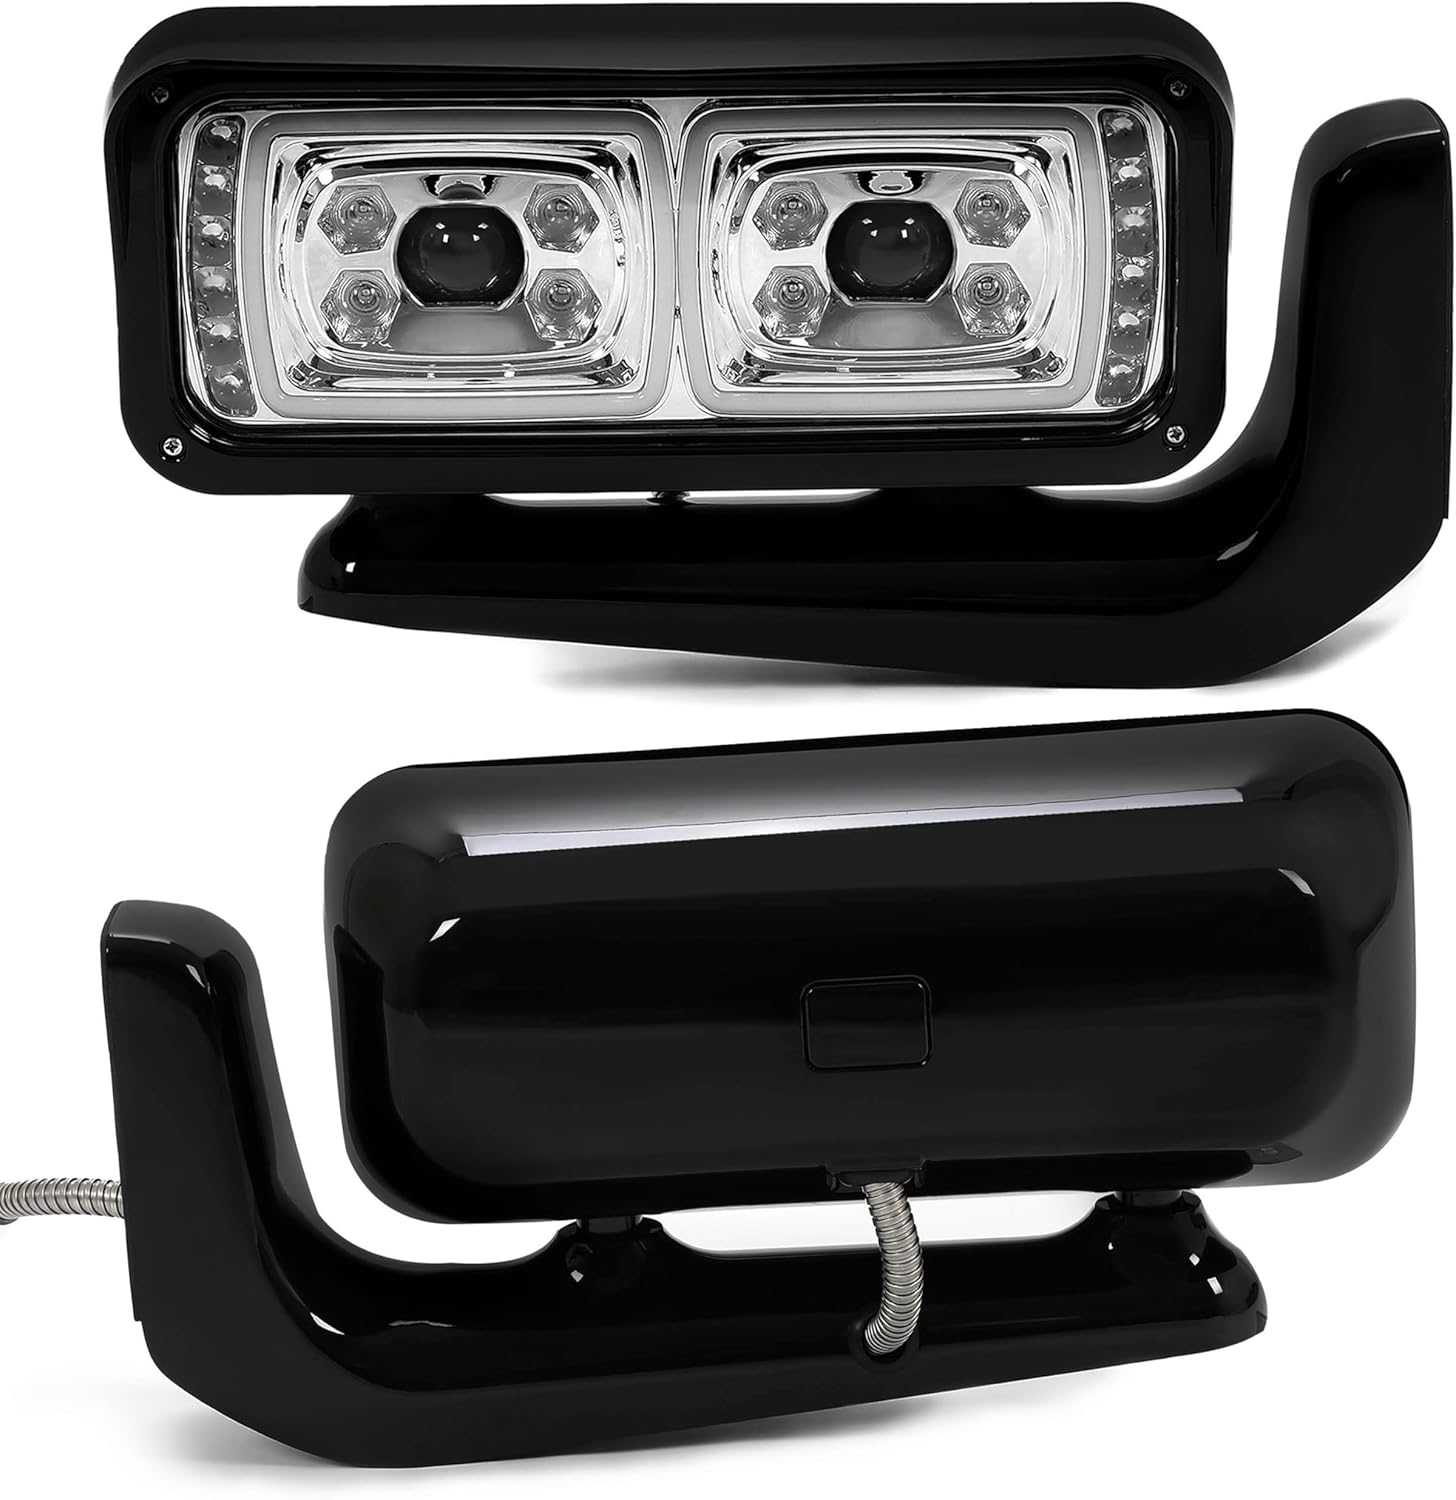
Image: Rear view of the HECASA LED Headlight, highlighting the wiring connections and adjustment screws.

Image: Detailed view of the wiring harness for the HECASA LED Headlights, showing individual wire connections.
Video: Demonstration of LED headlight adjustment for Peterbilt 388/389 models, illustrating how to properly aim the lights.
5. Operation
Your HECASA LED Headlights feature multiple lighting functions:
- Low Beam: Provides standard illumination for regular driving conditions.
- High Beam: Offers maximum illumination for improved visibility on dark roads.
- LED Running Light Bar: Enhances vehicle visibility during daytime and adds a modern aesthetic.
- Turn Signal: Amber lights indicate turns or lane changes.

Image: Various lighting modes of the HECASA LED Headlights, including low beam, high beam, daytime running lights, and amber turn signals.

Image: The HECASA LED Headlight showcasing its integrated LED running light bar and amber turn signal functionality.
Video: Overview of HECASA LED Headlights with mounting arms, demonstrating various light functions and features.
Video: Detailed demonstration of the light output and various functions of LED projector headlights.
6. Maintenance
To ensure the longevity and optimal performance of your LED headlights:
- Cleaning: Regularly clean the headlight lenses with a soft cloth and mild soap solution. Avoid abrasive cleaners that can scratch the plastic lens.
- Inspection: Periodically check all wiring connections for corrosion or looseness. Inspect the mounting arms and hardware for any signs of wear or damage.
- Lens Condition: Ensure the clear lens remains free from cracks or significant hazing, which can impair light output.
7. Troubleshooting
If you encounter issues with your HECASA LED Headlights, refer to the following common problems and solutions:
| Problem | Possible Cause | Solution |
|---|---|---|
| Headlight not working | Loose or corroded wiring connection, faulty bulb/LED, insufficient power supply. | Check all wiring connections and ensure they are secure. Inspect for corrosion and clean if necessary. Verify power supply to the headlight. If the issue persists, consult a professional. |
| Dim or flickering lights | Poor electrical connection, low voltage, damaged wiring. | Inspect wiring for damage or loose connections. Check vehicle's charging system for proper voltage output. |
| Improper light beam pattern | Incorrect headlight aim. | Refer to Section 4, Step 7 for instructions on adjusting headlight aim. |
8. Specifications
| Feature | Specification |
|---|---|
| Brand | HECASA |
| Model Number | MO-2272 |
| Color | Clear Lens Black Housing |
| Light Source Type | LED |
| Wattage | 25 watts |
| Special Feature | Waterproof |
| Lens Material | Plastic |
| Vehicle Service Type | Truck |
| Automotive Fit Type | Vehicle Specific Fit |
| Assembly Required | Yes |
| Item Weight | 28.9 pounds |
| Package Dimensions | 22.44 x 22.24 x 11.61 inches |
9. Warranty and Support
For warranty information or technical support, please refer to the product packaging or contact HECASA customer service directly. Keep your purchase receipt as proof of purchase.