
Denver MRD-52 LIGHTWOOD (Model 111161600080)
Denver Retro Music System MRD-52 LIGHTWOOD
Model: MRD-52 LIGHTWOOD (111161600080)
Introduction
This manual provides essential information for the safe and efficient operation of your Denver Retro Music System MRD-52 LIGHTWOOD. Please read this manual thoroughly before using the device and retain it for future reference.
The Denver MRD-52 is a versatile retro music system featuring a turntable, CD player, FM/DAB radio, Bluetooth receiver, and auxiliary input, designed to provide a comprehensive audio experience.
Safety Information
Always follow basic safety precautions when using this product to reduce the risk of fire, electric shock, and injury to persons.
- Do not expose this appliance to rain or moisture.
- Do not block any ventilation openings.
- Ensure the power cord is not pinched or walked on.
- Unplug the appliance during lightning storms or when unused for long periods.
- Refer all servicing to qualified service personnel.
- This product contains a laser. Do not open the CD compartment while a disc is spinning.
Package Contents
Please check that all items are present in the packaging:
- Denver Retro Music System MRD-52 LIGHTWOOD main unit
- External Speakers (2 units)
- Power Adapter
- User Manual (this document)
Product Overview
Familiarize yourself with the main components and controls of your music system.

Figure 1: Front view of the Denver Retro Music System with the turntable cover open, showing the record player, display, and control buttons.
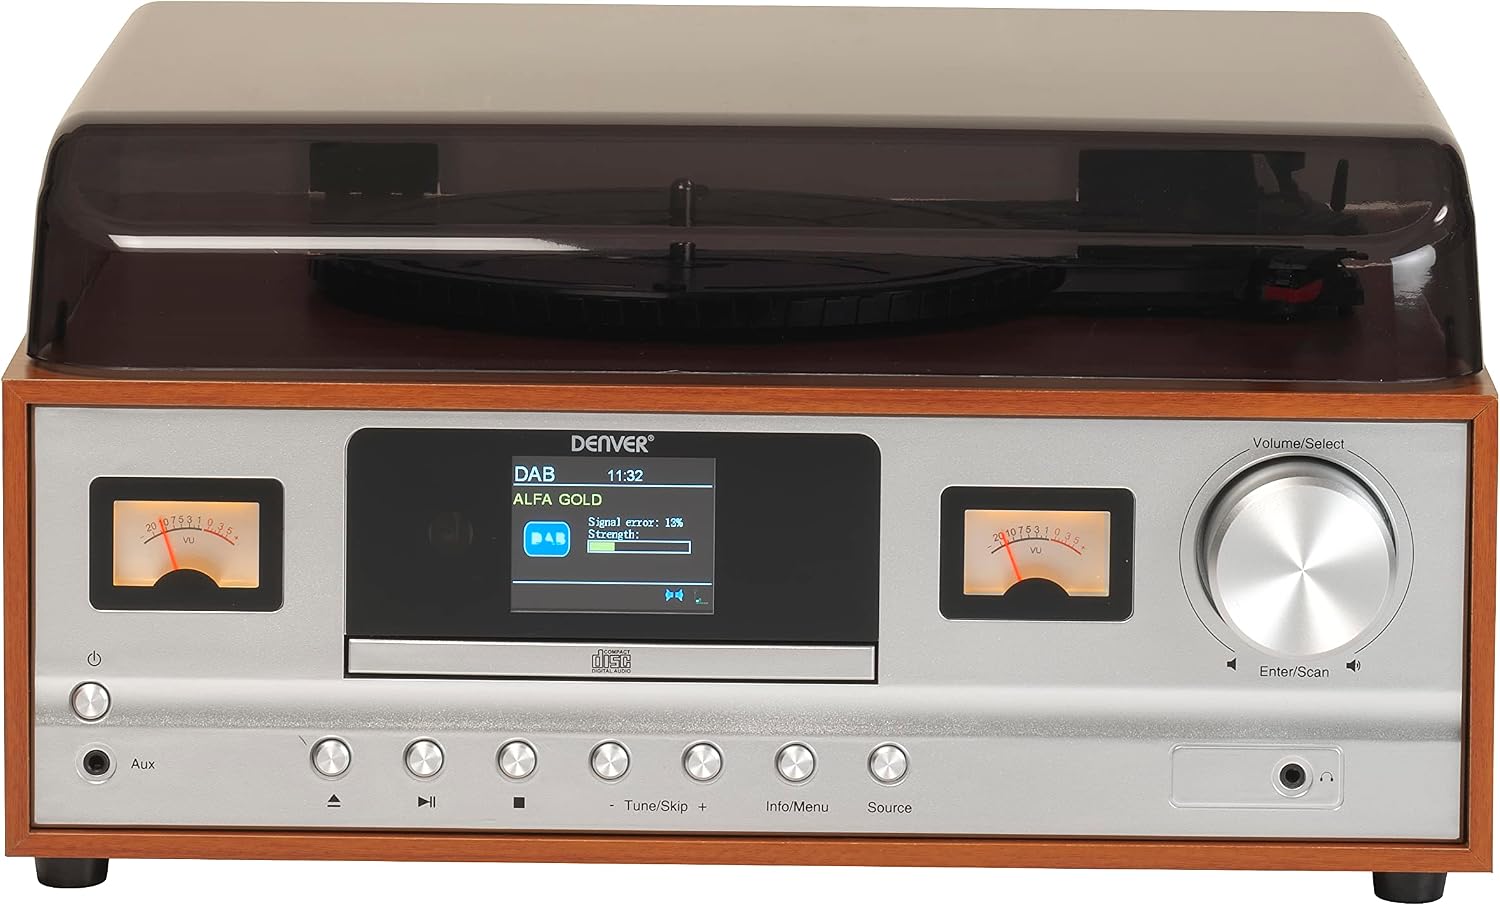
Figure 2: Close-up of the front panel, highlighting the display screen, control buttons, and volume knob.

Figure 3: Rear view of the music system, showing the speaker output terminals and power input.

Figure 4: The two external speakers included with the system, featuring a wooden finish and speaker grilles.
Front Panel Controls:
- Power Button: Turns the unit on/off.
- Display Screen: Shows current mode, track information, radio frequency, etc.
- Volume/Select Knob: Rotates to adjust volume, presses to select options.
- Aux Input: 3.5mm jack for external audio devices.
- Control Buttons: Play/Pause, Skip/Tune, Info/Menu, Source selection.
Rear Panel Connections:
- Speaker Outputs (R/L): Connect the included external speakers.
- DC IN (9V): Connect the provided power adapter.
Setup
1. Unpacking
Carefully remove all components from the packaging. Retain the packaging for future transport or storage.
2. Speaker Connection
- Locate the speaker cables attached to the external speakers.
- Connect the red wire to the red (+) terminal and the black wire to the black (-) terminal on the back of the main unit for both the Left (L) and Right (R) speakers. Ensure correct polarity for optimal sound.

Figure 5: Detailed view of the speaker terminals (R and L) and the DC power input on the rear of the unit.
3. Power Connection
- Insert the DC plug of the provided power adapter into the "DC IN 9V" jack on the rear of the unit.
- Plug the AC adapter into a standard wall outlet.
4. Initial Power On
Press the Power button on the front panel to turn on the unit. The display will light up.
Operating Instructions
General Operation
- Power On/Off: Press the Power button.
- Volume Control: Rotate the Volume/Select knob clockwise to increase volume, counter-clockwise to decrease.
- Source Selection: Press the Source button repeatedly to cycle through available modes: Phono, CD, FM, DAB, Bluetooth, AUX.
Bluetooth Operation
- Press the Source button until "Bluetooth" mode is selected. The display will show "Pairing" or "Waiting for connection".
- Enable Bluetooth on your mobile device (smartphone, tablet, etc.).
- Search for "MRD-52" in your device's Bluetooth list and select it to connect.
- Once connected, you can play audio from your device through the music system.
FM/DAB Radio Operation
- Press the Source button to select "FM" or "DAB" mode.
- Auto Scan: In FM/DAB mode, press and hold the Enter/Scan button to automatically scan and save available stations.
- Manual Tuning: Use the Tune/Skip +/- buttons to manually adjust the frequency.
- Presets: The system may automatically save stations to presets during auto-scan. Refer to the on-screen menu (using Info/Menu and Volume/Select knob) for managing presets.
CD Player Operation
- Press the Source button to select "CD" mode.
- Gently insert a CD into the CD slot located below the display. The disc will be automatically pulled in.
- Playback should begin automatically. Use the Play/Pause, Skip +/- buttons for control.
- To eject the CD, press the Eject button (usually integrated with Play/Pause or a dedicated button).

Figure 6: The CD player slot, showing a compact disc being inserted into the unit.
Turntable (Phono) Operation
- Press the Source button to select "Phono" mode.
- Open the dust cover.
- Place a record on the platter.
- Select the appropriate speed (33 1/3, 45, or 78 RPM) using the speed selector switch (if available, typically near the platter). The product specifications mention 78 RPM max, implying multi-speed support.
- Carefully lift the tone arm using the cueing lever and position the stylus over the desired track on the record.
- Lower the tone arm gently onto the record. Playback will begin.
- At the end of the record, lift the tone arm and return it to its rest.
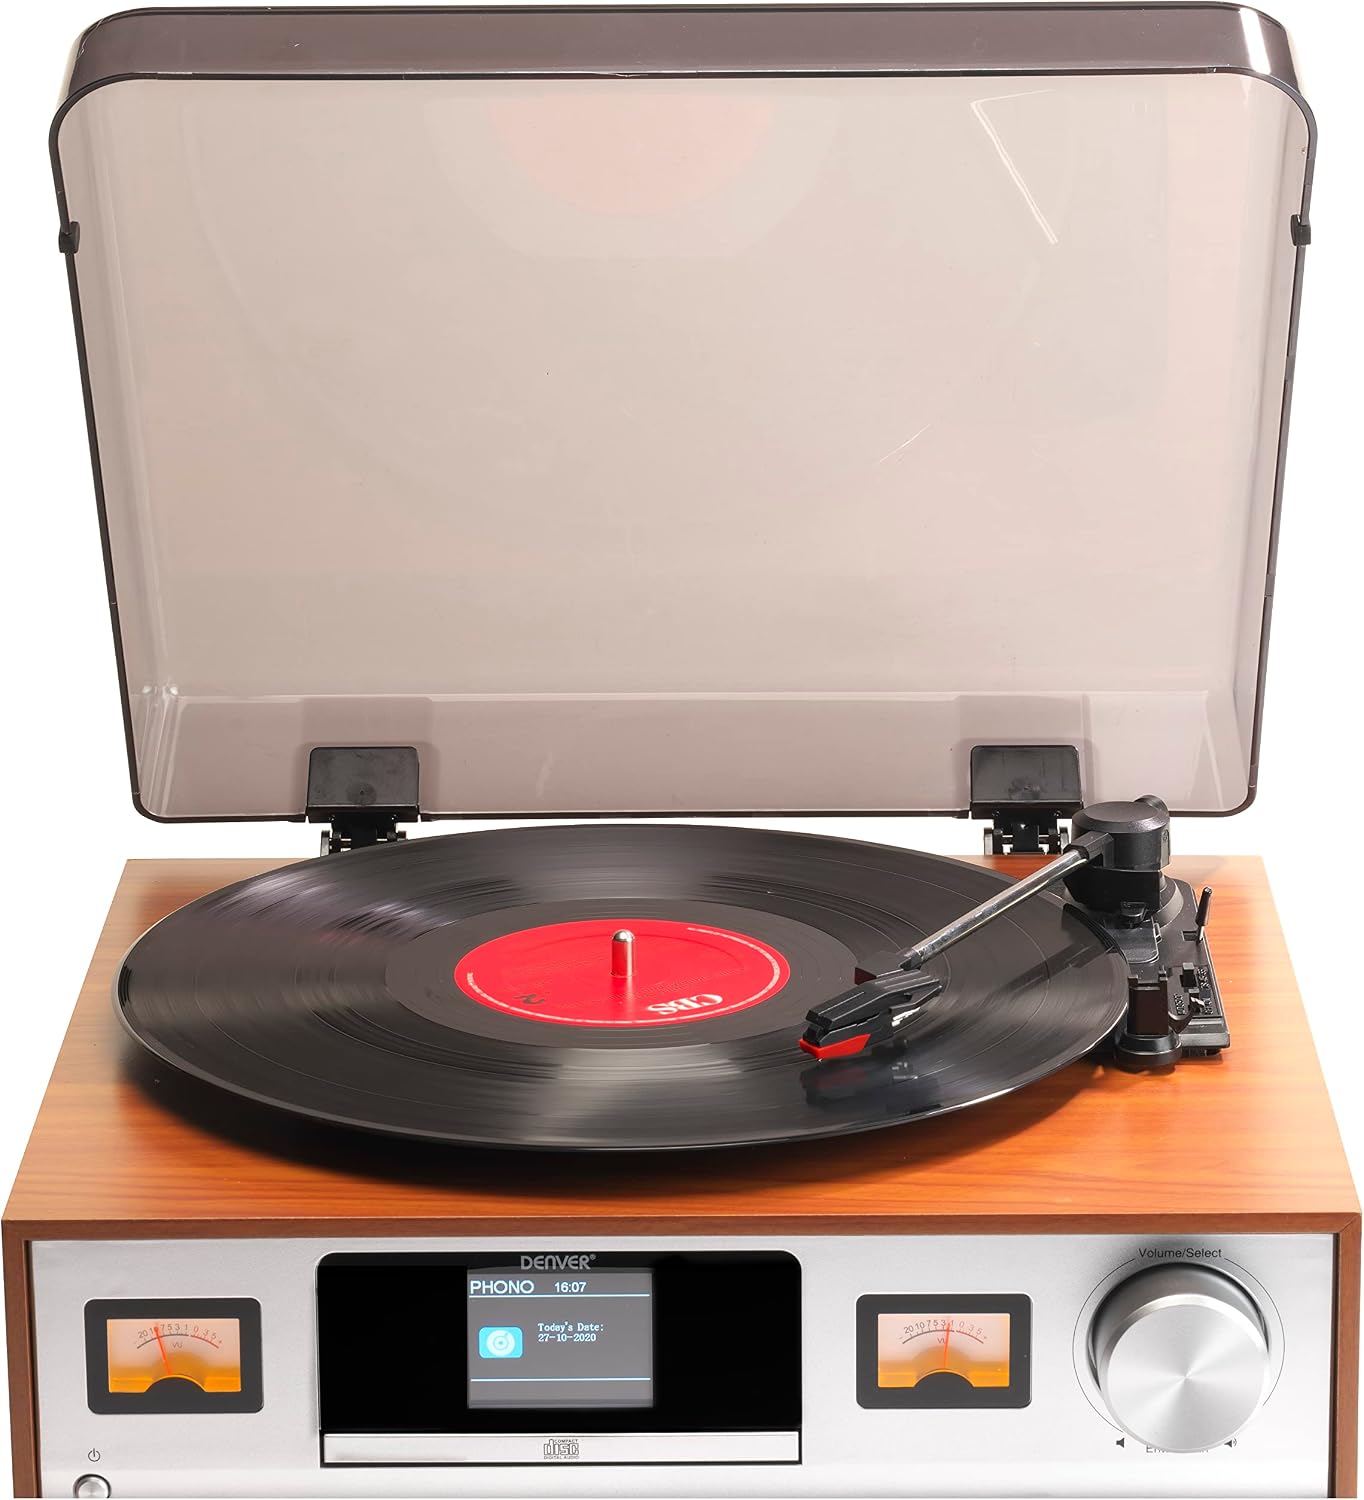
Figure 7: Detailed view of the turntable, showing a vinyl record on the platter and the tone arm with its stylus.
Auxiliary Input
Connect an external audio device (e.g., MP3 player, smartphone) to the AUX IN jack on the front panel using a 3.5mm audio cable. Select "AUX" mode using the Source button. Audio from the connected device will play through the system.
Maintenance
Cleaning
- Wipe the unit with a soft, dry cloth.
- Do not use abrasive cleaners, waxes, or solvents.
- For the turntable stylus, use a soft brush designed for stylus cleaning, brushing gently from back to front.
Stylus Replacement
The turntable stylus (needle) is a consumable part and will wear out over time. A worn stylus can damage your records. Replace the stylus when you notice a decrease in sound quality or distortion. Refer to the manufacturer's website or authorized service centers for replacement stylus information.
Storage
If storing the unit for an extended period, unplug it from the power outlet and cover it to protect it from dust. Ensure the tone arm is secured in its rest.
Troubleshooting
| Problem | Possible Cause | Solution |
|---|---|---|
| No power | Power cord not connected; Power outlet not active. | Ensure power cord is securely plugged in; Try a different outlet. |
| No sound | Volume too low; Incorrect source selected; Speakers not connected. | Increase volume; Select correct source; Check speaker connections. |
| Bluetooth not connecting | Device not in pairing mode; Device too far; Interference. | Ensure unit is in Bluetooth mode; Move device closer; Restart both devices. |
| Turntable sound distorted | Worn stylus; Dirty record; Incorrect speed. | Replace stylus; Clean record; Select correct RPM speed. |
| CD not playing | Disc inserted incorrectly; Disc scratched/dirty; Incorrect source. | Re-insert disc correctly; Clean disc; Select CD source. |
Specifications
| Feature | Detail |
|---|---|
| Model Number | 111161600080 |
| Brand | Denver |
| Connectivity Technology | Auxiliary, Bluetooth |
| Special Feature | Integrated Bluetooth receiver |
| Max Rotation Speed | 78 RPM |
| Item Weight | 6.08 Kilograms |
| Style | Retro |
| Signal Format | Digital |
| Power Consumption | 18W |
| Standby Consumption | < 1W |
| Power/Amps | 2 x 5W |
| Max Output Power | 2 x 5W |
| Frequency Bands | FM 87.5-108MHz / DAB 174.928-239.2MHz |
| Bluetooth Frequency | 2402-2480MHz |
| Input Voltage | DC = 9V |
Warranty and Support
For warranty information, please refer to the warranty card included with your product or contact your local retailer. Information regarding spare parts availability is not provided in this manual.
For technical support or service inquiries, please visit the official Denver Electronics website or contact their customer service department. The manufacturer is Denver Electronics A/S, located at Omega 5A Soeften, DK-8382 Hinnerup, Denmark.
You can find more information at www.denver-electronics.com.
Related documentsMRD-52 LIGHTWOOD (Model 111161600080)


Ask a question about this manual
Ask about setup, troubleshooting, compatibility, parts, safety, or missing instructions. Manuals+ will review the question and use this page’s manual context to help answer it.