Introduction
This manual provides essential instructions for the safe and efficient use of your SOLPERK 15W 12V Solar Battery Charger. This high-efficiency monocrystalline solar panel is designed for maintaining and charging 12V batteries in various applications, including cars, motorcycles, boats, RVs, and more. It features a durable design, an upgraded waterproof charge controller, and multiple safety protections.
Please read this manual thoroughly before installation and operation to ensure optimal performance and longevity of your solar charger.
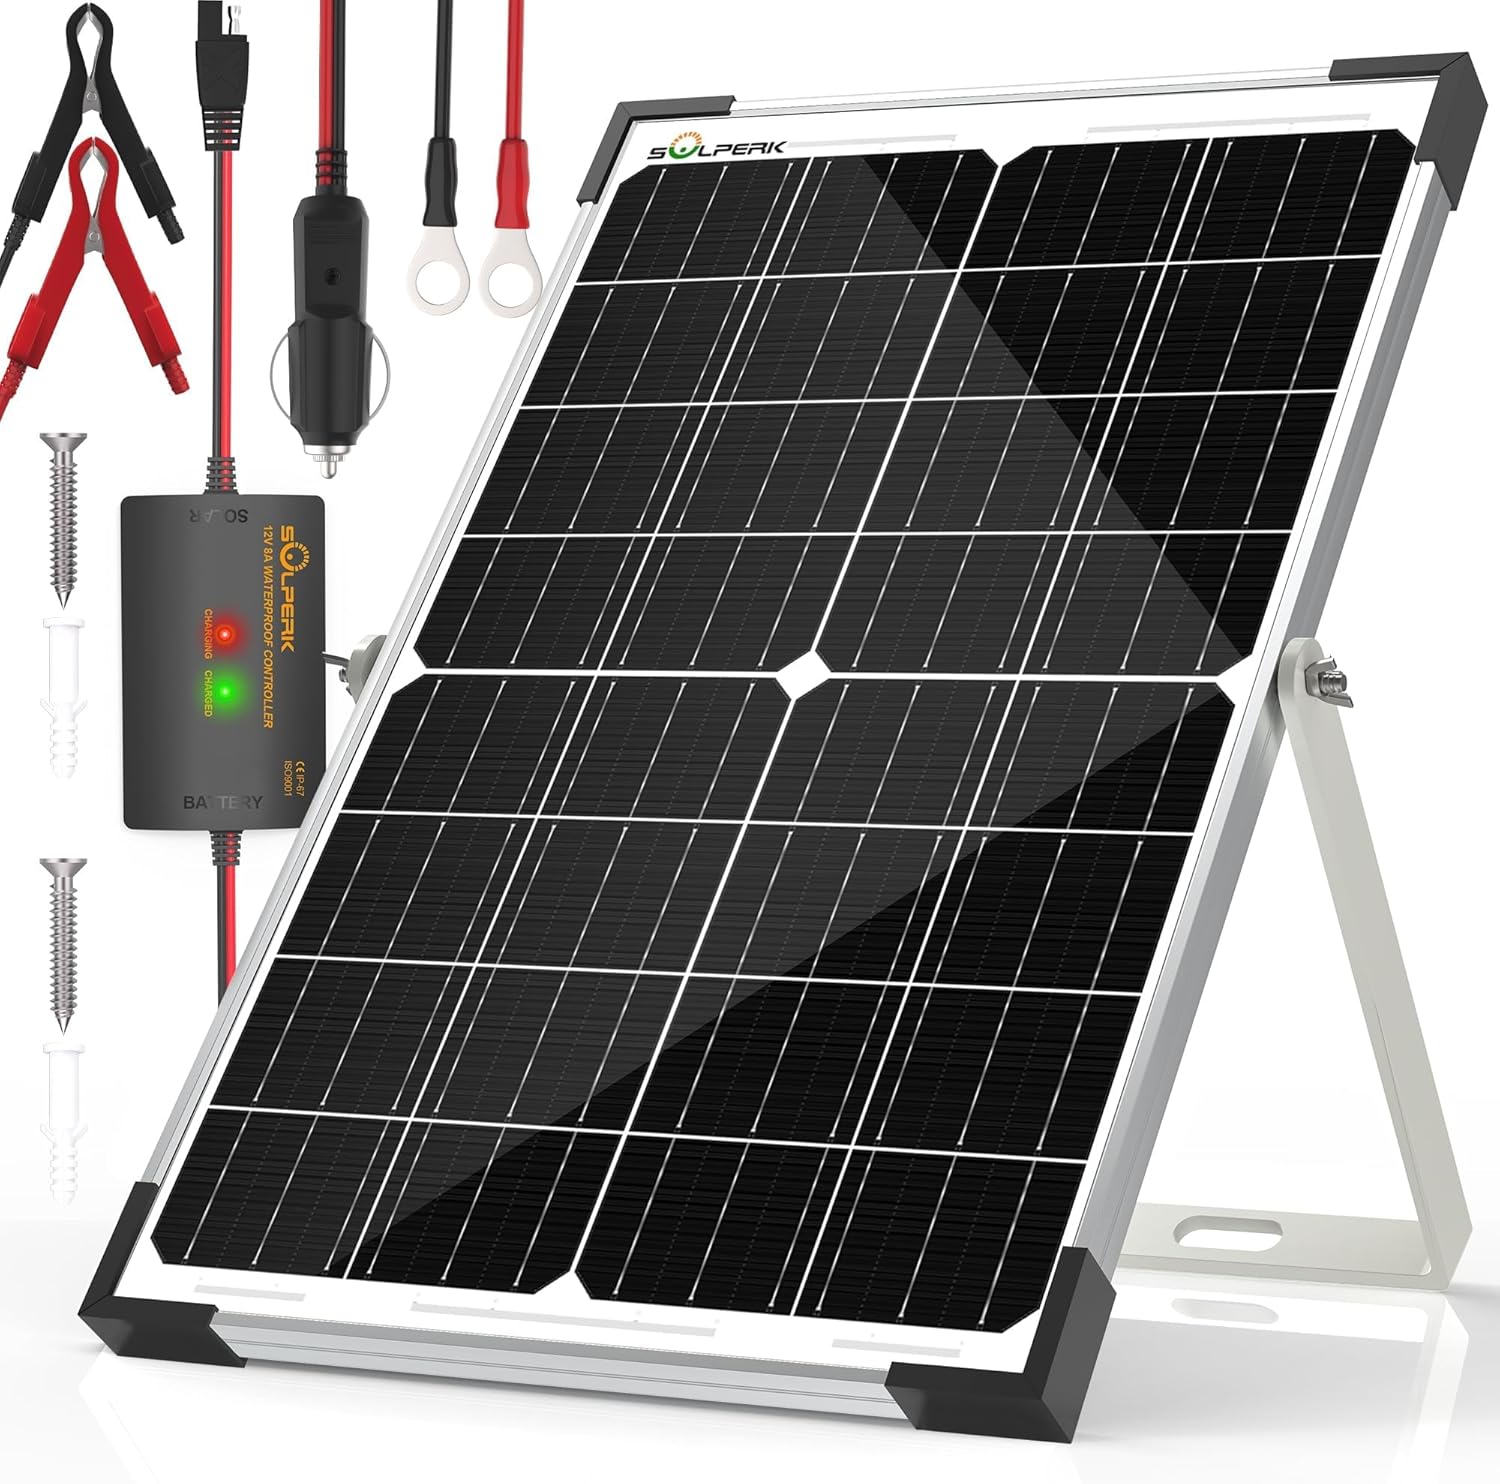
Image: The complete SOLPERK 15W 12V Solar Battery Charger kit, including the solar panel, charge controller, and various connectors.
Package Contents
Verify that all components listed below are included in your package:
- 1x 15W 12V Solar Panel
- 1x 8A Waterproof Charge Controller
- 1x Installation Bracket
- 1x Set of O-rings
- 4x Corner Guards
- 1x Set of Alligator Clips
- 1x Screw Kit
- 1x Cigarette Lighter Adapter
- 1x User Manual (this document)

Image: Visual representation of the solar panel dimensions and the various connection cables included in the package, such as alligator clips, O-rings, and a cigarette lighter adapter.
Setup and Installation
The SOLPERK 15W Solar Battery Charger is designed for quick and easy installation. Follow these steps to set up your solar panel and connect it to a 12V battery.
Mounting the Solar Panel
- Attach the adjustable bracket to the back of the solar panel using the provided screw kit.
- Position the solar panel in a location that receives maximum direct sunlight throughout the day. The adjustable bracket allows for a 0-90° tilt to optimize sun exposure.
- Secure the panel using the pre-drilled holes on the bracket. It can be mounted on roofs, walls, or placed on the ground.
- Install the corner guards on the panel's corners for added protection against impacts.

Image: A close-up view of the adjustable bracket, demonstrating its tilt capability for optimal sun angle.
Connecting to a 12V Battery
Follow these three easy steps to connect the solar panel to your 12V battery:
- Step 1: Connect the solar panel to the charge controller. Ensure a secure connection. At this point, both the "CHARGING" (red) and "CHARGED" (green) indicator lights on the controller will illuminate simultaneously.
- Step 2: Connect the charge controller to the battery using one of the provided connectors (alligator clips, O-rings, or cigarette lighter adapter). When using alligator clips or O-rings, ensure the positive (+) connector (red) is connected to the positive terminal of the battery and the negative (-) connector (black) is connected to the negative terminal. At this stage, only the "CHARGING" (red) light on the controller should be illuminated.
- Step 3: Once the battery voltage reaches 14.2V, the battery is fully charged. At this point, both the "CHARGING" (red) and "CHARGED" (green) lights on the controller will illuminate, indicating a full charge and maintenance mode.

Image: A diagram illustrating the three-step connection process from the solar panel to the charge controller and then to a 12V battery using various connectors.
Important: Ensure correct polarity when connecting to the battery to prevent damage to the charger or battery.
Operation
The SOLPERK 15W Solar Battery Charger operates automatically once connected. It is designed to charge and maintain 12V batteries, including LiFePO₄, GEL, and AGM types.
Charge Controller Indicators
- Red LED (CHARGING): Indicates that the battery is currently being charged.
- Green LED (CHARGED): Indicates that the battery is fully charged and the controller is in maintenance mode. Both red and green LEDs will be lit when fully charged.

Image: A close-up of the charge controller showing the red "CHARGING" and green "CHARGED" LED indicators.
Safety Features
The upgraded 8A waterproof controller incorporates multiple safety protections to ensure safe and reliable operation:
- Reverse Current Protection
- Overheat Protection
- Short Circuit Protection
- Overcharge Protection
- Overvoltage Protection
- Reverse Polarity Protection

Image: An exploded view diagram of the charge controller highlighting its internal components and various safety protection features.
The controller is fully sealed and IP67 waterproof, allowing it to function reliably in various weather conditions, including rain and direct sunlight. It also features zero nighttime power drain, preventing discharge of the battery when the sun is not present.
Video: A short demonstration showing the IP67 waterproof charge controller being splashed with water, confirming its resistance to environmental elements.

Image: The IP67 waterproof charge controller on the solar panel, with water droplets on its surface, illustrating its weather resistance.
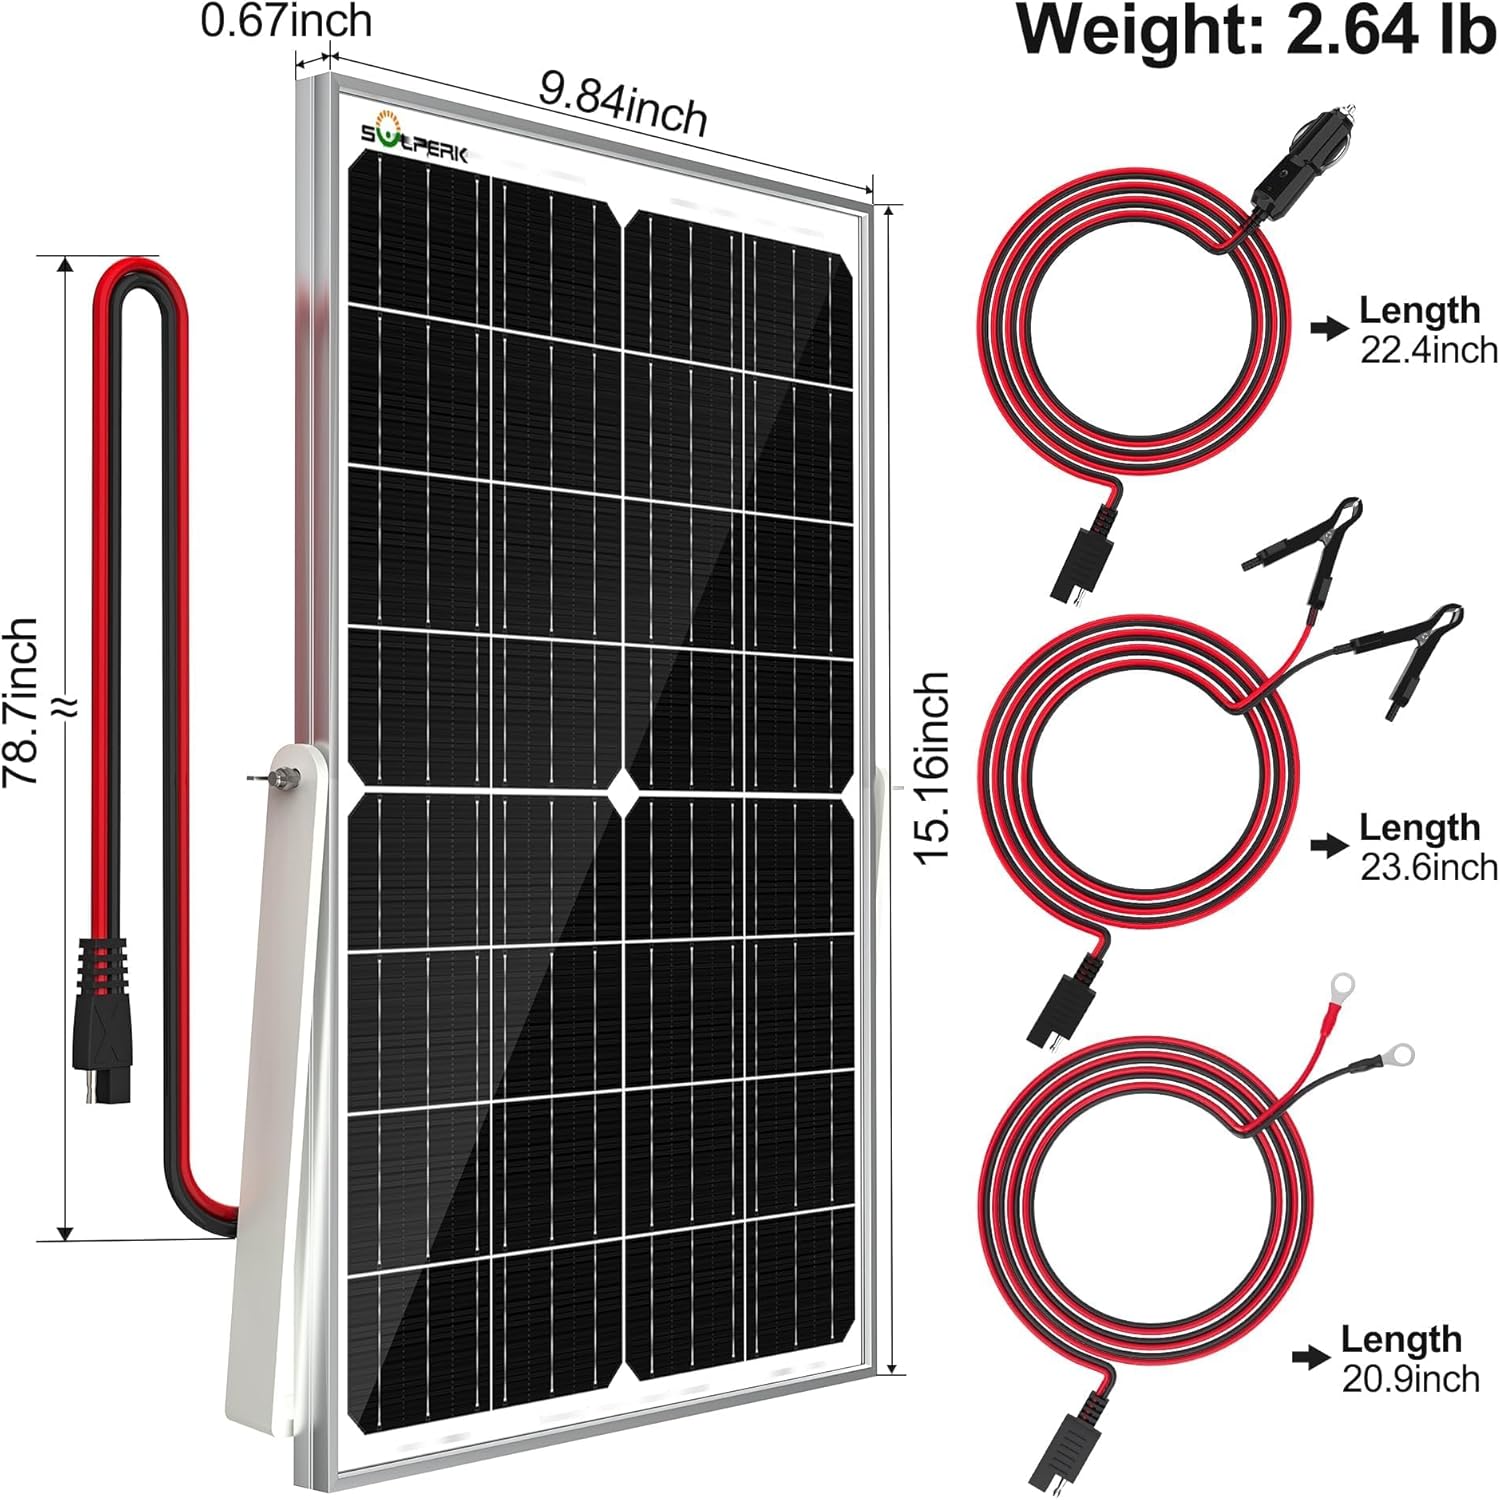
Image: The charge controller connected to a battery, illustrating the "Zero Battery Consumption" feature, which prevents battery drain during nighttime or low light conditions.
Maintenance
To ensure the long-term performance and efficiency of your SOLPERK solar charger, follow these maintenance guidelines:
- Cleaning: Periodically clean the surface of the solar panel with a soft, damp cloth to remove dust, dirt, and debris. A clean panel ensures maximum sunlight absorption and charging efficiency. Avoid abrasive cleaners or harsh chemicals.
- Inspection: Regularly inspect all connections for tightness and corrosion. Ensure cables are not frayed or damaged.
- Placement: Verify that the panel remains in an optimal position for sunlight exposure, especially after strong winds or other environmental disturbances.
- Durability: The panel features a tempered glass surface and an aviation-grade aluminum frame, designed to resist hail and corrosion. It operates effectively in extreme temperatures ranging from -40°F to 185°F.

Image: A detailed view of the solar panel's construction, highlighting the tempered glass surface and aluminum frame, which contribute to its 25-year service life and weather resistance.
Video: A short video demonstrating the durability of the solar panel by showing it withstand the weight of a vehicle, highlighting its robust construction.
Troubleshooting
If you encounter issues with your SOLPERK solar charger, refer to the following common problems and solutions:
| Problem | Possible Cause | Solution |
|---|---|---|
| No lights on controller / Not charging |
|
|
| Only red "CHARGING" light on, but battery not fully charging |
|
|
| Controller lights flicker or behave erratically |
|
|
For issues not covered here, or if troubleshooting steps do not resolve the problem, please contact SOLPERK customer support.
Specifications
| Feature | Detail |
|---|---|
| Brand | SOLPERK |
| Model Number | SK-M15W |
| Material | Monocrystalline Silicon |
| Maximum Power | 15 Watts |
| Maximum Voltage | 12 Volts |
| AC Adapter Current (Controller) | 8 Amps |
| Product Dimensions (L x W x H) | 15.2" x 9.9" x 0.7" |
| Item Weight | 1.64 Kilograms (3.61 pounds) |
| Efficiency | 23%-30% (High Efficiency) |
| Operating Temperature Range | -40°F to 185°F (-40°C to 85°C) |
| Waterproof Rating | IP67 (Controller) |
| Compatible Battery Types | LiFePO₄, GEL, AGM 12V batteries |
| Lifespan | 25 years (Solar Panel) |
Warranty and Support
SOLPERK stands behind the quality of its products. Your 15W 12V Solar Battery Charger comes with the following:
- 1-Year Replacement Warranty: For defects in materials and workmanship.
- Lifetime Expert Guidance: Access to professional technical assistance.
- 24/7 Priority Support: Dedicated customer service for any inquiries or issues.
For support, please visit the official SOLPERK website or contact their customer service team directly.

Image: A visual representation of the SOLPERK customer support team, emphasizing available assistance.