Product Overview
The HOMMPA Floating TV Stand is a versatile media console designed for televisions up to 65 inches. It offers both wall-mounted and floor-standing installation options, providing flexibility to suit various living spaces. The stand features a high-gloss finish on the front surface, ample storage with drop-down cabinets, and integrated multi-color LED lighting controlled via an app or remote.

Image: The HOMMPA Floating TV Stand installed in a modern living room, demonstrating its aesthetic appeal and functionality.
Safety Information
- Ensure all components are present and undamaged before assembly.
- Follow all assembly instructions carefully to prevent injury or damage to the product.
- Do not overload the TV stand. Refer to specifications for weight limits.
- When wall-mounting, ensure the wall material can support the weight of the stand and the television. Use appropriate wall anchors.
- Keep small parts away from children during assembly.
- Always use two or more people for lifting and moving the assembled unit.
Package Contents
Before beginning assembly, verify that all parts and hardware are included in the package. Refer to the assembly diagram for a complete list of components.

Image: An exploded view diagram illustrating all panels, hardware, and accessories included in the product packaging.
Assembly Instructions
This section provides step-by-step instructions for assembling your HOMMPA Floating TV Stand. Please read all steps before beginning. It is recommended to have a second person assist with assembly.
Assembly Video Guide
Video: A comprehensive assembly guide for the HOMMPA Floating TV Stand, demonstrating each step of the construction process.
Step-by-Step Guide
- Prepare the Base: Attach the L-shaped plastic feet to the bottom panel using the provided screws. Ensure they are securely fastened.
- Install LED Strip: Carefully stick the LED band to the designated area on the side of the base panel. Secure it with the provided buckles.
- Assemble Side Panels: Insert cam bolts into the pre-drilled holes on the side panels. Attach the wire box to the top panel.
- Connect Panels: Use wooden dowels and cam bolts to connect the side panels to the base and roof plates. Ensure all connections are tight.
- Insert Back Panel: Slide the back panel into the grooves of the assembled frame.
- Attach Doors: Install the hinges onto the drop-down cabinet doors. Attach the air pressure rods to the doors and the main frame. Secure the doors to the main unit using the hinges and screws.
- Final Placement: Choose between wall-mounted or floor-standing installation. For wall-mounting, use appropriate wall anchors (not always included, check package contents) and ensure the wall can support the weight. For floor-standing, ensure the unit is level and stable.
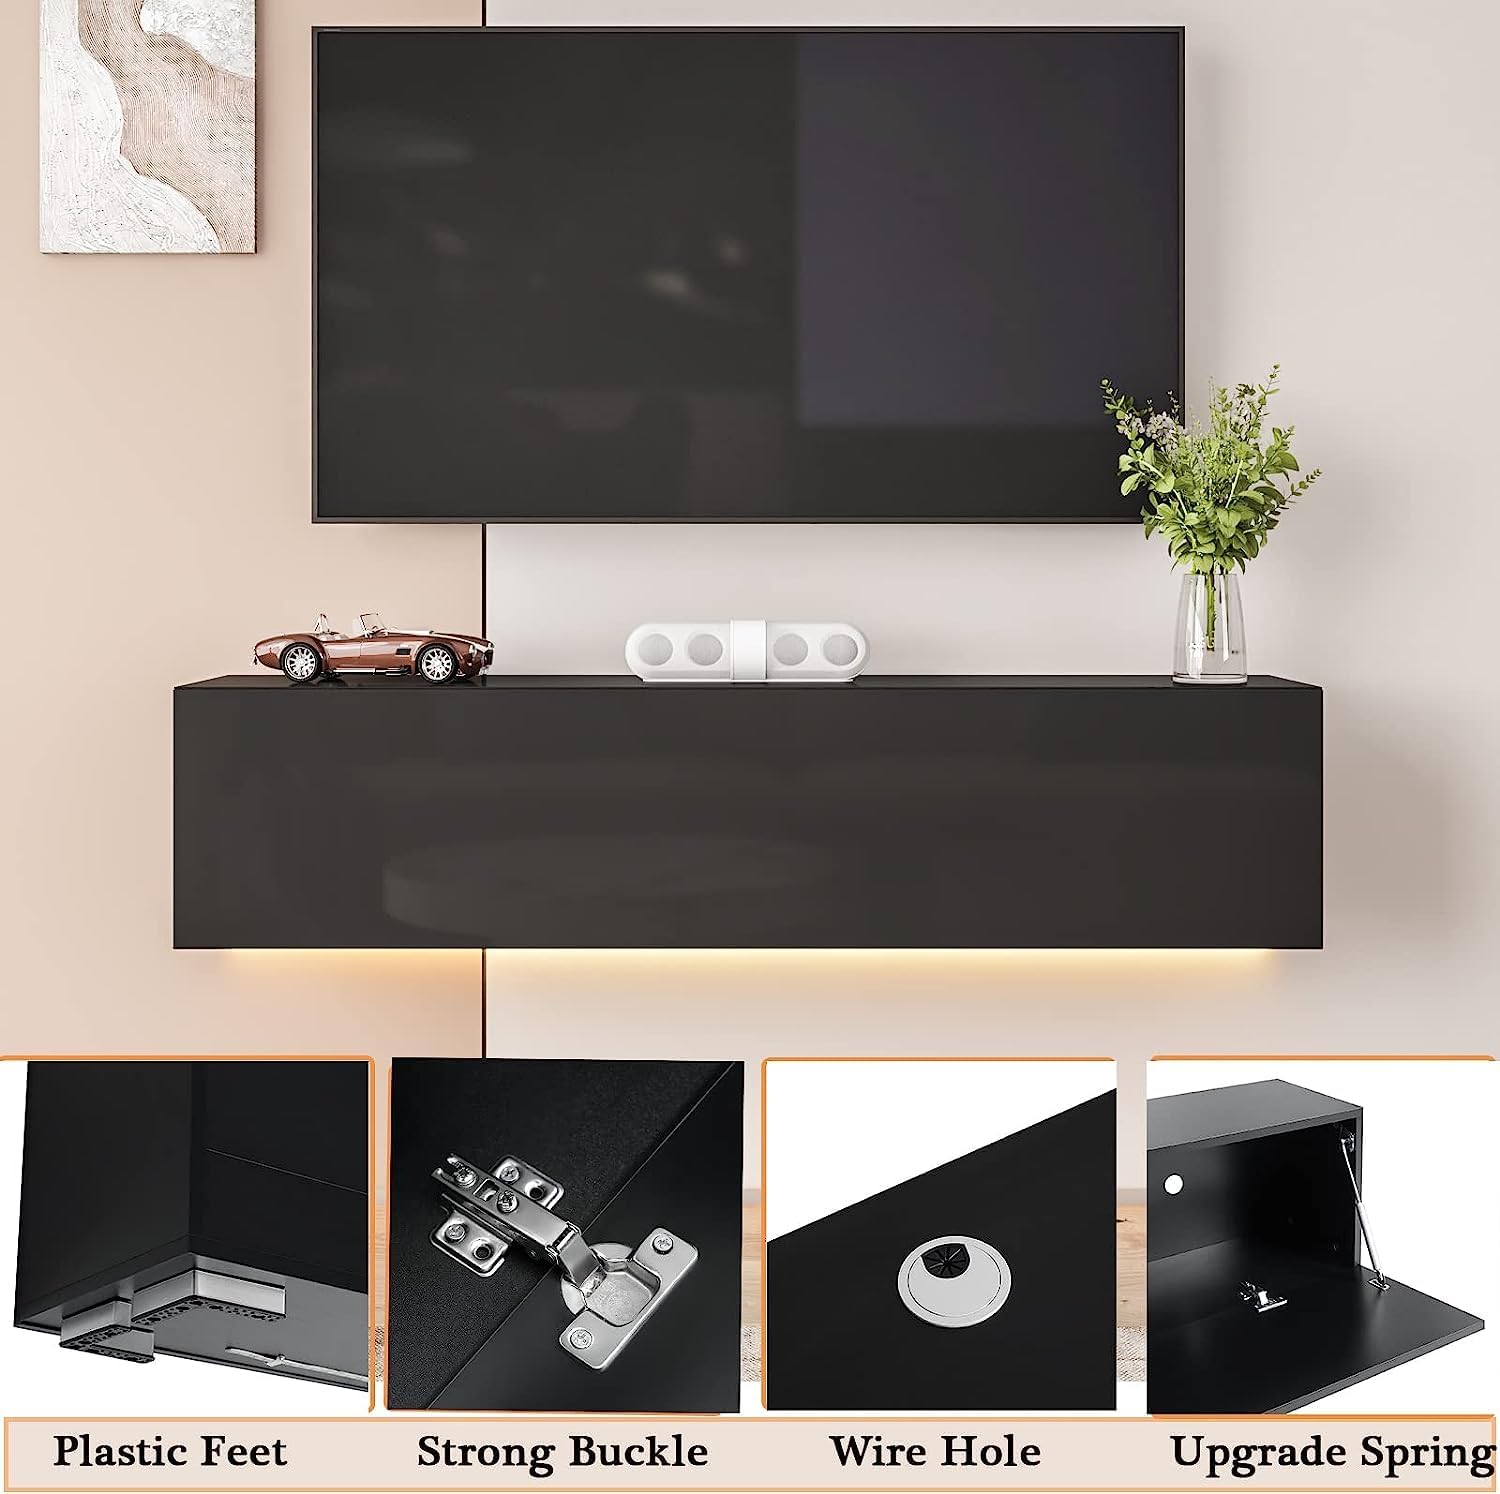
Image: Detailed view of the plastic feet and other hardware components.

Image: The interior of the TV stand with open compartments, highlighting the wire management holes.

Image: Illustration of the two installation methods: floating (wall-mounted) and floor-standing.
Operating Instructions (LED Lights)
The integrated LED lighting system can be controlled via a dedicated mobile application or the included remote control. Ensure the LED strip is properly connected to a power source.
- App Control: Download the specified mobile application (refer to the LED light manual or packaging for app name). Connect your device to the LED lights via Bluetooth or Wi-Fi as instructed in the app. The app offers 29 dynamic styles and over 6 million color options, music mode, MIC mode, and timing functions.
- Remote Control: Use the provided remote control to power on/off the lights, change colors, adjust brightness, and select various lighting modes.

Image: Screenshots demonstrating the mobile application interface for controlling the LED lighting features, including color selection and dynamic modes.
Maintenance
To maintain the appearance and longevity of your TV stand:
- Cleaning: Wipe the surfaces with a dry cloth. Avoid abrasive cleaners or harsh chemicals that may damage the high-gloss finish.
- Dusting: Regularly dust the unit to prevent buildup.
- Inspection: Periodically check all screws and connections to ensure they remain tight.
Troubleshooting
If you encounter any issues with your HOMMPA Floating TV Stand, refer to the following common solutions:
- Difficulty with Door Alignment: If cabinet doors are misaligned or do not close properly, check the hinge installation. Adjust the hinges as needed to achieve proper alignment. Ensure all screws are tightened evenly.
- Structural Instability: If the stand feels unstable or parts are separating, re-check all cam bolt and dowel connections. Ensure they are fully engaged and tightened. Avoid placing excessive weight on the unit.
- No Wire Access for Side Compartments: The design includes wire holes in the upper and lower plates for cable management. If specific side compartments lack direct wire access, consider routing cables through the main wire holes or consulting the manufacturer for alternative solutions.
- LED Lights Not Working: Verify that the LED strip is correctly connected to the power adapter and that the adapter is plugged into a functional power outlet. Check the remote control battery.
For further assistance, please contact customer support.
Specifications
| Feature | Detail |
|---|---|
| Brand | HOMMPA |
| Model Number | TV Standno15 |
| Material | Engineered Wood |
| Color | Black |
| Product Dimensions | 55.1 x 11.8 x 12.5 inches |
| Item Weight | 36.2 pounds |
| Number of Drawers | 3 (referring to drop-down cabinets as drawers in product description) |
| Number of Shelves | 1 (internal shelf) |
| Special Feature | LED Lighting, Wall-Mountable / Floor-Standing, High Gloss Front |
| Product Care | Wipe with Dry Cloth |
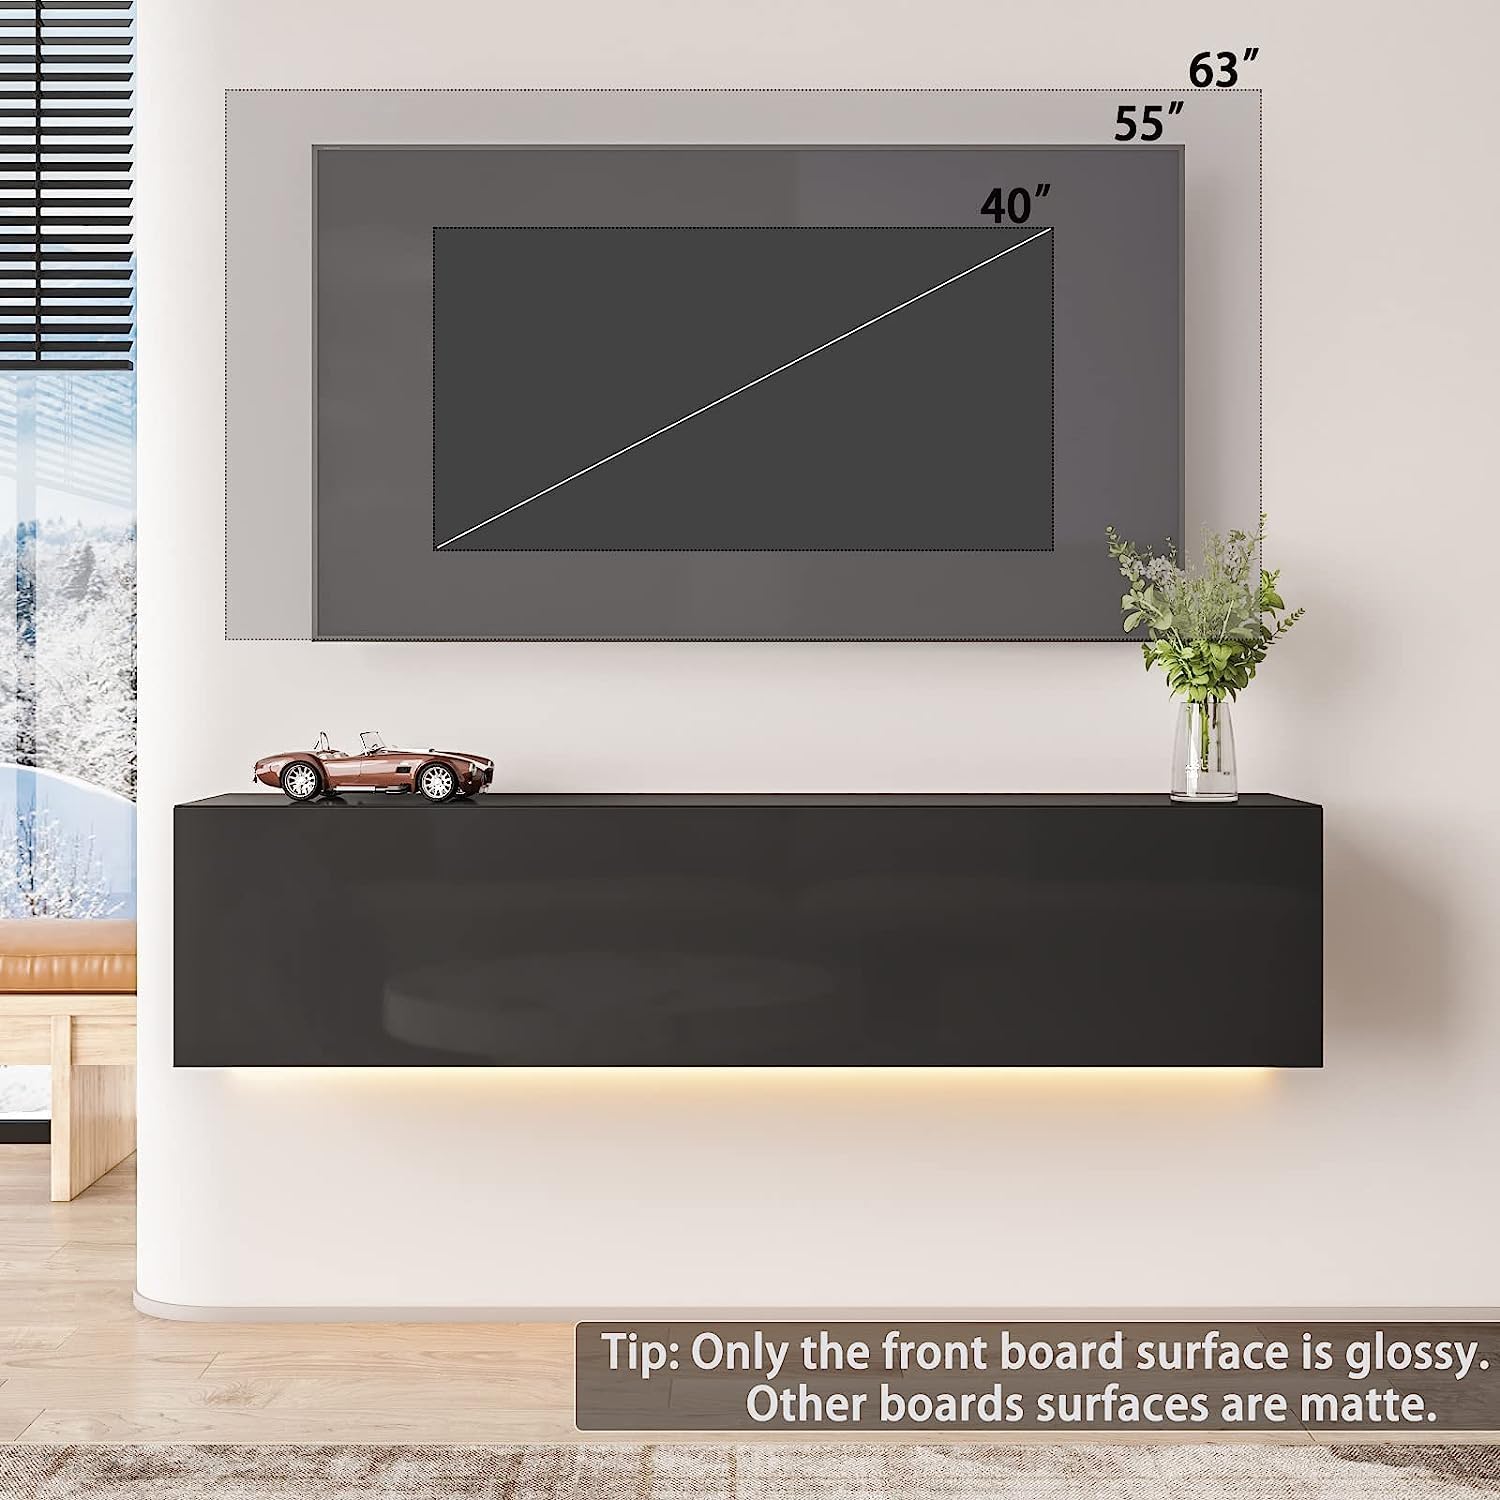
Image: Dimensional drawing of the TV stand, indicating length, width, and height measurements.
Warranty and Support
For any questions regarding assembly, missing parts, or product functionality, please contact HOMMPA customer support. Refer to your purchase documentation for specific warranty details.
If you encounter any issues during installation, please do not hesitate to contact us.