
1. Introduction
This manual provides detailed instructions for the installation, operation, and maintenance of your RUMOSE Rainfall Shower System, Model R_SS_00026_03_BK. Please read this manual thoroughly before installation and use to ensure proper function and longevity of your product. Keep this manual for future reference.
2. Safety Information
- Ensure all local plumbing and building codes are followed during installation.
- Turn off the main water supply before beginning any installation or maintenance.
- If you are unsure about any installation steps, consult a qualified professional plumber.
- Do not use abrasive cleaners or harsh chemicals on the product's finish, as this may damage the surface.
- Verify that all connections are secure and watertight to prevent leaks.
3. Package Contents
The RUMOSE Rainfall Shower System package includes the following components:
- 12-inch Square Rain Shower Head
- 4 PCS Body Jets
- 2-in-1 Handheld Spray
- Pressure Balance Valve
- Shower Arm
- Mounting Hardware
- User Manual (this document)

4. Specifications
| Feature | Detail |
|---|---|
| Brand | RUMOSE |
| Model Number | R_SS_00026_03_BK |
| Color | Matte Black |
| Material | Brass, Stainless Steel |
| Finish Type | Black |
| Number of Handles | 1 |
| Mounting Type | Wall Mount |
| Head Size | 12 inches |
| Spout Reach | 13 Inches |
| Flow Rate | 2.5 gpm @ 80 psi (Optional 1.8gpm @ 80psi) |
| Maximum Pressure | 60 Pound per Square Inch |
| Item Weight | 12.8 Pounds |
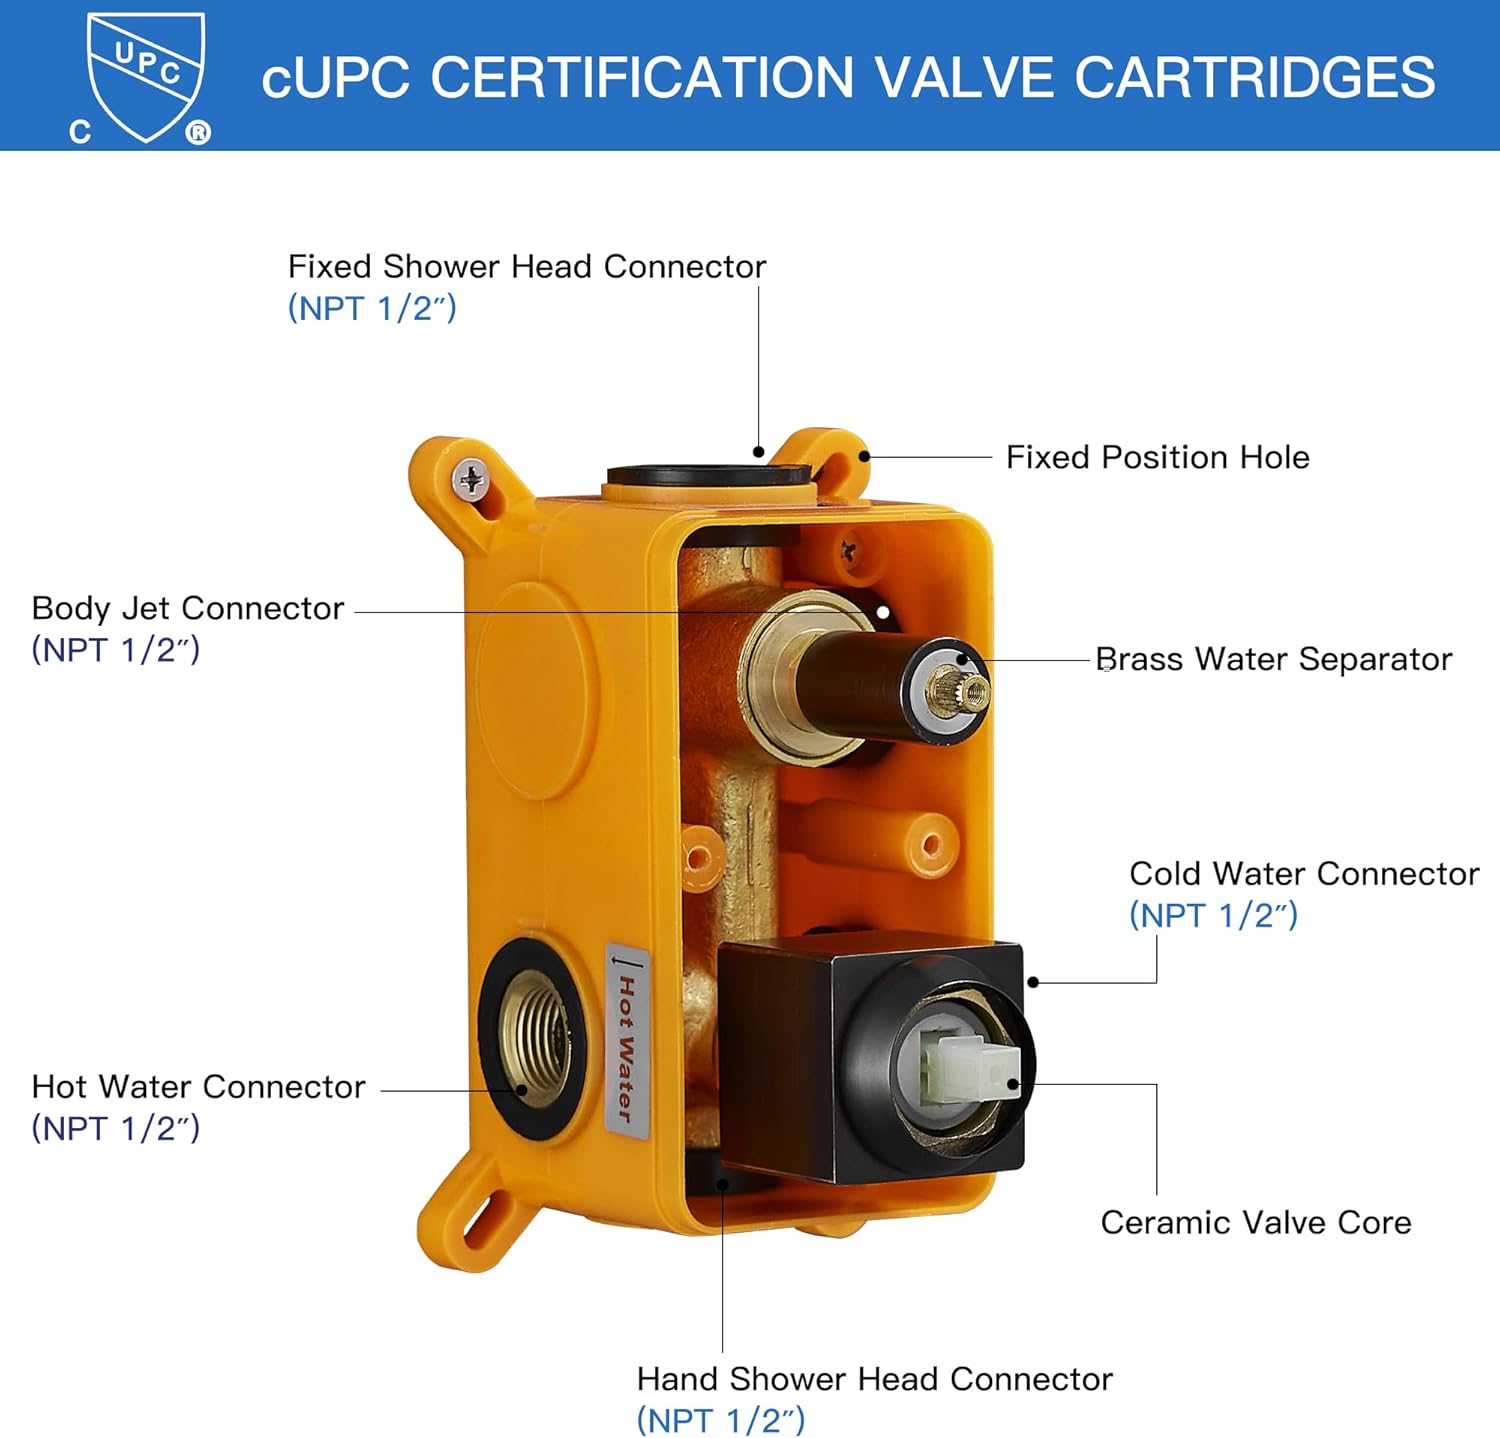
| Certifications | cUPC Certified Brass Valve Cartridge |

5. Setup and Installation
Installation of the RUMOSE Rainfall Shower System requires plumbing knowledge and adherence to local building codes. Professional installation is recommended to ensure correct setup and optimal performance. Refer to the detailed instructions and diagrams provided in the separate user manual included in your package for step-by-step guidance.
Key installation considerations include:
- Rough-in Valve Placement: The pressure balance valve must be securely installed within the wall, ensuring proper depth for the trim plate.
- Water Connections: Connect hot and cold water lines to the designated inlets on the valve.
- Component Connections: Connect the shower arm, body jets, and handheld spray hose to their respective outlets on the valve.
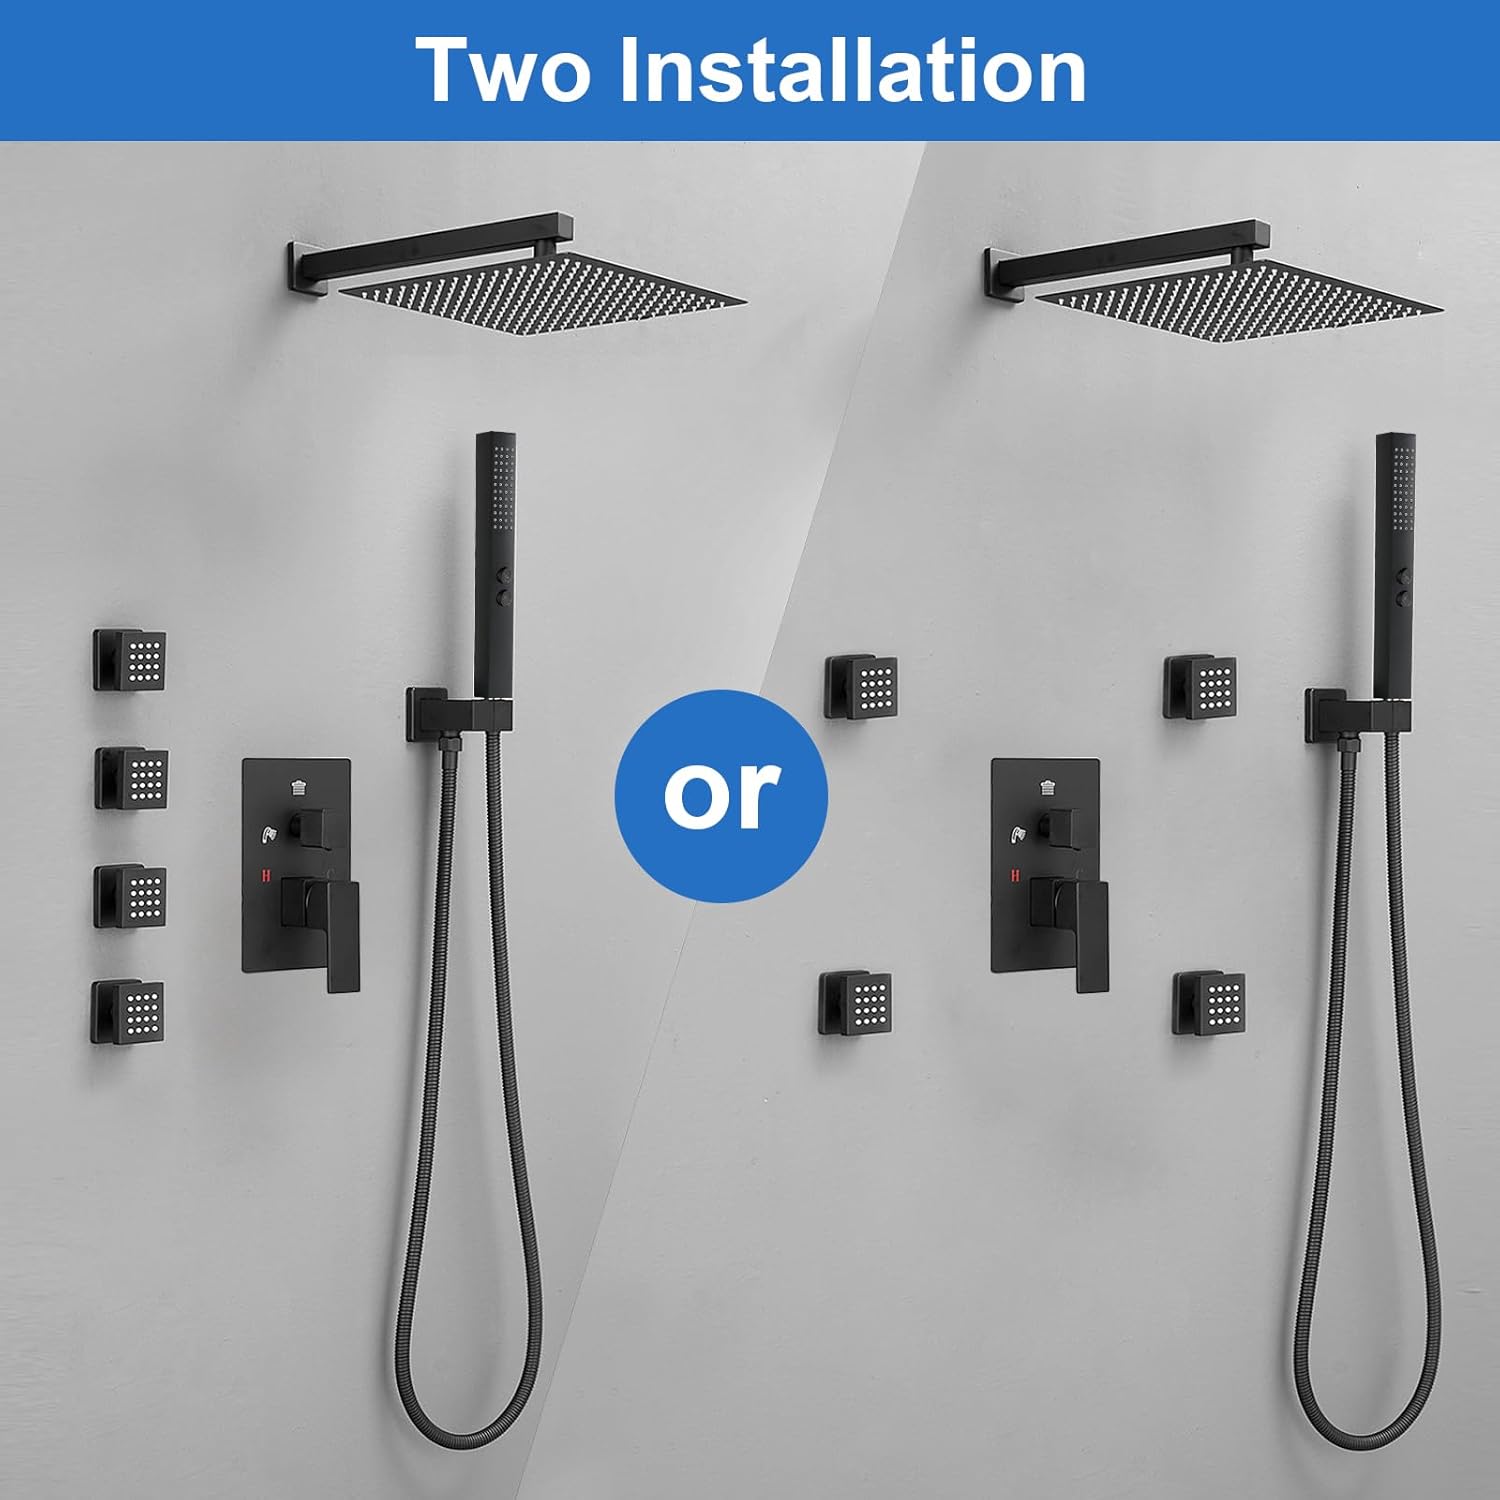
- Mounting: Securely mount the shower arm, shower head, body jets, and handheld spray holder to the wall.
6. Operating Instructions
Your RUMOSE Rainfall Shower System offers multiple functions for a customized showering experience:
- Main Control Handle: The primary handle controls water temperature and flow. Rotate to adjust temperature (Hot 'H' to Cold 'C') and lift/push to adjust water volume.
- Function Diverter Knob: The upper knob allows you to select between the rainfall shower head, body jets, or handheld spray.
- Rainfall Shower Head: Provides a wide, even water flow. Features innovative air injection technology to optimize water pressure and reduce noise.
- Body Jets: The four body jets can rotate 360 degrees, allowing you to direct the water flow for a targeted massage or hydrotherapy experience.
- 2-in-1 Handheld Spray: Offers two distinct spray modes. Press the button on the handheld unit to switch between a soft, wide spray and a strong, concentrated jet. This is also useful for cleaning the shower area.


7. Maintenance
Regular maintenance will help preserve the finish and functionality of your RUMOSE shower system.
- Cleaning the Finish: Clean the matte black finish with a soft, damp cloth. Avoid abrasive cleaners, scouring pads, or chemicals containing ammonia, bleach, or alcohol, as these can damage the finish.
- Nozzle Cleaning: The rain shower head and body jets feature self-cleaning silicone nozzles. To remove mineral buildup, gently rub the nozzles with your finger or a soft brush while water is flowing.
- Hose Maintenance: Periodically check the shower hose for kinks or damage. Clean the hose with a mild soap solution and rinse thoroughly.
8. Troubleshooting
If you encounter issues with your shower system, refer to the following common solutions:
| Problem | Possible Cause | Solution |
|---|---|---|
| Low Water Pressure | Partially closed shut-off valve, clogged nozzles, or low household water pressure. | Ensure shut-off valves are fully open. Clean shower head and body jet nozzles. Consult a plumber if household pressure is consistently low. |
| Leaking Connections | Loose connections or damaged O-rings/washers. | Tighten all connections. Replace any worn or damaged O-rings or washers. Use plumber's tape on threaded connections. |
| Inconsistent Water Temperature | Pressure balance valve issue or water heater problem. | Ensure your water heater is functioning correctly. If the issue persists, the pressure balance valve may require inspection by a professional. |
| Dripping Shower Head/Handheld | Mineral buildup or worn internal components. | Clean nozzles. If dripping continues, internal components of the valve or shower head may need replacement. Contact support. |
For issues not covered here or if troubleshooting steps do not resolve the problem, please contact RUMOSE customer support.
9. Warranty and Support
RUMOSE provides a limited lifetime warranty for this product. This warranty covers defects in material and manufacturing under normal use and service. For warranty claims or technical support, please contact RUMOSE directly through their official channels or the retailer where the product was purchased.
Manufacturer: RUMOSE
Seller: RUMOSE (via Amazon)
Please retain your proof of purchase for warranty validation.