1. Introduction
This manual provides detailed instructions for the setup, operation, maintenance, and troubleshooting of your Dohaeris Dual Bay USB 3.0 Hard Drive Enclosure. This device is designed to house two 2.5-inch or 3.5-inch SATA hard drives, offering data storage and RAID functionality for desktop and laptop computers.
Please read this manual thoroughly before using the product to ensure proper functionality and to prevent data loss.
2. Setup Guide
2.1 Package Contents
Verify that all items are present in the package:
- Dohaeris Dual Bay Hard Drive Enclosure
- USB 3.0 Type-C to Type-A Cable
- 12V/3A Power Adapter
- Screws for hard drive installation
- User Manual (this document)
2.2 Hardware Installation
Follow these steps to install your hard drives into the enclosure:
- Open the Enclosure: Gently slide open the enclosure to reveal the drive bays.
- Insert Hard Drives: Carefully slide your 2.5-inch or 3.5-inch SATA hard drives into the available bays. Ensure they are seated firmly into the SATA connectors. For 2.5-inch drives, additional supplements may be required for a secure fit.
- Secure Hard Drives: Use the provided screws to secure the hard drives within the enclosure, if applicable.
- Close the Enclosure: Slide the enclosure cover back into place until it clicks securely.
2.3 Connecting to Your Computer
- Connect Power: Plug the 12V/3A power adapter into the DC 12V port on the back of the enclosure, then connect it to a power outlet.
- Connect USB Cable: Connect one end of the USB 3.0 Type-C cable to the USB-C port on the enclosure and the other end to an available USB 3.0 port on your computer.
- Power On: Press the power button on the enclosure. The power indicator light should illuminate.

3. Operating Instructions
3.1 Powering On/Off
- Power On: Press the 'POWER' button on the rear of the enclosure. The LED indicator will light up.
- Power Off: Safely eject the drives from your operating system, then press and hold the 'POWER' button until the LED indicator turns off.
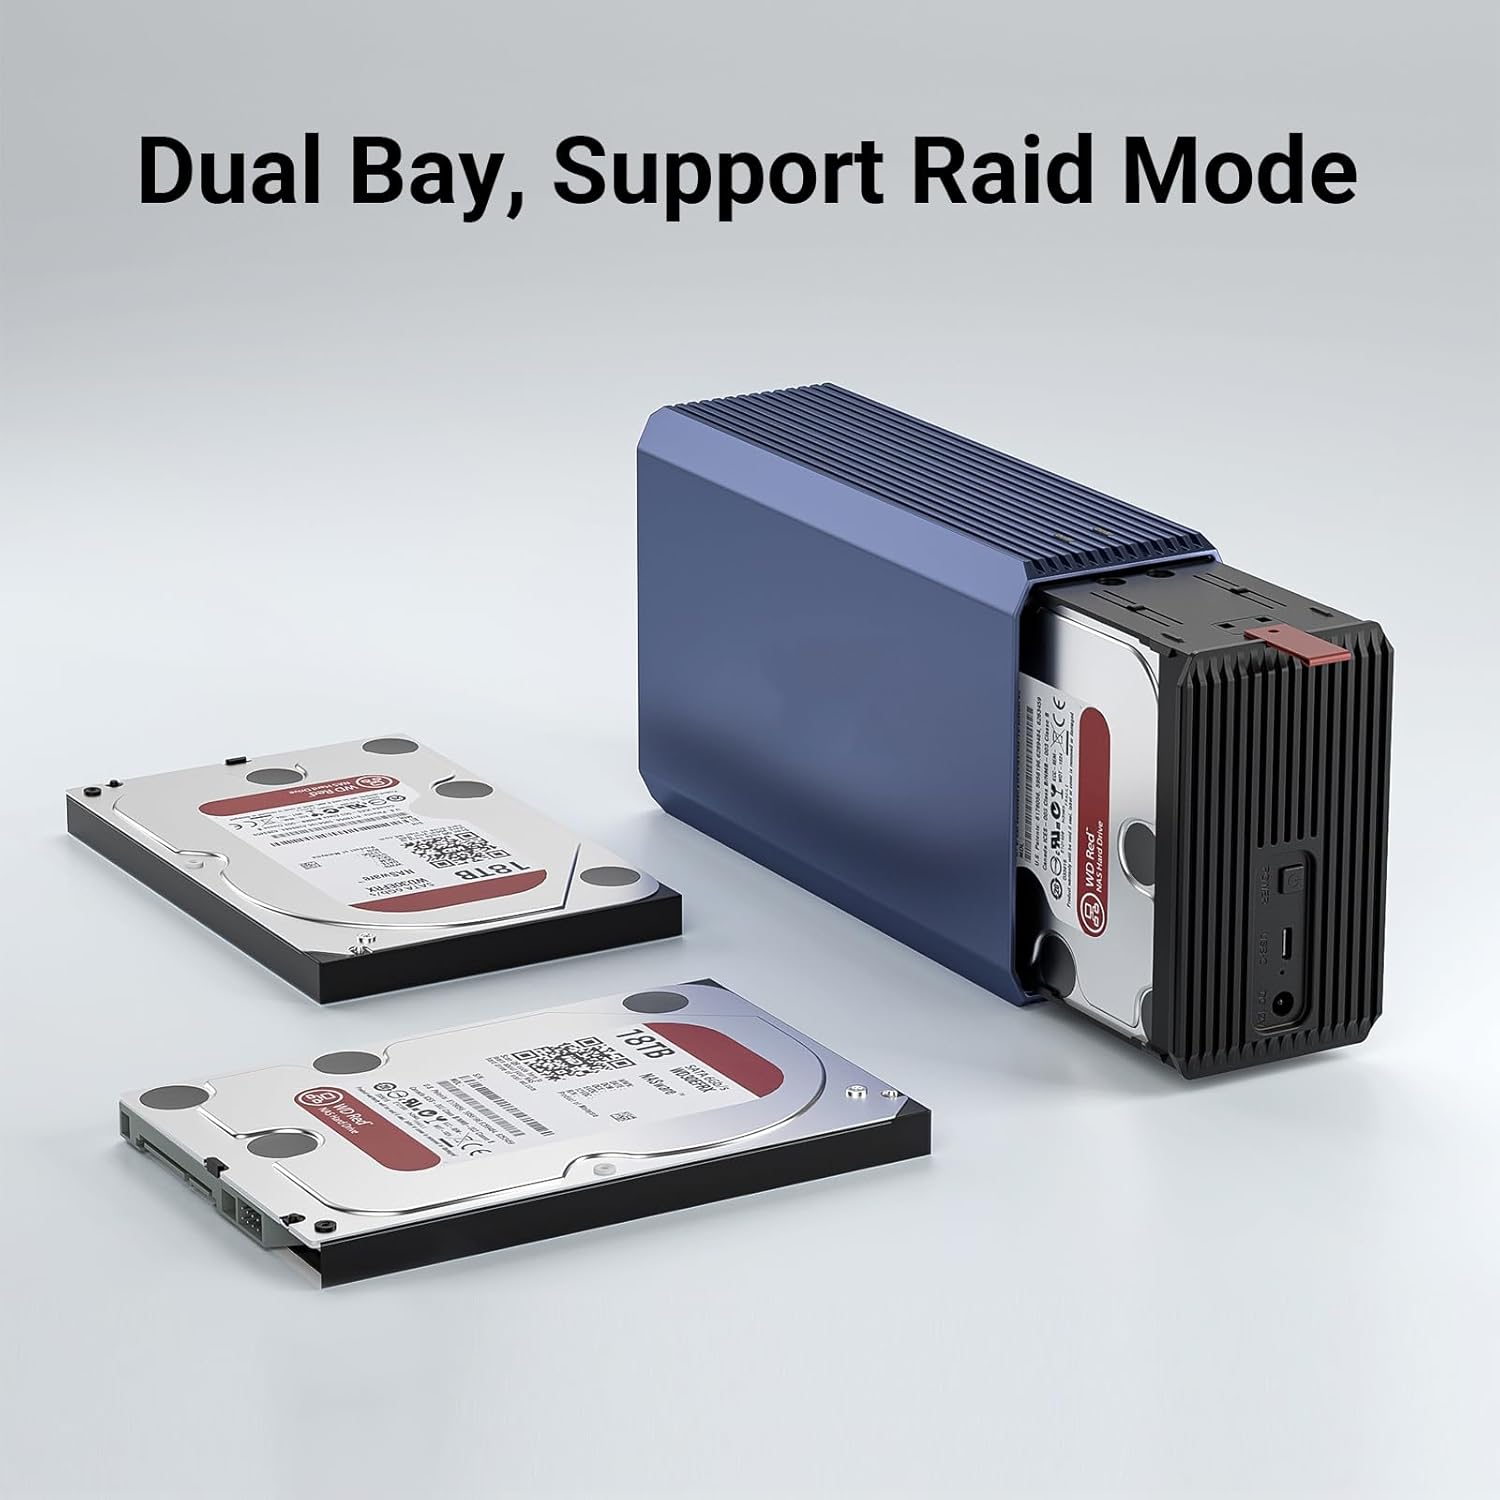
3.2 RAID Configuration
The enclosure supports RAID 0, RAID 1, JBOD, and SPAN modes. The RAID mode is configured using switches located on the back of the device. Changing RAID modes will erase all data on the installed hard drives. Back up your data before making any changes.

- RAID 0 (Striping): Combines two hard drives into a single logical unit, doubling storage capacity and improving read/write speeds. If one drive fails, all data is lost.
Setting: Switch 1 ON, Switch 2 ON. - RAID 1 (Mirroring): Creates an exact copy of data on both hard drives, providing data redundancy. The recognized capacity is that of a single drive. If one drive fails, data is preserved on the other.
Setting: Switch 1 OFF, Switch 2 ON. - JBOD (Just a Bunch Of Disks): Treats each hard drive as an independent disk. This is the factory default setting.
Setting: Switch 1 ON, Switch 2 OFF. - SPAN (Concatenation): Combines the storage capacity of both hard drives into a single large volume. Data is written sequentially across drives. If one drive fails, data on that drive is lost.
Setting: Switch 1 OFF, Switch 2 OFF.
To change RAID mode:
- Power off the enclosure and disconnect it from the computer.
- Adjust the RAID switches on the back of the enclosure to the desired configuration.
- Reconnect the power and USB cable, then power on the enclosure.
- The computer will detect the new RAID configuration. You may need to initialize and format the disk(s) in your operating system's Disk Management utility.
3.3 Data Transfer and Intelligent Sleep
The enclosure supports USB 3.0 for high-speed data transmission up to 5Gbps, utilizing the UASP protocol for optimized performance. It also features an intelligent sleep function, activating after 10 minutes of inactivity to conserve power and extend hard drive lifespan.

4. Maintenance
4.1 Cooling System
The enclosure features a built-in silent fan to ensure optimal operating temperatures for your hard drives, prolonging their lifespan and maintaining stable performance. Ensure the fan vents are not obstructed to allow for proper airflow.

4.2 General Care
- Keep the enclosure in a clean, dry environment, away from direct sunlight and extreme temperatures.
- Avoid dropping or subjecting the enclosure to physical shock.
- Clean the exterior with a soft, dry cloth. Do not use liquid cleaners.
5. Troubleshooting
5.1 Common Issues and Solutions
- Enclosure not recognized by computer:
- Ensure the power adapter is securely connected and the enclosure is powered on.
- Verify the USB cable is properly connected to both the enclosure and the computer.
- Try a different USB port on your computer or a different USB cable.
- Check Disk Management (Windows) or Disk Utility (macOS) to see if the drives are detected but uninitialized or unformatted.
- Drives not appearing after RAID configuration change:
- After changing RAID modes, drives typically need to be re-initialized and formatted in your operating system's Disk Management utility. This will erase existing data.
- Slow data transfer speeds:
- Ensure you are connected to a USB 3.0 port on your computer. USB 2.0 ports will result in slower speeds.
- Verify that your operating system and drivers support UASP.
5.2 Data Protection Features
The enclosure incorporates multiple protection mechanisms to safeguard your data and hardware, including overcurrent protection, overheat protection, voltage isolation protection, and short circuit protection.

6. Technical Specifications
| Feature | Specification |
|---|---|
| Model | B0CJBMB52Z |
| Material | Aluminum alloy |
| Dimensions | 200 x 120 x 65 mm |
| Weight | Approximately 645g |
| Color | Gray |
| Supported Drive Types | 2.5-inch / 3.5-inch SATA HDD/SSD (SATA1/SATA2/SATA3) |
| Max Capacity per Drive | 18 TB |
| Number of Bays | 2 |
| Hardware Interface | USB 3.0 Type-C |
| Data Transfer Speed | Up to 5Gbps (USB 3.0) |
| RAID Modes | RAID 0, RAID 1, JBOD, SPAN |
| Master Chip | JMS561 |
| Cooling | Built-in fan |
| Power Supply | 12V / 3A Power Adapter |
| Supported Operating Systems | Windows 7/8/10/11, macOS, Linux |
| UPC | 795930934364 |
7. Warranty and Support
For warranty information and technical support, please refer to the documentation provided with your purchase or contact Dohaeris customer service through the retailer where the product was purchased. Keep your proof of purchase for warranty claims.