Introduction
This manual provides essential information for the safe and effective installation, operation, and maintenance of your Lumizone Extra Tall Pressure Mounted Pet Gate. Please read all instructions carefully before use to ensure proper functionality and safety.
Safety Information
- Always ensure the gate is securely installed and tightened before use.
- Regularly check all locking mechanisms and pressure mounts for proper function and tightness.
- Do not use this gate at the top of stairs unless specifically designed and installed for that purpose with appropriate hardware mounting. This is a pressure-mounted gate.
- Never leave children or pets unattended near the gate.
- The gate is designed to restrict access; it is not a substitute for adult supervision.
- Keep small children and pets away from the gap between the gate and the wall during installation to prevent pinching.
Package Contents
- Main Gate Assembly
- Extension Panels (if applicable to your model width)
- Pressure Adjustment Bolts (4)
- Wall Protectors (4)
- Reinforcement Slot for Gate (1)
- Instruction Manual
Specifications
| Feature | Detail |
|---|---|
| Brand | Lumizone |
| Model Name | BM01 |
| Height | 55.12 inches |
| Adjustable Width | 55.12" - 59.24" W |
| Bar Gap | 1.37 inches |
| Mounting Type | Pressure Mount |
| Material | Metal |
| Color | Cream White |
| Weight | 34.6 pounds |
| Locking Mechanism | Double Lock |
| Door Functionality | Auto-Close (<90°), Keep Open (90°) |
Setup and Installation
This pressure-mounted gate requires no drilling for installation. Ensure your doorway or opening width is within the specified range for your gate model.
Pre-Installation Check
Before installation, ensure all components are present and undamaged. The gate may appear bent or have a gap at the top before installation; this is normal for pressure-mounted gates and will correct once pressure is applied.

Image: The Lumizone Extra Tall Pet Gate in Cream White, showing the main gate, extension panels, and pressure adjustment bolts. A cat and dog are visible behind the gate.
Step-by-Step Installation
- Insert Bolts: Insert the four pressure adjustment bolts into the holes at each corner of the gate.
- Position Gate: Place the gate in the desired opening (doorway, hallway, or bottom of stairs).
- Adjust Pressure: Begin to twist the adjustment nuts on the bolts. Rotate the nuts, not the bolts themselves, to extend the bolts and apply pressure against the walls. Ensure the gate is level and centered.
- Secure Tightly: Continue tightening the bolts until the gate is firmly secured and the gap between the gate and the wall is minimal. The gate should not move when pushed or pulled.
- Remove Zip Ties: Once the gate is fully installed and secure, carefully cut and remove any zip ties holding the gate frame together. Note: Do not cut zip ties before installation is complete, as they maintain the gate's structural integrity during shipping and initial setup.
- Install Wall Protectors (Optional but Recommended): For added protection against wall damage, place the provided wall protectors between the pressure adjustment bolts and the wall surface.
- Install Reinforcement Slot (Optional): Place the reinforcement slot at the bottom of the gate to reduce tripping hazards.
Visual Aid for Installation

Image: A diagram illustrating the four main steps of installing the pressure-mounted pet gate: inserting bolts, rotating the ring to adjust, fixing securely by pressure, and cutting zip ties after installation.

Image: A close-up view of the pressure adjustment bolt and the zip tie on the gate, with a note explaining that the initial gap is not a defect and will close upon proper installation.
Installation Video
Video: An official Lumizone video demonstrating the pressure-mounted installation of the Extra Tall Pet Gate, including how to adjust the width and secure it in a doorway.
Operating Instructions
Opening the Gate
- First Lock: Slide the knob on the top lock mechanism backward.
- Second Lock: Lift the gate door slightly upwards to disengage the lower lock.
- Open Door: Pull or push the gate door open. The gate can open in both directions (180°).
Closing the Gate
The gate features an auto-close function. If the door is opened less than 90 degrees, it will automatically swing shut and lock. If opened to 90 degrees or more, it will remain open for convenient passage.
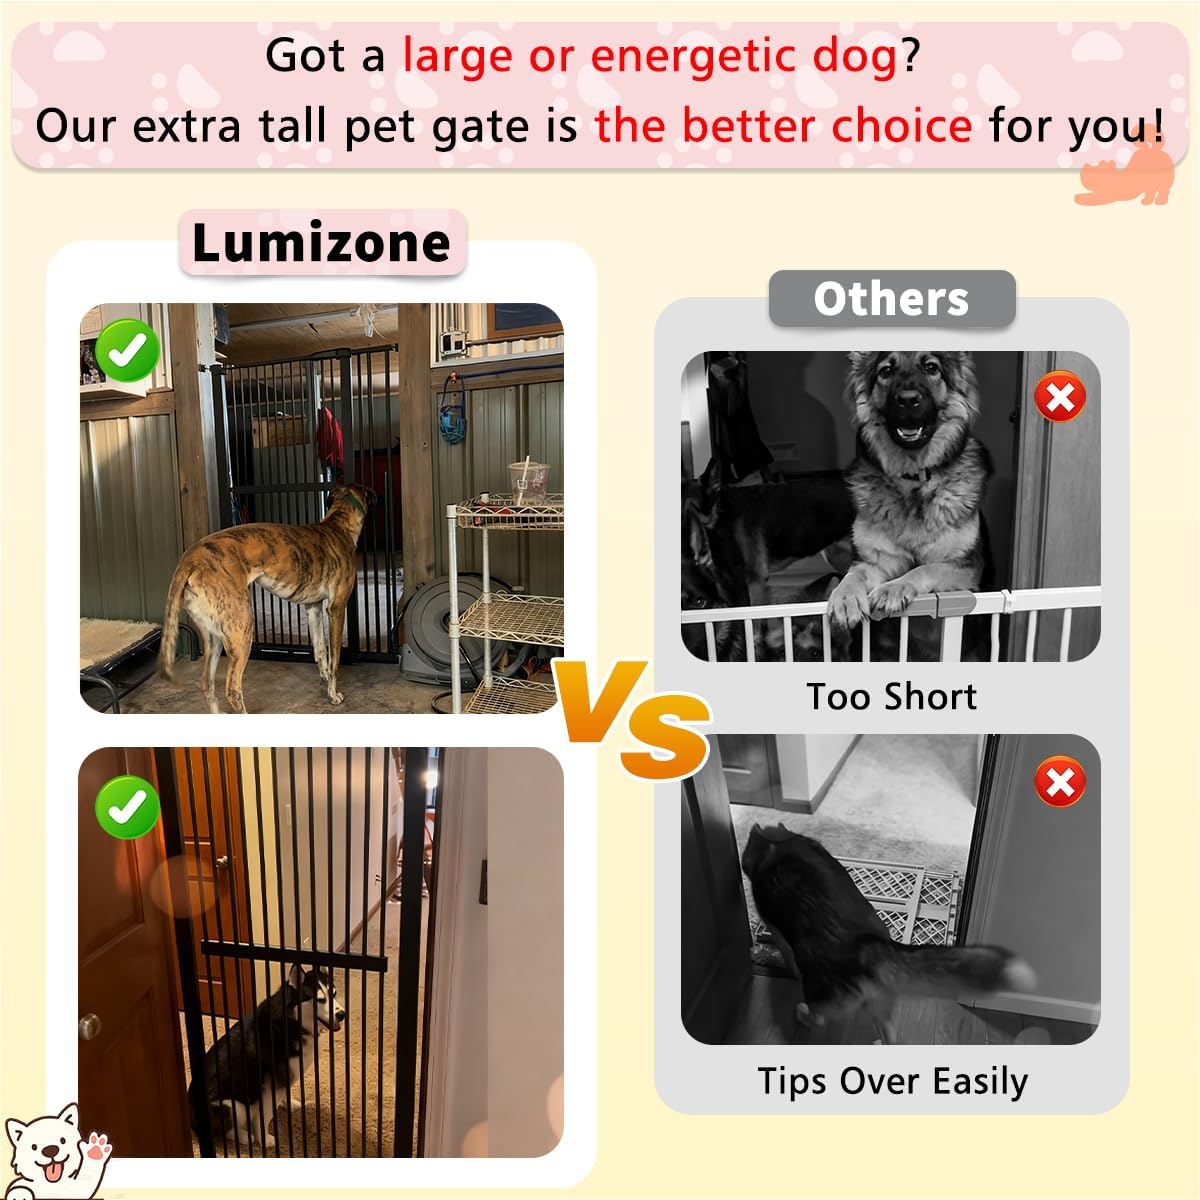
Image: A diagram illustrating the double-locking mechanism and the 90-degree auto-close and stay-open features of the gate.
Double Locking Mechanism
The gate is equipped with a double-locking system for enhanced security, preventing pets and children from easily opening it.

Image: A detailed view of the double-locking mechanism, showing how to slide the knob, lift up, and then pull or push to open the gate.
Maintenance
- Regularly inspect the gate for any loose parts, damage, or signs of wear.
- Ensure the pressure adjustment bolts remain tight to maintain stability. Re-tighten if necessary.
- Clean the gate with a soft, damp cloth and mild soap. Avoid abrasive cleaners or harsh chemicals.
- For optimal performance, keep the locking mechanisms free of debris.
Troubleshooting
Gate Appears Bent or Has a Gap Before Installation
This is normal for pressure-mounted gates. The frame is designed to be slightly offset before installation and will straighten once proper pressure is applied to the walls. Do not cut the zip ties until installation is complete.
Gate is Not Secure
Ensure the pressure adjustment bolts are tightened sufficiently. The gate should be firmly wedged between the walls and not easily moved. Check that the wall protectors are correctly positioned.
Gate Door Does Not Close Automatically
Verify that the gate is installed level and that the auto-close mechanism is not obstructed. If the door is opened past 90 degrees, it is designed to stay open.
Difficulty Opening/Closing the Gate
Check for any obstructions around the gate's hinges or locking mechanisms. Ensure the double-locking steps (slide knob, lift up) are followed correctly.
Warranty and Support
For warranty information, missing parts, or any product-related inquiries, please contact Lumizone customer support.
Email: lumizone2303@gmail.com
Please have your model number (BM01) and purchase details ready when contacting support.