HAUOMS V09
HAUOMS V09 Glass Top Vanity Desk with Mirror and Lights
User Manual
1. Introduction
Thank you for choosing the HAUOMS V09 Glass Top Vanity Desk. This manual provides essential information for the safe assembly, operation, and maintenance of your new vanity desk. Please read these instructions carefully before beginning assembly or use, and retain them for future reference.
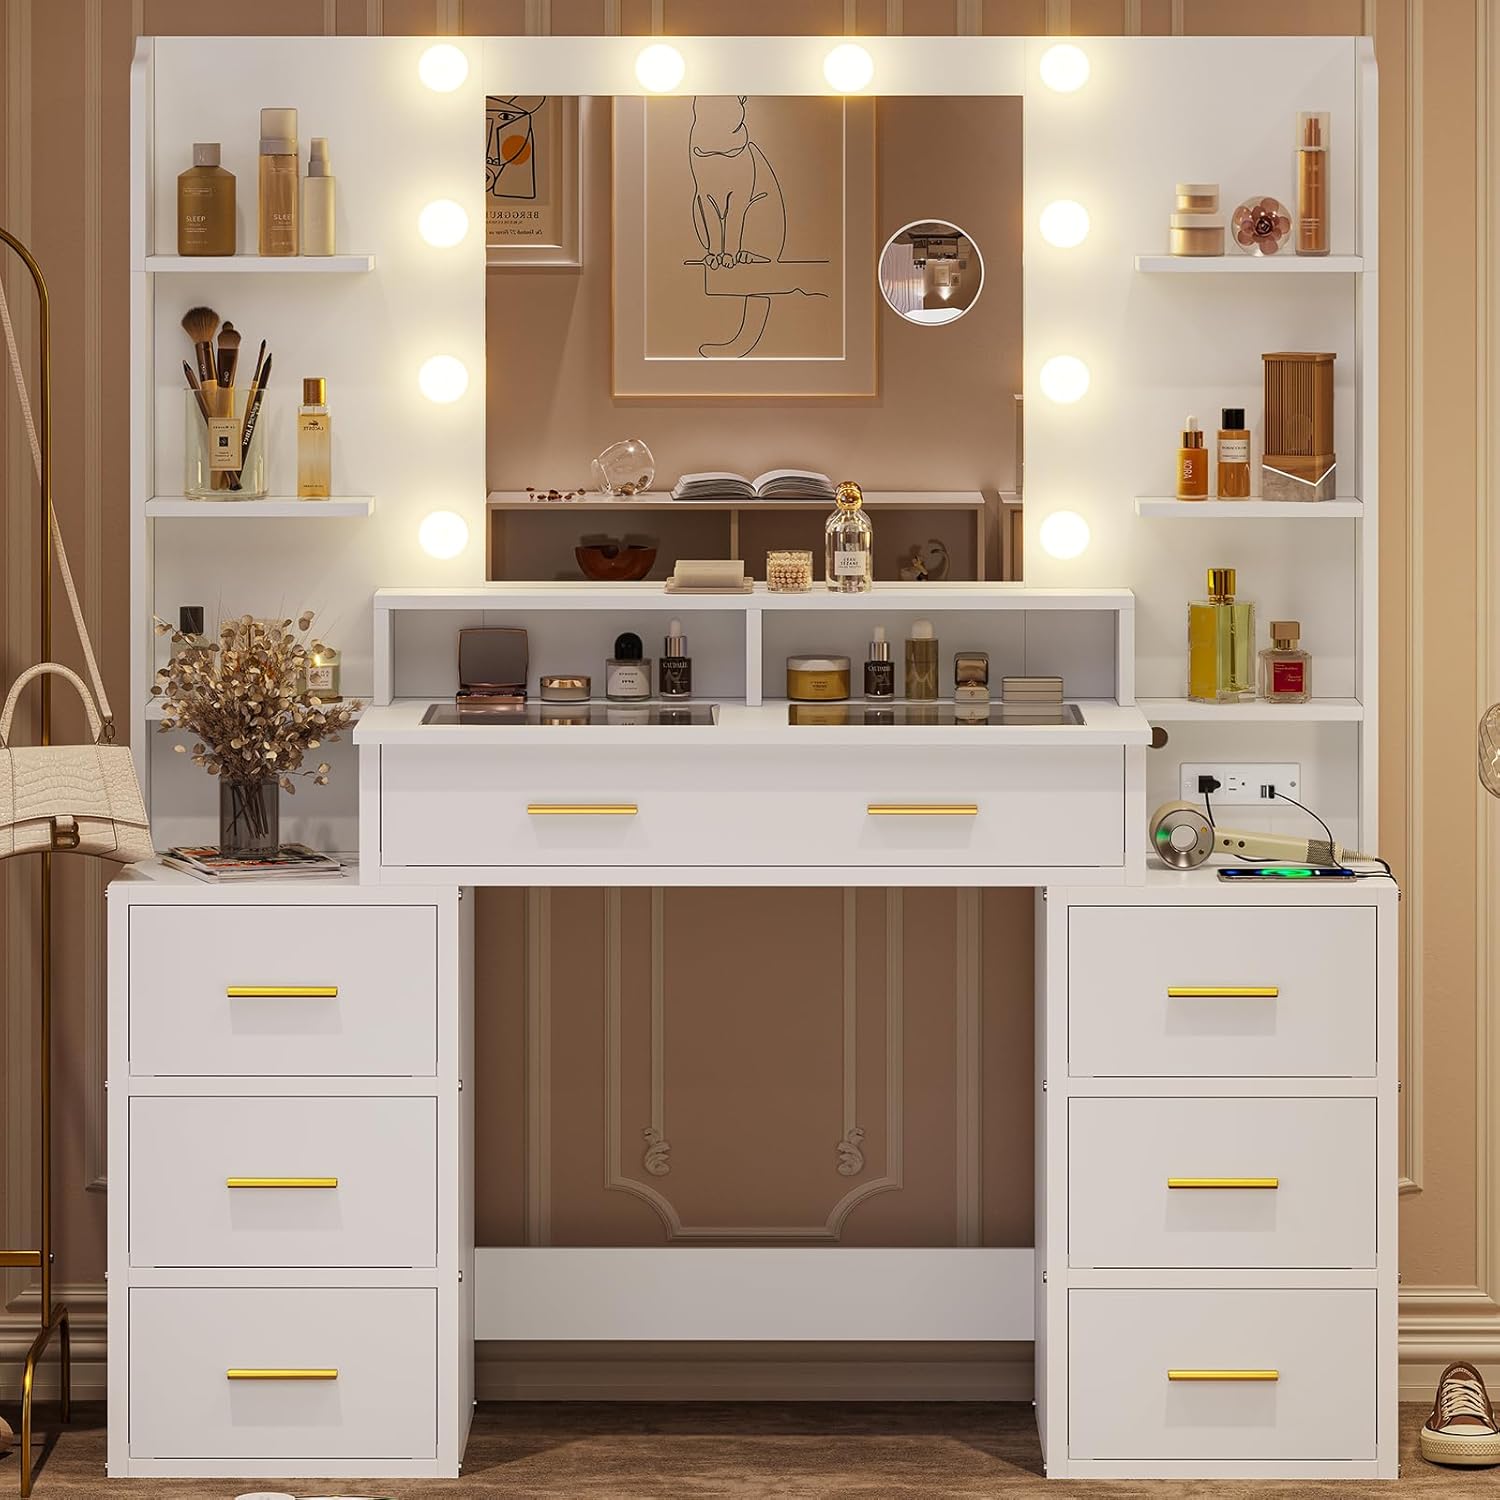
Image 1.1: The HAUOMS V09 Glass Top Vanity Desk, featuring a large mirror with Hollywood-style lights, a glass top, and multiple storage drawers.
2. Important Safety Information
Please observe the following safety precautions to prevent injury or damage to the product:
- Always unplug the vanity before assembly or disassembly.
- Be cautious of sharp edges and pinch points during assembly.
- Do not use the vanity if the mirror or lights are damaged.
- Keep the vanity away from water and heat sources.
- Always supervise children when they are near the vanity.
3. Package Contents
Before assembly, ensure all components are present and undamaged. Refer to the included assembly diagrams for a complete list of parts. Typically, your package should include:
- Vanity desk frame components
- Large mirror with integrated light bulbs
- Removable 10x magnifying mirror
- Glass top panel
- Drawer components (8 drawers)
- Shelf components (6 shelves)
- Built-in power strip with USB-A ports and AC outlets
- Assembly hardware (screws, dowels, etc.)
- Acrylic drawer dividers
4. Assembly Instructions
Assembly of the HAUOMS V09 Vanity Desk requires careful attention to detail. All parts are labeled with numbers to facilitate the process. Please follow the step-by-step instructions and diagrams provided in the separate assembly guide included with your product. It is recommended to have two people for assembly.
- Unpack all components and verify against the parts list.
- Lay out components on a clean, soft surface to prevent scratches.
- Assemble the main desk frame according to the diagrams.
- Install the drawers and shelves.
- Attach the mirror and light assembly.
- Secure the glass top panel.
- Install the built-in power strip.
Ensure all connections are secure before proceeding to setup.
5. Initial Setup
Once assembled, perform the following steps for initial setup:
- Placement: Position the vanity desk on a flat, stable surface.
- Power Connection: Plug the vanity's power cord into a standard electrical outlet.
- Magnifying Mirror: The 10x magnifying mirror has suction cups. Attach it to the main mirror surface or hold it as needed for precise beauty care.
6. Operating Instructions
6.1. Mirror Lights

Image 6.1: Illustration of the three available light settings and brightness adjustment.
The vanity mirror features 10 Hollywood-style light bulbs with three adjustable light settings:
- Changing Light Color: Press the power switch button to cycle through Warm Yellow, Warm White, and Cool White light settings.
- Adjusting Brightness: Hold down the power switch button to increase or decrease the brightness of the lights. Release the button when the desired brightness is reached.
6.2. 10x Magnifying Mirror
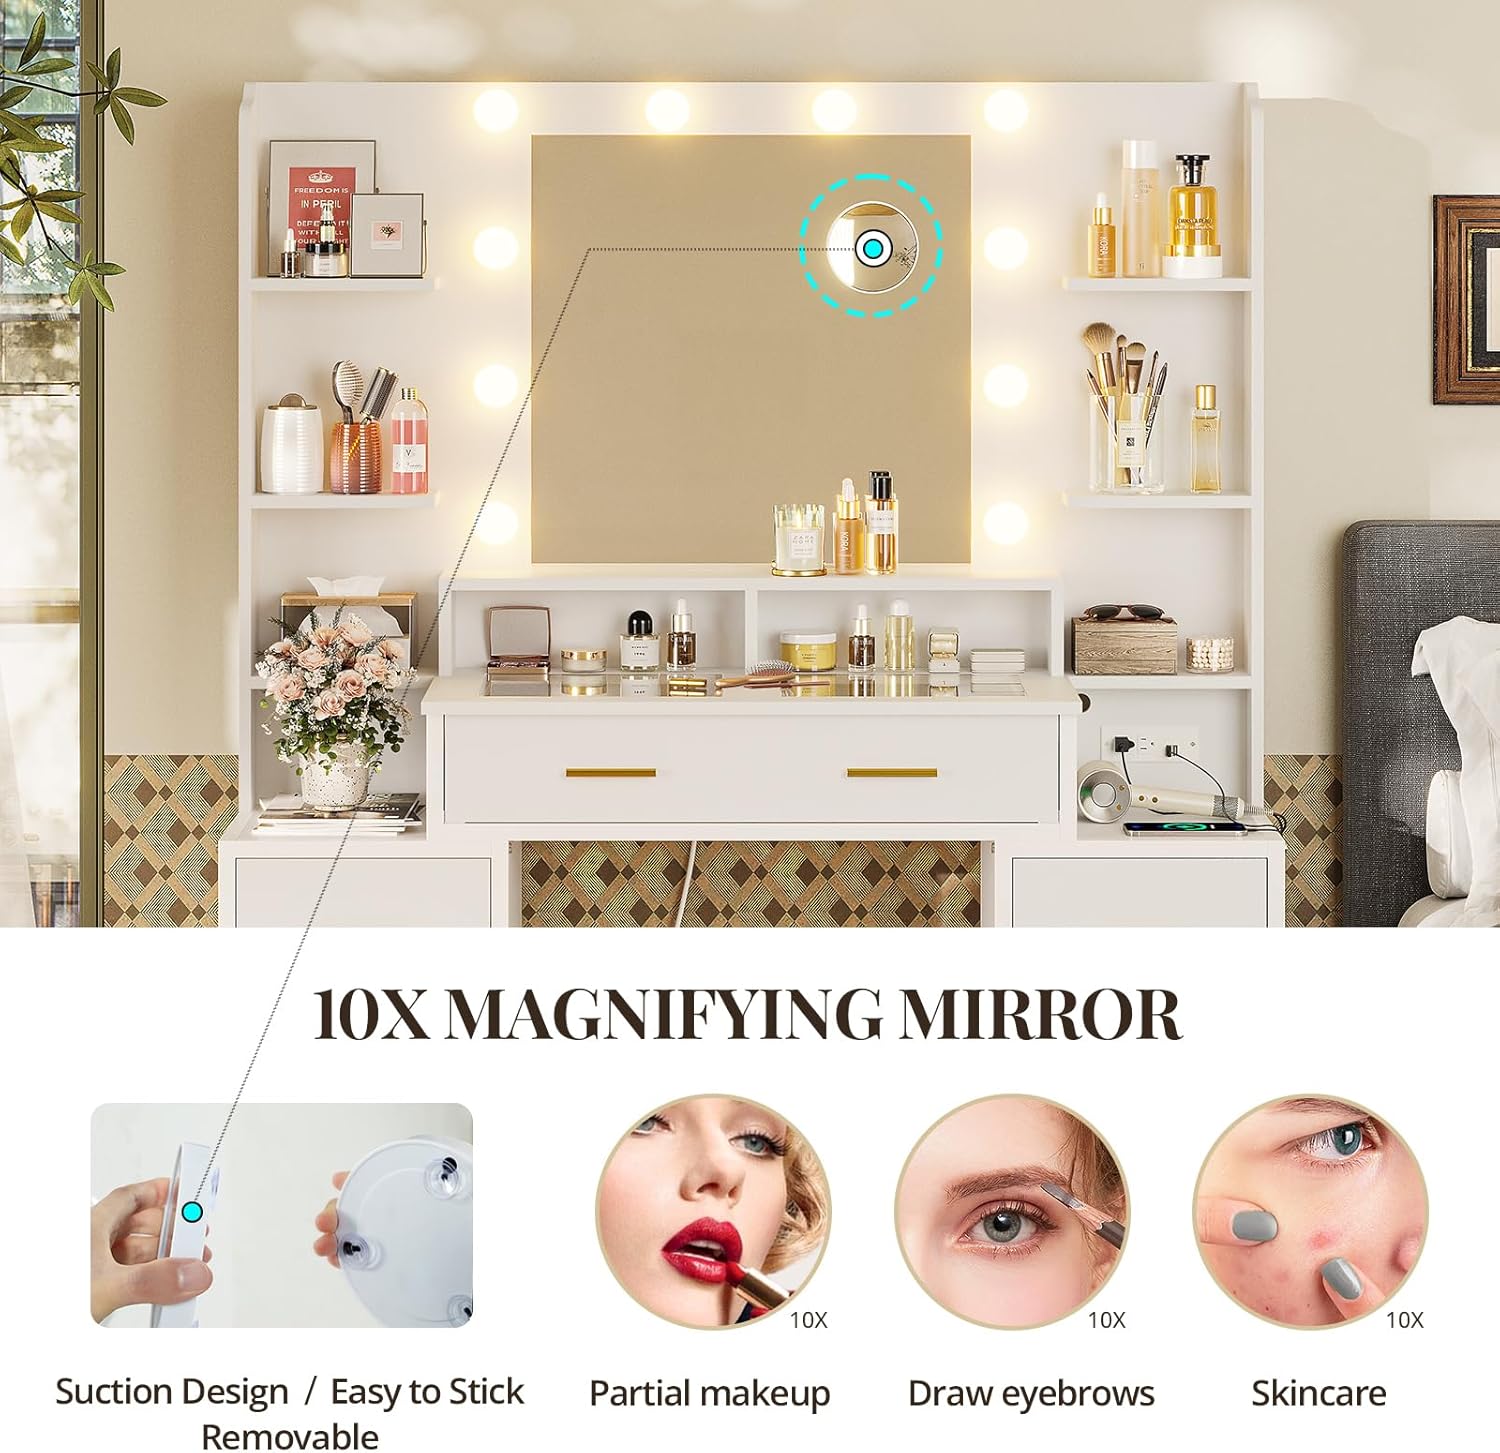
Image 6.2: The removable 10x magnifying mirror, demonstrating its suction design for easy attachment and use in detailed beauty tasks.
The included 10x magnifying mirror is designed for detailed tasks such as applying partial makeup, drawing eyebrows, or performing skincare routines. It features suction cups for temporary attachment to the main mirror surface or can be held manually.
6.3. Built-in Charging Station

Image 6.3: The integrated charging station, providing convenient access to power for various electronic devices.
A power strip is integrated into the backboard of the vanity, providing convenient access to power for your electronic devices. It includes:
- 2 USB-A Ports (5V/2.1A)
- 2 AC Outlets (125V/12A)
Use these outlets to power styling tools, charge smartphones, or other small electronic devices.
6.4. Storage Features

Image 6.4: A close-up view of a drawer with acrylic dividers, illustrating organized storage for cosmetics and accessories.

Image 6.5: Examples of compartment storage and the flexibility of adjustable acrylic dividers for various items.
The vanity desk offers extensive storage solutions:
- Glass-Top Compartment: The tempered glass top allows visibility into the compartment storage drawer beneath, ideal for displaying and accessing frequently used items. Acrylic dividers within this compartment can be removed and rearranged.
- Drawers: Eight spacious drawers provide ample space for cosmetics, styling tools, and other beauty essentials.
- Shelves: Seven open shelves offer additional storage and display areas.
7. Maintenance
To ensure the longevity and appearance of your vanity desk, follow these maintenance guidelines:
- Cleaning: Wipe surfaces with a damp cloth. Avoid abrasive cleaners or harsh chemicals that may damage the finish or glass.
- Dusting: Regularly dust all surfaces, including the mirror and light bulbs, with a soft, dry cloth.
- Glass Care: For the glass top and mirror, use a glass cleaner and a lint-free cloth to prevent streaks.
- Electrical Components: Ensure the power cord and outlets are free from dust and debris. Do not attempt to repair electrical components yourself.
8. Troubleshooting
If you encounter issues with your vanity desk, refer to the following common solutions:
- Lights Not Working:
- Check if the power cord is securely plugged into the wall outlet.
- Ensure the power switch on the vanity is in the 'On' position.
- Verify that the wall outlet is functional by plugging in another device.
- Charging Station Not Functioning:
- Confirm the vanity's main power cord is connected.
- Test with different devices and cables to rule out device-specific issues.
- Drawers Sticking:
- Ensure drawers are properly aligned on their glides.
- Check for any obstructions within the drawer or on the glides.
If problems persist, please contact customer support.
9. Specifications

Image 9.1: Dimensional overview of the HAUOMS V09 Vanity Desk.
| Feature | Detail |
|---|---|
| Brand | HAUOMS |
| Model Number | V09 |
| Product Dimensions (D x W x H) | 15" x 44.5" x 56.3" |
| Item Weight | 106 pounds |
| Frame Material | Alloy Steel |
| Furniture Finish | Glossy |
| Color | Modern White |
| Mirror Lights | 10 Hollywood-style bulbs, 3 light settings (Warm Yellow, Warm White, Cool White), adjustable brightness |
| Magnifying Mirror | Removable 10x with suction design |
| Charging Station | 2 USB-A Ports (5V/2.1A), 2 AC Outlets (125V/12A) |
| Storage | Glass-top compartment, 8 drawers, 7 shelves |
| Product Care Instructions | Wipe with Damp Cloth |
10. Warranty and Support
For warranty information or technical support, please refer to the documentation included with your purchase or contact HAUOMS customer service. Keep your purchase receipt as proof of purchase.
Customer Service: Please visit the HAUOMS store on Amazon or refer to the contact information provided in your product packaging for assistance.
Ask a question about this manual
Ask about setup, troubleshooting, compatibility, parts, safety, or missing instructions. Manuals+ will review the question and use this page’s manual context to help answer it.