1. Introduction
This manual provides comprehensive instructions for the assembly, operation, and maintenance of your Lifewit 3-Tier Beverage Crate Rack. Please read this manual thoroughly before assembly and use to ensure proper function and safety. Keep this manual for future reference.

Image 1.1: The Lifewit 3-Tier Beverage Crate Rack, designed for organized storage of beverage crates and other items.
2. Safety Information
- Ensure all components are securely fastened before placing items on the rack.
- Do not exceed the maximum load capacity of 150 kg per shelf or 300 kg total.
- Place the rack on a flat, stable, and level surface to prevent tipping.
- Keep children and pets away from the rack during assembly and when loaded with heavy items.
- Avoid placing the rack in high-traffic areas where it could be accidentally bumped.
3. Package Contents
Verify that all parts listed below are present before beginning assembly. If any parts are missing or damaged, contact customer support.

Image 3.1: All components included in the package for assembly.
- Vertical Frame Bars: (e.g., 2 long, 2 medium, 2 short)
- Horizontal Support Bars: (e.g., 4 pieces)
- X-Crossbars: (e.g., 2 sets)
- Adjustable Feet: (e.g., 4 pieces)
- Screws (A): 30 pieces
- Small Screws (B): 2 pieces
- Bolts (C): 4 pieces
- Nuts/Washers (D): 10 pieces
- Wrench (E): 1 piece
- Allen Key (F): 1 piece
4. Assembly Instructions
Assembly is straightforward and requires no drilling. Follow these steps carefully:
- Unpack Components: Carefully remove all parts from the packaging and lay them out on a clean, soft surface to prevent scratches. Refer to Image 3.1 to identify each part.
- Assemble Side Frames: Attach the horizontal support bars to the vertical frame bars using the provided screws (A). Ensure the holes align correctly.
- Connect Side Frames: Join the two assembled side frames using the remaining horizontal support bars and screws (A) to form the basic rectangular structure.
- Install X-Crossbars: Secure the X-crossbars to the rear of the frame using the small screws (B) and nuts/washers (D). This enhances stability.
- Attach Adjustable Feet: Screw the adjustable feet into the bottom of the vertical frame bars. Adjust them as needed to ensure the rack is level on your floor.
- Final Tightening: Once all parts are in place, use the provided wrench (E) and Allen key (F) to securely tighten all screws and bolts. Do not overtighten.
Note: The product description mentions an installation video is available. Please refer to the product page for access to this video, if needed, for visual guidance.
5. Usage and Placement
5.1 Load Capacity and Stability
The rack is constructed from robust metal, providing exceptional stability. Each tier is designed to support up to 150 kg, with a total maximum load capacity of 300 kg. The triangular structure and X-crossbar reinforcement contribute to its overall strength and durability.

Image 5.1: Load capacity and dimensions of the Lifewit Beverage Crate Rack.
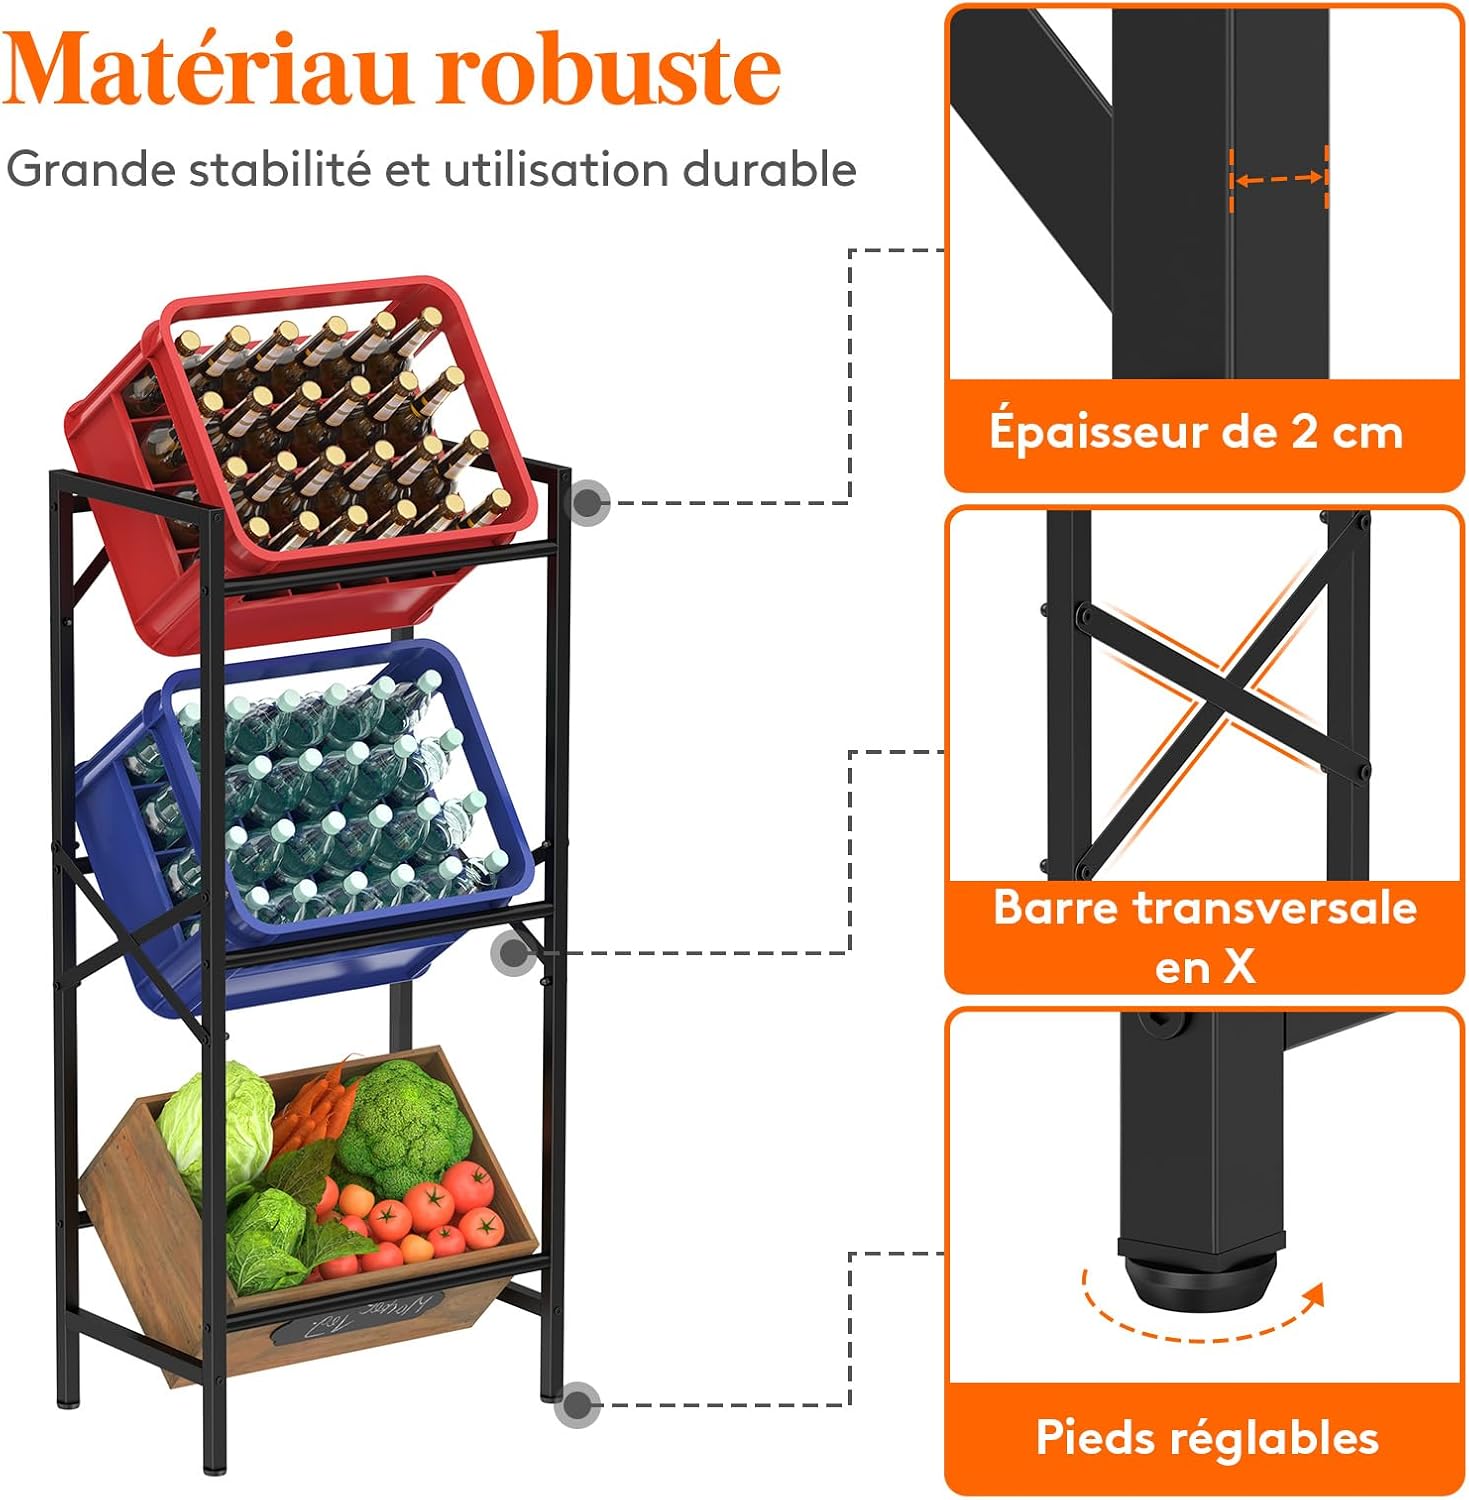
Image 5.2: Details of the rack's robust construction features.
5.2 Space Optimization and Accessibility
With dimensions of 49 x 32 x 108 cm, this vertical rack occupies minimal floor space while offering ample storage. The multi-tier design features an optimized tilt angle, allowing for quick and easy retrieval of bottles and efficient categorization of items. This design is ideal for narrow spaces.

Image 5.3: Multi-tier design for space-saving and easy access.
5.3 Versatile Storage Solutions
Beyond beverage and beer crates, this rack can be used with various containers such as wooden boxes, metal baskets, and plastic bins. It is suitable for storing a wide range of items including fruits, vegetables, snacks, bread, or clothing.

Image 5.4: Examples of various items stored on the rack, including beverages and produce.
5.4 Suitable Environments
This multifunctional rack is suitable for various environments, including kitchens, restaurants, food storage rooms, basements, balconies, or garages. Its minimalist black design complements different interior styles, helping to organize your home effectively.
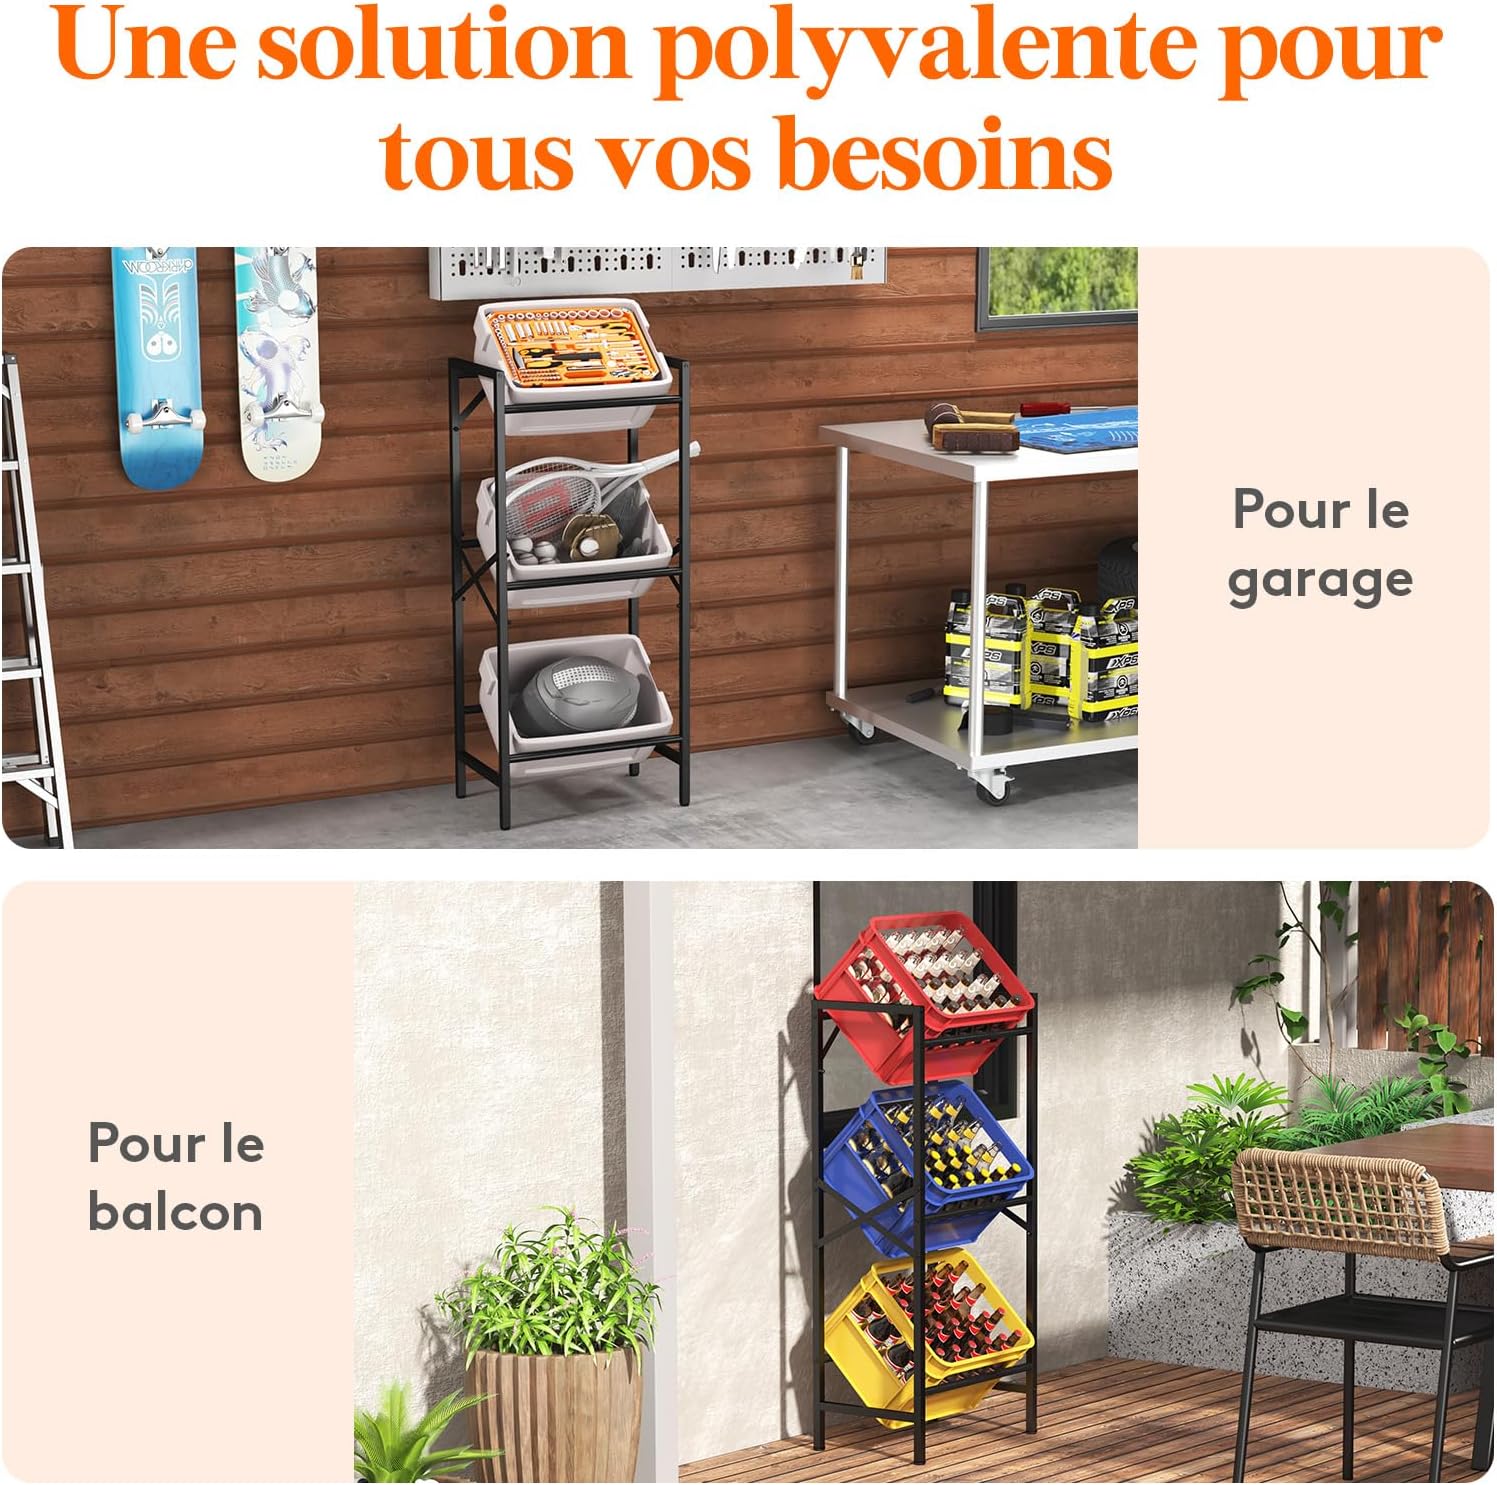
Image 5.5: The rack in different settings, such as a garage and a balcony.
6. Care and Maintenance
- Cleaning: Wipe the metal frame with a soft, damp cloth. Avoid abrasive cleaners or harsh chemicals that could damage the finish.
- Inspection: Periodically check all screws and bolts to ensure they remain tight. Retighten if necessary.
- Placement: Avoid prolonged exposure to direct sunlight or extreme humidity, which may affect the material's longevity.
7. Troubleshooting
- Rack is wobbly: Ensure all screws and bolts are fully tightened. Check that the adjustable feet are properly leveled on the floor.
- Missing parts: Refer to the 'Package Contents' section (Section 3). If parts are missing, contact Lifewit customer support.
- Difficulty assembling: Double-check the assembly instructions (Section 4). Ensure components are oriented correctly. Refer to the product page for any available installation videos.
8. Specifications
| Feature | Detail |
|---|---|
| Brand | Lifewit |
| Model Number | 23137 |
| Color | Black |
| Material | Metal |
| Product Dimensions (L x W x H) | 49 x 32 x 108 cm |
| Item Weight | 4.31 Kilograms |
| Number of Tiers | 3 |
| Load Capacity per Tier | Up to 150 kg |
| Total Load Capacity | Up to 300 kg |
| Special Feature | Space-saving |
| Assembly Required | Yes |
| Mounting Type | Floor Mount |
| Country of Origin | China |
9. Warranty and Support
For warranty information or customer support, please refer to the contact details provided with your purchase or visit the official Lifewit website. Keep your purchase receipt for warranty claims.