
HJH55
Richmat HJH55 Remote Control User Manual
Model: HJH55 (Remote B)
Brand: Generic (Compatible with Richmat systems)
Introduction
This manual provides detailed instructions for the Richmat HJH55 wireless remote control, specifically for Remote B, designed for adjustable bed bases. It covers setup, operation, and troubleshooting to ensure proper functionality with compatible adjustable bed systems.
This remote control is compatible with various adjustable bed brands including MLILY, MATTRESS FIRM, CLASSIC BRANDS, and INNOVA. Always verify compatibility with your specific control box device.
Product Overview
The Richmat HJH55 Remote Control (Remote B) features a backlit design and a range of buttons for controlling your adjustable bed's functions.
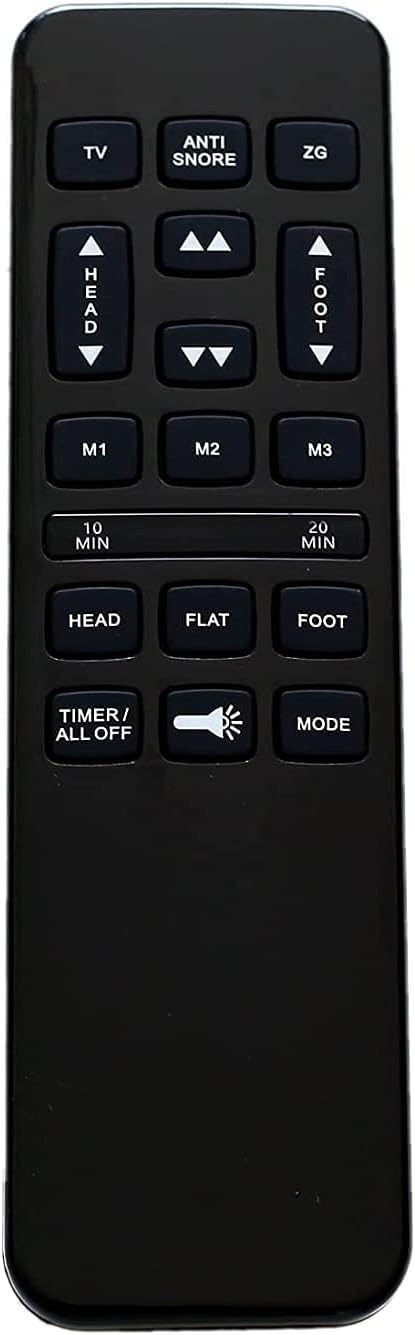
Figure 1: Front view of the Richmat HJH55 Remote Control (Remote B). This image displays the layout of all buttons, including TV, Anti-Snore, ZG, Head Up/Down, Foot Up/Down, M1, M2, M3, 10 Min, 20 Min, Head, Flat, Foot, Timer/All Off, Light, and Mode.

Figure 2: Comparison image showing Remote A and Remote B. Remote B, the subject of this manual, is distinguished by the "Anti-Snore" button, "M3" button, and "Flat" button, as opposed to Remote A's "Lounge" and different button configurations.

Figure 3: Detailed view of Remote B, emphasizing the "Anti-Snore", "M3", and "Flat" buttons, which are key identifiers for this specific remote model.
Button Functions:
- TV: Adjusts the bed to a TV viewing position.
- ANTI SNORE: Adjusts the head section to a position designed to reduce snoring.
- ZG (Zero Gravity): Moves the bed to a zero-gravity position, elevating both head and foot sections.
- HEAD UP/DOWN Arrows: Adjusts the head section of the bed up or down.
- FOOT UP/DOWN Arrows: Adjusts the foot section of the bed up or down.
- M1, M2, M3: Memory preset buttons to save and recall preferred bed positions.
- 10 MIN / 20 MIN: Timer functions for massage or other timed operations (if supported by bed base).
- HEAD: Returns the head section to a flat position.
- FLAT: Returns the entire bed to a flat position.
- FOOT: Returns the foot section to a flat position.
- TIMER / ALL OFF: Activates/deactivates timer or turns off all functions.
- Light Button: Activates/deactivates under-bed lighting (if supported by bed base).
- MODE: Cycles through different massage modes (if supported by bed base).
Setup
1. Battery Installation:
The Richmat HJH55 remote control requires two (2) AAA batteries (not included).
- Locate the battery compartment on the back of the remote control.
- Slide the battery compartment cover downwards to open.
- Insert two AAA batteries, ensuring correct polarity (+ and -) as indicated inside the compartment.
- Slide the battery compartment cover back into place until it clicks securely.

Figure 4: Back view of the remote control, showing the battery compartment cover.

Figure 5: Back view of the remote control with the battery compartment open, showing the correct orientation for AAA battery insertion.
2. Pairing Instructions:
The remote control does not come pre-paired with your adjustable bed base. You must pair it according to the instructions provided by your bed base's manufacturer. The general pairing process for Richmat systems often involves the following steps:

Figure 6: Illustration of the remote control and a compatible Richmat control box, emphasizing the connection required for pairing.
- Ensure your adjustable bed base is plugged into a working power outlet.
- Locate the control box under your bed base. It typically has a "Learn" or "Pair" button.
- Press and hold the "Learn" or "Pair" button on the control box for a few seconds until an indicator light (usually blue or green) starts flashing.
- Within 10 seconds of the light flashing, press and hold the "Head Up" and "Foot Up" buttons simultaneously on your Richmat HJH55 remote control.
- Hold the buttons until the indicator light on the control box stops flashing and becomes solid, or until the bed base responds. This indicates successful pairing.
- Test all remote functions to ensure proper operation.
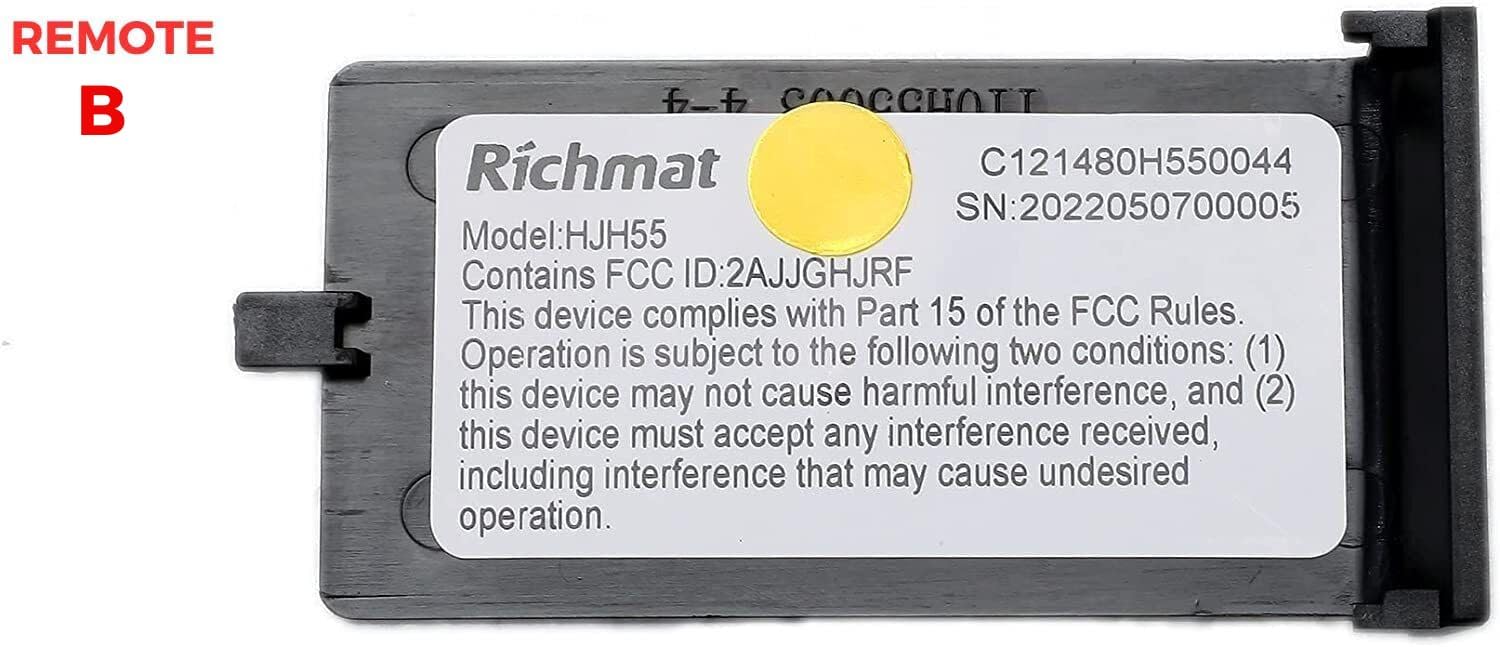
Figure 7: Close-up of the Richmat control box label, confirming Model: HJH55 and FCC ID: 2AJJGHJRF. This label helps verify compatibility.
Note: Specific pairing procedures may vary slightly by bed base model and manufacturer. Refer to your adjustable bed base's original user manual for precise pairing instructions if these steps do not work.
Operating Instructions
Once paired, the remote control allows you to adjust your bed base to various positions and utilize additional features.
- Adjusting Head and Foot: Use the HEAD UP/DOWN and FOOT UP/DOWN arrow buttons to independently raise or lower the head and foot sections of your bed.
- Pre-set Positions:
- Press TV to move the bed to a comfortable TV viewing position.
- Press ANTI SNORE to slightly elevate the head section, which may help reduce snoring.
- Press ZG for the Zero Gravity position, which elevates both the head and foot to promote circulation and reduce pressure.
- Memory Presets (M1, M2, M3):
- Adjust the bed to your desired position.
- Press and hold the desired memory button (M1, M2, or M3) until the bed briefly moves or a confirmation light/sound occurs. This saves the current position.
- To recall a saved position, simply press the corresponding memory button.
- Flat Position: Press the FLAT button to quickly return the entire bed base to a completely flat position.
- Individual Section Flat: Use the HEAD button to flatten only the head section, and the FOOT button to flatten only the foot section.
- Timer Functions: The 10 MIN and 20 MIN buttons may activate timed massage or other features if your bed base supports them. Consult your bed base manual for details.
- Light Control: Press the Light Button (flashlight icon) to turn on or off any integrated under-bed lighting.
- Mode Control: The MODE button may cycle through different massage modes or other functions.
- Timer / All Off: This button can activate a general timer or turn off all active functions.
Maintenance
Battery Replacement:
Replace batteries when the remote's response becomes sluggish or if the backlight dims. Follow the battery installation steps outlined in the "Setup" section.
- Always use new AAA batteries.
- Do not mix old and new batteries, or different types of batteries.
- Remove batteries if the remote will not be used for an extended period to prevent leakage.
- Dispose of used batteries responsibly according to local regulations.
Troubleshooting
| Problem | Possible Cause | Solution |
|---|---|---|
| Remote not responding. | Dead or incorrectly installed batteries. | Replace batteries, ensuring correct polarity. |
| Remote not responding. | Remote is not paired with the bed base. | Follow the pairing instructions in the "Setup" section. |
| Remote functions intermittently. | Low battery power or interference. | Replace batteries. Ensure no strong electronic devices are causing interference nearby. |
| Bed base does not move to desired position. | Obstruction under the bed or bed base malfunction. | Check for obstructions. If problem persists, consult your bed base manufacturer's manual or support. |
| Remote B does not work with my bed. | Incompatible remote model (e.g., requires Remote A). | Verify your original remote or control box matches Remote B (HJH55). If not, you may need a different remote model. |
If troubleshooting steps do not resolve the issue, please contact the manufacturer of your adjustable bed base for further assistance.
Specifications
- Model: HJH55 (Remote B)
- Brand: Generic (Compatible with Richmat systems)
- Power Source: 2 x AAA Batteries (not included)
- Color: Black
- Special Feature: Backlit buttons
- Compatible Devices: MLILY, MATTRESS FIRM, CLASSIC BRANDS, INNOVA adjustable bed bases (verify control box compatibility)
- FCC ID: 2AJJGHJRF (as seen on compatible control box)
Warranty and Support
This product is a replacement remote control. Warranty coverage, if any, is typically provided by the seller or the original manufacturer of the remote. For specific warranty information or technical support related to the remote control, please refer to the seller's policy or contact the manufacturer directly.
For issues related to your adjustable bed base, including pairing difficulties not resolved by these instructions, please contact the manufacturer of your bed base (e.g., MLILY, MATTRESS FIRM, CLASSIC BRANDS, INNOVA).
Ask a question about this manual
Ask about setup, troubleshooting, compatibility, parts, safety, or missing instructions. Manuals+ will review the question and use this page’s manual context to help answer it.