1. Product Overview
The Atomos Ninja 5.2" 4K HDMI Recording Monitor is a versatile on-camera monitor and recorder designed for professional filmmakers and content creators. It features a high-resolution Full HD touchscreen display, 4K HDMI recording capabilities, and support for ProRes RAW up to 6K with compatible cameras. This bundle includes essential accessories to enhance your workflow.
Bundle Contents:
- Atomos Ninja 5.2" 4K HDMI Recording Monitor
- Waith Power NP-F750 Battery
- Waith Power Battery Charger (NP-F750 compatible)
- Swivel and Tilt Adjustable Monitor Mount with Cold Shoe Mount
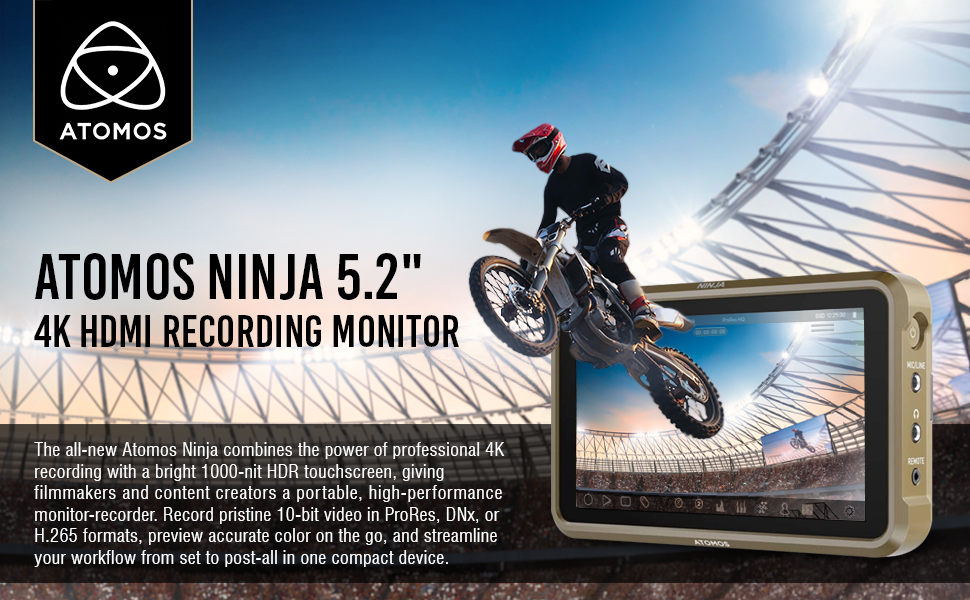
Image: Atomos Ninja 5.2" 4K HDMI Recording Monitor shown with included accessories: Waith Power NP-F750 Battery, Waith Power Battery Charger, and SmallRig Swivel & Tilt Adjustable Monitor Mount.
2. Setup
2.1 Charging the Battery
- Connect the Waith Power Battery Charger to a power outlet using the provided power brick.
- Insert the NP-F750 battery into the charger. The charger features automatic constant current control to prevent overcharging.
- A full charge typically takes approximately 60-90 minutes.

Image: The Waith Power NP-F750 battery and its dedicated charger. The charger is designed for quick and safe charging.
2.2 Mounting the Monitor
The included Swivel and Tilt Adjustable Monitor Mount allows for flexible positioning of your Atomos Ninja monitor.
- Attach the cold shoe base of the monitor mount to your camera's hot shoe, cage, or handle.
- Secure the Atomos Ninja monitor to the 1/4"-20 screw on the top of the mount.
- Adjust the tilt (180°) and swivel (360°) to your desired viewing angle. The tilt axis can be tightened via a knob to secure the monitor.

Image: The SmallRig Swivel and Tilt Adjustable Monitor Mount is shown attached to a camera, holding the Atomos Ninja monitor. This setup allows for flexible viewing angles.
2.3 Connecting to Camera
- HDMI Connection: Connect your camera's HDMI output to the Atomos Ninja's HDMI input using an HDMI 2.0 compatible cable for 4K video input. The monitor also provides HDMI output for loop-through functionality.
- Power Connection: Insert the charged NP-F750 battery into the L-series battery plate on the back of the Ninja. Alternatively, the monitor supports USB-C PD input for power.
- Audio/Remote: Utilize the 3.5mm mic/line input, headphone output, and remote port as needed for your setup.

Image: The side of the Atomos Ninja monitor, highlighting the HDMI input and output ports, essential for video signal transmission.
3. Operating Instructions
3.1 Powering On and AtomOS 11
Press and hold the power button on the side of the monitor to turn it on. The AtomOS 11 operating system provides an intuitive icon interface for easy navigation and access to various features.
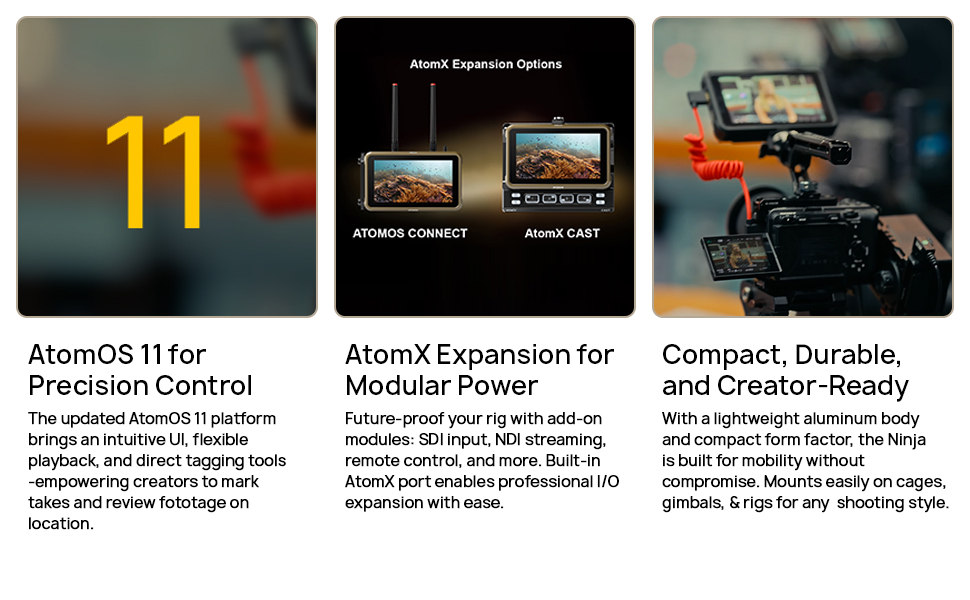
Image: The Atomos Ninja's touchscreen display showcasing the AtomOS 11 interface with various monitoring and recording options.
3.2 Recording and Codecs
- The Ninja monitor supports recording ProRes RAW footage at up to 6K resolution and 30 frames per second with select compatible cameras.
- It offers versatile recording options with support for popular codecs like ProRes and DNxHR/HD.
- Compatible with Master Caddy II and III hard drives for convenient storage.
3.3 Monitoring Tools
AtomOS 11 equips your monitor with advanced monitoring tools for precise exposure and focus control:
- Waveform & Vectorscope: For detailed analysis of video signals.
- Zebra & Peaking: To assist with exposure and focus accuracy.
- LUTs: Load and apply custom 3D LUTs for on-set color management.
- EL Zone & ARRI Standard: For enhanced exposure monitoring.
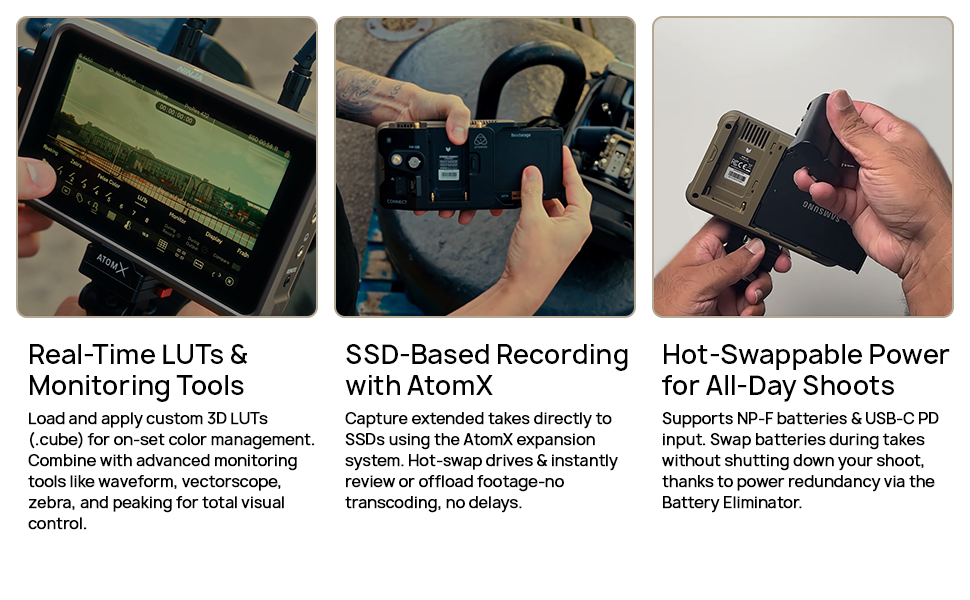
Image: The Atomos Ninja monitor screen showing advanced monitoring tools such as waveform, vectorscope, and false color for precise image analysis.
4. Maintenance
- Cleaning: Use a soft, lint-free cloth to clean the touchscreen and body of the monitor. Avoid abrasive materials or harsh chemicals.
- Storage: Store the monitor and accessories in a dry, cool place away from direct sunlight and extreme temperatures.
- Battery Care: Follow the manufacturer's guidelines for battery charging and storage to maximize battery life.
5. Troubleshooting
- "No Input" Message: Ensure your HDMI cable is securely connected to both the camera and the monitor. Verify the camera's HDMI output settings are correct and compatible with the monitor's input.
- Power Issues: Check if the battery is fully charged and properly inserted. If using USB-C PD, ensure the power source is sufficient.
- Touchscreen Unresponsive: Restart the monitor. If the issue persists, check for firmware updates.
- Overheating: While the monitor is designed for efficient cooling, prolonged use in direct sunlight or high ambient temperatures may cause it to warm up. Ensure adequate ventilation.
Video: A user demonstrates the Atomos Ninja monitor, showing its interface and how to navigate settings. This video can help users understand basic operation and troubleshoot input issues.
6. Specifications
| Feature | Specification |
|---|---|
| Brand | Atomos |
| Model Number | ATOATOMNJA004-KIT2 |
| Screen Size | 5.2 Inches |
| Resolution | 1920 x 1080 Pixels (FHD 1080p) |
| Brightness | 1000 nits |
| Display Type | LCD |
| Refresh Rate | 60 Hz |
| Contrast Ratio | Greater than 1000:1 |
| Connectivity Technology | HDMI (1 Total HDMI Port) |
| Additional Features | Touchscreen, 10-bit panel, ProRes RAW support, 4K/6K recording capabilities |
| Power Input | L-series battery plate (5.8 to 7.2V), USB-C PD |
7. Support
For further assistance, technical support, or warranty information, please visit the official Atomos website or contact their customer service. Keep your proof of purchase for any warranty claims.
Visit the Atomos Store on Amazon for more products and information.