1. Introduction
The Makerbase MKS Robin Nano V3.1 is an advanced 32-bit control board designed for 3D printers. Featuring an STM32F407VET6 microcontroller, it offers enhanced processing capabilities and improved anti-interference performance. This board is compatible with various 3D printer models and supports multiple display options, including the MKS TS35 color touch screen. It operates on Marlin 2.X firmware, providing a flexible and powerful platform for 3D printing.
2. Product Features
- Wide Compatibility: Designed for use with various 3D printers, including Ender-3, Ender-3 V2, and Ender-3 Pro.
- Enhanced Processing: Features an upgraded STM32F407VET6 microcontroller for more powerful performance compared to previous versions.
- Improved Stability: Incorporates anti-interference design with Schottky diodes in the temperature measurement and MOS circuits, and TVS protection for power input.
- Integrated Display Support: Includes a 3.5-inch TS35 color touch screen for intuitive user interaction.
- Versatile Display Options: Compatible with MKS H43 LCD, MINI12864, and LCD2004 displays, offering multi-color backlighting and direct knob adjustments.
- Marlin Firmware Support: Firmware is based on Marlin 2.X, allowing for easy compilation and customization by modifying the motherboard type in existing Marlin repositories.

Image: The MKS Robin Nano V3.1 board demonstrating compatibility with different display types, including MKS H43, LCD MINI12864, and TS35.
3. Safety Information
Please read and understand all safety instructions before installing or operating the MKS Robin Nano V3.1 control board. Failure to follow these instructions may result in electric shock, fire, or damage to the product or other equipment.
- Always disconnect power to the 3D printer before performing any installation, wiring, or maintenance.
- Ensure proper grounding for all electrical components.
- Verify all wiring connections are correct and secure before applying power. Incorrect wiring can cause damage.
- Avoid touching electronic components while the board is powered on.
- Operate the board within its specified voltage and temperature ranges.
- Keep the board away from moisture, dust, and extreme temperatures.
4. Setup and Installation
4.1 Physical Installation
Mount the MKS Robin Nano V3.1 board securely within your 3D printer's enclosure using appropriate standoffs and screws. Ensure adequate airflow around the board for cooling.
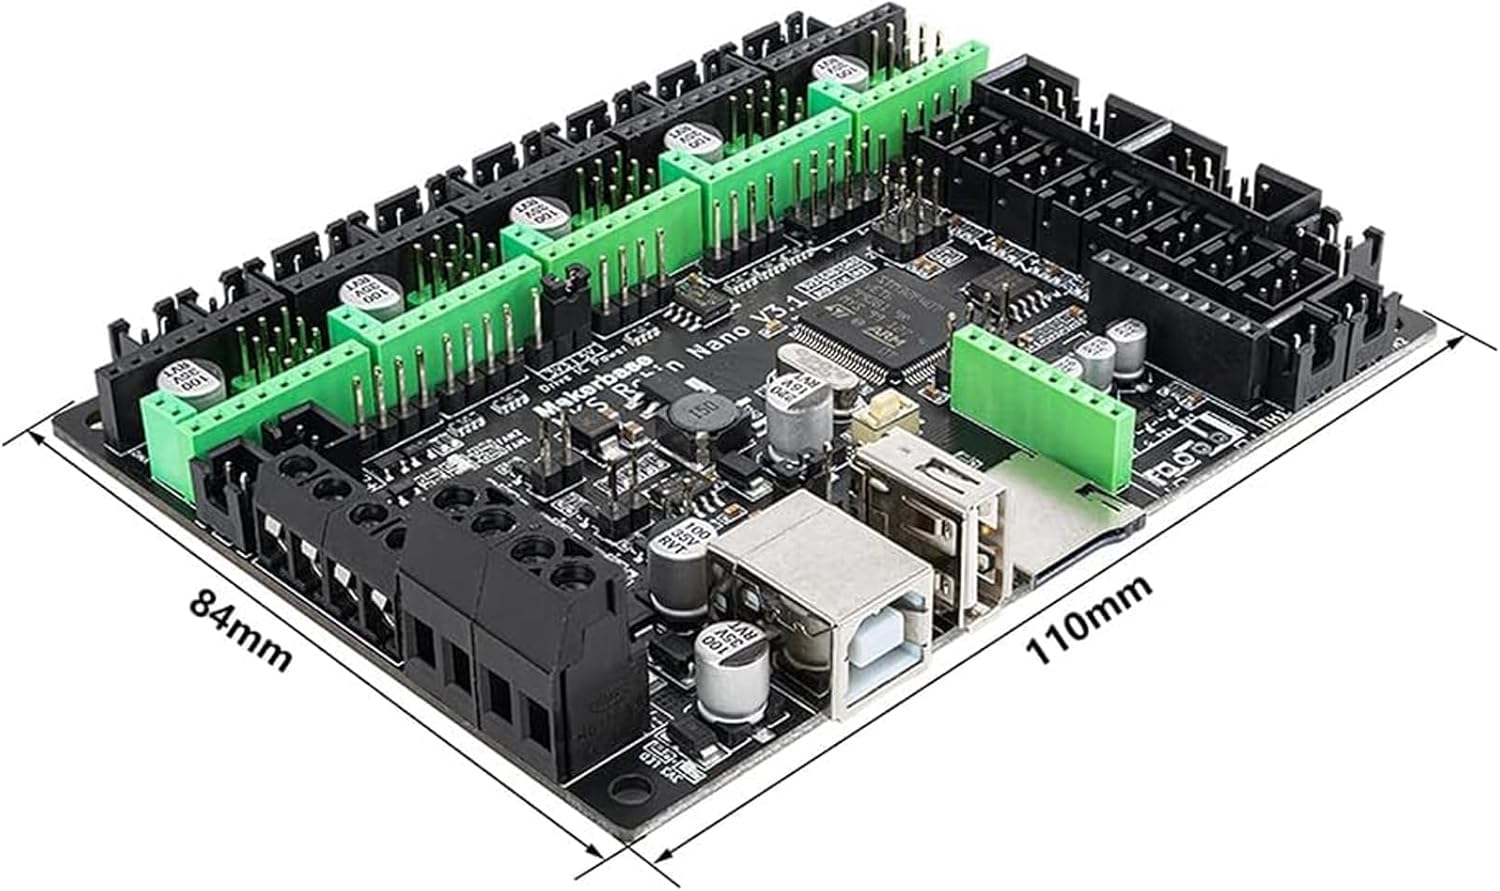
Image: The MKS Robin Nano V3.1 control board showing its physical dimensions (110mm x 84mm).
4.2 Wiring Connections
Refer to the pinout diagram for correct connection of power, stepper motors, heaters, thermistors, endstops, and other peripherals. Pay close attention to polarity for power connections and sensor inputs.
- Power Input: Connect your 12V/24V power supply to the designated power terminals.
- Stepper Motors: Connect X, Y, Z, E0, and E1 stepper motors to their respective driver slots. Ensure correct orientation of stepper drivers.
- Heaters: Connect the hotend heater (HE0) and heated bed (H-BED) to their terminals.
- Thermistors: Connect hotend (TH0) and heated bed (THB) thermistors to their inputs.
- Endstops: Connect X, Y, Z endstops to their corresponding pins.
- Display: Connect the TS35 touch screen or other compatible display to the dedicated display port.
- Fans: Connect cooling fans (FAN0, FAN1, FAN2) as needed.

Image: Detailed pinout diagram for the MKS Robin Nano V3.1 board, illustrating connections for power, motors, heaters, sensors, and communication interfaces.
4.3 Firmware Flashing
The MKS Robin Nano V3.1 uses Marlin 2.X firmware. To update or install firmware:
- Download the Marlin 2.X source code from the official GitHub repository.
- Modify the
Configuration.handConfiguration_adv.hfiles to match your printer's specific hardware and desired features. Ensure the motherboard type is correctly set for MKS Robin Nano V3.1. - Compile the firmware using a suitable IDE (e.g., VS Code with PlatformIO).
- Copy the compiled
firmware.binfile to the root directory of a FAT32 formatted SD card. - Insert the SD card into the board's TF card slot and power on the board. The firmware will automatically flash.
5. Operating Instructions
5.1 Using the TS35 Touch Screen
The TS35 touch screen provides a graphical interface for controlling your 3D printer. Navigate through menus by tapping icons and options. Common functions include:
- Print: Select and start print jobs from the SD card or USB disk.
- Move: Manually control the movement of X, Y, Z axes and extruders.
- Temperature: Monitor and adjust hotend and heated bed temperatures.
- Settings: Access printer configuration, calibration, and other advanced options.

Image: The MKS TS35 color touch screen display, showing its user interface with icons for various printer functions.
5.2 USB Disk and TF Card Printing
The MKS Robin Nano V3.1 supports printing directly from a USB disk or a TF (MicroSD) card.
- TF Card: Insert a FAT32 formatted TF card containing your G-code files into the board's slot. Select the desired file from the display to begin printing.
- USB Disk: Connect a USB flash drive (FAT32 formatted) with G-code files to the USB port on the board. The display will allow you to browse and select files for printing.
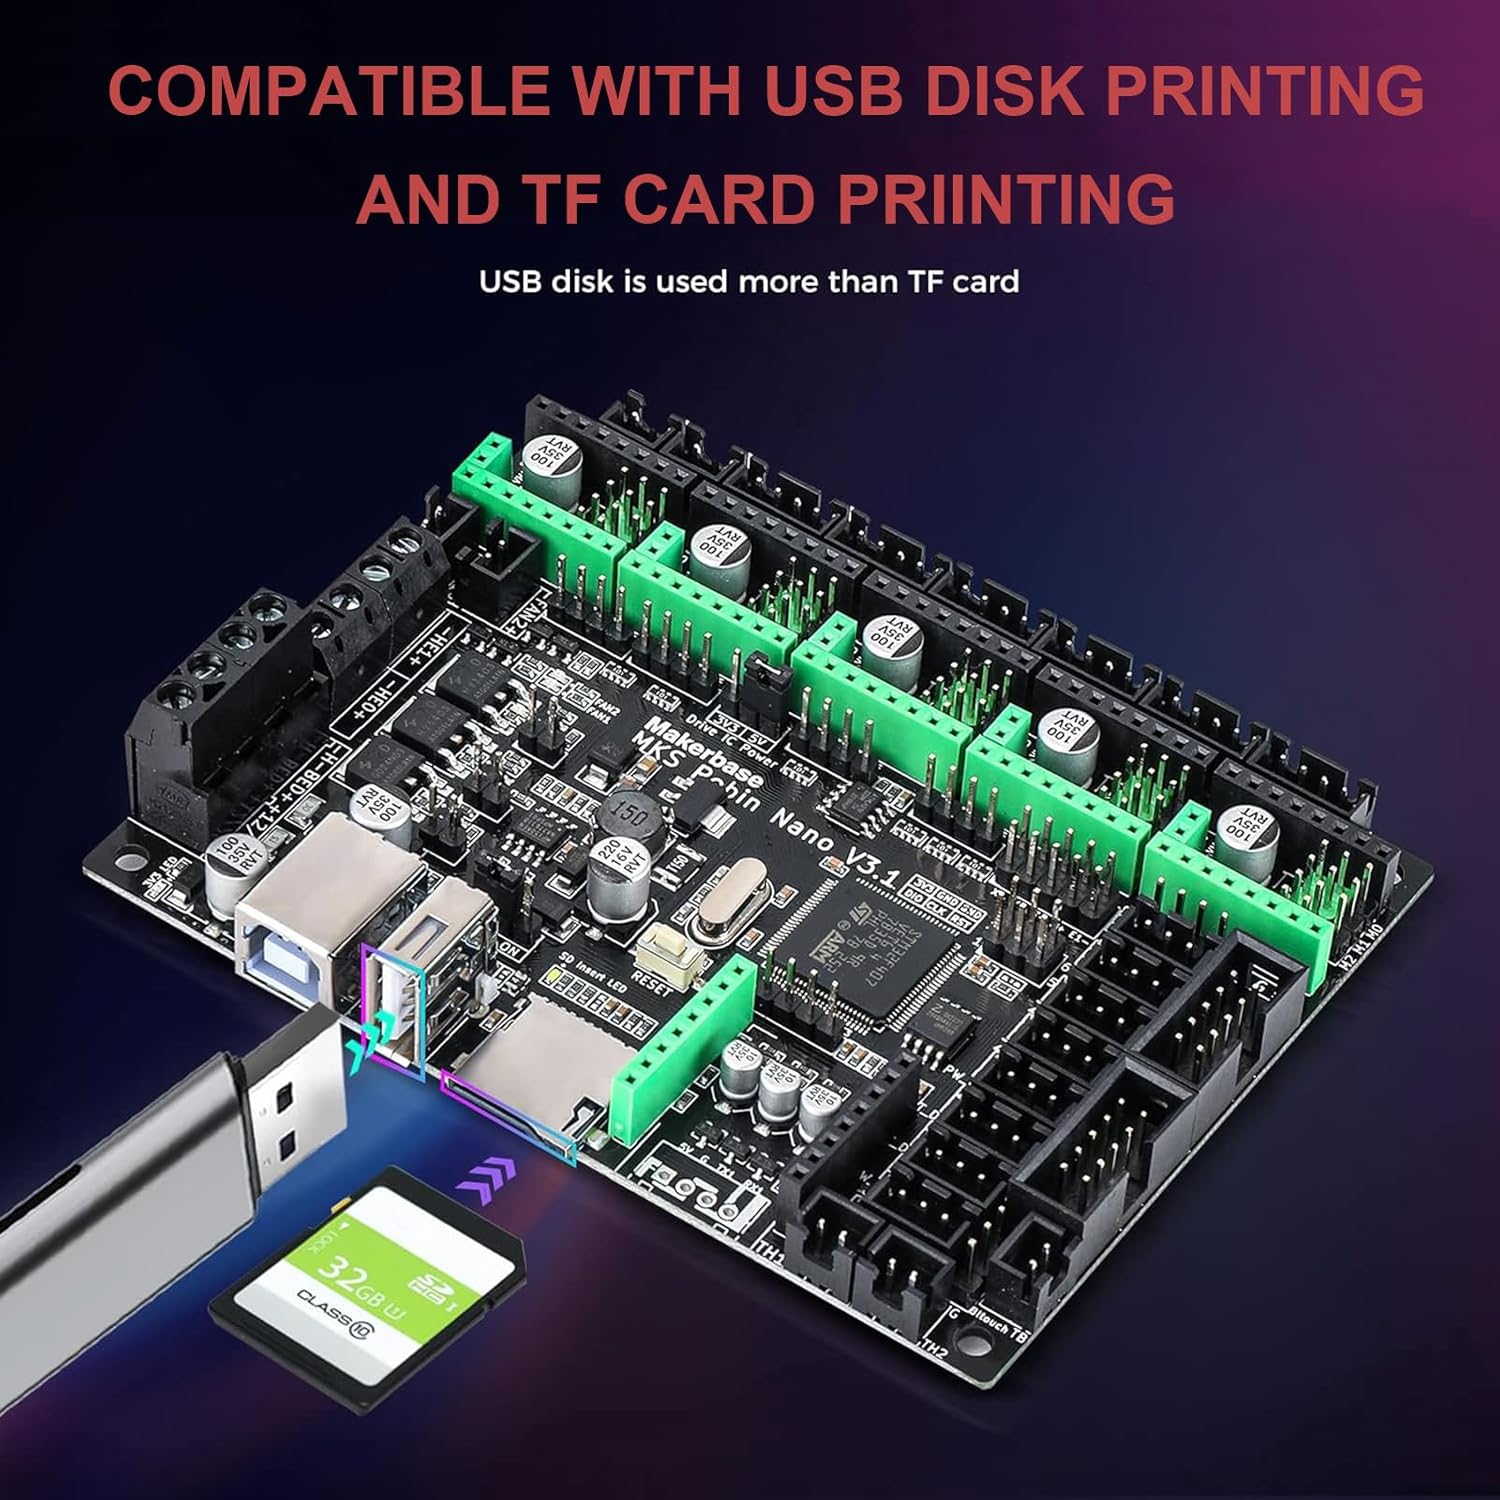
Image: The MKS Robin Nano V3.1 board illustrating its compatibility with both USB disk and TF card for direct printing.
6. Maintenance
Regular maintenance ensures the longevity and optimal performance of your MKS Robin Nano V3.1 board.
- Cleaning: Periodically clean the board with a soft, dry brush or compressed air to remove dust and debris. Ensure power is disconnected before cleaning.
- Firmware Updates: Check for official firmware updates from Makerbase or the Marlin community. Updating firmware can provide new features, bug fixes, and performance improvements.
- Connection Checks: Regularly inspect all wiring connections to ensure they are secure and free from corrosion or damage.
7. Troubleshooting
This section addresses common issues you might encounter with the MKS Robin Nano V3.1 board.
- Board Not Powering On:
- Check power supply connections and ensure correct voltage (12V/24V).
- Verify the power supply is functional.
- Stepper Motors Not Moving:
- Ensure stepper drivers are correctly inserted and oriented.
- Check motor wiring for continuity and correct pinout.
- Verify motor current settings in firmware or on drivers.
- Display Not Working:
- Check the display cable connection to the board.
- Ensure the correct display type is enabled in the firmware.
- Heating Issues (Hotend/Bed):
- Verify thermistor and heater wiring connections.
- Check thermistor type and PID settings in firmware.
- Ensure power supply can provide sufficient current for heaters.
- Firmware Flashing Failure:
- Ensure the SD card is FAT32 formatted and the
firmware.binfile is in the root directory. - Try a different SD card.
- Verify the firmware compilation process was successful.
- Ensure the SD card is FAT32 formatted and the
If issues persist, consult online resources, community forums, or contact technical support.
8. Specifications
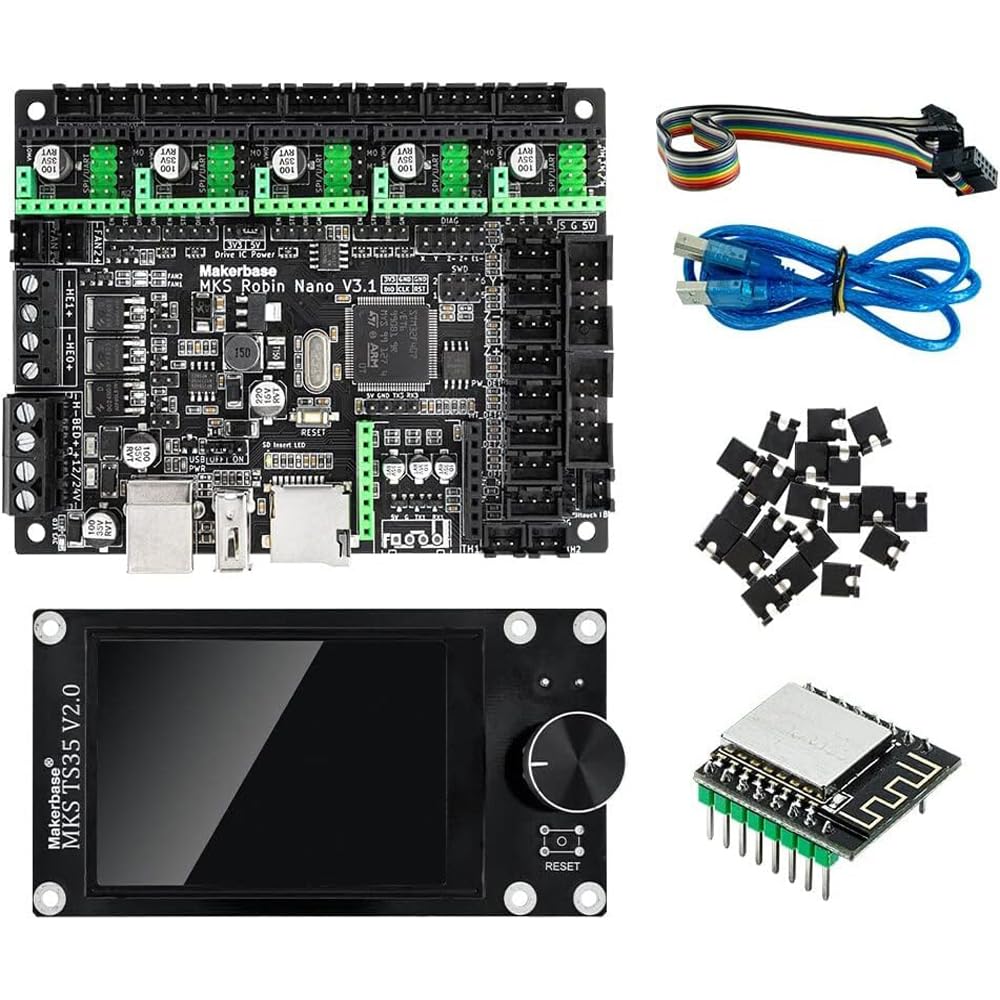
Image: The Makerbase MKS Robin Nano V3.1 control board, shown with the TS35 touch screen and WiFi module.
| Feature | Detail |
|---|---|
| Model | MKS Robin Nano V3.1 |
| Microcontroller | STM32F407VET6 (168 MHz) |
| Input Voltage | 12V - 24V |
| Display Type (Included) | TS35 Touchscreen |
| Operating Temperature | 20 Degrees Celsius (Optimal) |
| Firmware | Marlin 2.X based |
| Connectivity | USB Printing, TF Card Printing, WiFi |
| Dimensions | 110mm x 84mm (approximate) |
| Included Components | Control Board, TS35 Touch Screen, WiFi Module |
| Brand | Makerbase |
| ASIN | B0CHWKT1KL |
| UPC / GTIN | 707091969369 |
| Customer Reviews | 5.0 out of 5 stars (3 ratings) |
9. Warranty and Support
For warranty information and technical support, please refer to the documentation provided with your purchase or contact the seller/manufacturer directly. Keep your proof of purchase for any warranty claims.


