1. Safety Information
Please read all safety instructions carefully before attempting installation or maintenance. Failure to follow these instructions may result in personal injury or damage to your device.
- Disconnect Power: Always ensure your laptop is completely powered off and disconnected from the power adapter before opening the chassis.
- Remove Battery: If possible, remove the laptop battery to prevent accidental power-on.
- Static Electricity: Discharge any static electricity from your body by touching a grounded metal object before handling internal components. Consider using an anti-static wrist strap.
- Handle with Care: Laptop components are delicate. Handle the CPU fan and surrounding parts with extreme care to avoid damage.
- Professional Installation Recommended: If you are not comfortable with laptop disassembly, seek assistance from a qualified technician.
2. Product Overview
This GAOCHENG CPU fan is a replacement cooling component designed for specific Xiaomi MI Pro 15.6 laptop models. Its primary function is to dissipate heat generated by the Central Processing Unit (CPU), maintaining optimal operating temperatures and preventing thermal throttling or damage.
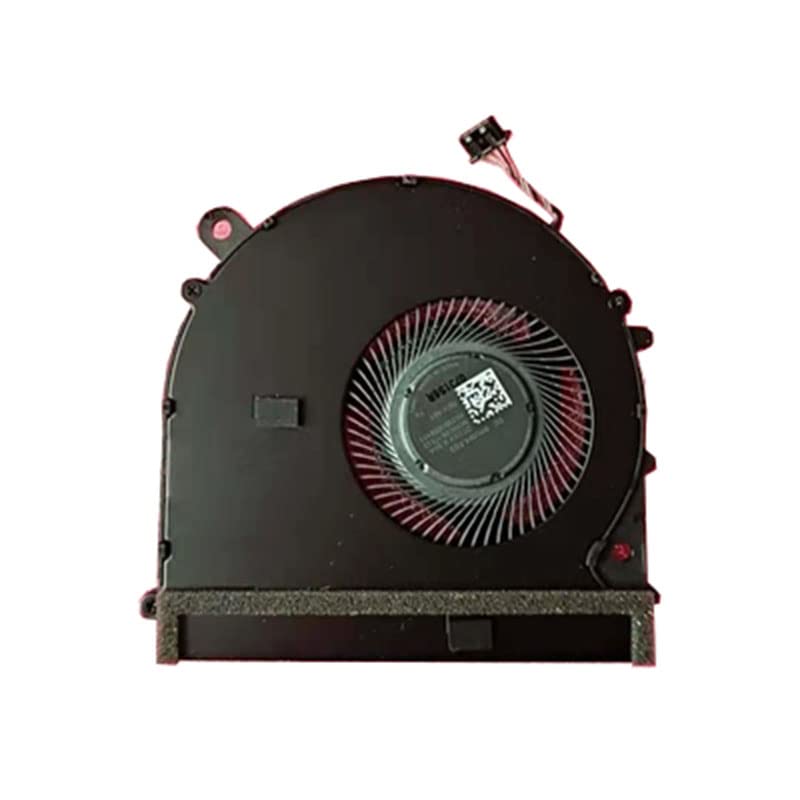
This image shows the GAOCHENG Laptop CPU Fan, highlighting its compact design and connector. It is designed for efficient cooling of the CPU in compatible Xiaomi MI Pro 15.6 laptop models.
Compatibility:
- Xiaomi MI Pro 15.6
- Models: 171501, 171501-AL, 171501-AQ, 171501-AF
3. Setup (Installation)
Replacing a laptop CPU fan requires careful disassembly and reassembly. Follow these general steps. Specific laptop models may have variations.
Tools Required:
- Small Phillips head screwdriver
- Plastic spudger or opening tool (optional, for prying open casing)
- Thermal paste (new application recommended)
- Isopropyl alcohol (for cleaning old thermal paste)
- Lint-free cloth
Installation Steps:
- Prepare Laptop: Power off your laptop completely, disconnect the power adapter, and remove the battery if it is external.
- Open Laptop Casing: Carefully unscrew all screws on the bottom panel of your laptop. Use a plastic spudger to gently pry open the casing, starting from an edge. Be mindful of any clips or ribbon cables.
- Locate Old CPU Fan: Once the laptop is open, identify the CPU fan. It is usually connected to a heatsink assembly over the CPU.
- Disconnect Old Fan: Gently disconnect the fan's power cable from the motherboard. This is typically a small, multi-pin connector.
- Remove Heatsink/Fan Assembly: Unscrew the screws holding the heatsink and fan assembly in place. These screws are often numbered or have springs. Remove the entire assembly carefully.
- Clean CPU and Heatsink: Use isopropyl alcohol and a lint-free cloth to thoroughly clean off all old thermal paste from the CPU die and the heatsink contact surface.
- Replace Fan: If the fan is separate from the heatsink, remove the old fan from the heatsink assembly and install the new GAOCHENG fan.
- Apply New Thermal Paste: Apply a small, pea-sized amount of new thermal paste to the center of the CPU die. Do not apply too much.
- Install New Fan/Heatsink Assembly: Carefully place the new fan and heatsink assembly back onto the CPU, aligning the screw holes. Tighten the screws in a diagonal pattern, a little at a time, to ensure even pressure. Do not overtighten.
- Connect Fan Cable: Reconnect the new fan's power cable to the motherboard connector. Ensure it is seated firmly.
- Reassemble Laptop: Carefully reattach the bottom casing, ensuring all clips engage and screws are tightened. Reinstall the battery if removed.
- Test: Power on your laptop and monitor fan operation and CPU temperatures to ensure proper installation.
4. Operating the CPU Fan
The GAOCHENG CPU fan operates automatically once correctly installed. The laptop's BIOS/UEFI and operating system will control the fan speed based on the CPU's temperature, increasing speed during heavy loads and decreasing it during idle periods to maintain optimal cooling and minimize noise.
5. Maintenance
Regular maintenance can extend the life of your CPU fan and ensure efficient cooling.
Cleaning:
- Frequency: It is recommended to clean the CPU fan and heatsink every 6-12 months, or more frequently if the laptop is used in dusty environments.
- Procedure:
- Power off and disconnect the laptop as described in the Safety Information.
- Open the laptop casing to access the fan.
- Use a can of compressed air to gently blow dust out of the fan blades and heatsink fins. Hold the fan blades to prevent them from spinning rapidly during cleaning, which can damage the bearings.
- Use a soft brush or cotton swab to remove stubborn dust.
- Reassemble the laptop.
6. Troubleshooting
If you encounter issues after installing the new CPU fan, consider the following:
- Fan Not Spinning:
- Check if the fan's power cable is securely connected to the motherboard.
- Ensure the fan is correctly seated and not obstructed by other components.
- Verify that the laptop is receiving power.
- Excessive Noise:
- Ensure all screws holding the fan/heatsink assembly are tightened properly, but not overtightened.
- Check for any loose cables or debris that might be interfering with the fan blades.
- Dust accumulation can cause noise; perform a thorough cleaning.
- Laptop Overheating:
- Confirm that new thermal paste was applied correctly and evenly between the CPU and heatsink.
- Ensure the heatsink is making full contact with the CPU.
- Check for proper airflow within the laptop chassis; ensure vents are not blocked.
- Verify that the fan is spinning at appropriate speeds when the CPU is under load.
If these steps do not resolve the issue, contact customer support or a professional technician.
7. Specifications
| Feature | Detail |
|---|---|
| Brand | GAOCHENG |
| Compatible Devices | Laptop (Xiaomi MI Pro 15.6 series) |
| Item Model Number | 171501 |
| Product Dimensions | 11.81 x 7.87 x 3.94 inches |
| Item Weight | 1.32 pounds |
| Manufacturer | GAOCHENG |
| ASIN | B0CHVJ8CD2 |
8. Warranty and Support
For warranty information or technical support, please refer to the documentation provided with your purchase or contact the seller directly. Keep your proof of purchase for any warranty claims.
Seller: JRKS Parts
Amazon Seller ID: A375TJIIGYUFL3