1. Introduction
This manual provides essential information for the safe and efficient operation, maintenance, and troubleshooting of your Fafeicy 18V Cordless Electric Pruning Shear. Please read it thoroughly before initial use and retain it for future reference. This tool is designed for pruning tree branches and similar vegetation.
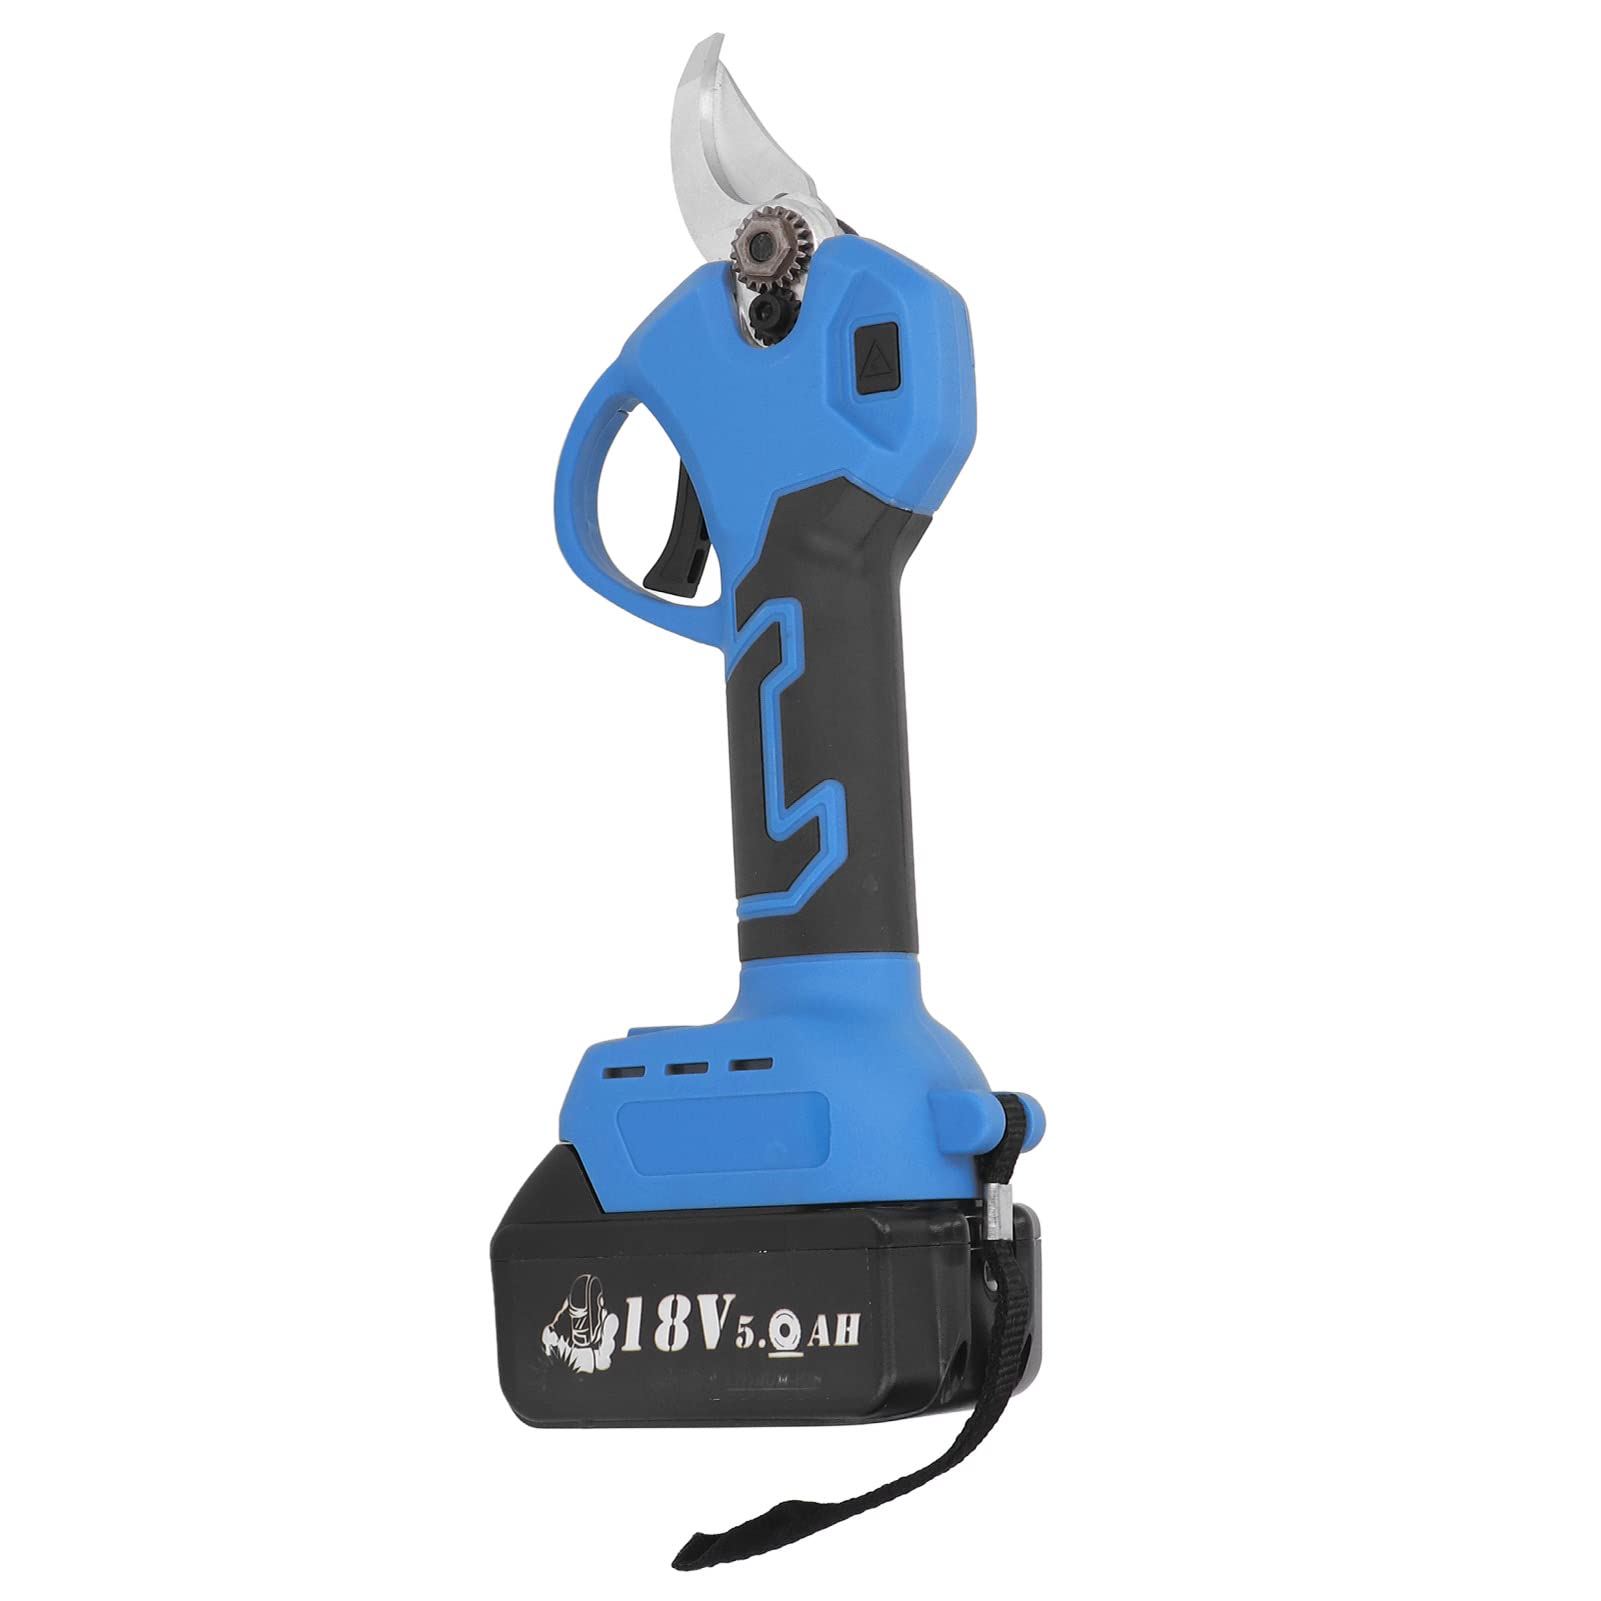
Image 1.1: Fafeicy 18V Cordless Electric Pruning Shear. This image shows the blue and black pruning shear alongside smaller images depicting its use in a garden, an orange orchard, and for shaping hedges.
2. Safety Information
Always observe basic safety precautions to reduce the risk of fire, electric shock, and personal injury when operating this tool.
- Read the Manual: Before operating the pruning shear, read and understand all instructions and safety warnings in this manual.
- Wear Eye Protection: Always wear appropriate eye protection (safety glasses or goggles) to protect against flying debris.
- Keep Hands Clear: Never place hands or fingers near the blades when the tool is connected to a battery. The blades are extremely sharp.
- Disconnect Battery: Always remove the battery pack from the tool before making any adjustments, changing accessories, or storing the tool.
- Secure Work Area: Ensure the area is clear of bystanders, especially children and pets, before operating the tool.
- Proper Grip: Maintain a firm grip on the handle during operation.
- Avoid Accidental Starting: Ensure the switch trigger is in the OFF position before inserting the battery pack.
- Use Recommended Batteries: Only use battery packs specified for this tool. Refer to the 'Specifications' section for compatible battery types.
- Store Safely: Store the tool in a dry, secure place out of reach of children when not in use.
3. Package Contents
Verify that all items are present upon opening the package:
- 1 x Cordless Electric Pruning Shear
- 2 x Wrench
- 1 x Instruction Manual
Note: Battery is not included with this product.
4. Product Overview
Familiarize yourself with the components of your electric pruning shear.

Image 4.1: Key components of the Fafeicy 18V Cordless Electric Pruning Shear. The image highlights the Handle, Blade Lock Screw, Alloy Blade, Movable Blade, Switch Trigger, and Function Center.
- Handle: Ergonomically designed for comfortable grip and control.
- Blade Lock Screw: Secures the blade in place.
- Alloy Blade: Fixed blade made of high carbon steel.
- Movable Blade: The cutting blade that moves to perform the cut.
- Switch Trigger: Activates the pruning shear.
- Function Center: Contains controls and indicators for operation.
5. Specifications
| Feature | Specification |
|---|---|
| Material | ABS, High Carbon Steel |
| Maximum Cutting Capacity (Steel plate 400N/mm²) | 1.6 mm (16 ga.) |
| Maximum Cutting Capacity (Steel plate 600N/mm²) | 1.2 mm (18 ga.) |
| Maximum Cutting Capacity (Steel plate 200N/mm²) | 2.5 mm (13 ga.) |
| Minimum Cutting Radius | 250 mm |
| Stroke Speed | 4300/min |
| Applicable Battery Type | 18V Lithium-ion battery (e.g., BL1815, BL1820, BL1530, BL1840, BL1850, BL1860) |
| Compatible 18V B-series Batteries | BL1850B (197285-8), BL1840B (197270-1), BL1830B (197602-2), BL1430B (197618-7), BL1820B (197487-6) |
| Other Compatible Batteries | BL1850, BL1840, BL1440 (196391-6), BL1415 (194560-3), BL1815N (196781-3) |
| Non-Compatible Batteries | G series batteries (e.g., BL1813G, BL1413G, BL1415G, BL1430G, BL1815G), 18V Ni-CD batteries (e.g., 1822) |
6. Setup
6.1 Battery Installation
- Ensure the pruning shear is turned off and the switch trigger is disengaged.
- Align the battery pack with the battery port on the bottom of the pruning shear.
- Slide the battery pack into the port until it clicks securely into place. Ensure it is fully seated.
- To remove the battery, press the release button (if present) and slide the battery pack out.
6.2 Initial Inspection
- Before each use, inspect the blades for any damage, dullness, or debris.
- Ensure all screws and fasteners are tight.
- Check that the switch trigger operates smoothly and returns to the OFF position.
7. Operating Instructions
7.1 Powering On and Off
- To Power On: With the battery installed, press and hold the power button (located on the function center) until the indicator light illuminates.
- To Power Off: Press and hold the power button again until the indicator light turns off. Always power off the tool when not in use or when changing positions.
7.2 Pruning Technique
- Ensure you have a stable footing and clear access to the branch you intend to prune.
- Position the branch between the open blades. Ensure the branch fits within the maximum cutting capacity of the shear.
- Press the switch trigger to close the blades and make the cut. Release the trigger to open the blades.
- Avoid forcing the tool through thick branches. If the tool struggles, the branch may exceed its capacity.
- Make clean cuts to promote healthy plant growth.
8. Maintenance
Regular maintenance ensures optimal performance and extends the lifespan of your pruning shear.
8.1 Cleaning
- Always remove the battery before cleaning.
- After each use, clean the blades with a damp cloth to remove sap, dirt, and debris. A mild detergent can be used if necessary.
- Dry the blades thoroughly to prevent rust.
- Clean the body of the tool with a soft, dry cloth. Do not use harsh chemicals or abrasive cleaners.
8.2 Lubrication
- Apply a few drops of light machine oil to the pivot points of the blades periodically to ensure smooth operation.
8.3 Storage
- Store the pruning shear in a dry, cool place, away from direct sunlight and moisture.
- Ensure the blades are closed and secured (if a blade lock mechanism is present).
- Remove the battery pack before long-term storage.
9. Troubleshooting
If you encounter issues with your pruning shear, refer to the following common problems and solutions:
| Problem | Possible Cause | Solution |
|---|---|---|
| Tool does not turn on | Battery not installed correctly Battery discharged Power button not pressed correctly | Ensure battery is fully seated Charge the battery Press and hold the power button until indicator light illuminates |
| Blades do not cut effectively | Blades are dull or dirty Branch is too thick Low battery power | Clean blades; consider sharpening or replacement Do not attempt to cut branches exceeding capacity Charge or replace battery |
| Tool stops during operation | Overload protection activated Battery discharged | Reduce cutting load; allow tool to cool Charge or replace battery |
If the problem persists after attempting these solutions, please contact customer support.
10. Warranty and Support
For warranty information and customer support, please refer to the documentation provided at the time of purchase or contact the seller directly. Keep your purchase receipt as proof of purchase.
Fafeicy is committed to providing quality products. For any questions or assistance, please reach out to the authorized Fafeicy service center or your retailer.