1. Introduction
Thank you for choosing the VEVOR Cordless Pressure Washer, Model XS-002. This manual provides essential information for the safe and efficient operation, maintenance, and troubleshooting of your device. Please read it thoroughly before use and retain it for future reference.
Product Overview
The VEVOR Cordless Pressure Washer is a portable, handheld power cleaner designed for various cleaning tasks, including vehicle washing, garden cleaning, floor washing, and window cleaning. It features a powerful 580 PSI maximum pressure, a 4.0Ah lithium-ion battery, and a versatile 6-in-1 nozzle.
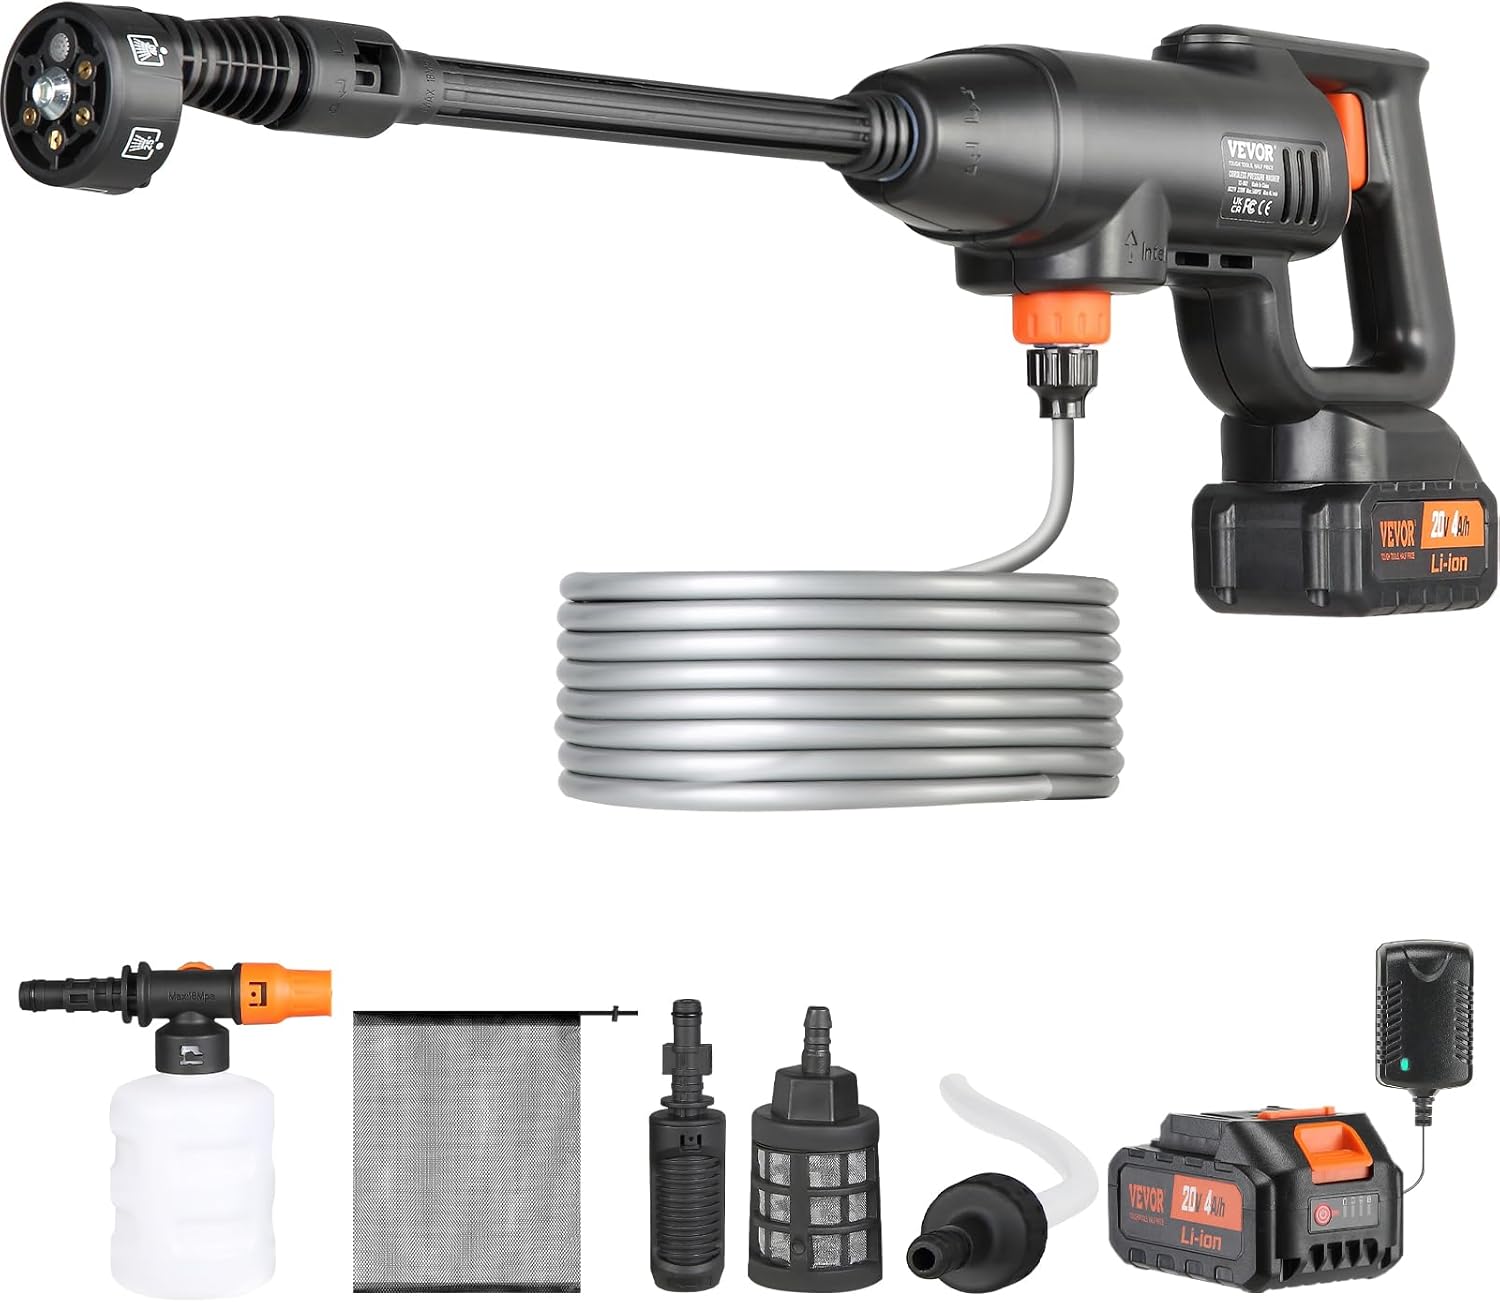
Figure 1: VEVOR Cordless Pressure Washer and included accessories.
2. Safety Instructions
Always observe basic safety precautions when using this product to reduce the risk of fire, electric shock, and personal injury.
- Read all instructions before using the appliance.
- Do not point the spray nozzle at people, animals, or electrical equipment.
- Wear appropriate personal protective equipment, including eye protection.
- Ensure the battery is fully charged before use and disconnected during assembly or maintenance.
- Keep children and pets away from the operating area.
- Do not operate the pressure washer if any parts are damaged.
- Use only VEVOR-approved accessories and replacement parts.
3. Product Components
Familiarize yourself with the main components of your VEVOR Cordless Pressure Washer.
- Pressure Washer Gun Body
- 6-in-1 Nozzle
- High/Low Pressure Nozzle
- 4.0Ah Lithium-Ion Battery
- Battery Charger
- Water Inlet Hose (19FT/6M) with Filter Basket
- Foam Pot
- Storage Bag

Figure 2: Key components including the 6-in-1 nozzle, foam pot, and water inlet hose.
4. Setup Instructions
Follow these steps to assemble and prepare your pressure washer for first use.
- Charge the Battery: Connect the 4.0Ah lithium-ion battery to the charger and plug the charger into a power outlet. The battery indicator lights will show charging progress. A full charge takes approximately 5 hours.
- Attach Nozzle: Select the desired nozzle (6-in-1 or high/low pressure) and attach it directly to the pressure washer body. Rotate it firmly to secure.
- Connect Water Hose: Connect the water inlet hose to the inlet port on the pressure washer. Ensure a secure connection.
- Insert Battery: Once charged, slide the battery into the battery slot on the pressure washer body until it clicks into place.
- Prepare Water Source: Place the filter basket end of the water inlet hose into a clean water source (e.g., bucket, pool, river). Ensure the filter is fully submerged and free from obstructions. The device can draw water from a height of up to 3 meters.

Figure 3: Visual guide for the 4-step assembly process.
5. Operating Instructions
5.1 Powering On and Off
- To turn on, press and hold the power button.
- To turn off, release the power button.
5.2 Adjusting Pressure and Nozzle Settings
The pressure washer offers two pressure modes and a versatile 6-in-1 nozzle for various spray patterns.
- Pressure Modes:
- Regular Pressure (290 PSI): Suitable for daily cleaning of walls and floors.
- High Pressure (580 PSI): Ideal for stubborn stains on cars and paving stones.
- 6-in-1 Nozzle: Rotate the nozzle head to select different spray patterns:
- 0° (Direct Jet) for wall crevices
- 15° for floor cleaning
- 25° for tile washing
- 40° for courtyard washing
- Shower mode for watering spray
- UP for ordinary cleaning

Figure 4: The 6-in-1 nozzle offers various spray patterns for different cleaning tasks.
5.3 Using the Foam Pot
For foam washing, attach the foam pot to the pressure washer. Fill the pot with appropriate cleaning solution. The foam pot provides an easy solution for applying soap or detergent.
5.4 Battery Indicator
The battery indicator lights on the device show the remaining battery charge. Monitor these lights to ensure sufficient power for your cleaning tasks.

Figure 5: Battery indicator lights display the current charge level.
6. Maintenance
Regular maintenance ensures optimal performance and extends the lifespan of your pressure washer.
- After Each Use:
- Disconnect the battery and water hose.
- Drain any remaining water from the unit and hose.
- Clean the filter basket to remove any debris.
- Wipe down the exterior of the unit with a damp cloth.
- Storage: Store the pressure washer and accessories in a dry, cool place, away from direct sunlight and freezing temperatures. Use the provided mesh storage bag for dust prevention and easy portability.
- Battery Care: Store the battery in a cool, dry place. If storing for extended periods, charge the battery to approximately 50% every 3-6 months to maintain its health.
7. Troubleshooting
Refer to this section for common issues and their solutions.
| Problem | Possible Cause | Solution |
|---|---|---|
| No water flow or weak pressure |
|
|
| Unit does not turn on |
|
|
| Short battery life |
|
|
8. Specifications
Technical specifications for the VEVOR Cordless Pressure Washer, Model XS-002.
| Feature | Specification |
|---|---|
| Model Number | XS-002 |
| Net Weight | 5.57 lbs / 2.52 kg |
| Voltage | DC 21V |
| Rated Power | 220W |
| Rated Working Pressure | 2±0.2 MPa (approx. 290 PSI) |
| Maximum Working Pressure | 4 MPa (approx. 580 PSI) |
| Rated Flow Rate | 3.4±5% L/min |
| Maximum Flow Rate | 4 L/min (approx. 1.1 GPM) |
| Suction Height | 9.84 ft / 3 m |
| Battery Voltage | 21V |
| Battery Capacity | 4.0Ah |
| Charger Voltage | 21V |
| Hose Length | 3 Meters (approx. 9.84 ft) |
| Product Dimensions | 30"L x 3.4"W x 9"H |
| Certification | CE |

Figure 6: Detailed technical specifications of the pressure washer.
9. Warranty Information
VEVOR products typically come with a standard warranty. For specific warranty terms and conditions applicable to your VEVOR Cordless Pressure Washer (Model XS-002), please refer to the warranty card included with your purchase or visit the official VEVOR website. Keep your purchase receipt as proof of purchase for warranty claims.
10. Customer Support
For technical assistance, replacement parts, or any questions regarding your VEVOR Cordless Pressure Washer, please contact VEVOR customer support. You can find contact information on the official VEVOR website or through your purchase platform.
Online Support: Visit VEVOR Support


