Introduction
The COMPUTHERM E280 Wi-Fi Thermostat allows you to control connected heating or cooling devices, such as boilers or air conditioning systems, via your smartphone or tablet over the internet. This thermostat is compatible with any two-wire thermostatic connector and supports both 24V and 230V control circuits. It is particularly useful for managing heating/cooling in homes, apartments, or holiday residences, especially when occupancy schedules are irregular.
Equipped with a connectable floor temperature sensor, the E280 is ideal for controlling underfloor heating systems. It features two potential-free relays that can operate simultaneously, allowing independent control of two devices. This enables the thermostat to manage a pump and a zone valve in addition to the main boiler, facilitating multi-zone heating systems without requiring a separate zone control system.

Image: The Computherm E280 Wi-Fi Thermostat displaying room temperature and set temperature, alongside a smartphone showing the thermostat's control application.
Package Contents
Upon opening the package, please verify that all components are present and undamaged.
- Computherm E280 Wi-Fi Thermostat unit
- Floor temperature sensor
- Mounting screws and wall plugs
- User Manual (this document)

Image: The Computherm E280 thermostat, its floor sensor, mounting hardware, and printed user manuals as found in the product packaging.
Setup and Installation
Important: Installation should only be performed by a qualified electrician or heating engineer. Ensure the main power supply is disconnected before commencing any wiring.
1. Mounting the Thermostat
- Choose a suitable location on an interior wall, away from direct sunlight, drafts, or heat sources, at approximately 1.5 meters (5 feet) from the floor.
- Carefully separate the front panel from the backplate of the thermostat.
- Mark the drilling points on the wall using the backplate as a template.
- Drill holes, insert wall plugs, and secure the backplate to the wall using the provided screws.
2. Wiring Connections
The Computherm E280 features two potential-free relays (K1 and K2) for controlling heating/cooling systems and an optional floor sensor.

Image: The rear view of the Computherm E280 thermostat, detailing the terminal block for electrical connections, including power input, relay outputs (K1 and K2), and the floor sensor input.
- Power Supply (L, N): Connect the live (L) and neutral (N) wires of your 230V AC power supply.
- Relay K1 (COM, NO, NC): This relay is typically used for controlling the main heating/cooling device (e.g., boiler).
- COM: Common terminal.
- NO: Normally Open (connect to this for heating applications where the circuit closes to activate).
- NC: Normally Closed (connect to this for cooling applications where the circuit opens to activate).
- Relay K2 (COM, NO): This relay can be used for an auxiliary device, such as a pump or zone valve.
- COM: Common terminal.
- NO: Normally Open.
- Floor Sensor: Connect the wires from the external floor temperature sensor to the designated terminals.
3. Final Assembly
- Once wiring is complete and secure, carefully reattach the front panel of the thermostat to the backplate.
- Restore power to the system. The thermostat display should illuminate.
Operating Instructions
The Computherm E280 can be operated directly via its touch buttons or remotely via the dedicated smartphone application.
1. Initial Power-On and Wi-Fi Connection
- After power-on, the thermostat will display the current room temperature and default settings.
- Download the "Computherm" or "Smart Life" app from your smartphone's app store (iOS or Android).
- Follow the in-app instructions to add a new device and connect your E280 thermostat to your 2.4 GHz Wi-Fi network. This typically involves putting the thermostat into pairing mode (refer to the app or thermostat's quick start guide for specific button presses).
2. Basic Thermostat Functions (On-Device)

Image: A detailed view of the Computherm E280 thermostat's digital display, showing current room temperature, set temperature, day, and time, along with the touch-sensitive control buttons below the screen.
- Power Button (⏻): Press to turn the thermostat on or off.
- Mode Button (↻): Cycle through operating modes (e.g., Heating, Cooling, Auto, Manual).
- Set Button (⏱): Access settings or programming menus.
- Up/Down Arrows (▲ / ▼): Adjust temperature setpoints or navigate menu options.
3. Remote Control via Smartphone App
The smartphone app provides comprehensive control and monitoring capabilities:
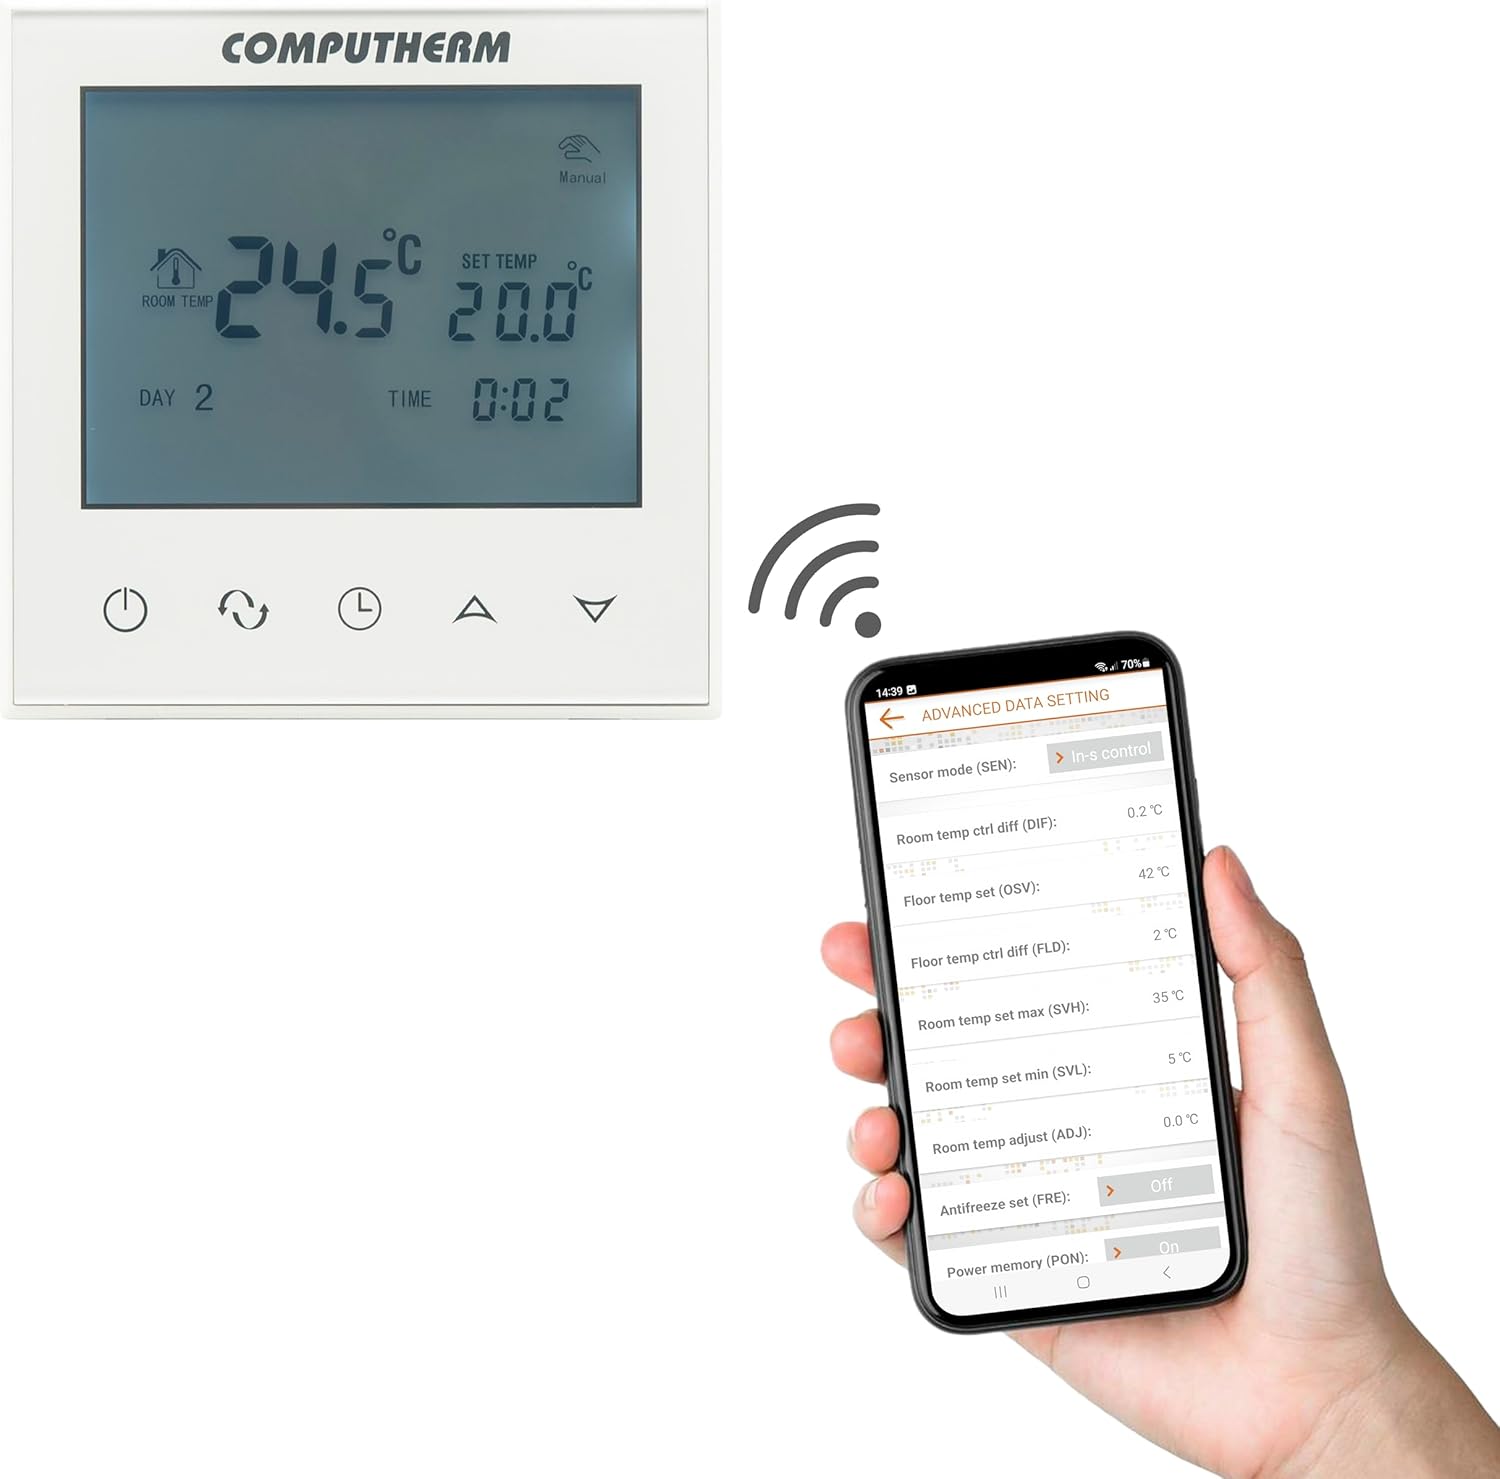
Image: A smartphone screen displaying the advanced settings interface of the Computherm E280 thermostat app, showing options like sensor mode, temperature differentials, and antifreeze settings.
- Temperature Adjustment: Easily change the set temperature from anywhere.
- Scheduling: Create and modify weekly heating/cooling schedules.
- Mode Selection: Switch between heating, cooling, and manual modes.
- Advanced Settings: Configure parameters such as temperature calibration, switching sensitivity, floor sensor limits, and antifreeze protection.
- Monitoring: View current room and floor temperatures, operating status, and historical data.
Maintenance
The Computherm E280 thermostat requires minimal maintenance to ensure optimal performance.
- Cleaning: Wipe the thermostat's display and casing with a soft, dry cloth. Avoid using abrasive cleaners, solvents, or chemical sprays, as these can damage the surface or internal components.
- Sensor Check: Periodically ensure that the internal and external (floor) temperature sensors are free from obstructions or debris that could affect accurate readings.
- Software Updates: Keep the smartphone application updated to the latest version to benefit from new features and performance improvements. The thermostat's firmware may also receive updates via the app.
Troubleshooting
If you encounter issues with your Computherm E280 thermostat, refer to the following common problems and solutions:
| Problem | Possible Cause | Solution |
|---|---|---|
| Thermostat display is blank. | No power supply. | Check circuit breaker and wiring connections. Ensure power is restored. |
| Cannot connect to Wi-Fi. | Incorrect Wi-Fi password, 5GHz network, or weak signal. | Verify Wi-Fi password. Ensure you are connecting to a 2.4 GHz network. Move thermostat closer to router or use a Wi-Fi extender. Restart thermostat and router. |
| Heating/Cooling system not responding. | Incorrect wiring, system turned off, or thermostat in wrong mode. | Check wiring connections (refer to Setup section). Ensure heating/cooling system is powered on. Verify thermostat is in the correct operating mode (e.g., Heating). |
| Inaccurate temperature readings. | Sensor obstruction, thermostat location, or calibration issue. | Ensure sensors are clear. Relocate thermostat if exposed to drafts/direct sunlight. Check app for temperature calibration options. |
If the problem persists, please contact Computherm customer support.
Specifications
| Feature | Detail |
|---|---|
| Brand | COMPUTHERM |
| Model Number | E280 |
| Color | White |
| Material | Plastic |
| Product Dimensions (L x W x H) | 1.7 x 8.6 x 8.6 cm |
| Item Weight | 370 grams |
| Voltage | 240 Volts AC (max. 24V DC / 240V AC for relays) |
| Power Source | Corded Electric |
| Connectivity Technology | Wi-Fi (b/g/n) 2.4 GHz |
| Temperature Measurement Range (Internal) | 0 °C - 50 °C (0.1 °C increments) |
| Temperature Measurement Range (Floor Sensor) | 0 °C - 99 °C (0.1 °C increments) |
| Temperature Measurement Accuracy | ± 0.5 °C |
| Adjustable Temperature Range | 5 °C - 99 °C (0.5 °C increments) |
| Switching Sensitivity | ± 0.1 °C to ± 1.0 °C (0.1 °C increments) |
| Switchable Current (K1) | 8A (2A inductive load) |
| Switchable Current (K2) | 3A (1A inductive load) |
| Heat Sensor Type (Internal & Floor) | NTC 3950K 10kΩ at 25°C |
| Special Features | Programmable, Wi-Fi Control, Floor Sensor Included |
| Specific Uses | Radiator, Underfloor Heating |
Warranty and Support
The Computherm E280 Wi-Fi Thermostat comes with a 2-year warranty from the date of purchase. This warranty covers manufacturing defects and malfunctions under normal use. Please retain your proof of purchase for warranty claims.
For technical support, troubleshooting assistance, or warranty inquiries, please contact your retailer or visit the official Computherm website for contact information.